
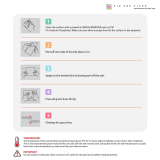
TILE INSTALLATION
SURFACE PREPARATION
1. Check the resistance of the
substrate*, by scratching on different
parts of the substrate surface. If it
crumbles easily it should be scari-
fied and applied again, so that the
surface is more resistant. This will
eliminate the possibility tiles loosen-
ing overtime.
*
S
u
b
s
t
r
a
t
e
:
S
u
p
p
o
r
t
o
r
c
o
n
c
r
e
t
e
b
a
s
e
w
h
e
r
e
t
h
e
c
e
r
a
m
i
c
p
r
o
d
u
c
t
w
i
l
l
b
e
i
n
s
t
a
l
l
e
d
2. Check that the surface level of the
Substrate is adequate. Avoid leveling
with adhesive.
3. If it is required to install floor on
floor, check the surface where the
installation will be made and make
sure there are no loose tiles. The
presence of voids below the surface
precludes proper installation.
4. Doorjambs may be undercut for
tile to slip under.
1. Mark the center point of all four
walls.
2. Snap chalk lines between the
center points of opposite walls.
Make any necessary adjustments
3. Using tile spacers, lay out a row of
loose tiles along the center lines in
both directions. Leave space for
uniform joints.
T
I
P
:
I
f
c
u
t
s
l
e
a
v
e
t
i
l
e
s
s
m
a
l
l
e
r
t
h
a
n
h
a
l
f
o
f
t
h
e
i
r
o
r
i
g
i
n
a
l
s
i
z
e
,
a
d
j
u
s
t
t
h
e
c
e
n
t
e
r
l
i
n
e
b
y
s
n
a
p
p
i
n
g
a
n
e
w
l
i
n
e
a
h
a
l
f
t
i
l
e
c
l
o
s
e
r
t
o
t
h
e
w
a
l
l
.
R
e
p
e
a
t
a
l
o
n
g
o
t
h
e
r
c
e
n
t
e
r
l
i
n
e
n
e
c
e
s
s
a
r
y
.
4. Divide the room into smaller grids
(approx. 2 ft x 3 ft) by snapping addi-
tional lines parallel to center lines
01
STEP
LAYOUT
02
STEP
PAGE -

1. Verify the identification of the
product purchased before being
installed, the necessary information
appears on the label of each box.
Make sure that the name of the
product, the tone number and mea-
surement are the same in all boxes.
In the case of ceramic pavements
(floors), do not mix identified prod-
ucts with different tone numbers
and measurements.
1.1 In the case of ceramic cover-
ings (walls) make sure that the
name of the product and the
tone number are the same in all
boxes. Do not mix identified
products with different tone
numbers
.
2. It is important that you know the
shade variation of the product that
you will choose, since it will help you
decide the type of environment you
want to obtain with the installation
of ceramic tiles.
3. For flooring installations, mix the
contents of several boxes, identified
with the same number of tone and
measure (Caliber), to obtain the best
appearance. For wall installations,
perform the above process based
only on the tone identified in the
boxes.
4. Do not install if drastic difference
in product dimensions is noticed.
5. In the event that any of the tiles to
be installed has an apparent defect,
please discard and use another tile
of the same shade and caliber.
1. Make sure that the surface where
the products will be installed is
completely clean, free of oils, pow-
ders, paints or impurities, which
inhibit the adhesion of the tile to the
surface. Cleaning can be done with
a broom, pressure washers, spatulas
or sandpaper.
2. Saturate the surface of the
substrate so that it remains moist
during laying, but without puddles.
3. In the event that the installa-
tion is going to be floor on floor,
after cleaning the surface, check
whether damaged or loose tiles
exist and make the necessary repairs
to ensure that no loose or damaged
tile remain in the subfloor.
TILE INSTALLATION
PRODUCT VARIATION
03
STEP
04
STEP
LAYING FLOORS AND WALL TILES
PAGE -
5
5.1
6

4. Use the appropriate adhe-
sive for the product (floor or wall;
ceramic) and installation type and
follow the manufacturer's instruc-
tions. To install floor on floor, use the
special adhesive recommended for
these cases.
4.1 Mix only enough adhesive or
mortar to be used within 30 minutes.
4.2 Using the type of trowel recom-
mended on the adhesive package,
spread a 1/4 in. coat on the surface of
one grid area, using the flat side of
the trowel. NOTE: Do not cover an
area larger area than can be set in 15
minutes. NOTE: In the case of wall
installations, the direction of the
adhesive must be horizontal
4.3 Use the notched side of trowel to
comb adhesive into standing ridges
by holding trowel at a 45° angle.
4.4 Remove excess adhesive, leaving a
uniform, ridged setting bed.
4.5 For large format tiles, butter the
backside of the tile to ensure proper
full-coverage. Use a medium bed
mortar for tiles with a dimensional
length greater than 15 inches on any
one side. NOTE: 90% mortar contact
is recommended.
5. Place the pieces by pressing
slightly downwards and make a
movement perpendicular to the
grooves several times. Tap gently
with the rubber mallet to ensure
adhesion and remove air that may
remain trapped in the adhesive.
6. During installation, clean the
spaces between the tiles (space for
joint) with a sponge moistened with
water.
7. Keep a joint between the tiles, as
indicated on the product packaging.
The omission of this can cause the
lifting of the pieces or cause infiltra-
tions. Proper installation requires a
perimeter expansion joints – the
absence of a perimeter joint may
cause tile to break or lift with room
temperature changes.
8. For products with rectangular
formats, perform the installation in a
or 25% ± 5% out-of-phase pattern
with respect to the length of the
long side.
TILE INSTALLATION
04
STEP
04
STEP
LAYING FLOORS AND WALL TILES
LAYING FLOORS AND WALL TILES
PAGE -

1. Choose the adhesive color that
most closely matches the color of
the product and apply it following
the manufacturer's instructions.
2. Remove tile spacers and spread
grout on the tile surface, forcing
down into joints with a rubber grout
float or squeegee.
3. Tilt the float at a 45° angle and
remove excess grout from surface
immediately with the edge of float.
13. Tilt it at a 90° angle and scrape it
diagonally across tiles.
4. Wait 15–20 minutes for grout to
set slightly, then use a damp sponge
to clean grout residue from surface
and smooth the grout joints, rinsing
sponge often.
5. Let dry until grout is hard and
haze forms on tile surface, then
polish with a soft cloth and wait 72
hours for heavy use. NOTE: Don’t
apply sealers or polishes for three
weeks, and then only in accordance
with manufacturer’s recommenda-
tions.
6. Perform the curing of the joints 24
hours after the installation is com-
pleted: clean the joints again with a
sponge moistened with water.
7. Allow the adhesive dry as indicat-
ed by the manufacturer. In a floor
installation, do not walk or put
objects before drying is complete, as
it could cause unevenness.
1. Once the drying time is complete,
thoroughly clean the installed prod-
uct, using a mop, soft bristle broom,
neutral detergent and water.
2. The complete removal of grout
and construction dirt after products
have been installed will improve
daily maintenance.
3. Clean by scrubbing the installa-
tion with hot water and a pH neutral
liquid cleaner (soapless), followed by
a thorough rinsing, then remove the
rinse water with a wet vacuum or
dry toweling.
4. If some residue remains, further
cleaning will need to be done –
follow grout manufacturer recom-
mendations.
5. For more aggressive cleaning,
floor scrubbing machines equipped
with nylon pads or brushes should
be used. Wet vacuuming of the
suspended dirt and grout is recom-
mended.
6. Be sure that cleaning products
do not containing muriatic acid,
hydrofluoric acid or similar since
these substances can damage/alter
the surface of the tiles or change the
appearance of the tiles.
TILE INSTALLATION
05
STEP
06
STEP
POST-INSTALATION CLEAN UPGROUTING JOINT
PAGE -
-
 1
1
-
 2
2
-
 3
3
-
 4
4


TrafficMASTER LBAJ91L7 Installation guide
- Type
- Installation guide
- This manual is also suitable for
Ask a question and I''ll find the answer in the document
Finding information in a document is now easier with AI
Related papers
Other documents
-
Mirrella 45017S Installation guide
-
-
Harbor Freight Tools Flooring 95742 User manual
-
Ivy Hill Tile L2C2 STONE TILES User manual
-
Mirrella 45060 Installation guide
-
daltile 9999575239 User manual
-
 Tic Tac Tiles HD-SQS01-5 Installation guide
-
 Tic Tac Tiles HD-BBW51-10 Installation guide
-
 TRUE PORCELAIN CO. 1100739 Installation guide
-
Shaw HD80100240 Installation guide


