Page is loading ...

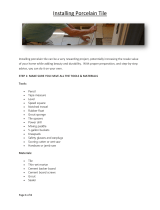
Tiles Installation Instructions
Surface Preparation
Tile may be installed over most structurally sound substrates. Make sure they are clean,
smooth, dry and free of wax, soap scum and grease. Any damaged, loose or uneven areas
must be repaired, patched and leveled.
Remove any moldings, trim, appliances that could interfere with the installation. Doorjambs
may be undercut for tile to slip underneath.
1) Check all caliber and shades of products are identified before installation.
2) Allow 3 mm. joint- widths between the tiles
(As the table below)
Layout
Mark the center point of all four walls. Snap chalk lines between the center points of
opposite walls, which will intersect at the center of the room. Make sure they’re perfectly
square by using a framing square, and adjust if necessary.
Lay out a row of loose tiles along the center lines in both directions, leaving spaces for
uniform joints (use spacers). If the layout leaves cuts smaller than ½ tile at walls, adjust the
center line by snapping a new line ½ tile closer to the wall. Repeat along other center line if
necessary. Now divide the room into smaller grids (approx. 2’ x 3’) by snapping additional
lines parallel to center lines.
Apply Adhesive
Select the right adhesive for the substrate and carefully read and follow all
instructions/precautions on the package. Mix only enough to be used within 30 minutes.
3 mm. upper
CALIBER & SHADE
PRODUCT
NAME
LOT. NUMBER (FACTORY/DATE/TIME)
ACTUAL SIZEE
GRADE
QUANTITY
NORMAL SIZE

Tiles Installation Instructions
Using the type trowel recommended on the adhesive package, spread a ¼” coat on the
surface of one grid area, using the flat side of the trowel without covering the guidelines.
Then use the notched side of trowel to comb adhesive into standing ridges by holding the
trowel at a 45-degree angle. Remove excess adhesive, leaving a uniform, ridged setting bed.
Rule of thumb, don’t spread a larger area than can be set in 15 minutes.
Cutting Tile
Measure tiles to be cut carefully and mark with a pencil or felt-tip pen. Make straight or
diagonal cuts with a tile cutter, curved cuts with a nipper (chipping away small pieces for
best results), full-length curved cuts with a rod saw. Sharp-cut edges may be smoothed with
a carborundum stone to allow a soft finish.
Setting Tile
Remember that variation of shades is an inherent characteristic of ceramic tile; mix tiles
from several cartons as you set, for a blended effect. Begin installing tiles in the center of
the room, one grid at a time. Finish each grid before moving to the next. Start with the first
tile in the corner of the grid and work outward.
Set tiles one at a time using a slight twisting motion, never slide tiles into place. Insert tile
spacers as each tile is set, leave equal joints between tiles. Fit perimeter tiles in each grid
last while leaving ¼” gap between tile and wall.
Once grid is completely installed, tap in all tiles with a rubber mallet or hammer and wood
block ensuring a good bond and level plane. Remove excess adhesive from joints with a
putty knife, and from tile with a damp sponge. Do not walk on tiles until they are set;
usually 24 hrs.
Grouting Joints
Once your tile is in place and has had about 24 hours to set, the last step is the grout the
joints. Read the package instructions carefully. Mix only enough to use in about 30 minutes.
Remove tile spacers and spread grout on the tile surface, forcing down into joints with a
rubber grout float or squeegee. Tilt the float at a 45-degree angle. Remove excess grout
from surface immediately with the edge of float. Tilt it at a 90-degree angle and scrape it
diagonally across tiles. Wait 15-20 minutes for grout to set slightly, then use a damp sponge
to clean grout residue from surface and smooth the grout joints. Rinse sponge frequently
and change water as needed. Let dry until grout is hard and haze forms on tile surface, then
polish with a soft cloth. Rinse again with sponge and clean water if necessary. Wait 72 hours
for heavy use. Don’t apply sealers or polishes for three weeks, and then only in accordance
with manufacturer’s recommendations.

Tiles Installation Instructions
/