Page is loading ...

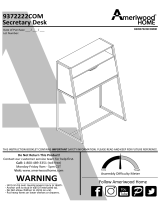
9837222COM
DESK
‐Unitcantipovercausingsevereinjuryordeath.
‐Anchorunittostudinwall(ifinstructedto).
‐DoNotallowchildrentoclimbonunit.
‐Putheavyitemsonlowershelvesordrawers.
B349837222COM0
THISINSTRUCTIONBO OKLETCONTAINS
IMPORTANT
SAFETYINFORMATION.PLEASEREADANDKEEPFORFUTUREREFERENCE.
WARNING
FollowAmeriwoodHome
Tube
You
DateofPurchase___/___/___
LotNumber:
DoNotReturnThisProduct!
Contactourcustomerserviceteamforhelpfirst.
Call:1‐800‐489‐3351(tollfree)
Monday‐Friday9am‐5pmCST
Visit:www.ameriwoodhome.com
AssemblyDifficultyMeter
Easy
Tough

ContactUs!
HelpfulHints
2
ameriwoodhome.com
DoNOTreturnthisproduct!
Contactourfriendlycustomerserviceteamfirstforhelp.
Callus!
1‐800‐489‐3351
Monday‐Friday
9am‐5pmCST
Visitameriwoodhome.comtoviewthe
limitedwarrantyvalidintheU.S.andCanada.
AssemblyTips
‐Openyouritemintheareayouplantokeepittoavoidexcessiveheav ylifting.
‐Identify,sortandcountthe partsbeforeattemptingassembly.
‐Compressiondowelsarelightlytappedinwithahammer.
‐Slidesarelabeledwitha
R
(right)and
L
(left)forproperplacement.
‐MakesuretoalwaysfacethepointonthetopoftheCamLock towar d sthe
outeredge.
‐Useallthenailsprovidedforthebackpanelandspreadthemou tequally.
‐Backpanelmustbeusedtomakesureyourunitissturdy.
‐Do
NOTuseharshchemicalsorabrasivecleanersonthisitem.
‐Neverpush,pull,ordragyourfurniture.
Tube
You
Tube
You
PEOPLENEEDEDFORASSEMBLY:1‐2
ESTIMATEDASSEMBLYTIME:1HOUR

3
ameriwoodhome.com
BeforeYouStart
Q
u
i
c
k
T
i
p
A
s
s
e
m
b
l
y
CamLockFasteningSystem
ThisCamLockFasteningSystem willbeusedthroughouttheassemblyprocess.
1
3
2
4
Tube
You
Readthrougheachstepcarefullyandfollowtheproperorder
Separateandcountallyourpartsandhardware
Giveyourselfenoughroomfortheassemblyprocess
Havethefollowingtools:FlatHeadScrewdriver,#2PhillipsHead
ScrewdriverandHammer
Caution:Ifusingapowerdrillorpowerscrewdriverforscr ewing,
pleasebeawaretoslowdownandstopwhenscrewistight.
Failuretodosomayresultinstrippingthescrew.

4
ameriwoodhome.com
BoardIdentification
Notactualsize
Tube
You
LeftPanel
39837222010
RightPanel
39837222020
LeftPartition
39837222030
RightPartition
39837222040
ModestyPanel
39837222050
LeftFrontPanel
39837222060
RightFrontPanel
39837222070
Top
39837222080
DrawerFront
39837222090
DrawerBack
39991070044400B
x2
FrontLeg
39837222110
x2
RearLeg
39837222120
DrawerBottom
39837331130
A B
C
D
E
F G
H
I
K
L
M
DRW
BACK

5
ameriwoodhome.com
BoardIdentification
Notactualsize
Tube
You
LeftDrawerSide
39991070346010L
RightDrawerSide
39991070346010R
Drawer Sides and Drawer Back are
labeled with part description.
A
B
C
D
E
F
G
H
I
K
K
L
L
M
LEFT
DRW
SIDE
RIGHT
DRW
SIDE
DRW
BACK
LEFT
DRW
SIDE
RIGHT
DRW
SIDE

6
ameriwoodhome.com
PartList
ActualSize
Tube
You
NotActualSize
(x16)
#A22570
cam lock
(x16)
#A22510
cam bolt
(x8)
#A22920
connector
(x8)
#A11600
1-1/4" flat head
(x18)
#A21660
wood dowel
(x8)
#A243222
cam cover
(x8)
#A22910
connector bolt
(x4)
#A12120
7/16" pan head
(x2)
#A54203
drawer bracket
(x10)
#A11080
7/16" flat head
(x2)
#A17400
7/8" bolt
(x1)
#A99040
glue bottle
(x1)
#A56770
drawer slide kit
(x1)
#A52925
handle
LeftCabinetMember
RightCabinetMember
LeftDrawerMember
RightDrawerMember
14a
14b
14c
14d
1
2
3
4
5
6
7
8
9
10
11
12
13

7
ameriwoodhome.com
STEP
1
Proper orientation of CAM LOCK
Tip
Assembly
Quick
Tube
You
(x4)
#A22570
*rawedgesareshaded
Youwillneedtotaptheconnector
(3)withahammertofullyinsert.
Besuretheconnectorispositioned
asshownbeforepushingintohole.
1
1
2
3
A
(x4)
#A22510
(x2)
#A22920
2
2
2
3
1

8
ameriwoodhome.com
STEP2
Proper orientation of CAM LOCK
Tip
Assembly
Quick
Tube
You
*rawedgesareshaded
B
2
1
1
3
Youwillneedtotaptheconnector
(3)withahammertofullyinsert.
Besuretheconnectorispositioned
asshownbeforepushingintohole.
1
2
(x4)
#A22570
(x4)
#A22510
(x2)
#A22920
3
2
2

9
ameriwoodhome.com
STEP3
(x8)
#A21660
A
5
5
Tube
You
13
(x1)
#A99040
Fill each dowel hole approximately 1/3 full with glue. Press the dowels into the holes as shown.
Note: There should be some glue squeeze out as the dowels are inserted. Keep a damp cloth at hand to
wipe this up as you assemble the cabinet.

10
ameriwoodhome.com
STEP
4
5
(x8)
#A21660
5
B
Tube
You
Fill each dowel hole approximately 1/3 full with glue. Press the dowels into the holes as shown.
Note: There should be some glue squeeze out as the dowels are inserted. Keep a damp cloth at hand to
wipe this up as you assemble the cabinet.
13
(x1)
#A99040

11
ameriwoodhome.com
STEP
5
Tube
You
(x4)
#A22510
2
K
L
2
2

12
ameriwoodhome.com
STEP
6
Tube
You
L
K
A
Fill each dowel hole approximately 1/3 full with glue. Press the dowels into the holes as shown.
Note: There should be some glue squeeze out as the dowels are inserted. Keep a damp cloth at hand to
wipe this up as you assemble the cabinet.
13
(x1)
#A99040
Parts to be flush this end
U
N
L
O
C
K
L
O
C
K

13
ameriwoodhome.com
STEP
7
Tube
You
Fill each dowel hole approximately 1/3 full with glue. Press the dowels into the holes as shown.
Note: There should be some glue squeeze out as the dowels are inserted. Keep a damp cloth at hand to
wipe this up as you assemble the cabinet.
2
(x4)
#A22510
K
L
2
2

14
ameriwoodhome.com
STEP8
13
(x1)
#A99040
Fill each dowel hole approximately 1/3 full with glue. Press the dowels into the holes as shown.
Note: There should be some glue squeeze out as the dowels are inserted. Keep a damp cloth at hand to
wipe this up as you assemble the cabinet.
Parts to be flush this end
U
N
L
O
C
K
L
O
C
K
L
K
B
Tube
You

15
ameriwoodhome.com
STEP9
Proper orientation of CAM LOCK
Tip
Assembly
Quick
1
(x6)
#A22570
1
1
E
Tube
You

16
ameriwoodhome.com
STEP10
Youwillneedtotaptheconnector
(3)withahammertofullyinsert.
Besuretheconnectorispositioned
asshownbeforepushingintohole.
Tube
You
3
3
Fill each dowel hole approximately 1/3 full with glue. Press the dowels into the holes as shown.
Note: There should be some glue squeeze out as the dowels are inserted. Keep a damp cloth at hand to
wipe this up as you assemble the cabinet.
(x2)
#A22570
(x2)
#A21660
(x4)
#A22920
1
1
5
5
F
G
C
D
13
(x1)
#A99040

17
ameriwoodhome.com
STEP
11
Tube
You
7
(x8)
#A22910
7
H

18
ameriwoodhome.com
STEP12
Tube
You
4
(x4)
#A11600
4
F
G
C
D
H
3
turn the screw clockwise
to lock in place

19
ameriwoodhome.com
STEP13
Tube
You
turn the screw clockwise
to lock in place
Fill each dowel hole approximately 1/3 full with glue. Press
the dowels into the holes as shown.
Note: There should be some glue squeeze out as the
dowels are inserted. Keep a damp cloth at hand to wipe
this up as you assemble the cabinet.
13
(x1)
#A99040
U
N
L
O
C
K
L
O
C
K
E
H
B
K
L
3

20
ameriwoodhome.com
STEP
14
Tube
You
13
(x1)
#A99040
U
N
L
O
C
K
L
O
C
K
Fill each dowel hole approximately 1/3 full with glue. Press
the dowels into the holes as shown.
Note: There should be some glue squeeze out as the
dowels are inserted. Keep a damp cloth at hand to wipe
this up as you assemble the cabinet.
turn the screw clockwise
to lock in place
3
A
B
E
K
L
/