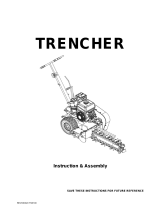
Toro TRX-16 Trencher User manual

Type
User manual

This manual is also suitable for

FormNo.3422-267RevA
TRX-16,TRX-20,andTRX-26
Trencher
ModelNo.22972—SerialNo.402461470andUp
ModelNo.22972G—SerialNo.402000000andUp
ModelNo.22973—SerialNo.402501800andUp
ModelNo.22973G—SerialNo.402000000andUp
ModelNo.22974—SerialNo.402000000andUp
Registeratwww.Toro.com.
OriginalInstructions(EN)
*3422-267*A
ThisproductcomplieswithallrelevantEuropean
directives;fordetails,pleaseseetheseparateproduct
specicDeclarationofConformity(DOC)sheet.
WARNING
CALIFORNIA
Proposition65Warning
Thisproductcontainsachemical
orchemicalsknowntotheStateof
Californiatocausecancer,birthdefects,
orreproductiveharm.
Theengineexhaustfromthisproduct
containschemicalsknowntotheStateof
Californiatocausecancer,birthdefects,
orotherreproductiveharm.
DANGER
Theremaybeburiedutilitylinesinthework
area.Diggingintothemmaycauseashock
oranexplosion.
Havethepropertyorworkareamarkedfor
buriedlinesanddonotdiginmarkedareas.
Contactyourlocalmarkingserviceorutility
companytohavethepropertymarked(for
example,intheUnitedStates,call811forthe
nationwidemarkingservice).
ItisaviolationofCaliforniaPublicResourceCode
Section4442or4443touseoroperatetheengineon
anyforest-covered,brush-covered,orgrass-covered
landunlesstheengineisequippedwithaspark
arrester,asdenedinSection4442,maintainedin
effectiveworkingorderortheengineisconstructed,
equipped,andmaintainedforthepreventionofre.
Theenclosedengineowner'smanualissupplied
forinformationregardingtheUSEnvironmental
ProtectionAgency(EPA)andtheCaliforniaEmission
ControlRegulationofemissionsystems,maintenance,
andwarranty.Replacementsmaybeorderedthrough
theenginemanufacturer.
Introduction
Thismachineisdesignedtodigtrenchesinsoilto
burycablingandpipingforvariousapplications.Itis
notintendedtocutrock,wood,oranyothermaterial
otherthansoil.
Readthisinformationcarefullytolearnhowtooperate
andmaintainyourproductproperlyandtoavoid
injuryandproductdamage.Youareresponsiblefor
operatingtheproductproperlyandsafely.
YoumaycontactTorodirectlyatwww.Toro.com
forproductsafetyandoperationtrainingmaterials,
accessoryinformation,helpndingadealer,orto
registeryourproduct.
Wheneveryouneedservice,genuineToroparts,or
additionalinformation,contactanAuthorizedService
DealerorToroCustomerServiceandhavethemodel
andserialnumbersofyourproductready.Figure
1illustratesthelocationofthemodelandserial
numbersontheproduct.Writethenumbersinthe
spaceprovided.
Important:Withyourmobiledevice,youcan
scantheQRcodeontheserialnumberdecal
(ifequipped)orvisitwww.Toro.comtoaccess
warranty,parts,andotherproductinformation.
g007797
Figure1
1.Modelandserialnumberplate
ModelNo.
SerialNo.
Thismanualidentiespotentialhazardsandhas
safetymessagesidentiedbythesafety-alertsymbol
(Figure2),whichsignalsahazardthatmaycause
seriousinjuryordeathifyoudonotfollowthe
recommendedprecautions.
©2018—TheToro®Company
8111LyndaleAvenueSouth
Bloomington,MN55420
2
Contactusatwww.Toro.com.
PrintedintheUSA
AllRightsReserved
g000502
Figure2
1.Safety-alertsymbol
Thismanualuses2wordstohighlightinformation.
Importantcallsattentiontospecialmechanical
informationandNoteemphasizesgeneralinformation
worthyofspecialattention.
Contents
Safety.......................................................................4
SafeOperatingPractices....................................4
SafetyandInstructionalDecals..........................6
Setup.......................................................................11
1InstallingtheBoomandChain.........................11
2CheckingtheFluidLevels..............................12
3ChargingtheBattery(Electric-StartModels
Only).............................................................12
ProductOverview...................................................12
Controls...........................................................12
KeySwitch....................................................13
Specications..................................................15
Attachments/Accessories.................................15
Operation................................................................16
AddingFuel......................................................16
PerformingDailyMaintenance..........................17
StartingtheEngine...........................................17
DrivingtheMachine..........................................18
ShuttingofftheEngine......................................18
DiggingaTrench..............................................18
MovingaNon-FunctioningMachine..................19
SecuringtheMachineforTransport..................19
LiftingtheMachine...........................................19
OperatingTips.................................................20
Maintenance...........................................................21
RecommendedMaintenanceSchedule(s)...........21
Pre-MaintenanceProcedures..............................22
RemovingtheCoverPlate................................22
RemovingtheBottomShield............................23
Lubrication..........................................................23
GreasingtheMachine.......................................23
GreasingtheTrencherHousing........................24
EngineMaintenance...........................................25
ServicingtheAirCleaner..................................25
ServicingtheEngineOil....................................27
ServicingtheSparkPlug...................................29
FuelSystemMaintenance...................................30
DrainingtheFuelT ank......................................30
ReplacingtheFuelFilter...................................31
ElectricalSystemMaintenance...........................31
ServicingtheBattery.........................................31
ReplacingtheFuses(Models22973and
22974)...........................................................34
DriveSystemMaintenance..................................34
ServicingtheTracks.........................................34
BeltMaintenance................................................37
ReplacingthePump-DriveBelt.........................37
ControlsSystemMaintenance.............................37
AdjustingtheTraction-Control
Alignment......................................................37
HydraulicSystemMaintenance...........................39
HydraulicFluidSpecications...........................39
CheckingtheHydraulic-FluidLevel...................40
ReplacingtheHydraulicFilter...........................40
ChangingtheHydraulicFluid............................41
TrencherMaintenance.........................................42
ReplacingtheDiggingTeeth.............................42
CheckingandAdjustingtheDiggingChain
andBoom.....................................................42
ReplacingtheDriveSprocket...........................43
Cleaning..............................................................44
RemovingDebrisfromtheMachine..................44
Storage...................................................................44
Troubleshooting......................................................46
Schematics.............................................................48
3
Safety
Improperuseormaintenancebytheoperatoror
ownercanresultininjury.Toreducethepotential
forinjury,complywiththesesafetyinstructions
andalwayspayattentiontothesafety-alert
symbol(Figure2),whichmeansCaution,Warning,
orDanger—personalsafetyinstruction.Failureto
complywiththeinstructionmayresultinpersonal
injuryordeath.
SafeOperatingPractices
Thisproductiscapableofamputatinghandsandfeet.
Alwaysfollowallsafetyinstructionstoavoidserious
injuryordeath.
WARNING
Engineexhaustcontainscarbonmonoxide,
anodorlesspoisonthatisfatalifinhaled.
Donotruntheengineindoorsorinan
enclosedarea.
Training
ReadtheOperator'sManualandothertraining
material.Iftheoperator(s)ormechanic(s)cannot
readEnglish,itistheowner'sresponsibilityto
explainthismaterialtothem.
Becomefamiliarwiththesafeoperationofthe
equipment,operatorcontrols,andsafetysigns.
Alloperatorsandmechanicsshouldbetrained.
Theownerisresponsiblefortrainingtheusers.
Neverletchildrenoruntrainedpeopleoperateor
servicetheequipment.Localregulationsmay
restricttheageoftheoperator.
Theowner/usercanpreventandisresponsible
foraccidentsorinjuriesoccurringtohimselfor
herself,otherpeopleorproperty.
Preparation
Beforeusingthemachine,havetheareamarked
forundergroundutilitiesanddonotusethe
machineinmarkedareas.
Evaluatetheterraintodeterminewhataccessories
andattachmentsyouneedtoproperlyand
safelyperformthejob.Useonlytheaccessories
andattachmentsthatareapprovedbythe
manufacturer.
Wearappropriateclothingincludinggloves,eye
protection,longpants,substantialslip-resistant
footwear,andhearingprotection.Tiebacklong
hairanddonotwearlooseclothingorloose
jewelry.
Inspecttheareawhereyouwillusetheequipment
andremoveallobjects,suchasrocks,toys,and
wire,thatthemachinecouldthrow.
Checkthattheoperator'spresencecontrols,safety
switches,andshieldsareattachedandfunctioning
properly.Donotoperatethemachineunlessthey
arefunctioningproperly.
FuelSafety
Useextracarewhenhandlingfuel.Itisammable
anditsvaporsareexplosive.
Extinguishallcigarettes,cigars,pipes,andother
sourcesofignition.
Useonlyanapprovedfuelcontainer.
Donotremovethefuelcaporllthefueltank
whiletheengineisrunningorhot.
Donotaddordrainfuelinanenclosedspace.
Donotstorethemachineorfuelcontainerwhere
thereisanopename,spark,orpilotlight,such
asonawaterheaterorotherappliance.
Ifyouspillfuel,donotattempttostarttheengine;
avoidcreatinganysourceofignitionuntilthefuel
vaporshavedissipated.
Operation
Useyourfullattentionwhileoperatingthe
machine.Donotengageinanyactivitythat
causesdistractions;otherwise,injuryorproperty
damagemayoccur.
Neverrunanengineinanenclosedarea.
Operatethemachineonlyingoodlight,keeping
awayfromholesandhiddenhazards.
Ensurethatallthedrivesareinneutralandthe
parkingbrakeisengaged(ifapplicable)before
startingtheengine.Starttheengineonlyfromthe
operator'sposition.
Slowdownanduseextracareonhillsides.
Ensuretotravelintherecommendeddirectionon
hillsides.Turfconditionscanaffectthestabilityof
themachine.
Slowdownandusecautionwhenmakingturns,
crossingroadsandsidewalks,andwhenchanging
directionsonslopes.
Neveroperatethemachinewithouttheguards
securelyinplace.Ensurethatalltheinterlocksare
attached,adjusted,andfunctioningproperly.
Donotchangetheengine-governorsettingor
overspeedtheengine.
Parkthemachineonalevelsurface,lowerthe
hydrauliclift,disengagethehydraulics,engagethe
parkingbrake(ifapplicable),shutofftheengine,
4
andremovethekeybeforeleavingtheoperator's
positionforanyreason.
Keepyourhandsandfeetawayfrommovingparts.
Lookbehindanddownbeforebackingupto
ensurethatthepathisclear.
Nevercarrypassengersandkeeppetsand
bystandersaway.
Donotoperatethemachinewhenyouaretired,ill,
orundertheinuenceofalcoholordrugs.
Usecarewhenloadingorunloadingthemachine
intoatrailerortruck.
Usecarewhenapproachingblindcorners.
Ensurethattheareaisclearofpeoplebefore
operatingthemachine.Stopthemachineif
anyoneentersthearea.
Neverjerkthecontrols;useasteadymotion.
Donottouchpartsthatmaybehotfromoperation.
Allowthemtocoolbeforeattemptingtomaintain,
adjust,orservicethemachine.
Operatethemachineinareaswherethereare
noobstaclesincloseproximitytoyou.Failureto
maintainadequatedistancefromtrees,walls,and
otherbarriersmayresultininjuryasthemachine
backsupduringoperationifyouarenotattentive
tothesurroundings.Operatethemachineonlyin
areaswherethereissufcientclearanceforyou
tosafelymaneuver.
Locatethepinchpointareasmarkedonthe
machineandkeepyourhandsandfeetawayfrom
theseareas.
Lightningcancausesevereinjuryordeath.If
lightningisseenorthunderisheardinthearea,do
notoperatethemachine;seekshelter.
SlopeOperation
Slopesareamajorfactorrelatedtoloss-of-control
andtip-overaccidents,whichcanresultinsevere
injuryordeath.Theoperatorisresponsiblefor
safeslopeoperation.operatingthemachineon
anysloperequiresextracaution.Beforeusingthe
machineonaslope,youmust:
Reviewandunderstandtheslopeinstructions
inthemanualandonthemachine.
Evaluatethesiteconditionsofthedayto
determineiftheslopeissafeformachine
operation.Alwaysusecommonsense
andgoodjudgmentwhenperformingthis
evaluation.Changesintheterrain,suchas
moisture,canquicklyaffecttheoperationof
themachineonaslope.
Operateupanddownslopeswiththefrontof
themachineuphill.
Identifyhazardsatthebaseoftheslope.Do
notoperatethemachineneardrop-offs,ditches,
embankments,waterorotherhazards.The
machinecouldsuddenlyrolloverifawheelortrack
goesovertheedgeortheedgecollapses.Keep
asafedistance(twicethewidthofthemachine)
betweenthemachineandanyhazard.
Avoidstarting,stopping,orturningthemachineon
aslope.Avoidmakingsuddenchangesinspeed
ordirection;turnslowlyandgradually.
Keepallmovementsonslopesslowandgradual.
Donotmakesuddenchangesinspeedor
direction.
Donotoperatethemachineunderanyconditions
wheretraction,steering,orstabilityisinquestion.
Beawarethatoperatingthemachineonwetgrass,
acrossslopesordownhillmaycausethemachine
tolosetraction.Lossoftractiontothewheelsor
tracksmayresultinslidingandalossofbraking
andsteering.Themachinecanslideevenifthe
wheelsortracksarestopped.
Identifyhazardsatthebaseoftheslope.Do
notoperatethemachineneardrop-offs,ditches,
embankments,waterorotherhazards.The
machinecouldsuddenlyrolloverifawheelortrack
goesovertheedgeortheedgecollapses.Keep
asafedistance(twicethewidthofthemachine)
betweenthemachineandanyhazard.
Removeormarkobstaclessuchasditches,holes,
ruts,bumps,rocksorotherhiddenhazards.T all
grasscanhideobstacles.Uneventerraincould
overturnthemachine.
Donotparkthemachineonahillsideorslope
withoutloweringthehydrauliclifttotheground.
MaintenanceandStorage
Parkthemachineonalevelsurface,lowerthe
hydrauliclift,disengagethehydraulics,engagethe
parkingbrake(ifapplicable),shutofftheengine,
andremovethekey.Waitforallmovingpartsto
stopbeforeadjusting,cleaning,orrepairingthe
machine.
Cleandebrisfromthehydrauliclift,drives,
mufers,andenginetohelppreventres.Wipe
upanyspilledoilorfuel.
Allowtheenginetocoolbeforestoringanddonot
storethemachinenearames.
Neverallowuntrainedpersonneltoservicethe
machine.
Usejackstandstosupportthecomponentswhen
required.
Carefullyreleasepressurefromcomponentswith
storedenergy.
Keepyourhandsandfeetawayfromthemoving
parts.Ifpossible,donotmakeadjustmentswith
theenginerunning.
5
Disconnectthebatteryorremovethespark-plug
wiresbeforemakinganyrepairs.Disconnect
thenegativeterminalrstandthepositivelast;
connectthepositiverstandthenegativelast.
Chargethebatteryinanopen,well-ventilated
area,awayfromsparkandames.Unplugthe
chargerbeforeconnectingordisconnectingitfrom
thebattery.Wearprotectiveclothinganduse
insulatedtools.
Batteryacidispoisonousandcancauseburns.
Avoidcontactwithskin,eyes,andclothing.Protect
yourface,eyes,andclothingwhenworkingwitha
battery.
Batterygassescanexplode.Keepcigarettes,
sparks,andamesawayfromthebattery.
Keepallpartsingoodworkingconditionandall
hardwaretightened.Replaceallwornordamaged
decals.
Keepallnutsandboltstight.Keeptheequipment
ingoodcondition.
Nevertamperwiththesafetydevices.
Keepthemachinefreeofdebrisbuildup.Wipeup
anyspilledoilorfuel.Allowthemachinetocool
beforestoring.
Shutofftheengine,removethekey,andinspect
themachineifyoustrikeanobject.Makeany
necessaryrepairsbeforestarting.
UseonlygenuineTororeplacementparts.
Keepyourbodyandhandsawayfrompinhole
leaksornozzlesthatejecthigh-pressurehydraulic
uid.Usecardboardorpapertondhydraulic
leaks;neveruseyourhands.Hydraulicuid
escapingunderpressurecanpenetrateskinand
causeinjuryrequiringsurgerywithinafewhours
byaqualiedsurgeon;otherwise,gangrenemay
result.
SafetyandInstructionalDecals
Safetydecalsandinstructionsareeasilyvisibletotheoperatorandarelocatednearanyarea
ofpotentialdanger.Replaceanydecalthatisdamagedormissing.
decalbatterysymbols
BatterySymbols
Someorallofthesesymbolsareonyourbattery.
1.Explosionhazard
6.Keepbystandersasafe
distancefromthebattery.
2.Nore,opename,or
smoking
7.Weareyeprotection;
explosivegasescan
causeblindnessandother
injuries.
3.Causticliquid/chemical
burnhazard
8.Batteryacidcancause
blindnessorsevereburns.
4.Weareyeprotection.9.Flusheyesimmediately
withwaterandgetmedical
helpfast.
5.ReadtheOperator's
Manual.
10.Containslead;donot
discard
decal93-6686
93-6686
1.Hydraulicuid
2.ReadtheOperator'sManual.
decal93-7814
93-7814
1.Entanglementhazard,belt—stayawayfrommovingparts;
keepallguardsandshieldsinplace.
6
decal93-9084
93-9084
1.Liftpoint/Tie-downpoint
decal100-4650
100-4650
1.Crushinghazardofhand—keepbystandersasafedistance
awayfromthemachine.
2.Crushinghazardoffoot—keepbystandersasafedistance
awayfromthemachine.
decal107-8495
107-8495
1.Parkingbrake
decal133-5619
133-5619
decal137-3873
137-3873
1.ReadtheOperator’sManual.
decal137-3874
137-3874
1.ReadtheOperator’sManual.
7
decal115-4020
115-4020
1.Turnright3.Reverse
2.Forward
4.Turnleft
decal99-9952
99-9952
1.Cuttinghazard,chainandauger—stayawayfrommovingpartsandkeepbystandersawayfromthemachine.
2.Warning—shutofftheengineandremovethekeybeforepreformingandmaintenanceorrepairs.
3.Explosionand/orelectricshockhazard—donotdiginareaswithburiedgasorpowerlines.
8
decal115-1230
115-1230
1.Warning—donotoperatethismachineunlessyouaretrained.
2.Engine—stop
3.Engine—run
4.Trencherchain—reverse
5.Trencherchain—forward
6.Trencherchain—off
7.Enginethrottle
8.Fast
9.Slow
10.Choke
11.On/Closed
12.Off/Open
13.ReadtheOperator'sManualbeforestartingtheengine;tostarttheengine,movethetrencher-controlleverintotheOFFposition,
placethetractioncontrolintheNEUTRALposition,movethethrottlelevertotheFASTposition,engagethechoke,turnthekeyto
theRUNposition,anddisengagetheparkingbrakeoncetheenginehasstarted.
14.ReadtheOperator'sManualbeforeoperatingthetrencher;tooperatethetrencher,lowertheboom,movethetrencher-control
levertothereferencebar,pullthetractioncontrolrearwardtomoveinreverseanddigthetrench.
9
decal115-1231
115-1231
1.Cutting/dismembermenthazardofbystanders,
trencher—keepbystandersasafedistanceawayfromthe
machine;donotoperatethetrencherchainwhiletransporting
themachine.
6.Explosionhazard;shockhazard—donotusemachinenear
buriedutilitylines;contacttheproperagenciesbeforedigging.
2.Explosionhazard,fueling—shutofftheengineandextinguish
allameswhenfueling.
7.Boomelevation
3.Tipping/crushinghazard—lowertheboomwhenoperating
onslopes.
8.Lowertheboom
4.Warning—stayawayfrommovingparts;waitforallmoving
partstostop
9.Raisetheboom
5.Warning—lowertheboom,engagetheparkingbrake,shutoff
theengine,andremovethekeybeforeleavingthemachine.
10
Setup
LooseParts
Usethechartbelowtoverifythatallpartshavebeenshipped.
ProcedureDescription
Qty.
Use
Boom(soldseparately)
1
1
Chain(soldseparately)
1
Installtheboomandchain.
2
Nopartsrequired
Checktheuidlevels.
3
Nopartsrequired
Chargethebattery(electric-startmodels
only).
1
InstallingtheBoomand
Chain
Partsneededforthisprocedure:
1
Boom(soldseparately)
1
Chain(soldseparately)
Procedure
Important:Thereareseveralboomandchainsize
congurationsavailable.RefertoyourAuthorized
ServiceDealertoobtaintheappropriateboomand
chaintomeetyourrequirements.
1.Parkthemachineonalevelsurfaceandengage
theparkingbrake.
2.Shutofftheengineandremovethekey.
3.Removethebolt,2saddlewashers,andnut
securingthespoilsaugerandremovetheauger
(Figure3).
Note:Savethefastenersforfutureuse.
g011470
Figure3
1.Spoilsauger
6.Adjustingbolt
2.Boom7.Jamnut
3.Bolts8.Armonthedrivehead
4.Doublewasher9.Drivesprocket
5.Nuts
4.Removethe2bolts,nuts,anddoublewashers
fromthesidesoftheboom(Figure3).
5.Loosentheadjustingboltandjamnut(Figure3).
6.Slidetheboomoverthearmonthedrivehead.
7.Installthe2bolts,nuts,anddoublewashers
removedinstep4throughtheboomandarm,
butdonottightenthem.
8.Ifthechainisnotconnected,connectthelinks
bypressingorhammeringtheclevispinsupplied
withthechainthroughthelinks.
Important:Toavoidbendingthechainlinks,
placeblocksunderandbetweenthelinks
whenhammeringtheclevispinthrough.
9.Securetheclevispinwiththecotterpinsupplied
withthechain.
11
10.Loopthediggingchainovertheaugerdriveshaft
andontothedrivesprocket,ensuringthatthe
diggingteethpointforwardontheupperspan.
11.Settheupperspanofthechainintoplaceon
thetrencherboom,thenwrapthechainaround
therollerattheendoftheboom.
12.Threadtheadjustmentboltintotheboomand
turnitinuntilthereis3.8to6.3cm(1-1/2to2-1/2
inches)ofslackinthechainonthebottomspan.
13.Threadthejamnutdowntheadjustingboltand
tightenitsecurelyagainsttheboom.
14.Torquethe2boltsandnutssecuringtheboom
to183to223N·m(135to165ft-lb).
15.Installthespoilsaugerusingthebolt,2saddle
washer,andnutthatyouremovedpreviously.
16.Torquetheboltandnutto101N·m(75ft-lb).
2
CheckingtheFluidLevels
NoPartsRequired
Procedure
Beforestartingtheengineforthersttime,check
theengine-oilandhydraulic-uidlevels.Refertothe
followingsectionsformoreinformation:
CheckingtheEngine-OilLevel(page27)
CheckingtheHydraulic-FluidLevel(page40)
3
ChargingtheBattery
(Electric-StartModelsOnly)
NoPartsRequired
Procedure
Chargethebattery;refertoChargingtheBattery
(page32)formoreinformation.
ProductOverview
g015375
Figure4
1.Control
panel
4.Chain
guard
7.Boom10.Reverse
safety
plate
2.Engine
5.Chain
8.Trencher
head
3.Spoils
auger
6.Digging
teeth
9.Track
Controls
Becomefamiliarwithallthecontrols(Figure5)before
youstarttheengineandoperatethemachine.
ControlPanel
g007801
Figure5
1.Tractioncontrol5.Throttlelever
2.Hydraulic-lift(boom
elevation)lever
6.Chokelever
3.Trenchercontrollever7.Keyswitch
4.Referencebar
8.Hourmeter
12
KeySwitch
Recoil-StartMachines
Thekeyswitchhas2positions:OFFandRUN.Refer
toStartingtheEngine(page17).
Electric-StartMachines
Thekeyswitchhas3positions:OFF,RUN,andSTART.
RefertoStartingtheEngine(page17).
ThrottleLever
Movethecontrolforwardtoincreasetheenginespeed
andrearwardtodecreasetheenginespeed.
ChokeLever
Beforestartingacoldengine,movethechokelever
forward.Aftertheenginestarts,regulatethechoke
tokeeptheenginerunningsmoothly.Assoonas
possible,movethechokeleverallthewayrearward.
Note:Awarmenginerequireslittleornochoking.
HourMeter
Whentheengineisoff,thehourmeterdisplaysthe
numberofhoursofoperationthathavebeenlogged
onthemachine.
ReferenceBar
Whendrivingthemachine,usethereferencebar
asahandleandaleveragepointforcontrollingthe
machine.T oensuresmooth,controlledoperation,
donottakebothhandsoffthereferencebarwhile
operatingthemachine.
TractionControl
g008128
Figure6
1.Referencebar
2.Tractioncontrol
Tomoveforward,movethetractioncontrolforward
(Figure7).
g008129
Figure7
Tomoverearward,movethetractioncontrol
rearward(Figure8).
Important:Whenreversing,lookbehindyou
forobstructionsandkeepyourhandsonthe
referencebar.
g008130
Figure8
13
Toturnright,rotatethetractioncontrolclockwise
(Figure9).
g008131
Figure9
Toturnleft,rotatethetractioncontrol
counterclockwise(Figure10).
g008132
Figure10
Tostopthemachine,releasethetractioncontrol
(Figure6).
Note:Thefartheryoumovethetractioncontrolin
anydirection,thefasterthemachinemovesinthat
direction.
Hydraulic-Lift(BoomElevation)
Lever
Tolowertheboom,slowlymovetheleverforward
(Figure11).
Toraisetheboom,slowlymovetheleverrearward
(Figure11).
g007802
Figure11
1.Lowertheboom2.Raisetheboom
Boom-ElevationLock
Theboom-elevationlocksecurestheboom-elevation
leversothatyoucannotpushitforward.Thishelps
toensurethatnooneaccidentallylowerstheboom
duringmaintenance.Securetheboomwiththelock
anytimeyouneedtostopthemachinewiththeboom
raised.
Tosetthelock,liftuponitsoitclearstheholeinthe
controlpanelandswingittotherightinfrontofthe
boomelevationlever,pushingitdownintothelocked
position(Figure12).
g007803
Figure12
1.Boom-elevationlever2.Boom-elevationlock
14
TrencherControlLever
Todigwiththetrencher,rotatetheleverrearwardand
pullitdowntothereferencebar(Figure13,number1).
Toreversethetrencherhead,rotatethelever
rearward,thenmoveitleftintotheupperslot(Figure
13,number2).
Ifyoureleasethelever,itwillautomaticallyreturnto
theneutralposition(Figure13,number3),stopping
thechain.
g007108
Figure13
1.Forward3.Neutral
2.Reverse
Parking-BrakeLever
Toengagetheparkingbrake,pullthebrakelever
rearwardandup(Figure14).
Todisengagetheparkingbrake,pullthelever
rearwardandthendown(Figure14).
g007804
Figure14
1.Parking-brakelever(inthedisengagedposition)
Specications
Note:Specicationsanddesignaresubjectto
changewithoutnotice.
Width
86cm(33.8inches)
Lengthwith70cm(24
inch)boom
209.5cm(82.5inches)
Lengthwith91.4cm(36
inch)boom
235cm(92.6inches)
Lengthwith122cm(48
inch)boom(Model22974
only)
282.5cm(111.2inches)
Height
117cm(46inches)
Weight(Model22972)*499kg(1,100lb)
Weight(Model22973)*538kg(1,185lb)
Weight(Model22974)*578kg(1,208lb)
*A91.4cm(36inch)boomandchainaddsabout27kg(60lb)tothelisted
weight.
Attachments/Accessories
AselectionofT oroapprovedattachmentsand
accessoriesisavailableforusewiththemachine
toenhanceandexpanditscapabilities.Contact
yourAuthorizedServiceDealerorauthorizedT oro
distributororgotowww.Toro.comforalistofall
approvedattachmentsandaccessories.
Toensureoptimumperformanceandcontinuedsafety
certicationofthemachine,useonlygenuineToro
replacementpartsandaccessories.Replacement
partsandaccessoriesmadebyothermanufacturers
couldbedangerous,andsuchusecouldvoidthe
productwarranty.
15
Operation
Note:Determinetheleftandrightsidesofthe
machinefromthenormaloperatingposition.
Important:Beforeoperatingthemachine,check
theuidlevels,andremovedebrisfromthe
machine.Ensurethattheareaisclearofpeople
anddebris.Youshouldalsoknowandhave
markedthelocationsofallutilitylines.
AddingFuel
DANGER
Incertainconditions,fuelisextremely
ammableandhighlyexplosive.Areor
explosionfromfuelcanburnyouandothers
andcandamageproperty.
Fillthefueltanksoutdoors,inanopen
area,whentheengineiscold.Wipeupany
fuelthatspills.
Neverllthefueltanksinsideanenclosed
trailer.
Neversmokewhenhandlingfuelandstay
awayfromanopenameorwherefuel
fumesmaybeignitedbyaspark.
Storefuelinanapprovedcontainerand
keepitoutofthereachofchildren.Never
buymorethana30-daysupplyoffuel.
Donotoperatewithoutentireexhaust
systeminplaceandinproperworking
condition.
DANGER
Incertainconditionsduringfueling,static
electricitycanbereleased,causingaspark
thatcanignitethefuelvapors.Areor
explosionfromfuelcanburnyouandothers
andcandamageproperty.
Alwaysplacefuelcontainersontheground
awayfromyourvehiclebeforelling.
Donotllfuelcontainersinsideavehicle
oronatruckortrailerbed,becauseinterior
carpetsorplastictruckbedlinersmay
insulatethecontainerandslowthelossof
anystaticcharge.
Whenpractical,removeequipmentfrom
thetruckortrailerandrefueltheequipment
withitswheelsontheground.
Ifthisisnotpossible,thenrefuelsuch
equipmentonatruckortrailerfroma
portablecontainerratherthanfroma
fuel-dispensernozzle.
Ifyoumustuseafuel-dispensernozzle,
keepthenozzleincontactwiththerimof
thefueltankorcontaineropeningatall
timesuntilfuelingiscomplete.
WARNING
Fuelisharmfulorfatalifswallowed.
Long-termexposuretovaporscancause
seriousinjuryandillness.
Avoidprolongedbreathingofvapors.
Keepyourfaceawayfromthenozzleand
fueltankopening.
Keepfuelawayfromyoureyesandskin.
RecommendedFuel
Forbestresults,useonlyclean,fresh(lessthan
30daysold),unleadedgasolinewithanoctane
ratingof87orhigher((R+M)/2ratingmethod).
Ethanol:Gasolinewithupto10%ethanol
(gasohol)or15%MTBE(methyltertiarybutyl
ether)byvolumeisacceptable.Ethanoland
MTBEarenotthesame.Gasolinewith15%
ethanol(E15)byvolumeisnotapprovedforuse.
Neverusegasolinethatcontainsmorethan
10%ethanolbyvolume,suchasE15(contains
15%ethanol),E20(contains20%ethanol),orE85
(containsupto85%ethanol).Usingunapproved
gasolinemaycauseperformanceproblemsand/or
enginedamagewhichmaynotbecoveredunder
warranty.
Donotusegasolinecontainingmethanol.
16
Donotstorefueleitherinthefueltankorfuel
containersoverthewinterunlessyouuseafuel
stabilizer.
Donotaddoiltogasoline.
UsingStabilizer/Conditioner
Useafuelstabilizer/conditionerinthemachineto
providethefollowingbenets:
Keepsfuelfreshlongerwhenusedasdirectedby
thefuel-stabilizermanufacturer
Cleanstheenginewhileitruns
Eliminatesgum-likevarnishbuildupinthefuel
system,whichcauseshardstarting
Important:Donotusefueladditives
containingmethanolorethanol.
Addthecorrectamountoffuelstabilizer/conditioner
tothefuel.
Note:Afuelstabilizer/conditionerismost
effectivewhenmixedwithfreshfuel.Tominimize
thechanceofvarnishdepositsinthefuelsystem,
usefuelstabilizeratalltimes.
FillingtheFuelTank
1.Parkthemachineonalevelsurface,engage
theparkingbrake(ifapplicable),andlowerthe
hydrauliclift.
2.Shutofftheengine,removethekey,andallow
theenginetocool.
3.Cleanaroundthefuel-tankcapandremoveit
(Figure15).
g247445
Figure15
1.Fuel-tankcap
4.Fillthetankwithfueltoabout6to13mm(1/4to
1/2inch)belowthebottomofthellerneck.
Important:Thisspaceinthetankallows
fueltoexpand.Donotllthefueltank
completelyfull.
5.Installthefuel-tankcapsecurely.
6.Wipeupanyspilledfuel.
PerformingDaily
Maintenance
Beforestartingthemachineeachday,performthe
EachUse/DailyprocedureslistedinMaintenance
(page21).
StartingtheEngine
1.Movethethrottlelevermidwaybetweenthe
SLOWandFASTpositions(Figure16).
g007809
Figure16
1.Throttlelever3.Key
2.Chokelever
2.MovethechokelevertotheONposition(Figure
16).
Note:Awarmorhotenginemaynotrequire
choking.
3.Starttheengineasfollowsforyourmachine:
Forrecoil-startmachines,turnthekeytothe
ONposition,thenpulltherecoilhandleon
topoftheengine.
Forelectric-startmachines,turnthekey
totheONposition(Figure16).Whenthe
enginestarts,releasethekey.
Important:Donotengagethestarterfor
morethan10secondsatatime.Ifthe
enginefailstostart,allowa30-second
cooldownperiodbetweenattempts.
Failuretofollowtheseinstructionscan
burnoutthestartermotor.
4.GraduallymovethechokelevertotheOFF
position(Figure16).Iftheenginestallsor
hesitates,engagethechokeagainuntilthe
enginewarmsup.
17
5.Movethethrottlelevertothedesiredsetting
(Figure16).
Important:Runningtheengineathigh
speedswhenthehydraulicsystemiscold
(i.e.,whentheairtemperatureisator
belowfreezing)coulddamagethehydraulic
system.Whenstartingtheengineincold
conditions,allowittoruninthemiddle
throttlepositionfor2to5minutesbefore
movingthethrottletotheFASTposition.
Note:Iftheoutdoortemperatureisbelow
freezing,storethemachineinagaragetokeep
itwarmerandaidinstarting.
DrivingtheMachine
Usethetractioncontrolstomovethemachine.The
fartheryoumovethetractioncontrolsinanydirection,
thefasterthemachinemovesinthatdirection.
Releasethetractioncontrolstostopthemachine.
CAUTION
Whenreversing,youmaybackintostationary
objectsoroverbystandersandcauseserious
personalinjuryordeath.
Lookbehindyouforobstructionsor
bystandersandkeepyourhandsonthe
referencebar.
Thethrottlecontrolregulatestheenginespeedas
measuredinrpm(revolutionsperminute).Placethe
throttleleverintheFASTpositionforbestperformance.
Youcan,however,usethethrottlepositiontooperate
atslowerspeeds.
ShuttingofftheEngine
1.Parkthemachineonalevelsurface,engage
theparkingbrake(ifapplicable),andlowerthe
hydrauliclift.
2.MovethethrottlelevertotheSLOWposition
(Figure16).
3.Iftheenginehasbeenworkinghardorishot,let
itidleforaminutebeforeturningthekeyswitch
totheOFFposition.
Note:Thishelpstocooltheenginebeforeyou
shutitoff.Inanemergency,youcanshutoff
theengineimmediately.
4.TurnthekeyswitchtotheOFFpositionand
removethekey.
CAUTION
Achildoruntrainedbystandercould
attempttooperatethemachineandbe
injured.
Removethekeyfromtheswitchwhen
leavingthemachine,evenifjustforafew
seconds.
DiggingaTrench
DANGER
Thismachineiscapableofamputatinghands
andfeet.
Alwayswearsubstantial,slip-resistant
footwear.
Stayintheoperatingpositionwhilethe
machineisrunning,andkeepawayfrom
movingparts.
Keepallbystandersasafedistanceaway
fromthemachine.
Stopthemachineimmediatelyifany
peopleoranimalsentertheworkarea.
WARNING
Diggingatrenchthrowssoilandother
debrisintotheair,whichcouldinjureyouor
bystanders.
Alwaysweareyeprotectionwhenusing
thetrencher.
Keepallbystandersasafedistanceaway
fromthetrencher.
WARNING
Thetrencherisveryloudwhendigginga
trencherandcandamageyourears.
Alwayswearhearingprotectionwhenusing
thetrencher.
1.Starttheengine,raisetheboom,movethe
throttlelevertotheFASTposition,andmovethe
machineovertheareatobetrenched.
2.Pullthetrenchercontrollevertothereference
bartoengagethetrencher.
3.Slowlylowertheboomandchainintothe
ground.
Note:Toachievethemaximumdepth,youmay
needtolowertheboomasfarintotheground
asitcangowiththechainrunning.Then,stop
18
thechainandloweritfully.Startthechainagain
andresumeoperation.
4.Oncethetrencherboomisinthegroundata45°
to60°angle,slowlymovethemachinerearward
toextendthetrench.
Note:Ifyoumovetoofast,thetrencherwillstall.
Ifitstalls,raiseitslightly,slowlydriveforward,or
reversethechaindirectionmomentarily.
5.Whennished,raisetheboomoutofthetrench,
thenstopthetrencher.
MovingaNon-Functioning
Machine
Important:Donottoworpullthemachine
withoutrstopeningthetowvalves,oryouwill
damagethehydraulicsystem.
1.Engagetheparkingbrakeandlowerthe
hydrauliclift.
2.Shutofftheengineandremovethekey.
3.Removethebottomshield.
4.Usingawrench,turnthetowvalvesonthe
hydraulicpumpstwicecounter-clockwise(Figure
17).
g007816
Figure17
1.Towvalves
5.Installthebottomshieldandtowthemachine
asrequired.
6.Afterrepairingthemachine,closethetowvalves
beforeoperatingit.
SecuringtheMachinefor
Transport
Important:Donotoperateordrivethemachine
onroadways.Usecarewhenloadingorunloading
themachineintoatrailerortruck.
1.Parkthemachineonalevelsurface,engage
theparkingbrake(ifapplicable),andlowerthe
hydrauliclift.
2.Shutofftheengineandremovethekey.
3.Securethemachinetoatrailerwithchainsor
strapsusingthetie-down/liftloopsatthefront
andrearofthemachine(Figure18andFigure
19).Refertoyourlocalordinancesfortrailerand
tie-downrequirements.
g015378
Figure18
1.Fronttie-downloop
g007818
Figure19
1.Reartie-downloops
LiftingtheMachine
Youcanliftthemachineusingthetie-down/liftloops
asliftpoints(Figure18andFigure19).
19
OperatingTips
Cleantheareaoftrash,branches,androcks
beforetrenchingtopreventdamagingthemachine.
Alwaysbegintrenchingwiththeslowestground
speedpossible.Increasespeedifconditions
permit.Ifthechainspeedslowsdown,reduce
thegroundspeedtokeepthechainmovingatits
fastestrate.Donotspinthetrackswhiletrenching.
Alwaysusefullthrottle(maximumenginespeed)
whentrenching.
Alwaystrenchbackward(i.e.,inreverse).
Trenchwiththechainata45°to60°angleforbest
results.
Youwillbeabletodigatrenchfasterbycontrolling
thedepthwithperiodicadjustmentsoftheboom.
Ifthetrencherbindsinthesoil,reversethechain
direction.Oncethechainisloose,changechain
directionsandcontinuetrenching.
Ifyouneedthenishedtrenchtobecleaner
thanwhatispossiblewiththetrencher,you
canpurchaseacrumberfromyourdealer.The
crumbermountsontothetrencherheadand
scrapesthetrenchcleanasyoudig.
Toimprovethequalityoftrencheslessthan61cm
(24inches)deep,usea61cm(24inch)boom.
Iftheliftspeedofthemachineistooslowortoo
fast,adjusttheboltindicatedinFigure20.
g020996
Figure20
1.Lift-speedadjustmentbolt
Usethecorrectchainforthegroundconditions,as
listedinthefollowingtable:
SoilTypeRecommendedChainType
SandySoilchain(congurewith
extrateethforafasterdigging
speed;refertoyourAuthorized
ServiceDealer)
SandyLoam/Loam/Loamy
Clay
Soilchain
Wet,stickyclay
Soilchain
Hardsoils:dryclayand
compactedsoils
Combinationchain
Rockysoil/gravel
Rockchain
20
  • Page 1 1
  • Page 2 2
  • Page 3 3
  • Page 4 4
  • Page 5 5
  • Page 6 6
  • Page 7 7
  • Page 8 8
  • Page 9 9
  • Page 10 10
  • Page 11 11
  • Page 12 12
  • Page 13 13
  • Page 14 14
  • Page 15 15
  • Page 16 16
  • Page 17 17
  • Page 18 18
  • Page 19 19
  • Page 20 20
  • Page 21 21
  • Page 22 22
  • Page 23 23
  • Page 24 24
  • Page 25 25
  • Page 26 26
  • Page 27 27
  • Page 28 28
  • Page 29 29
  • Page 30 30
  • Page 31 31
  • Page 32 32
  • Page 33 33
  • Page 34 34
  • Page 35 35
  • Page 36 36
  • Page 37 37
  • Page 38 38
  • Page 39 39
  • Page 40 40
  • Page 41 41
  • Page 42 42
  • Page 43 43
  • Page 44 44
  • Page 45 45
  • Page 46 46
  • Page 47 47
  • Page 48 48
  • Page 49 49
  • Page 50 50
  • Page 51 51
  • Page 52 52
  • Page 53 53
  • Page 54 54
  • Page 55 55
  • Page 56 56

Toro TRX-16 Trencher User manual

Type
User manual
This manual is also suitable for

Ask a question and I''ll find the answer in the document

Finding information in a document is now easier with AI