Rongta Technology ACE H1 User manual
- Category
- Print & Scan
- Type
- User manual
This manual is also suitable for
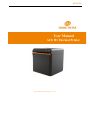
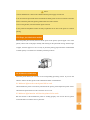
Rongta Technology ACE H1 is a front paper exit and upper paper exit thermal printer. It supports NFC quick connect, human voice remind, and is compatible with 80 and 58 paper rolls. It also features USB, Ethernet and cashbox interfaces, allowing for easy integration into various systems. With a high printing speed of 250mm/s and support for various barcode printing, it is suitable for use in retail, hospitality, and other industries. Additionally, it supports the printing of bitmap and downloaded figures, making it a versatile choice for printing receipts, tickets, and other documents.
Rongta Technology ACE H1 is a front paper exit and upper paper exit thermal printer. It supports NFC quick connect, human voice remind, and is compatible with 80 and 58 paper rolls. It also features USB, Ethernet and cashbox interfaces, allowing for easy integration into various systems. With a high printing speed of 250mm/s and support for various barcode printing, it is suitable for use in retail, hospitality, and other industries. Additionally, it supports the printing of bitmap and downloaded figures, making it a versatile choice for printing receipts, tickets, and other documents.


-
 1
1
-
 2
2
-
 3
3
-
 4
4
-
 5
5
-
 6
6
-
 7
7
-
 8
8
-
 9
9
-
 10
10
-
 11
11
-
 12
12
-
 13
13


Rongta Technology ACE H1 User manual
- Category
- Print & Scan
- Type
- User manual
- This manual is also suitable for
Rongta Technology ACE H1 is a front paper exit and upper paper exit thermal printer. It supports NFC quick connect, human voice remind, and is compatible with 80 and 58 paper rolls. It also features USB, Ethernet and cashbox interfaces, allowing for easy integration into various systems. With a high printing speed of 250mm/s and support for various barcode printing, it is suitable for use in retail, hospitality, and other industries. Additionally, it supports the printing of bitmap and downloaded figures, making it a versatile choice for printing receipts, tickets, and other documents.
Ask a question and I''ll find the answer in the document
Finding information in a document is now easier with AI
Related papers

Other documents
-
Tally Dascom DM-320 User manual
-
 RONGTA 820 Series User manual
-
Xiamen 820 Series User manual
-
Wincor Nixdorf BEETLE /iSCAN EASY Family User manual
-
-
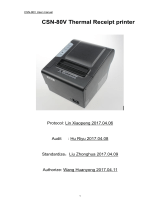 Cashino CSN-80V User manual
-
Orient Technologies M280D User manual
-
-
innovative technology NV200 User manual
-
Ingenico Moby C150 User manual

