Page is loading ...

Read instructions before starting installation*
Review of “Tricks of the Trade” on the reverse will assist with installation.
For purposes other than water, contact JCM Industries for application and product assistance.
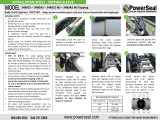
1. Thoroughly clean pipe surface. Check the size and range of the tapping sleeve to verify correct size product. Check pipe surface
where gasket will seat to make certain pipe is free of flaws, gouges and extreme irregularities.
2. Lubricate pipe and face of gasket with soap-water or gasket lubricating solution. Do not use grease or pipe lubricant. Oil based
lubricants can prevent the gasket from adhering to pipe surface for water tight seal.
3. Position outlet half of body on pipe, making sure outlet is aligned with branch line to be connected. Never position so that rotation is
required. Rotation can result in gasket dislocation.
4. Position back half of body and install bolts. (For fittings provided with stainless steel hardware, see reverse side.) NOTE: For fittings
with hardware furnished with double washer sets, to assure ease of installation and obtain optimum bolt torque levels, install the
double set of washers under each nut.
Tighten outside bolts first, working toward the center. Tighten bolts evenly. Alternate from one side of sleeve to the other. The gap
between sleeve halves should be equal on both sides. JCM recommends the use of a torque wrench to ensure proper torque levels.
Improper torque levels can result in leaking assembly or damage to the pipe wall.
Tighten bolts to the following torque levels:
Pipe sizes 6” - 12” 100 ft. lbs. of torque
Pipe sizes 14” & larger 125 ft. lbs. of torque
On Thin Wall, PVC (SDR21, 26), and Flexible Pipe 50 - 55 ft. lbs. minimum
HDPE SDR11, SDR17 - 6” - 12” 60 ft. lbs. minimum
HDPE SDR11, SDR17 - 14” and Larger 90 ft. lbs. minimum
NOTE: For test and working pressure above 250 PSI bolts must be tightened to 125 - 150 ft. lbs. of torque.
(Contact JCM for proper application)
5. Check inside of sleeve neck to make certain gasket is properly seated and not protruding where tapping cutter may damage it.
6. Install tapping valve. JCM recommends adherence to the AWWA M-44 Manual recommendations for proper valve installation,
support and trenching. Improper support can result in undo stress.
7. Test assembly seals with water (per ANSI/AWWA C-223) using test port provided on sleeve or test connection on tapping machines.
When testing the assembly against the pipe to pressures greater than the internal pressure of the host pipe, application should be
treated with caution to prevent imploding or damaging the pipe wall due to thin wall, flexible or brittle conditions. Inspection and
verification of the pipe integrity is the responsibility of the end user. For inquiries, contact JCM Industries, Inc.
8. When assured that all seals are tight and test is completed, re-check bolt torques after 15 minutes and proceed with the tapping
operation. JCM Industries endorses the ANSI/AWWA C105/A21.5 and ASTM A674 for polyethylene encasement for corrosion
protection.
Note:
Size on size tapping cutter must not be larger than recommended by pipe manufacturer. Tapping operation must not force
the pipe away from the gasket seal.
*Ensure fitting is suitable for application (confirm size, materials, pressure ratings, line content, meets local governing & association standards, etc.).
Pipeline operation forces, including pressure fluctuations, thermal expansion/contraction, movement/shifting, etc. will influence the success of the
application. Proper anchorage, restraint, harnessing, thrust blocks or other devices must be provided to prevent pipe movement (lateral, angular, axial) or
pipe pullout from the bolt-on fitting. Inspection of the pipe integrity is the responsibility of the end user. JCM recommends the use of calibrated torque
wrench. Failure to follow installation instructions will result in voided product warranty.
For application review or questions contact JCM Industries at 1-800-527-8482, 903-832-2581
Installation Instructions
Model 412 Fabricated Carbon Steel Tapping Sleeve
Flanged Outlet
INT412-0115

JCM Quality Fittings Equipped With 18-8 Stainless Steel Bolts and Nuts
When not properly handled it is the nature of stainless steel fasteners to gall and freeze (seize up). This is due to the inherent properties
of the stainless material. Galling and freezing is often triggered by the presence of metal chips, burrs and grains of sand on the threads of
the bolts and nuts. Extra care has been taken by JCM prior to assembly and packing of this fitting to assure a trouble-free installation.
1. The nuts and bolts are made from material of different hardness so that they have different strengths.
2. Nuts are coated with a special anti-seize coating. Additional lubricant may be needed. A Molybdenum-Base lubricant is
recommended.
3. Each nut is assembled by hand to be sure that it went on the bolt freely.
4. The bolts and nuts are handled carefully to avoid damage to the threads.
5. The bolts and nuts are made to exacting specifications to assure that the correct material is used and that the thread form is correct.
Stainless hardware is especially susceptible to galling. JCM supplies specially coated nuts to eliminate the galling caused by over-
torquing, but the bolt threads must be kept clean, free from nicks and not pitched or thrown into the tool bucket during the
installation process. Use of the JCM 901 Master Wrench or JCM 905 Torque Wrench with Deep Socket is highly recommended.
Use of pneumatic wrench for installation could cause hardware to seize and is not recommended.
Tricks of the Trade
Years of field experience, special applications and product testing have revealed many subtleties regarding application and
installation of bolted fittings. For maximum performance under adverse conditions take advantage of the JCM “Tricks of the
Trade.”
Lubricate the pipe with soap-water or water. Oil based pipe lubricants produce a film between the gasket and pipe surface that is not
water soluble and can interfere with the gasket/pipe water tight seal.
Do not rotate the sleeve on the pipe. Rotation of the sleeve on the pipe can result in the gasket being ripped from the groove and
damaging the gasket beyond repair. Some manufacturers recommend rotation - JCM does not.
Tighten the bolts in the sequence provided in the instructions. Fittings are engineered to “load” the gasket in a certain fashion.
Instructions provide the “sequence” of tightening bolts. Ensure the gap between sleeve halves is equal on both sides
Confirm bolt torques with a torque wrench. Proper compression of the gasket is critical to the success of the tapping sleeve
installation. A torque wrench should be used to ensure recommended levels are achieved. Most field problems are directly related to lack
of proper torque levels.
For water applications, proper valve installation, support and trenching per AWWA M-44. Improper assembly support and careless
backfilling can sabotage an otherwise perfect installation.
INTSSB - 0415
Stainless Steel Fastener Management
and
Tips and Tricks Of The Trade
For a Successful Installation
/


