La Crosse Technology WS6890 Instructional Manual
- Category
- Alarm clocks
- Type
- Instructional Manual
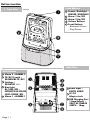
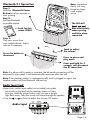
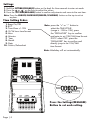
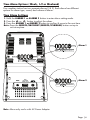
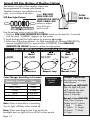
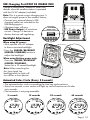
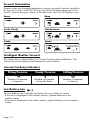
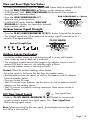
La Crosse Technology WS6890 is a multifunctional weather station with a Bluetooth speaker that can charge your devices and much more. It features a large, easy-to-read LCD display that shows indoor and outdoor temperature and humidity, weather forecast, time, date, and moon phase. The WS6890 also has a built-in alarm clock with snooze function and two separate alarms with crescendo sound that increase to max volume in 5 minutes.
La Crosse Technology WS6890 is a multifunctional weather station with a Bluetooth speaker that can charge your devices and much more. It features a large, easy-to-read LCD display that shows indoor and outdoor temperature and humidity, weather forecast, time, date, and moon phase. The WS6890 also has a built-in alarm clock with snooze function and two separate alarms with crescendo sound that increase to max volume in 5 minutes.


-
 1
1
-
 2
2
-
 3
3
-
 4
4
-
 5
5
-
 6
6
-
 7
7
-
 8
8
-
 9
9
-
 10
10
-
 11
11
-
 12
12
-
 13
13
-
 14
14
-
 15
15
-
 16
16


La Crosse Technology WS6890 Instructional Manual
- Category
- Alarm clocks
- Type
- Instructional Manual
La Crosse Technology WS6890 is a multifunctional weather station with a Bluetooth speaker that can charge your devices and much more. It features a large, easy-to-read LCD display that shows indoor and outdoor temperature and humidity, weather forecast, time, date, and moon phase. The WS6890 also has a built-in alarm clock with snooze function and two separate alarms with crescendo sound that increase to max volume in 5 minutes.
Ask a question and I''ll find the answer in the document
Finding information in a document is now easier with AI
Related papers
-
La Crosse Technology 308-1415FCT User manual
-
La Crosse WS6835 Owner's manual
-
La Crosse Technology 308-1415TH User manual
-
La Crosse Technology TX141TH-Bv3 Quick start guide
-
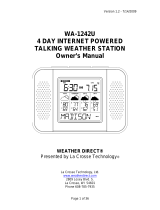 La Crosse Technology WEATHER DIRECT WA-1242U Owner's manual
-
La Crosse CA77932 User manual
-
La Crosse Technology WS6821A Quick Setup Manual
-
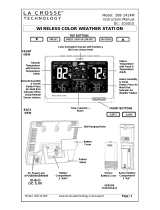
Sharper Image Wireless Color Weather Station Owner's manual
-
 La Crosse Technology 308-1414M User manual
-
La Crosse Technology WS-9630TWC-IT User manual


Other documents
-
Marathon CL030063 User manual
-
Little Tikes 663437 User manual
-
Belkin F8J018TTGRN Datasheet
-
Sencor SDC 7200 User manual
-
Lexibook SM1660 User manual
-
 Explore Scientific WSH4008000000 Owner's manual
-
Irox EBR606C Owner's manual
-
 Explore Scientific WSH4002000000 Owner's manual
-
Alecto WS-5300 User manual
-
Explore Scientific RPW3008 Owner's manual

