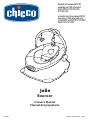
Chicco Jolie is a bouncer designed for babies from birth up to approximately 6 months old, or until the child is able to sit up unassisted. It features a 3-point harness to keep your baby secure, a removable infant insert and headrest for added support, and a variety of toys to keep your baby entertained. The bouncer also has a built-in music and vibration box to help soothe your baby.
Chicco Jolie is a bouncer designed for babies from birth up to approximately 6 months old, or until the child is able to sit up unassisted. It features a 3-point harness to keep your baby secure, a removable infant insert and headrest for added support, and a variety of toys to keep your baby entertained. The bouncer also has a built-in music and vibration box to help soothe your baby.


-
 1
1
-
 2
2
-
 3
3
-
 4
4
-
 5
5
-
 6
6
-
 7
7
-
 8
8
-
 9
9
-
 10
10
-
 11
11
-
 12
12
-
 13
13
-
 14
14
-
 15
15
-
 16
16
-
 17
17
-
 18
18
-
 19
19
-
 20
20


Chicco Jolie is a bouncer designed for babies from birth up to approximately 6 months old, or until the child is able to sit up unassisted. It features a 3-point harness to keep your baby secure, a removable infant insert and headrest for added support, and a variety of toys to keep your baby entertained. The bouncer also has a built-in music and vibration box to help soothe your baby.
Ask a question and I''ll find the answer in the document
Finding information in a document is now easier with AI
in other languages
- español: Chicco Jolie Manual de usuario
Related papers
-
Chicco Close to You™ Bassinet User manual
-
-
-
-
-
-
Chicco PACK URBAN PLUS Owner's manual
-
-
Chicco Musical Walking Turtles Owner's manual
-
Other documents
-
Kmart 43142774 User manual
-
JLab Bouncer Bluetooth Stereo Speaker BOUNCER User manual
-
Hasbro Baby Bouncer User manual
-
BABYTREND BC20B Owner's manual
-
BABYTREND Trend EZ Bouncer (2020) Owner's manual
-
Bounceland 9022 Installation guide
-
Chipolino Baby musical bouncer Siesta Operating instructions
-
mothercare Bounce About Door Baby Bouncer User guide
-
-
 ABC Design Classic Bouncer Operating instructions
