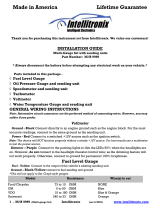
MAN# 650088B
POWER
Connect the red wire from the main harness to accessory power from the ignition switch.
Never connect this to a battery charger alone. It needs to have a 12 volt battery connected to it. Battery chargers
have an unregulated voltage output that will cause the system to not operate properly.
GROUND
The black wire is the main ground for display system. A poor ground connection can cause improper or erratic
operation.
STATUS AND WARNING INDICATORS
The right turn, left turn, and high beam indicators are activated by 12 volts at their respective hook-up wires. The
right turn signal wire is green, the left turn signal wire is orange, and the high beam wire is purple. These can be
connected to the same wires that the indicator lights would be connected to. The display system wire colors may not
match the wire colors in your electrical wire harness, consult a service manual to determine the color code and location of
any wires you cannot locate.
The neutral, low oil, and check engine indicators are activated by ground at their respective hook-up wires. The
check engine wire is pink, the low oil wire is brown, and the neutral wire is white/green.
LOW VOLTAGE WARNING
When the voltage drops below 11 volts with the engine running, LO VLT will be displayed.
SECURITY SYSTEM INDICATOR
The security system indicator is a red light that is activated by 12 volts to the white/black wire. It will light up
whether the gauge is powered or not.
VSS(Vehicle Speed Sensor connections)
Failure to calibrate the speedometer may cause your odometer mileage to increase very rapidly.
The gray wire connects to the vehicle speed sensor. For two wire pulse generators attached to a speedometer
cable, attach one wire from the sensor to the speedometer ground and connect the other to the gray wire. If the signal is
being shared by a cruise control or ECM, make sure they all use a common ground for the pulse generator.
For inductive pickup’s, connect one terminal from the pickup to ground and connect the other terminal to the gray
wire on the gauge.
For 3 wire Hall-effect sensors, refer to the installation instructions for the sensor to determine wire color code.
Most 3 wire sensors use the following color code: RED – power, BLACK – ground, WHITE – speed signal. Connect the
sensor signal wire to the gauge gray wire, connect the sensor power wire to the gauge white w/red stripe, and connect the
sensor ground wire to the gauge black wire. If the bike’s harness provides +5V power and ground to the sensor, please
leave all wires connected to the bike as from the factory and “Tee” into the signal wire.
For speed sensor integrated into a vehicle wiring harness(most Metric Cruisers w/factory VSS utilize a 3-wire
Hall-effect sensor), consult a service manual to determine the color code and location of the speedometer signal. If the
factory harness supplies +5V to the sensor, please utilize the factory connection in place of the white/red power
wire.
For 2004+ Harley and 2003 V-Rod applications make sure to simply “Tee” into the white wire on the speed
sensor to make certain the ECM will still receive its proper VSS signal from the sensor.
2006+ Sportsters utilize a black/blue wire for the VSS signal in place of the white wire on most big-twin models.
The speedometer is fully adjustable and calibration is discussed in the Speedometer Setup section. VSS wires
should be isolated from the ignition system. Coils, plug wires, or tachometer signal wires routed near or with the VSS wire
can cause: erratic speedometer operation, speed reading at a standstill, incorrect or difficult calibration.
TACHOMETER
The tachometer is used by connecting the yellow wire from the main harness to the negative side of the coil or to
an ignition module tach output. The tachometer is adjustable for 1 – 15 cylinder settings. The 1 cylinder setting is used
for single-fire ignition systems without a buffered tach output.
For tach signals integrated into a vehicle wiring harness, consult a service manual to determine the color code and
location of the tachometer signal. The bar displays rpm x1000. The starting bar range is 250 – 6500. If the rpm exceeds
6500 the bar will automatically switch to a 500 – 13,000 bar readout and will remain there until the rpm drops below 2000.
For 2004+ Harley and 2003 V-Rod
The tachometer signal will come from the negative side of the ignition coil. Blue/Orange for the front cylinder,
Yellow/Blue for the rear cylinder, connect the tachometer input to only one of these two wires, set the tachometer for a 1
cyl signal, see Tachometer Set-up for instructions.
SHIFT LIGHT OUTPUT
The shift light output is a ground switch that turns on whenever the rpm exceeds the warning point. It can handle
0.25A, equivalent to a 3W 12V bulb. Connect a low current indicator as follows: One wire from the light will connect to 12
volts, the other wire will connect to the white/purple wire from the gauge.
If a large or high power light will be used, then a relay should be connected as follows: One of the coil wires
should be connected to 12 volts and the other coil wire will connect to the white/purple wire from the gauge. The relay


