Page is loading ...

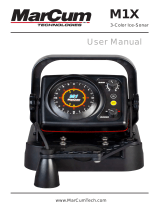
VS485C
Under Water Viewing System
User Manual
www.MarCumtech.com

www.MarCumtech.com
- 2 -
Introduction
Thank you for your purchase of the MarCum VS485C, and welcome to the world of underwater
viewing in full color! Your new VS485C can be used to hunt for underwater treasures, locate the
“spot on the spot”, observe fish in their natural habitat, learn how to interpret signals on your
sonar, and learn how fish react to your lure or bait presentation. Utilizing a color viewing system
enables the user to see how fish, bait, lures and weeds really look. The applications are endless.
MarCum’s primary objective is to enhance the experience of the outdoor enthusiast and we’ve
created a viewing system that is not only user friendly on the ice, but is easy to use in open
water as well. You will now be able to stop guessing at what is below the surface and take all the
mystery out of what is underwater. Have fun and good viewing!
Features
800v x 480h super-high resolution LCD monitor.
CMOS image sensor
Manta camera design utilizing Darkwater Technology lighting system.
50 feet of high strength camera cable.
Removable down-view and trolling fin.
Removable sun shroud.
Front keypad control panel.
On screen monitor adjustments.
Video Output jack.
90° cable connections to prevent cable wear.
Padded soft pack encompasses internal molded case that stores battery and Manta camera.
This provides maximum portability and protection.
7.2 amp 12v rechargeable battery with charger.
Full 1 Year Warranty.
The 800v x 480h high resolution LCD monitor on the VS485C viewing system provides for an
extraordinarily sharp and clear picture under most viewing conditions. It’s recommended when
viewing outdoors, that the backlight (brightness) be increased to enhance your viewing experi-
ence. Although classified as daylight viewable, it is recommended that you turn the monitor away
from direct sunlight. When faced with very bright sun and/or dingy water, shrouding the monitor
will improve the viewing experience. As indicated, the screen brightness can be adjusted to
improve outside viewing but with direct light and monitor glare it can detract from the picture
quality.
The VS485C series LCD systems are considered to be water resistant but not water proof.
They’re designed to be used in the outside elements under most conditions but under no
circumstances should the monitor come in direct contact with standing water or be submerged.
Also, be sure to fold down and cover the monitor should you experience heavy rain while out in a
boat or on the ice. Should your VS485C viewing system become wet from rain or snow, be sure
to get it to a warm dry place to dry out as soon as possible. You may experience some blurriness
or slowdown in LCD performance when you first power up the screen in cold temperatures. It
can take up to several minutes before the screen temperature reaches the appropriate operating
range.
In order to create an ultra-clear, high resolution picture, there needs to be a matching high
quality camera. The VS485C uses the best camera module available; the CMOS camera.
This camera offers a 90° angle of view, giving the user a wide coverage area for maximum
visibility.

www.MarCumtech.com
- 3 -
The Manta camera design matches the high quality CMOS camera with adjustable high
intensity white LED lights. This lighting option incorporates MarCum’s exclusive Darkwater
Lighting Technology. Darkwater technology greatly reduces particulate reflection and
increases viewing distance by positioning the lights above and behind the actual camera lens.
The digital keypad activates an onscreen display for making adjustments to the monitor
brightness, contrast, color and sharpness. In addition to adjusting the monitor screen settings,
the digital keypad also controls underwater lighting and power ON / OFF.
To clean the monitor screen, use a cleaner recommended for plastic and a soft cloth towel.
The video output jack located on the rear of the monitor allows for adding an external monitor
such as a bigger screen TV or a video recording device. Be advised that the video signal coming
out of the RCA jack is “analog”, and that most recording devices are digital, so having a device
that will convert the analog signal to digital may be necessary to successfully record what you
see on your monitor.
The camera and power cables have been designed with 90° terminal connections to prevent
cable wear. Along with the 90° connections, each cable connector is keyed differently to prevent
plugging the cable into the wrong port. The rear cable access panel provides cable strain relief
and is screwed to the back of the monitor. The panel securely holds the cables in place and
prevents unnecessary wear.
The 50 feet of reinforced camera cable is flexible for ease of handling yet offers high tensile
strength.
The Manta camera incorporates internal ballast weights within the camera housing. The amount
of weight is ideal for use while stationary, but when using from a boat, mounting the supplied tail
fin will keep the camera facing straight ahead. The fin may also be used for down viewing,
simply mount the fin on the back of the camera housing and clip the cable into the special slot in
the fin.
The VS485C is protected with a stylish reinforced padded soft pack case. Under the soft pack is
a molded ABS hard case with a built-in battery tray and a hook and loop strap to securely hold
the battery in place. Next to the battery is a storage compartment for the camera and camera
cable. The monitor folds down flat and the padded case encompasses the entire system
protecting it during transportation. On the left side of the case is a carrying handle for ease of
transport.
Getting Started
Remove the VS485C from the packaging and place it on a level surface with the MarCum
Technologies logo facing towards you and right side up. Open the top cover of the soft pack by
lifting up on the hook and loop closers on each side and front of the soft pack. Once opened,
loosen the knobs on either side of the gimbal bracket (at the base of the monitor) by turning
each one counter-clockwise. Make sure to loosen the knobs a considerable distance. Then
depress both knobs by pushing inwards and hold in place. This releases the lock on the monitor
angle. While depressing the knobs with the base of your palms, use the index fingers of each
hand and gently lift the monitor up to the desired viewing position and release tension on the
gimbal knobs. Once you have set the monitor to the desired viewing angle, gently tighten the
knobs until they are snug. The battery, camera and cable are now accessible behind the monitor.
It’s easiest to remove the hook and loop straps and unzip the soft pack case.
The depth of field (distance the camera can see underwater) depends on the clarity of the water
and available light at the depth the camera is used. In clear water, the depth of field can be many

www.MarCumtech.com
- 4 -
feet but in cloudy or muddy water the depth of view can be reduced to only a few inches due to
particles suspended in the water. Dirty or muddy water and/or low light penetration can detract
from the quality of the picture. Optimum picture quality will result from clear water and adequate
light penetration.
If your camera provides a great picture above the water, but the image on the screen disappears
once the camera has been deployed, it is safe to say that the conditions on that particular body
of water are not conducive to underwater viewing.
Adjusting the Monitor Settings
The VS485C monitor has four different adjustments that can be made to enhance the image on
the monitor to the user’s preference. (Note: The VS485C has been pre-set with factory defaults
for normal viewing.) To access the settings menu, press the menu key on the digital keypad. The
settings menu will be displayed on the screen (Note: if you wait too long before selecting an
adjustment, the menu screen will time out and disappear). To change between on-screen
adjustment choices (brightness, contrast, color, and sharpness), continue to press the menu key.
The selected on-screen adjustment will be highlighted on the LCD screen. To change the
settings within a selected menu, use the UP and DOWN arrows located on the far right of the
digital keypad. You will see the numbers of the selected adjustment increase or decrease
depending on the arrow direction you are depressing. To accept the changes, release the UP /
DOWN arrow and settings will be saved. Once the settings are adjusted properly, the on-screen
menu will shut off automatically. Occasionally, you may find that one of your settings will not
adjust. By simply scrolling through the menu options and coming back to the setting that
wouldn’t adjust a second time, you will automatically reset the internal timer, enabling that setting
to be adjusted.
Contrast – Contrast is the difference in brightness between lightest and darkest tones in a
picture. A picture with too much contrast has highlights (lighter tones) that are too bright and no
detail and shadow areas that are too black. A picture with too little contrast looks dull, with no
true blacks and more grayish highlights. Different water clarities coupled with the amount of light
available will affect the contrast. Adjust the contrast to the desired setting for the best overall
picture.
Brightness – Use the brightness adjustment to change the overall brightness of a picture. You
can lighten a picture that’s too dark, or darken one that’s too light. Different lighting conditions
and water clarity will affect the brightness of the picture. Increasing the brightness will make
viewing the VS485C outdoors during daylight hours much easier.
Sharpness – Sharpness is the amount of high-frequency detail in the image. Adjust the
sharpness according to personal preference. (Note: Increasing the contrast can give an
impression of increased sharpness, so try this first).
Color – Increasing the color saturation will increase the vividness but can make the picture
look darker overall. Decreasing the color saturation will make the colors look washed out and
gray.
Color-Kill – This feature allows you to switch between color and black and white with the push
of a button. For viewing in low-light, dirty water, or after dark, Black and White viewing is
recommended for optimal viewing. Good water clarity and daylight viewing is optimal for
viewing in color. Note: The Color-kill feature will turn on automatically when the camera’s light
sensor doesn’t detect enough light for optimal color viewing. This can happen in low light
conditions, in deep water, or when the ice is very thick and/or covered with snow.

www.MarCumtech.com
- 5 -
Reset - This feature will reset your menu system to factory defaults.
Exit - This feature will exit you from the menu system.
Lighting - The VS485C utilizes super high intensity white LED lights. The VS485C incorporates
Darkwater technology which greatly reduces particulate reflection and increases viewing
distance by positioning the lights above and behind the actual camera lens.
To turn the lighting system ON, press the key titled LIGHTS, located on the digital keypad on the
front of the monitor. By pressing the key, a small green LED light to the right of the button will be
illuminated. This indicates that the high intensity white LED lights are ON. To turn the lighting
system OFF, press the light button a second time. To increase the lighting intensity, press the
UP arrow key on the right side of the digital keypad. There are 100 intensity level settings from
low to high. To decrease the intensity of the lights while the lights are ON, press the down key on
the right side of the digital keypad. The amount of LED light required will depend on the clarity
and amount of particulates in the water. Darker, stained water will require more light while clear
water will have sufficient light penetration therefore decreasing the need for LED intensity.
Ice Fishing Application
Watching fish react to your bait will keep you and your kids entertained for hours. The VS485C
can be used to search for that perfect weed line or locate the crib or rock pile where fish will
generally school. To use as a search tool, drill a series of holes through the ice in the location
you’re interested in fishing. The VS485C is small enough to hold in your arms while walking from
hole to hole. Drop the camera down each hole in search for the best spot or until you locate fish.
Once you’ve located the spot, drill a hole 3 or 4 feet away from the hole you’re actually going to
fish in. Set the VS485C on the ice and lower the camera down the second hole. To assist in
keeping the camera at the desired depth and direction, it is recommended that a Camera Panner
(purchased separately) be used. Once you send a lure or bait down and locate it with the
VS485C, you’re ready to fish. The depth and direction of the VS485C can be changed at any
time by lowering or raising the camera and rotating the camera cable between your fingers [or by
using a Marcum Camera Panner]. The VS485C also includes a down viewing fin that snaps into
the back of the Manta camera. Once the fin is attached, the camera cable can be inserted
through the cutout at the rear of the fin and locked into place. It is recommended that you leave
about six inches of excess cable, forming a loop, before locking the cable into place. The
camera can now be lowered into the hole to view what is directly below you. This can be very
helpful while fishing in shallow water.
Open Water Application
To locate fish, look for treasure, or find that perfect spot, simply turn the camera power ON and
drop the Manta camera into the water. If you’re drifting with the wind or using a trolling motor
with the VS485C, attach the supplied trolling fin to the rear of the Manta Camera for added
stability. The internal weight is enough to keep the camera down while the fin assists in keeping
the Manta camera tracking straight through the water. Proceed slowly and with caution in areas
with a lot of underwater obstructions—if the camera becomes hung up, back up from the
direction you were traveling from and slowly try to back the camera out of the snag. DO NOT
pull directly upward with force unless all other avenues have been pursued.
Battery Charging
When properly cared for, a sealed lead acid battery will last for at least a couple of years.
Batteries are made to be used, and they need to be used to make the most of them. The most
important thing you can do is to promptly recharge your battery after each use.

www.MarCumtech.com
- 6 -
Not charging your battery immediately after use is the number one thing that leads to battery
failure.
For safety reasons, it is recommended that you place your system on a flat, hard surface like
cement or tile when charging it, away from any flammable materials. Be sure to disconnect the
charger from the wall when not in use, and avoid leaving your battery hooked up to the charger
for extended periods of time.
When you get home from a trip, put your battery on charge right away, and leave it there
overnight, or for around 8-12 hours. Likewise, on the night before you go ice fishing, put it on the
charger again, just to make sure.
Again, there is no danger of overcharging your battery. We often talk to people who hesitate to
charge their battery after each use for fear that the battery will develop a “memory” and this will
lead to a shortened run time— THIS IS FALSE!!! ALWAYS CHARGE YOUR BATTERY AFTER
EVERY USE!!! Be sure to use the charger that came with your system, or a similar one that is
between .5 amp and 1 amp. Using a larger charger, like you would use on a car, truck, RV, or
boat is likely to cause damage to the battery.
To charge your battery:
To charge, simply couple the two ends of the charging system and connect the red and black
wires to the battery. It is normal for a green light to appear on the charger when it is plugged into
the battery only. It is also normal for the light on the charger to be green if it is just plugged into
the wall. When it is plugged into the wall and battery, you will see a red LED light appear on the
charger. If the light is red, the battery is being charged. When your battery is fully charged, this
red light should change to green. If it is time to go fishing and the light has not turned green, go
fish and try to allow a longer charging period next time. If your LED light never turns from red to
green, it is likely that your battery is no longer accepting a full charge to turn the LED light
green.
The VS485C viewing system includes the Sun Shield, which can be attached to the monitor to
improve viewing while outdoors. The Sun Shroud comes with three hook and loop attachment
strips that enable the owner to easily attach the shroud when conditions warrant its use, or
remove it when not needed.
To install, first remove the loop tape from the hook tape. Peel the adhesive cover and apply the
strips of loop tape to each side and the top of the monitor. The hook tape attached to the shroud
can now be married to the loop tape on the monitor, and your monitor can now be more easily
viewed in sunlight.
If your viewing image appears cloudy, fuzzy or the screen begins to shrink, check your battery
charge. One of the major symptoms of a dead or near- dead battery is the degradation of your
viewing image. Try charging your battery or if the battery is unable to hold a charge, replace it
with a new one of similar specification. If you need to remove the battery, unplug the two battery
terminals from the battery. Remove the hook and loop strap that is holding the battery in place
and lift the battery out. To replace the battery, place a new battery into the battery compartment
and secure it with the hook and loop strap and re-connect the positive and negative terminals.

www.MarCumtech.com
- 7 -
Product Performance Specifications
Battery: 12 volt DC, 7.2 Amp hr
Charger: 12 volt DC
Camera Image Sensor: CMOS Sensor
Light Sensitivity: .01 lux with lights on
Field of View: 90 degrees
Monitor: 7" (800 x 480)
Current Draw –
System ON (lights off): 630mA
System ON (lights on - full): 815mA
One Year Warranty
MarCum warranties this product to be free from defects in materials and workmanship for one
year from the date of purchase. This warranty applies to customers who properly complete
the online product registration form found on the MarCum Technologies Website:
www.marcumtech.com/support
MarCum Technologies will repair or replace any components that fail in normal use. Failures
due to abuse, misuse, unauthorized alteration, modification, or repair are not covered. The
warranty is valid only for the original owner who purchases the unit from an authorized dealer.
An original sales receipt dated within the warranty period is required for all warranty claims.
To best serve our customers, MarCum Technologies has set a standardized battery warranty
policy. Battery warranty coverage requires a proof of purchase. Please see our website,
www.marcumtech.com/support for full details on warranty coverage.
HOW TO OBTAIN SERVICE
If your system is malfunctioning, check the support section of our website. You may find that the
solution to your problem is something you can resolve yourself. If you need to send it in, there is
no need to contact our office. Getting repairs made is as simple as going to our website,
MarCumtech.com clicking the support tab and then filling out the MarCum Warranty Claim.
Once you have completed and submitted a warranty claim, package the system as described
on the website and ship it to us.
If your system is out of warranty, it is a simple as going to our website and filling out a MarCum
non-warranty claim. Once you have completed the non-warranty claim, package the system as
described on the website and ship it to us. All non-warranty repair pricing is determined after
the system is received by us.

www.MarCumtech.com
MarCum User Manuals are available for downloads from
www.MarCumtech.com.
2020-0323
Some people are more comfortable calling for shipping instructions. During peak ice season,
we sometimes receive a high volume of calls, making it impossible to get to all customers
who phone in. For this reason, strongly consider using the online forms at
www.marcumtech.com/support or the "Live Chat" option.
OUR ADDRESS:
MARCUM TECHNOLOGIES
ATTN: SERVICE DEPT.
3943 QUEBEC AVE NORTH
MINNEAPOLIS, MN 55427
Please send your email inquiries to service@marcumtech.com
If you are unable to use email or internet, you may call us at 763-512-3987.
Our office hours are Monday – Friday, 8 – 4 Central Time.
International callers may use 888-778-1208.
The customer is responsible for shipping costs associated with returning the system to MarCum
Technologies. MarCum will pay for shipping the repaired system back to the customer while it is
still under warranty. All out of warranty services will be charged a fee for service and shipping
which must be paid in advance. The system should be securely packed and shipped “pre-paid
freight” and insured to MarCum Technologies. It is the customer’s full responsibility to track their
products sent out in the mail or other forms of delivery service. MarCum
Technologies will not
be liable for packages lost in route to us. Unless specified otherwise, do not include batteries or
other accessories when returning the product for repair. MarCum Technologies will not be
responsible for lost or damaged accessories. Turnaround time can vary, on average it is about
1 week.
/