Page is loading ...

Table of Contents Rev. 2/27/2019 SPB-P-72 MANUAL
Table of Contents Copyright 2019 Vestil Manufacturing Corp. Page 1 of 7
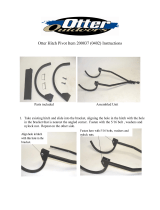
SPB-P-72 Fork-Mounted Snow Plow
Instruction Manual
Receiving instructions:
After delivery, remove the packaging from the product. Inspect the product closely to determine
whether it sustained damage during transport. If damage is discovered, record a complete description
of it on the bill of lading. If the product is undamaged, discard the packaging.
NOTE:
The end-user is solely responsible for confirming that product design, use, and maintenance comply
with laws, regulations, codes, and mandatory standards applied where the product is used.
Replacement Parts and Technical Support:
For answers to questions not addressed in these instructions and to order replacement parts,
labels, and accessories, call our Technical Service and Parts Department at (260) 665-7586. The
department can also be contacted online at http://www.vestilmfg.com/parts_info.htm
.
Vestil Manufacturing Corp.
2999 North Wayne Street, P.O. Box 507, Angola, IN 46703
Telephone: (260) 665-7586 -or- Toll Free (800) 348-0868
Fax: (260) 665-1339
Table of Contents
Signal Words……………………………………………………………………………………………………………………. 2
Hazards………….………………………………………………………………………………………………………………. 2
Exploded View and Bill of Materials………………………………………………………………………………................. 3
Installation…………………….………………………………………………………………………………………………4 - 5
Record of Normal Condition………………………………………………………………………………………………….. 6
Inspections & Maintenance……………………………………………………………...................................................... 6
Labeling Diagram………………………………………………………………………………………………………………. 6
Limited Warranty……………………………………………………………………………………..………………………… 7

Table of Contents Rev. 2/27/2019 SPB-P-72 MANUAL
Table of Contents Copyright 2019 Vestil Manufacturing Corp. Page 2 of 7
Signal Words:
This manual classifies personal injury risks and situations that could lead to property damage with SIGNAL
WORDS. A safety message appears with a signal word that describes an improper/dangerous use of the product.
The signal word indicates the seriousness of the injury that could result from the described use.
Identifies a hazardous situation which, if not avoided, WILL result in DEATH or SERIOUS
INJURY. Use of this signal word is limited to the most extreme situations.
Identifies a hazardous situation which, if not avoided, COULD result in DEATH or SERIOUS
INJURY.
Indicates a hazardous situation which, if not avoided, COULD result in MINOR or MODERATE
injury.
Identifies practices likely to result in product/property damage, such as operation that might
damage the product.
Hazards:
Vestil strives to identify all hazards associated with the use of its products. However, material handling is
dangerous and
no manual can address every risk. The most effective means for preventing accidents is for the
end-user to exercise
common sense and sound judgment whenever using this product.
If this product is used or maintained improperly serious personal injuries or death might result.
ALWAYS use the product properly.
• Read and understand the entire manual before assembling, using or servicing the product.
• Read the manual to refresh your understanding of proper use and maintenance procedures.
• DO NOT attempt to resolve any issue with the product unless you are both authorized to do so and certain that it
will be safe to use afterwards.
• DO NOT modify the product in any way. Unauthorized modifications might make the plow unsafe to use and
automatically void the Limited Warranty on p. 7.
• DO NOT exceed the capacity of the plow. Capacity is provided on Label 287, which is shown in the Labeling
Diagram on p. 6.
• Inspect the plow before each use according to the Inspection procedures on p. 6. Look for signs of excessive
wear, damage, or distortion. Check all fasteners and confirm that they are securely tightened and undamaged.
• Review the safety messages included in the manual(s) for your fork truck and operate it according to the
instructions while using this plow / fork attachment.
• DO NOT stand or walk, or allow any other person to stand or walk, beneath an elevated plow. Always maintain
ample separation between the plow and all persons involved with snow-clearing operations. DO NOT plow nearby
or towards any person.
• Remain at a safe distance from the fork lift and plow while the plow is in use.
• ONLY use the plow to move snow. For example, DO NOT push equipment, vehicles, pallets, etc.
• DO NOT leave the fork truck unattended if the plow is elevated. Always lower the forks until the plow rests on the
ground.
• DO NOT remove or obscure any label. Verify the placement and legibility of all labels as shown in the Labeling
Diagram on p. 6. DO NOT use this device UNLESS all product labels are readable, undamaged, and fastened
securely to the plow.
Proper use, maintenance, and storage are essential for this product to function properly.
o Always use this product in accordance with the instructions in this manual and consistent with any training applied
to fork truck operation at your workplace
o Periodically lubricate moving parts.

Table of Contents Rev. 2/27/2019 SPB-P-72 MANUAL
Table of Contents Copyright 2019 Vestil Manufacturing Corp. Page 3 of 7
Item Part no. Description Qty. Item Part no. Description Qty.
1 47-514-001 Weldment, mid-frame 1 14 45286 #11 hitch pin clip,
1
/
8
” x 2
5
/
8
” 2
2 47-514-003 Weldment, frame, plow attachment 1 15 47-157-001 Snow plow ski/shoe 2
3 47-528-004 Weldment, fork pocket 1 16 47-612-001 Weldment, pin with chain 1
4 47-514-023 Weldment, frame, blade 1 17 47-145-002 Eyebolt with nuts & lock washer 2
5 47-017-006 Bar stiffener, front blade 1 18 15374 Hex cap screw,
3
/
4
”-10 x 5
1
/
2
” 1
6 21826
Carriage bolt, Gr. 5, zinc-plated,
1
/
2
”-13UNC x 2”
5 19 0147910 Hex nut,
3
/
4
”-10, Gr. 8 1
7 36309
Hex nut, Gr. 5, zinc-plated,
1
/
2
”-
13UNC
5 20 01-146-006 Spring 2
8 15209
Bolt, HHCS, Gr. 8, zinc-plated,
1
/
2
”-
13UNC x 1
1
/
2
”
4 21 47-514-021 Weldment, frame, right side 1
9 33626 Lock washer, zinc-plated,
1
/
2
” 4 22 47-514-022 Weldment, frame, left side 1
10 36110 Hex nut, zinc-plated,
1
/
2
”-13 4 23 47-014-038 Frame, right side, formed 1
11 47-112-001 Clevis pin, 1” x 3
1
/
4
” 2 24 47-014-039 Frame, left side, formed 1
12 65127 Cotter pin, zinc-plated,
3
/
16
” x 2” 2 25 11209
1
/
2
”-13 x 1
1
/
2
” HHCS, ASTM
A307, Gr. A, zinc-plated
18
13 14-612-001 Pin, lock, weldment 2 26 37030
1
/
2
”-13 Nylon insert lock nut 18
Exploded View and Bill of Materials:

Table of Contents Rev. 2/27/2019 SPB-P-72 MANUAL
Table of Contents Copyright 2019 Vestil Manufacturing Corp. Page 4 of 7
Installation:
Step 1: Mount the plow on your forklift.
(A) Remove the locking pins from the tine lock brackets: First pull out the hitch pins and then remove the lock
pins as shown in diagram A. Adjust the positions of the tines of your lift truck to match the locations of the fork
pockets; then slowly drive the truck forward until the forks extend all the way through the fork pockets. The
heels of the forks should contact the ends of the fork pockets so that the tine lock brackets project behind the
heel of each fork).
(B) Secure the plow to the forks by reinstalling the tine lock pins and hitch pins (see frame B below).
NOTE: It might not be possible to lock the tines in the tine locks until step 2 on the following page has been
completed.
(C) When properly adjusted, the cross bar of the mid-frame will rest against the mast of your forklift.
Step 2: Adjust the position of the mid-frame.
When properly adjusted, the cross bar of the mid-frame weldment (MFW) will rest against the mast of your
forklift. Four bolt fasten the fork pocket weldment (FPW) fastens to the MFW. To adjust the position of the mid-
frame, unfasten and remove all 4 bolts. Complete Step 1B now (reinstall tine lock pins) if you were unable to do
so in step 1. Adjust the position of the mid-frame to bring the cross bar into solid contact with the mast of your
forklift. Align the bolt holes in the cross channels of the FPW and the MFW. Then, reinstall and fasten the bolts.
Tighten the connections. The cross bar MUST solidly contact the forklift mast otherwise the vertical frame
elements might be damaged while using the plow.
Tine lock
bracket
Secure tine lock pins with hitch pins
B
Fork pocket
Hitch pin
A
Tine lock pin
Cross
bar
Remove all four bolts (2 on each
side) from the cross channel
Unfasten and remove all 4
bolts (2 on each side)
from the cross channel
Cross bar
contacts
forklift mast
C
Overhead View
Cross bar
Side View
Fork pocket
NOTE: Model
SPB-N-72 shown

Table of Contents Rev. 2/27/2019 SPB-P-72 MANUAL
Table of Contents Copyright 2019 Vestil Manufacturing Corp. Page 5 of 7
Step 3: Select the desired plow angle.
The plow can be set in 3 positions by pinning the plow pin through the appropriate hole (A-C) in the Mid-
Frame Weldment (MFW). In the diagram below, the plow is pinned at position B. To change the plow position,
remove the plow pin. Rotate the plow until hole A, B or C aligns with the holes in the top and bottom plates of
the plow attachment frame. See also Exploded View, item 2, p. 3. The pin must extend through both plates of
the plow attachment frame.
A B C
Plow pin
Step 4: Adjust plow blade height (above ground level).
Plow blade height can be increased by adding washers between the shoe bushing and the shoe bracket on
both sides of the plow: 1) Remove the lynch pin (flip the locking ring over; then pull out the pin); 2) Pull the shoe
out of the bracket. Leave the shoe bushing in place on the shaft of the shoe. Put the necessary number of
washers on top of the shoe bushing; then 3) Reinstall the shoe and the lynch pin.
Lynch pin
Shoe
bushing
Shoe
Shoe
bracket
Washers installed
between bushing and
bracket to increase
height of plow
Step 5: Adjust spring tension.
Two coil springs control the pitch of the
plow. Greater spring tension pulls the top
edge of the plow back and causes the
bottom edge of the plow to move farther
forward. Decreasing spring tension has the
opposite effects. To adjust spring tension,
loosen the hex nuts on the inside of the
plow lip (nuts labeled “a” in the diagram).
Adjust the position of the nuts on the outer
side of the lip (labeled “b”) to achieve the
desired spring tension. Tighten the inside
nuts (a) against the lip to complete the
adjustment.
b
b
a
a
Top and bottom plates of plow
attachment frame
Flip
locking
ring

Table of Contents Rev. 2/27/2019 SPB-P-72 MANUAL
Table of Contents Copyright 2019 Vestil Manufacturing Corp. Page 6 of 7
Record of Normal Condition:
Before using the lifter for the first time, create a written record of its appearance and operation. Include detailed
descriptions about the frame, fork pockets, pins and pin brackets, plow blade, springs, shoes, eye bolts, and pivot
points. Thoroughly photograph the unit including all labels applied to it. Add the photographs to the record. This
record establishes normal condition of the plow. When conducting inspections in the future, compare your
observations to this record to determine if a component is in normal condition or requires repair or replacement.
Inspections & Maintenance: Numbers in parentheses () correspond to item numbers in Exploded View
on p. 3.
Before each use, inspect the plow to confirm that it is in normal condition. DO NOT use the plow unless it is in
normal condition.
1. Tine lock pins (13): Confirm that both lock pins are straight and undamaged. Also confirm that the pin holes in
the tine lock brackets (see Step 1, frame A, on p. 4) are not enlarged and that the brackets are not cracked,
warped, etc. Both lock pins must be secured with their hitch pins every time the plow is installed on your
forklift.
2. Labeling: All labels should be readable and located as shown below in the Labeling diagram. Replace any
label that is missing or not easily readable (e.g. faded). Contact Technical Service to order replacement
labels.
Inspect the following components at least once per month.
1. Hardware: bolts, nuts, washers, pins, hinge pins; pay particular attention to the 5½ in. hex cap screw (Item no.
9) that fastens the plow attachment frame weldment (18) to the mid-frame weldment (1); also closely inspect
the fasteners (8; 9; 10) that connect the fork pocket weldment to the mid-frame weldment.
2. Shoes (15) and shoe brackets: both shoes should be securely fastened to the shoe brackets with lynch pins.
They should not be bent or worn so substantially that they do not across the ground.
3. Fork pockets: confirm that each pocket is structurally sound and free of rust. Do not use the plow if the fork
pockets are structurally compromised, e.g. significantly rusted, bent, or broken.
4. Welds: confirm that all welds are intact.
5. Weldments (1; 2; 3; 4; 21; 22): examine each weldment for abnormal shape, broken welds, and looseness.
6. Overall condition of the plow: the structure should be clean, square and rigid, and free of significant rust and
corrosion. Remove dirt and debris. Grease pivot points. Apply touchup paint to all areas where the finish is
damaged.
7. Springs: examine the two springs that control plow pitch (20). The springs should resist forward rotation of the
plow and should securely attach to the plow blade (4) and plow attachment frame (2). Examine the springs for
rust, cracks, stretching, etc. that compromises function.
Labeling diagram:
Each unit should be labeled as shown in the diagram. However, label content and location are subject to
change without notice so your product might not be labeled exactly as shown. Compare the diagram below to
your Record of Normal Condition. If there are any differences between actual labeling and this diagram, adapt
the diagram to reflect actual labeling. Replace all labels that are damaged, missing, or not easily read (e.g.
faded). To order replacement labels or to inquire whether your unit is properly labeled, contact the technical
service and parts department online at http://www.vestilmfg.com/parts_info.htm
or by calling (260) 665-7586
and asking for the Parts Department.
A: label 287
B: label 218
C: label 208
C (back side
of blade)
C (top of
mid-frame)
A
B

Table of Contents Rev. 2/27/2019 SPB-P-72 MANUAL
Table of Contents Copyright 2019 Vestil Manufacturing Corp. Page 7 of 7
LIMITED WARRANTY
Vestil Manufacturing Corporation (“Vestil”) warrants this product to be free of defects in material and
workmanship during the warranty period. Our warranty obligation is to provide a replacement for a defective,
original part covered by the warranty after we receive a proper request from the Warrantee (you) for warranty
service.
Who may request service?
Only a warrantee may request service. You are a warrantee if you purchased the product from Vestil or from an
authorized distributor AND Vestil has been fully paid.
Definition of “original part”?
An original part is a part used to make the product as shipped to the Warrantee.
What is a “proper request”?
A request for warranty service is proper if Vestil receives: 1) a photocopy of the Customer Invoice that displays
the shipping date; AND 2) a written request for warranty service including your name and phone number. Send
requests by one of the following methods:
US Mail Fax Email
Vestil Manufacturing Corporation (260) 665-1339 info@vestil.com
2999 North Wayne Street, PO Box 507 Phone Enter “Warranty service request”
Angola, IN 46703 (260) 665-7586 in subject field.
In the written request, list the parts believed to be defective and include the address where replacements should be
delivered. After Vestil receives your request for warranty service, an authorized representative will contact you to
determine whether your claim is covered by the warranty. Before providing warranty service, Vestil will require you
to send the entire product, or just the defective part (or parts), to its facility in Angola, IN.
What is covered under the warranty?
The warranty covers defects in the following original, dynamic parts: motors, hydraulic pumps, motor controllers,
and cylinders. It also covers defects in original parts that wear under normal usage conditions (“wearing parts”),
such as bearings, hoses, wheels, seals, brushes, and batteries.
How long is the warranty period?
The warranty period for original dynamic components is 30 days. For wearing parts, the warranty period is 90
days. Both warranty periods begin on the date Vestil ships the product to the Warrantee. If the product was
purchased from an authorized distributor, the periods begin when the distributor ships the product. Vestil may, at its
sole discretion, extend a warranty period for products shipped from authorized distributors by up to 30 days to
account for shipping time.
If a defective part is covered by the warranty, what will Vestil do to correct the problem?
Vestil will provide an appropriate replacement for any covered part. An authorized representative of Vestil will
contact you to discuss your claim.
What is not covered by the warranty?
The Warrantee (you) is responsible for paying labor costs and freight costs to return the product to Vestil for
warranty service.
Events that automatically void this Limited Warranty.
• Misuse;
• Negligent assembly, installation, operation or repair;
• Installation/use in corrosive environments;
• Inadequate or improper maintenance;
• Damage sustained during shipping;
• Collisions or other accidents that damage the product;
• Unauthorized modifications: Do not modify the product IN ANY WAY without first receiving written authorization
from Vestil.
Do any other warranties apply to the product?
Vestil Manufacturing Corp. makes no other express warranties. All implied warranties are disclaimed to the
extent allowed by law. Any implied warranty not disclaimed is limited in scope to the terms of this Limited Warranty.
Vestil makes no warranty or representation that this product complies with any state or local design, performance,
or safety code or standard. Noncompliance with any such code or standard is not a defect in material or
workmanship.
/