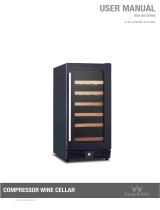
LG GC051SS User guide

Category
Wine coolers
Type
User guide

This manual is also suitable for

LG GC051SS wine cellar offers a sophisticated storage environment for your wine collection. With its temperature-controlled zones, you can create the ideal conditions for red and white wines. The sleek design and vibration-dampening system ensure your wines age gracefully and undisturbed. Store up to 46 bottles of your favorite vintages in this stylish and functional wine cellar.

LG GC051SS wine cellar offers a sophisticated storage environment for your wine collection. With its temperature-controlled zones, you can create the ideal conditions for red and white wines. The sleek design and vibration-dampening system ensure your wines age gracefully and undisturbed. Store up to 46 bottles of your favorite vintages in this stylish and functional wine cellar.

26
Contents
Understanding &Preparation
Safety Instructions.............................................................................................27
Installation .........................................................................................................32
Door Reversal ...................................................................................................34
Movement, Transportation and Voltage Change...............................................35
How To Use
Parts identification.............................................................................................36
If this happens...................................................................................................38
Temperature regulation and related indication..................................................39
Correct Way to Wine Storage............................................................................41
Cleaning
Cleaning ............................................................................................................43
Confirmation
These are Not Faults.........................................................................................44
Please confirm the following before calling for service......................................45
Reference
Tips to help you enjoy your refrigerator.............................................................46
Energy-Saving Method......................................................................................47
Thank you for purchasing LG products.
Safety Notes
Safety notes are given for safe and correct use of the product.
• Safety notes are divided into “warning” and “alert” as described below.
• After reading, keep this manual in a convenient location for easy reference.
w is an indication of a dangerous condition under specific conditions.
ww
Warning (For Power Connection)
Use a Dedicated Power Outlet.
Do Not Use An Extension Cord.
Sharing an outlet with another appliance can
result in a circuit overload and fire.
Make certain that the appliance is properly
grounded.
Improper grounding (earthing) may cause electric
shock or damage to the appliance. For specific
grounding (earthing) requirements, refer to page
32.
Before replacing the light bulb, always unplug
the refrigerator to avoid an electric shock.
Power Plug Should Not Be Pinched by the
back of the refrigerator.
The plug may be damaged, leading to fire or
shock if it is pinched.
For cleaning, remove the power plug first.
Do not unplug with wet hands or you may recieve
an electric shock.
Insert the power plug tightly after checking to
see that no dust or foreign matter is on it.
A dirty plug or a loose connection may result in a
fire.
27
ww
Warning
Personal injury or death may occur if operating
rules are not followed.
ww
Alert
Damage or property loss of house or contents
may occur if operating rules are not followed.
grounding line
over 75cm
copper plate
This appliance is not intended for use by persons (including children) with reduced physical, sensory
or mental capabilities, or lack of experience and knowledge, unless they have been given supervision
or instruction concerning use of the appliance by a person responsible for their safety.
Children should be supervised to ensure that they do not play with the appliance.
28
ww
Warning (For Power Connection)
Clean dust off the power plug regularly to
reduce the risk of fire.
Do not damage, puncture, kink, stretch, or
twist the power cord.
A damaged power cord can cause fire or electric
shock.
Do not place any foreign objects into the
ventilation louvers. This could result in an
electric shock or injury.
Do not modify or extend the Power Cord.
It may cause electric shock or fire.
ww
Warning (For Refrigerator Operation)
Do not disassemble, repair or change this
product.
Injury, electric shock or fire may result and
warranty coverage may be voided.
Do not climb on the refrigerator door. The
refrigerator may tip over, resulting in damage
and/or injury.
Special care should be given to prevent children
from climbing on the refrigerator door.
Do not place heavy items on top of the
refrigerator.
They might fall and cause injury when the door is
opened.
Do not place any flammables such as ether,
benzene, alcohol, or liquified gas into the
refrigerator.
An explosion may result.
The appliance is not intended for use by young children.
Children should not be permitted to play with the appliance.
29
ww
Warning (For Refrigerator Operation)
Do not store drugs or chemicals in the
refrigerator.
The Wine Cellar is not intended for the
preservation of such temperature sensitive items.
Deterioration or undesirable reactions may occur.
Do not use flammable or explosive sprays
near the refrigerator.
A spark from an electric or control circuit can
ignite a fire or explosion.
Do not place vases, drinking glasses, or other
liquid containers on the refrigerator.
Liquids spilled into electrical components may
result in electric shock or other damage.
This Wine Cellar is intended for use only as a
home appliance. It is not designed to withstand
the rigors or environment of recreational vehicles
or marine installations.
Keep refrigerator away from fire.
If you detect a gas leak, do not touch the
refrigerator or power cord.
Vacate the home and phone the fire department
from a mobile phone or a neighbor's phone.
Do not use excessive water when cleaning the
inside or outside of the refrigerator.
Wet insulation will adversely affect efficiency and
may cause leakage or fire.
For disposal of this product, remove the door,
leave the shelves and dividers in place, and put
the unit in a location where children can not get
inside.
30
ww
Warning (Important Safety Instruction)
This appliance contains a small amount of isobutane refrigerant (R600a), natural gas with high
environmental compatibility, but it is also combustible. When transporting and installing the
appliance, care should be taken to ensure that no parts of the refrigerating circuit are damaged.
Refrigerant squirting out of the pipes could ignite or cause an eye injury. If a leak is detected,
avoid any naked flames or potential sources of ignition and air the room in which the appliance
is standing for several minutes.
In order to avoid the creation of a flammable gas air mixture if a leak in the refrigerating circuit occurs,
the size of the room in which the appliance may be sited depends on the amount of refrigerant used.
The room must be 1m
2
in size for every 8g of R600a refrigerant inside the appliance. The amount of
refrigerant in your particular appliance is shown on the identification plate inside the appliance.
Never start up an appliance showing any signs of damage. If in doubt, consult your dealer.
ww
Keep ventilation openings, in the appliance enclosure or in the built-in structure, clear of
obstruction.
ww
Do not use mechanical devices or other means to accelerate the defrosting process, other
than those recommended by the manufacturer.
ww
Do not damage the refrigerant circuit.
ww
Do not use electrical appliances inside the food storage compartments of the appliance,
unless they are of the type recommended by the manufacturer.
ww
The refrigerant and insulation blowing gas used in the appliance require special disposal
procedures. When disposal, please consult with service agent or a similarly qualified
person.
31
ww
Caution
When removing the power plug, grasp the
plug firmly and pull from the socket. Never
pull the cord.
Unplug the refrigerator when it will not be
used for an extended time.
Do not install the refrigerator in a damp place
or where it can easily get wet.
Damp insulation will greatly reduce the efficiency
of the refrigerator.
Do not reach under the refrigerator with your
hands. Sharp edges on the metal base may
cause injury.
Do not use this product when the power cord
or plug are damaged or fit loosely in the
socket hole is loose.
These conditions may cause a short circuit
resulting in fire.
The refrigerator should be installed on a level
and solid floor.
This will reduce vibration and avoid the possibility
of tipping over when the door is opened.
Do not install in a position where the glass
door might hit, or be hit by, furniture or other
objects when the door is opened.
Your refrigerator is heavy (54-83kg,
depending on model). If it must be lifted, use
2 or 3 helpers.
Always carry the refrigerator in a nearly upright
position - never tipped to the front, back, or side.
humidity
Installation
1. Choose a Good Location
Maintain proper distances between
the refrigerator and items around it.
• To ensure proper air circulation around the fridge
-freezer,please maintain sufficient space on both
the sides as well As top and maintain at least 2
inches (5 cm) from the rear wall.
• If the refrigerator is too close to surrounding
items, its operation may be affected and more
energy will be consumed.
Install in a dry and well-ventilated
place
• Do no install the refrigerator in a damp place or in
places where it can easily get wet, to prevent
metal parts from rusting or causing electric shock.
• Install the refrigerator in a well-ventilated place.
Avoid heat, and direct sunlight
• If surrounding temperature is high, it may
decrease product efficiency and increase electric
usage.
2. Levelling the refrigerator
Place in a firm and level location
• If the floor is not already level, use the adjustable feet to level the refrigerator from side to side.
• On carpeted floors and some types of hardwood floors, it is advisable to place the refrigerator on a
thin sheet of plywood to prevent discoloration caused by heat from the refrigerator's condenser.
• An unstable floor can cause refrigerator vibration, noise, and door sag.
Adjust the front of the refrigerator
slightly higher than the back
• Rock the refrigerator side to side, front to back,
and corner to corner to be sure that it is solid;
then readjust the front leveling feet so the front is
slightly higher than the back.
• If the front is low, the door may not close tightly.
Refrigerator performance will be affected and
condensation may form on the interior.
32
The Wine Cellar refrigerator is designed for best performance in an environment between 10°C and
35°C. A higher or lower temperature will affect the refrigerator's operation and shorten its useful life.
Raise the front
end slightly high
adjustable
leveling foot
mat
humidity
More than
5cm to back
Keep proper space
Installation
3. Grounding (Earth Ground)
Grounding must be done to prevent electric shock.
Grounded Outlet (earth ground)
connections
• If the AC230V outlet has a properly wired ground
connection, no additional grounding is needed.
Connections without Grounded
Outlets (earth ground)
• If a AC230V grounded outlet is not available, a
ground wire, connected to a copper plate buried
underground, can be used.
Places where grounding (Earth
Ground) is impossible
• In places where access to ground is not possible,
connect the refrigerator to a leakage protection
switch (rated current 15mA) and then connect it to
the outlet.
Places where no grounding is allowed
• Never connect ground wires to gas pipes, water
pipes, a lightening arrester, or telephone lines.
4. Please connect with power
supply
Power supply connection
• Plug into a 230V outlet.
5. Storing your wine
• After power is connected, wait 4 hours before placing wine into the refrigerator.
Plastic pipe without conductive properties can not be used for grounding.
33
Only AC230V use
grounding line
over 75cm
leakage
protection
copper plate
Door Reversal
1) HINGE COVER Disconnection
2) HINGE CAP Disconnection
3) BOLT Unfasten and HINGE Disconnection
4) DOOR Disconnection
5) DOOR CAP Disconnection
6) HINGE- L( 1) Disconnection
7) HINGE- L( 2) Disconnection
Adjust Screw Disconnection and Location Movement Assembly.
8) HINGE- L( 1) and HINGE- L( 2) Location Movement Assembly.
9) HINGE- PIN Disconnection Location Movement. Outer HOLE
10) DOOR 180° Rotation
11) HINGE STOPPER Disconnection Location Change Assembly
12) DOOR SET Attachment
13) HINGE Assembly
14) HINGE COVER Attachment
15) HINGE CAP Attachment
16) DOOR CAP Attachment.
34
Hinge
Cover
Bolt
Hinge
Hinge-Pin
Hinge-L(1)
Hinge-L(1)
Hinge-Pin
Hinge-Stopper
Hinge-L(2)
Adjust Screw
Hinge Cap
Door Cap
Note
Reversing the doors is not covered by the warranty.
Movement, transportation and voltage change
Moving the refrigerator
Before moving
1. Remove all contents from the refrigerator.
2. Disconnect the power plug.
3. Secure loose parts, such as shelves, with tape.
4. Raise the refrigerator a little and screw the adjustable feet in as far as possible.
During transportation
1. Hold onto the adjustable feet while carrying.
2. Always carry the refrigerator in a nearly upright position - never tipped to the front, back, or side.
3. Refrigerators are heavy. If it must be lifted, get 2 or 3 helpers.
Note: If the refrigerator is moved by pushing, the adjustable feet must be screwed in tightly.
The adjustable feet may scratch your floor or block the refrigerator from being moved.
35
Fasten the door with transparent
tape to prevent it from opening.
Disposal of your old appliance
1. When this crossed-out wheeled bin symbol is attached to
a product it means the product is covered by the European
Directive 2002/96/EC.
2. All electrical and electronic products should be disposed of
separately from the municipal waste stream via designated
collection facilities appointed by the government or the local
authorities.
3. The correct disposal of your old appliance will help prevent
potential negative consequences for the environment and
human health.
4. For more detailed information about disposal of your old
appliance, please contact your city office, waste disposal
service or the shop where you purchased the product.
Part identification
36
*Glass tray
Light bulb
• Light bulb inside the wine
cellar can be turned on or
off by pressing the button
on the operation panel.
• Light bulb inside the wine
cellar will automatically
turn off after one hour.
Wine holder
Top/Bottom Separation
Panel
• The partition is separated
into 'Top' partition and
'Bottom' partition based
on the top/bottom
separation panel.
Temperature is adjusted
with 'Top' button and
'Bottom' button
respectively.
Operation panel
Wine shelf
Adjustable supports
Can be adjusted when
the refrigerator is not
stable.
Type 1
Part identification
37
Type 2
Light bulb
• Light bulb inside the wine
cellar can be turned on or
off by pressing the button
on the operation panel.
• Light bulb inside the wine
cellar will automatically
turn off after one hour.
Top/Bottom Separation
Panel
• The partition is separated
into 'Top' partition and
'Bottom' partition based
on the top/bottom
separation panel.
Temperature is adjusted
with 'Top' button and
'Bottom' button
respectively.
Operation panel
Wine shelf
Adjustable supports
Can be adjusted when
the refrigerator is not
stable.
Type 3
Light bulb
• Light bulb inside the wine
cellar can be turned on or
off by pressing the button
on the operation panel.
• Light bulb inside the wine
cellar will automatically
turn off after one hour.
Operation panel
Wine shelf
Adjustable supports
Can be adjusted when
the refrigerator is not
stable.
If this happens
When cooling capability weakens
When a large amount of wine is placed into the
refrigerator, more time is needed to reach the
desired temperature and get stabilized. (Sudden
changes in temperature are the main reason for
damage to wine flavor)
When power is off
Avoid opening the refrigerator door frequently
and add no more wine for storage (to prevent the
interior temperature from rising).
After power is restored, the displayed
temperature should be 8°C. Reset is needed.
(see page 39,40)
When light bulb malfunctions
Contact with the shop or after-sales service
center.
When unit stays idle for a long time
Disconnect power supply and clean refrigerator
interior. Open the door for 2-3 days to dry the
refrigerator (To prevent mold and bad odor).
When the refrigerator is restarted, the displayed
temperature should be 14°C. Reset is needed.
38
“TOP”and “MIDDLE”
temperature
control button
Temperature regulation and related indication
The regulated temperature range is 6°C to 18°C
Change the Temperature
Default (factory) setting is 14°C for the upper section, the lower section is 8°C.
Storage Temperature for wine
• Note that the temperature of the upper section cannot be set colder than the lower section.
If you want to adjust the upper section below the current temperature of the lower section, it is
necessary to first lower the temperature in lower section.
When it is delivered, the temperature is set to RED (14°C) for upper shelf, and WHITE (8°C) for lower shelf.
The recommended temperature range for wine is:
Press “Hold ” button for 3 seconds.
In the unlocked state, the temperature
indicators blink.
* Children should be restricted from tampering
with the “Hold ” button to avoid causing
unwanted changes.
Each press of an upper or lower
temperature button will raise or lower the
temperature by 1°C.
After the temperature is set the
temperature display blinks for 10
seconds and then blinking is disabled
and it is automatically locked.
For best results, select a temperature setting
in the range specified for each type of wine.
WHITE 6°C~11°C
RED 12°C~18°C
39
Lock/Unlock Function
To change the temperature, press
the button for 3 seconds.
Power button
Press to turn ON, Press and
hold 3 seconds to turn OFF
“BOTTOM” temperature
control button
Indication of wine
category
Indication of
“BOTTOM” set
temperature
Lighting bulb button
Push for ON, Push again for
OFF (Light wil automatically turn
off after one hour.)
WHITE 6°C~11°C RED 12°C~18°C
• The time for the interior temperature to reach the set temperature varies with the specific usage of the
refrigerator.
• The displayed temperature is the set temperature, which may be different from the actual temperature
of the wine stored in the refrigerator.
• After a power outage, temperature resetting is needed. Resetting can be done in accordance with
instructions in ‘Temperature Setting during Installation’.
Type 1 / Type 2
Indication of “TOP”
and “MIDDLE” set
temperature
Temperature regulation and related indication
The regulated temperature range is 6°C to 18°C
Change the Temperature
Default (factory) setting is 14°C for the section.
Storage Temperature for wine
When it is delivered, the temperature is set to RED (14°C).
The recommended temperature range for wine is:
Press “Hold ” button for 3 seconds.
In the unlocked state, the temperature
indicators blink.
* Children should be restricted from tampering
with the “Hold ” button to avoid causing
unwanted changes.
Each press of temperature button
will raise or lower the
temperature by 1°C.
After the temperature is set the temperature
display blinks for 10 seconds and then
blinking is disabled and it is automatically locked.
For best results, select a temperature setting
in the range specified for each type of wine.
WHITE 6°C~11°C
RED 12°C~18°C
40
WHITE 6°C~11°C RED 12°C~18°C
• The time for the interior temperature to reach the set temperature varies with the specific usage of the
refrigerator.
• The displayed temperature is the set temperature, which may be different from the actual temperature
of the wine stored in the refrigerator.
• After a power outage, temperature resetting is needed. Resetting can be done in accordance with
instructions in ‘Temperature Setting during Installation’.
Lock/Unlock Function
To change the temperature, press
the button for 3 seconds.
Lighting bulb button
Push for ON, Push again for
OFF (Light wil automatically turn
off after one hour.)
Indication of wine
category
Indication of
set temperature
temperature
control button
Type 3
This model is not a power button.
The Correct Way to Store Wine
The appliance is intended to be used exclusively for storage of
wine.
Before Storage
At the Time of Setting...
Thoroughly clean the refrigerator interior.
Put wine into the refrigerator around 4 hours after
power is turned on.
When outdoor temperature is high, as in summer, the
cooling time may exceed 4 hours.
When placing wine into the refrigerator
At the time of cleaning!
For extended storage, wine labels must
be protected with plastic foil.
(To prevent the labels from falling or
molding)
41
First clean the
refrigerator interior
thoroughly
Store wine
4 hours later
The Correct Way to Store Wine
Loading Direction
General Shelf: When placing in the wine, place
the wine bottle in alternate
directions as shown in the
picture.
Bottom Shelf: Bottom shelf can hold 4 bottles,
maximum 9 bottles.
Wine Storage in the Decoration Cabinet
• Bottles with remaining wine inside should be recorked for
storage.
• Bottles may break if the cork is forced into them.
• Sediment may appear with different categories of wines,
their storing states in shops and their storage durations, but
that does not mean the wine has become deteriorated and
harmful.
42
Cleaning
Clean the shelves and the refrigerator interior thoroughly once every year with power plug
disconnected.
1. Before cleaning
Power plug must be pulled out first to secure the
cleaning.
2. Please do not use the following articles for
cleaning
Please do not use articles that can damage the
refrigerator surface and its accessories, which include
abrasive grain, petroleum, benzene, chlorohydric acid,
solvent, hot water, brush, etc.
3. Do not wash with water
To wash the refrigerator directly with water will cause
electricity leakage or other faults.
4. Cleaning refrigerator surface
Clean with soft towels dipped in warm water or detergent.
If neutral detergent is used, it must be cleaned with clean
towels.
5. Cleaning door seals
Dirty door seals will get aged and damaged easily and
that will cause cold air leakages.
43
These are Not Faults
There are abnormal noises inside the refrigerator
• Sound of coolant flowing.
There are cooling pipes in the rear, which often make noises. But that is not a fault.
Bulb is off when the door is either closed or opened
• Press “On/Off” button to turn on the bulb and it ill automatically turn off an hour later.
• Press “On/Off” button again to turn off the bulb before closing the door.
Condensation drops on the door seal
• Condensate drops may appear on the door seal interface when outdoor temperature is high and
humidity is thick.
Wipe them away with dry cloth.
Condensate Drops
Condensate drops on the surface
Same as what happens when icy water is filled into
a glass, i.e. condensate drops will appear on its
outer surface.
Condensate drops will appear when warm and humid
air touches the unit in the rainy season, especially in
summer. Wipe them away with dry cloth.
Condensate drops in interior
Condensate drops will appear in interior if the door
is opened frequently when it is hot and humid.
About 5-10 minutes later, the glass will become clean
and transparent. This is not a fault.
Odor
New product, but with odor
Same as a new car or new furniture which will give
off new odor.
The odor from the new product may come from plastic
accessories or other various accessories used inside.
44
Wipe with
dry cloth
Please confirm the following before calling for service
Situation
The refrigerator
does not operate
Inefficient cooling
Strong noise and
abnormal sound
Condensate drops
appear
in the
interior
The door can not
be closed tightly
Please check
• Is power supply cut?
• Is power plug inserted into socket?
• Is power voltage 230V?
• Is the adopted booster switched on?
• Is the door closed tightly?
• Is it under direct sunlight or near
heat sources such as gas stove?
• Is the distance between the
refrigerator and surrounding items
appropriate?
• Is the temperature in the installation
place appropriate?
• Has anything such as carpet
blocked the heat grill (ventilation)?
• Is the floor flat and firm and is it
installed stably (noise may be a little
strong on wooden floor)?
• Are there any piled things in the
refrigerator back or its top?
• Is the door closed tightly?
• Is the refrigerator tilted forward?
• Are shelves placed correctly?
Measures
• Check if other electric appliances
operate or not.
• Re-insert the plug properly.
• Switch on the booster.
• Raise the refrigerator front slightly
using the adjustable foot.
Move wine bottles away from the
door to allow to close tightly.
• Check the installation location.
• Keep an appropriate distance away
from surrounding items .
• Temperatures above 10°C and
below 35°C is appropriate.
• Remove the blockage, such as
carpet.
• Please install it on flat and firm floor.
• Move away the pile things.
• The drops will automatically
disappear after the door is close
tightly. But the best way is to wipe
them away first.
• Please adjust the adjustable foot
(adjusting the refrigerator front
slightly higher will allow the door to
be closed tightly).
• Please place shelves properly.
45
  • Page 1 1
  • Page 2 2
  • Page 3 3
  • Page 4 4
  • Page 5 5
  • Page 6 6
  • Page 7 7
  • Page 8 8
  • Page 9 9
  • Page 10 10
  • Page 11 11
  • Page 12 12
  • Page 13 13
  • Page 14 14
  • Page 15 15
  • Page 16 16
  • Page 17 17
  • Page 18 18
  • Page 19 19
  • Page 20 20
  • Page 21 21
  • Page 22 22
  • Page 23 23
  • Page 24 24

LG GC051SS User guide

Category
Wine coolers
Type
User guide
This manual is also suitable for

LG GC051SS wine cellar offers a sophisticated storage environment for your wine collection. With its temperature-controlled zones, you can create the ideal conditions for red and white wines. The sleek design and vibration-dampening system ensure your wines age gracefully and undisturbed. Store up to 46 bottles of your favorite vintages in this stylish and functional wine cellar.

Ask a question and I''ll find the answer in the document

Finding information in a document is now easier with AI