Page is loading ...

No: 340975 – 04/26 Rev. 1
adorne
TM
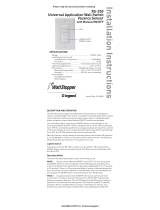
SensaSwitch - Manual ON/Auto OFF, SP/3W
INSTALLATION INSTRUCTIONS
Catalog Number(s): ASVS12
Country of Origin: Made in China
1
1-POLE
STRIP
GAGE
3-WAY
WHITE
HOT
P
GAG
-
W
1-POLE
STRIP GAGE
HOT
INSTALLATION INSTRUCTIONS
Please read these instructions completely before you
begin. adorne
TM
sensors are designed for installation in
standard electrical boxes. However, some of the installa-
tion methods vary slightly from traditional methods. If you
do not understand these instructions or are unsure of your
abilities, seek the assistance of a qualified electrician.
WARNING
To prevent severe shock or electrocution,
always disconnect power at the service
panel before beginning work.
3-Way
In a 3-Way circuit, Traveler wires
are the two insulated wires con-
nected to the switch that are NOT
the HOT wire that you identified
previously.
Single Pole
When replacing existing switches, label
wires before disconnecting.
Disconnect old switch.
Briefly restore power and use a line voltage
meter to identify the wires.
HOT or LINE (usually black) - runs from
service panel to switch
LOAD Runs from switch to fixture
NEUTRAL (usually white) The old switch
may not have used a NEUTRAL wire, but
it is usually available in the box.
GROUND - bare copper or Green wire
with or without yellow stripe
DISCONNECT power at the service panel
once you’ve identified the wires.
2
If necessary, cut wires and strip
insulation using stripping guide on
back of switch.
3
Connect frame ground wire and sen-
sor ground wire to bare ground wire in
box. Fold ground wires into back of box.
Mount frame to wall box with screws
provided. Tighten screws just enough to
hold frame in place.
Do NOT over-tighten.
TIPS
• Pre-fold wires into wall box to make it easier to fit them in the
box when sensor is connected.
• Use caution to avoid marring wall surface with the metal frame.
Use only with Legrand adorne
TM
system.
For more information and helpful how-to videos,
visit www.adornemyhome.com/install.
DO NOT USE
PLATE INSTALLED
WITHOUT A WALL
TOP
Remove spacers from the
frame. Since this sensor fills the frame
completely, you will not need the spacers.
From the back of the frame, pinch the
tabs on the spacer to release.
SPECIFICATIONS
Voltage - 120VAC, 60Hz
Load (Single Pole or Multi-way)
Incandescent or LED lamp: 0-600 Watt
Fluorescent lamp: 0-600 VA
Fan Motor: 1/6 hp
Adjustable Time Delay - 5 sec (test mode), 5 min - 30 min
Environment - Residential Indoor Use Only
Humidity - 95% RH, non-condensing
Installation Shall Be In Accordance With All Applicable
Regulations, Local And NEC Codes.
TOP
Frame
Wall Plate
Frame Ground Wire
SensaSwitch
Switch Ground Wire
Single Pole
Connect sensor as shown.
Insert wires into terminals and tighten
screws securely.
• Connect LINE wire to HOT terminal on sensor
• Connect LOAD wire to 1-POLE terminal
• Connect NEUTRAL from the circuit and from
lamp (LOAD) to WHITE terminal
NOTE: NEUTRAL wire is not required for
sensor to function properly.
4
Ground
Neutral
Hot/Line
Load
Ground
Neutral
Hot/Line
Load
Traveler
1-POLE
3-WAY
WHITE
HOT
AY
AY
W
W
Ground
Neutral
Hot/Line
Load
1-POLE
STRIP GAGE
3-WAY WHITE
HOT
1-POLE
STRI
P
GAGE
E
HO
T
NOTE:When two wires connect to
the same terminal on the switch,
both wires must be the same
gage (12AWG or 14AWG.) If they
are not the same gage, you will
not have a secure connection
Same gage wires
Spacers
NOTE: NEUTRAL wire is not required for
sensor to function properly.
WARNING
To Reduce Risk of Electrical Shock,
unit shall be properly grounded in
accordance with NEC and Local Codes.
Failure to connect the ground wire will
result in an unsafe installation that
could lead to personal injury.

No: 340975 – 04/26 Rev. 1
© Copyright 2012 Legrand All Rights Reserved.
60 Woodlawn Street
West Hartford, CT 06110
1.877.BY.LEGRAND
(295.3472)
www.legrand.us
570 Applewood Crescent
Vaughan, ONT L4K 4B4
905.738.919 5
www.legrand.ca
1-POLE
3-WAY
WHITE
HOT
AY
AY
W
W
1-POLE
STRIP
3-WAY
WHITE
HOT
P
W
W
3
3
The ASVS12 is designed to replace a standard single pole or multi-way light or
fan switch. The sensor uses passive infrared technology to sense human motion
in a space and turn the lights or fan OFF when the room is vacant. It is ideal for
applications in a home where there is a direct line of sight from the sensor to
the room such as bedrooms and family/living rooms.
Like a standard switch, pressing the ON/OFF button will turn the light or fan
(controlled load) ON and OFF. Unlike a standard switch the ASVS12 automati-
cally turns OFF the controlled load after the coverage area has been vacant for
a period of time known as the Time Delay. If motion is detected within 30 sec-
onds after it automatically turns OFF, the ASVS12 automatically turns the load
back ON. This 30 second grace period is the only time the sensor functions with
automatic-on capability.
LED functionality
The smart switch has one locator LED on the ON/OFF button. When the
connected load is off the locator LED will be on. When the connected load is on
the locator LED will be off.
Note: The LEDs will only function when the neutral wire is connected.
When the neutral wire is not connected the device will function properly,
but the locator LED will never be illuminated. See Step 4 above for details
on how to wire the device.
Initial Power Up Supply
There is an initial warm-up and calibration period the first time power is applied
to the units, after a power failure lasting more than 5 minutes and after the load
is replaced.
SENSOR ADJUSTMENT & PROGRAMMING
Adjusting the time delay
The factory setting for the time delay dial is 15 minutes. To increase the amount
of time the load remains ON after the last motion detection, turn the dial clock-
wise (maximum = 30 minutes). To reduce the amount of time, the load remains
ON after the last motion detection, turn the dial counterclockwise (minimum =
5 minutes). The unit will enter test mode if the trimpot is turned fully counter-
clockwise. Stop just before turning the trimpot completely counter-clockwise to
avoid entering test mode. See Test Mode section for further details.
Disabling the locator LED
The locator LED can be disabled by pressing and holding the on/off button
for 10 seconds. After 10 seconds the locator LED will ash to indicate that the
locator LED has been disabled. To enable the LED, press and hold the on/off
button for 12 seconds. The locator LED will ash at 10 seconds, continue to
keep holding down the on/off button until the locator LED ashes twice at 12
seconds indicating that the LED has been enabled.
Test Mode
Activate test mode in order to test the detection coverage. If the neutral wire
is connected, the locator LED will blink indicating that the unit is in test mode.
During test mode the controlled load turns on for 5 seconds each time the sen-
sor detects occupancy. Follow these steps:
• Turn the time delay trimpot fully counter-clockwise
• Move out of the coverage area or stand very still. The controlled load turns off
after 5 seconds if no motion is detected
• Move into the coverage area. The controlled load turns on for 5 seconds each
time the sensor detects motion. After 5 seconds expires without motion detec-
tion, the load turns OFF. The controlled load turns on automatically with the next
motion detection and stays on for 5 seconds
• Repeat as necessary to ensure that the desired coverage areas are within
detection range
• Turn the trimpot back to the desired time delay once the coverage area has
been verified
• The device will remain in test mode for 5 minutes before automatically convert-
ing back to normal operation. If additional time is needed, turn the trimpot away
from the minimum setting and then turn back to its minimum setting, resetting
the 5 minutes.
TROUBLESHOOTING
Status LED is enabled and the load will not turn ON:
• Check the lamp to make sure that it has not burned out
• Check the circuit breaker to be sure it is functioning
No Status LED
• Check the ground and neutral connections (Note: neutral is not required for
product to function properly)
Load will not turn ON:
Press the ON/OFF button. The load should turn ON. If not:
• Check the light bulb and/or motor switch on the fan mechanism
• Turn off power to the circuit then check wire connections
Load will not turn OFF:
• Make sure there is a solid ground connection. The device requires the ground
connection to operate
• Note: The time delay can be set from 5 minutes to 30 minutes. Ensure that the
time delay is set to the desired delay and that there is no movement within the
sensor’s view for that time period.
• To quickly test the unit for proper operation, turn the time delay to minimum
and move out of the sensor’s view. Lights should turn off after 5 seconds.
• Press the ON/OFF button. If load does not turn off, turn off power to the cir-
cuit then check wire connections.
Factory reset
To change the operating mode back to the default settings press and hold the
on/off button for 15 seconds. The locator LED will flash once at 10 seconds,
continue to press and hold the on/off button. The locator LED will flash twice at
12 seconds, continue to press and hold the on/off button. The locator LED will
flash 3 times at 15 seconds signaling that the device has been reset.
4
Technical Assistance:
(877) 295-3472
www.adornemyhome.com/install
LIMITED LIFETIME WARRANTY
Limited lifetime warranty information for adorne products is available at
www.adorne.com/warranty. Limited warranty information for adorne
TM
products may also be obtained free of charge by sending a written
request, along with your proof of purchase (including purchase date), to:
Legrand
Attn: adorne Customer Service/Warranty Department
50 Boyd Avenue
Syracuse, NY 13209
3-Way
The term master designates the sensor that connects
to the load. The term auxiliary refers to the sensor that
does not connect to the load.
Master
• Connect NEUTRAL wire from the circuit and from the
lamp (LOAD) to WHITE terminal
• Connect LINE wire to HOT terminal
• Connect LOAD wire to 1-POLE terminal
• Connect TRAVELER wire to the 3-WAY terminal
NOTE: NEUTRAL wire is not required for
sensor to function properly.
Auxiliary
• Connect NEUTRAL wire from circuit in the other wiring
box to WHITE terminal
• Connect LINE wire to HOT terminal
• Connect TRAVELER wire to the 3-WAY terminal
• 1-POLE terminal on auxiliary is not used
NOTES: A light can be controlled by one master and up
to four auxiliary sensors.
If you are installing multiple sensors in the frame, wire
all devices before snapping them into the frame.
Lens
On/Off Button
OPERATION
1-POLE
3-WAY
WHITE
HOT
AY
AY
W
W
1-POLE
STRIP
3-WAY
WHITE
HOT
P
W
W
3
3
3-Way Master
3-Way Auxiliary
1-POLE
STRIP GAGE
3-WAY WHITE
HOT
1-POLE
STRIP GAGE
3-WAY WHITE
HOT
1-POLE
STRIP GAGE
3-WAY WHITE
HOT
1-POLE
STRIP GAGE
3-WAY WHITE
HOT
Locator LED
CAUTION Do not overturn the time delay adjustment dial.
Ground
Neutral
Hot/Line
Load
Traveler
TOP
NOTE – If you need to
remove sensor after
snapping into frame, first
remove frame from wall
box to access the four
locking tabs on the back
of the sensor. Insert a flat
screwdriver to depress
tabs as you apply pressure
to push switch out.
NOTE – To remove
wall plate, insert a
small, flat screwdriver
in notches on wall plate
and twist gently to pry
from frame.
5
Carefully fold wires
into box.
Snap sensor into
frame.
6
STRIP
GAGE
AY
WA
A
WA
W
WA
3-WAY
-W
3-W
3
-
-
3-W
3
3
3
3
3
3
3
WHITE
Snap wall plate to frame.
There are three click-
stops to adjust the fit of
the wall plate to the sen-
sor and the wall.
Never apply cleaner
directly to the sensor
or wall plate. Apply to a
soft cloth and use cloth
to remove any smudges
from the product.
Coverage Area
The ASVS12 has a maximum coverage
range of 180 degrees and a coverage
area of 600 sq. ft. The sensor must have
a clear and unobstructed view of the
coverage area. Objects blocking the sen-
sor’s lens may prevent detection thereby
causing the light to turn off even though
someone is in the area. Windows, glass
doors, and other transparent barriers will
obstruct the sensor’s view and prevent
detection.
Major Motion 35’ (10.6 m)
Minor Motion 20’ (6 m)
7.5’ (2.2 m)
15’ (4.5 m)
TOP
Sensor Adjustment
Time Delay Trimpot
/