Page is loading ...

BSEXS-V / ELEX

2
3
8
"
60.32mm
30"
762mm
30"
MAX: 30" [762mm]
MIN: 14" [356mm]
762mm
BSEXS-V / ELEX

BSEXS-V / ELEX

C
A
J
B
F
H
G
E
D
H
H
G
J
J
J
I
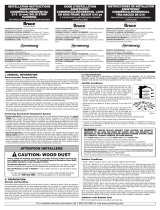
ÉTAPE 3:
• Mettre les morceaux de bois "
B
" et "
C
" en place
et marquer l'emplacement des trous. Installer les
ancrages "
J
" .
• Enduire le dos des morceaux de bois
"
B
" et "
C
" de colle à construction,
installer ceux-ci de manière à ce que les
rainures graver dans le bois emprisonnent
et soutiennent la vitre.
Visser au mur à l'aide des vis "
H
".
STEP 3:
• Put the wooden pieces “
B
” and “C” in place and mark
the holes on the wall. Fix the anchoring “J” at the location on
the wall.
• Cover the back part of wooden pieces “
B
” and “
C
”
with construction adhesive . Install the 2 pieces so that
the grooves carved into the wood trap and support the glass “
A
”
Screw the pieces to the wall with the help of screws “
H
”.
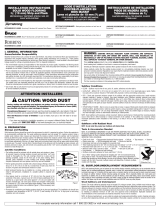
ÉTAPE 2:
• Enduire le dos de la pièce "
A
" de
colle à construction et installer le plus haut possible
sous la hotte. Bien collée et centrée à sa place.
Fixer un clou "
I
" au centre en bas, pour l'empêcher de
glisser vers le bas pendant l'installation des 2 côtés de bois.
STEP 2:
• Cover the back part of piece “
A
” with
construction adhesive and install the piece the highest possible
under the hood. Well glued and centered in its place,
put a nail “
I
” under piece “
A
” in the center to prevent it from
sliding down during the installation of pieces “
B
” and “
C
”.
Avant de commencer l’installation,
assurez-vous d’avoir sous la main :
• Une perceuse
•
Une mèche 1/8"
•
Un tournevis carré #8 ou étoile #2
•
Un tube d’adhésif de construction
ÉTAPE 1:
• Assurez-vous de bien nettoyer l’endroit où vous collerez le dosseret.
• Trouver et marquer le centre de la hotte.
STEP 1:
• Make sure to clean the place where you will install the backsplash
• Find the center of the hood and mark it on the wall
.
Before starting the installation,
make sure you have on hand:
• A drill
•
A drill bit 1/8’’
•
A screwdriver
star #2 or
square #8
•
A tube of construction adhesive
BSEXS-V / GAMMA

C
A
J
B
I
F
H
G
E
D
H
H
I
G
J
J
J
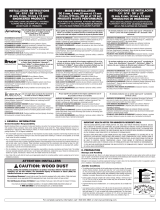
ÉTAPE 5:
• Positionner la moulure "
F
" à sa place en vous assurant
que le dessus de la pièce est égal au dessus du comptoir.
• Marquer les trous oblongs et percer le centre
des marques à l'aide d'une mèche 1/8".
• Enlever la protection de la moulure "
F
" .
• Positionner la moulure et la fixer à l'aide des vis "
G
" en
prenant soins de ne pas les serrer complètement.
• Une fois les 4 vis mises en place, pousser fermement sur le
devant de la moulure et finaliser le serrage des vis.
STEP 5:
• Position the trim “
F
” in place making sure that the top of the trim is
even to the top of the counter.
• Mark the oblong holes and drill the center
of the marks with a drill bit 1/8”.
• Remove the protective film from the trim “
F”.
• Reposition the trim and set it in place with the help of
screws “
G
” taking care not to completely screw them.
• Once the 4 screws in place, push firmly on the front of the trim
and finish tightening the screws.
ÉTAPE 4:
• Enlever le papier de protection sur les
colonnettes "
D
" et "
E
" et enduire le dos de celles-ci
de colle à construction. Les coller sur les morceaux
de bois "
B
" et "
C
". Fixer un clou "
I
" de chaque côté
pour les empêcher de glisser vers le bas pendant
le séchage de la colle.
• Fixer à l'aide de ruban à masquer les colonnettes "
D
" et "
E
"
pour une période de 24 Heures.
STEP 4:
• Remove the protection film from pieces “
D
” and “
E
”
and cover the back of these pieces with construction adhesive.
Glue the 2 pieces on the wooden pieces “
B
” and “
C
”.
Put a nail “
I
” on each side under pieces “
D
” and “
E
” to prevent
them from sliding down during the drying of the glue.
• Secure pieces “
D
” and “
E
” with the help of masking tape
for a period of 24 hours.
BSEXS-V / ELEX
/


