Page is loading ...


DETAITS
Ftlttl
NBcenvn
Stzn-Z4
x 86mm
Fu-rvr-KoDAK
135:
20- or
36-exposure
I,ENS
ScnNrmrn
RrrrNe-XeNoN-Coated
SOmm
f/2
LnNs
OprNrNc
s-f
/2,
f
/2.9,
f
/
4,
t
/5.6,
f
/
8,
f
/tt,f
/rc
SHU''ER
SvNcrrno-Coupun-Cocked
by
film
advance
lever
Spsros-
L,l/2,
L/5,
LiL0,
L/25,I/50,1/100'
l/250,1/500
second,
and
"8"
Fr,esn-Built-in
synchronization
for
Class
F,
M,
and
Speedlanrp
TOCUSING
AND
Y'EW'NG
Coupr.rn
ReNcr
Frrvprn-Superimposed
qage
VrBw
Frrvorn-Optical,
eye-level,
combined
with
range
ffnder
FocusrN6
ReNcs-}y'
feet
to
inffnity
DOUBT
E- EXPOSIIRE
PREVENfTON-Automatic
Frllvl
ADVANOE
LEyER-Advances
fflm and
cocks
shutter
with one
stroke
coNstRUctroN
Eonv-Die-cast-Black
leather
eovered
Tnrr,op
Socxrr-Standard
American
thread
coifErNAtroN
l,[Ns
Aff ASHT
EN'S
No.
29 Kodak
Adapter
Ring or
the
lX-inch
Kodak
Adaptei
Ring,
Series
VI;
Series
VIA Lens
Hood
/!
i..
l(odak
Retina
lla
Ca'tera
RETTNA-XENON
f/2 IENS
.
SYNCHRO.COiIPUR
SHUTTEn
PRINTED
IN
U}IITED STATE9
OF AMERICA
www.orphancameras.com

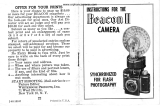
*importont:
The
film
odvonce
lever
od-
vonces
the
film
ond
cocks the
shuiler;
it
should not
be
forced.
lt
locks
when
the
counler
is
sel ol
l, olso
when
the
film
hos
been
odvonced
but not
exposed.
SERrAl. NUA,IBER
-
for
positive
identificotion
-
is
locoted
in
front
of
lhe
occessory
clip;
keep
o record
of this number.
The
prefix
"EK"
is
used to
designote lhose
Retino
Comeros
im-
porled
by lhe
Eostmon
Kodok
Compony. Be
sure io
fully
de-
scribe
your
comero,
including
the
full
seriol number with
pre-
fix
when
corresponding
obout
it.
Be
sure to
sove the
Certificote
of lmport
ond
Ownership included with
your
comero.
l(odak
Retina
lla
Camera
toble
of
contents
Introduction
Opening
and
Closing
the
Camera
A B
C's
and
Simplest
Settings
Shutter
Speed
Lens
Opening
Focusing
Films
Loading
H
olding
the
C amera-
V
iewing
Taking
the
Picture
Unloading
Flash
Time
Exposures
Depth
of Field
Picture
Taking
Aids
Exposure
Tables
ll
2
3
4
7
7
8
to
l2
t5
t6
t7
IE
2l
22
23
28
T.
M. REG.
U. S. PAT.
OFF.
www.orphancameras.com

o
To get
the
most
from
your
camera, take
time
to
get
acquainted with it. Follow the
directions carefully,
practicing
with
your
camera
as
you
go
along. This
is a
precision
instrument, never
force
anything;
if
some-
thing does not
work
smoothly,
review the
in-
structions
about its
operation.
Before
making
any
important
pictures-a
trip,
some
special event,
or
any
pictures
ex-
introduction
pected
to
prove
valuable-
you
should shoot
a roll
or
trvo
of film
and take a
few
flash
pictures.
This
will
give
you practice
and
will
provide
a
check
on
)/our
equipment. If
you
have
any
ques-
tions,
),our
Kodak dealer
rvill always be
glad
to help
you
in any way
he
can.
nole:
Like
any fine lens,
this
lens
should
be
cleaned with
lur". To clean the
front
or back
surface,
first
brush
alvay any
grit
or dust.
Then
wipe
the
surface gently
with
Kodak
Lens
Cleaning
Paper or a
soft,
lintless cloth.
If moisture
is necessary, breathe
on the lens
or use Kodak Lens Cleaner.
2
To
open the comero
. . .
press
the
OPEN|NG
BUTTON
ond
pull
down
lhe
fronl
until
it
locks.
To close the
comero
. . .
this
comero con-
not
be
closed if it is
focused
for
onything
but infinity.
Be
sure
the
focusing
knob is
pushed
clockwise,
os
you
foce lhe
lens,
os
for
os
it will
go;
then
squeeze the two
CIOS-
ING
BUTTONS
WhiIC
closing
the
bed.
www.orphancameras.com

the key to
good pictures
Y our
Comero
A B
C's:
When
you press
the exposure
button to
take
a
picture,
light
goes
through the lens to
make
an
invisible
image of the
subiect
on
the
film.
q
By turning the
knurled shutter speed
rin$,
"a,"
you
control the
lengtlt of
tirne
the
fihn is
exposed
to this light.
b
By moving the
lever,
"b,"
to
one of the
settings
on the
lower
scale,
you
change
the
arrr ount of
light reaching
the
film.
C
By
moving the
focusing knob,
"c,"
Llntil
the
double
image
in the
range
finder
becomes superimposed,
/ou
control the
sharpness
of the
picture.
The
tinted
oppeoronce
of lhe
lens
is
due lo
o speciol
cooting
which
improves
the
brillionce
of
block-ond-white
piclures
ond
the
color
purity
of
full-color
piclures.
4
www.orphancameras.com

stondqrd
settings
for
simple
snqpshots
For
snapshots
of
average subjects
in
bright
sunlight,
use the
following
settings:
With Kodochrome
Film Doylighl
Type:
Set
"a"
(shutter
speed)
on
50
(L/50
second).
Set
"b"
(lens
opening)
between
f
/5.6
and
f
/8.
Set
"c"
(focus)
to bring
the small
circle,
near
the
l0-foot
mark,
to
the
focusing index
for
subjects
in the
7- to
lS-foot
range.
For
sub-
jects
13
feet
and
beyond,
bring
the small
circle,
near
the 2S-foot
mark, to the
focusing
index.
With
Kodqk Plus-X
Film:
Set
"a"
(shutter
speed)
on
50
(1/50
second).
Set
"b"
(lens
opening)
o.t
I I
(f
/LI).
Set
"c"
(focus)
to
bring
the small
circle,
near
the
l0-foot
mark,
to the
focusing index
for
subjects
in the 6-
to
2S-foot
range.
For sub-
jects
I0
feet and
be1'ond,
bring
the small
circle,
near
the
2S-foot
mark,
to the
focusing
index.
6
q
shutter
speed
Turn
the
knurled
shutter
speed ring
to bring
the
nnp
Dor
opposite thc required
shutter
speed.
The follow-
itrg
speecls are
provided:
1, l/2, L/5,
r/70, r/25,
L/50, L/L00,
l/250,
and f/500
second.
"8"
exposures
can
also
be
made;
see
page
2I.
The
shutter is
cocked automatically when
the film
is advanced.
Do
not
change the
shutter
setting
from
I/250
to t/500
or vice versa u;hen the
shut-
ter
is cocked.
A tripod
or other firm
support
should
be
used for
speeds
slower than I/25
second.
N
ote:
Never oil the
shtrtter or camel'a
mechanism.
b
lens
opening
I\{ove
the
LENs
opENrNG LEVER
across
the
scale, illustrated
on
page
8,
to
regulate
the
amount
of
light reaching
the film.
This lever
click
stops
at
each opening. By
pressing
down
on it,
the lever
is easier to move.
7
www.orphancameras.com

The
opening
is
largest rvhen
the
lever
is
sct
at
2
(f
tZ\
and
smallest rvhen
set at
f
6
(ltt01.
Each
succeeding
largcr
opening
lets
throtrgh
tu'ice the
light
of the
one
before;
for
example,
f
/8lets
through
tr,vice
the
light
of
f
/11,
and
f
/lt
lets
through
twice
the light
of
f
/ta.
The
shutter
speecl ancl
lens
opening
r,vork
together
to
give the right
exposure.
Expo-
srrrc tables
are on
pages
28
and
29.
c
focusing
The
range
fincler
of
this
camera
is
coupled
to
the
lens.
\loving
the
FocusrNc
KNoB
until
the
trvo
images
in
the
range
fincler
coincicle
focuses
the
camera.
_
Careftrllv
look
through
the
vierv-and-range
fincler
opening
and
you
rvill
see that
part
8
of
the
picture
is clear
and
part
is
tinted.
When the camera is out of
focus,
the tinted
image is
separate
from
the clear
image,
form-
ing
a
double image of
the
subject.
Move the
focusing knob
until the
two
images coincide
to become
a
single
image. The
range finder
can be used only on still subjects.
To
focus
the camera without using the
range
finder,
estimate the distance by eye;
then move
the
focusing
knob to bring the
proper
distance
to the
FocusrNc
rNDEx.
The
numbers
on the
FocusrNc
scALE represent
the camera-to-subject
distance in
feet.
When
using infrared film,
use the
red dot for
the
index instead
of the
regular
index.
The two
small circles on the
focusing
scale
are for
the ts'o standard
settings
describecl
on
page
6.
www.orphancameras.com

Kodok
Films
Use
l(odclk
| 35
Film
For
beautiful
color-use
Kodacll'ome
trilm-
Dal,light
Type outdoors,
Type
A with
flood
or flarsh,
20 or
,'36
exposures.
With
full-color
Kodachrome
you
can
cap-
ture
the vivid
colors
of an
autumn
landscape,
of
spring florvers,
of
gaudy
carnivals
or
the
gny colors
at a
children's
garden
party,
a
picnic,
a
cherished holiday
.
.
. or the
delicate
colors
of
that
infant
son or daughter.
Yes,
with
color
there
are
new fields
to
conquer.
Kodachrome
trilm
is
sent to
Kodak
for
processing
at
no
extra
cost. It
is returned
to
you
as
2
x 2-inch
mounted
transparencies
(unless
otherwise
specified)
which
can
be
vierved
by
transmitted
light,
projected
as
slides,
ancl from
rvhich
color
prints
can
be
rnacle.
See
your
Kodak
dealer for
full-color
Kodacolor
Prints
and Enlargentents
at mod-
erate
prices.
t0
For high-quoliry
enlorgemenls
. use
Kodok Plus-X
Ponchromotic Film-fine
groin
ond
high resolv-
ing
power permit
high-
quolity
enlorgemenls.
An
excellent
film
f
or
generol
outdoor
ond
well-lighted interior
use.
20
or 36
exposures.
For
poor
lighr
. . . use
Kodok
Super-
XX
Ponchromolic Film-
very
high speed
mokes
f his
on ideol film lo use
with
orlificiol
light. 20
or
36
exposures.
For
fine-groin
copying
use
Kodok Micro-
File Film-on
exlremely
fine-groin,
slow,
pon-
chromotic
film for
copy-
ir,g
printed
molter,
mops,
documents, efc.
36 exposures.
1l
www.orphancameras.com

looding
Load
the
camera
in subdued
light, never
in
bright
light.
Kodak
135
Film
is
contained
in
a lighttight
magazine.
Reu;ind
the
film
into
this
magazine
after
the
exposltres
lrutse
been
made
and
bef ore
the
cantera
back
is
opened.
Various
Kodak
135
Films
are
described on
pages
l0 and
ll.
|
.
Lift
rhe lock
ond
open
lhe
comero
bock.
2. Turn
the
knurled edge
of
the counler
in
the
direc-
tion of
lhe orrow
to bring
the
diomond
neor 36
to the
in-
dex
mork
for
o 36-exposure
mogozine.
Bring
the dio-
mond
neor
20 to the
index
mork lor o
20-exposure
mogozine. The
counter
will
move o
mork
every
lime fhe
fifm is
odvonced.
lt
will
ol-
woys
show the
number
of
ex-
posures
REMA,N,NG on lhe
tiln.
L2
3. Dro*
oul
lhe
f ilm
ReWIND
KNOB
os
lor os
it
will
9o.
Insert lhe
film
mogozine in
lhe recess under
fhe rewind
knob. The
end of
lhe mog-
ozine
contoining
lhe
cross-
piece goes
loword the re-
wind knob. Push
in the
re-
wind knob
ond
lurn if to
engoge
the slol
with
lhe
crosspiece
in
lhe
mogozine.
4. lnserl lhe
end of
fhe film
leoder
in
the
slof of
the toke-
up
reel.
Do
not try lo
remove
lhis
reel
from the comero.
Give the flonge
of
the reel
o
lurn with
the thumb
unlil
the film is wropped
once
oround the
reel.
5.
Conlinue
to lurn
lhe
flonge
of
lhe reel with
the
thumb,
unlil the first
or sec-
ond
perforolion
on
lhe
edge
of
the
film toword the
top of
lhe
comero
is
engoged by
one
of
the
sprocket leelh.
The
leeth
of
the
sprockels
musl
fil in
the
holes in the
www.orphancameras.com

film.
Close
ond lock
lhe
com-
ero bock.
6.
Press ond
releose lhe
film
lever
butlon
(orrow
in
5); lhen
operole the
film lever.
Do this
3 fimes. Be
sure to
moke
o
complete
stroke
with
lhe lever;
then
let it fly
bock
to its
originol
posilion.
Afler
winding
three
times
the firsf
frome
of film is in ploce
ond
36
or
20
on the
film
counler
is
in
position.
Advoncing
fhe
film
olso
cocks the
shutler.
7.
Rotote the
film-type
indi-
color
with
the
boll
of the
lhumb
lo
bring lhe nome
of
the film
opposite the
index.
Note:
When the
figure
I
on
the film
counler
reoches
lhe index, moke
the
lost
exposure.
The film lever
is
locked ond fhe film
should
be rewound into
lhe
mogo-
zine
(see
poge
171.
lt lhe film lever
locks ot ony time,
do not
force if
but
check
the
counter
lo
see
if it is
set
ot l. Move the
counler
off
I to releose the film winding
mechonism.
r4
holding
the cqmerq
I{olcl
tlrc ciunerir
us
shorvn bcklrv. Either
positiorr
is cornfortarble and
practiclrl;
you
carn
holcl the camera remarkablv
steaclv
"vhile
you
sqrreeze
the exposrlre button to takc:
the
picture.
using
the view finder
Steady the carnem
against
your
face.
Focus
the camera
a.s clescribed on
page
8.
Place
the
rear of
the
finder
close enolrgh to the
eye
so
that the entire
frorrt frarrne
ciul l)e
seen.
Conrpose
the
picture,
rnoving
the camerA
an(l
yotrr
hearl
together.
f::l
':
&j-,.
ffii.
15
\
www.orphancameras.com

roking the
picture
I
.
\Iake the lens
and
shutter
settings.
2.
Cock
the shtrtter
and
adr,'ance the
film
"
with
a single
full
stroke
of
the filnr
advance lever.
3.
Fclcus
and compose
finder.
the
picture
in
the
4.
\lake the exposure.
Hold
the camera
steady;
it's a
good
idea to
hold
)'our
breath
rvhile
vou s-q
-u-e-e-z-e
the exposure
button.
o\\'hen
the
exposure
button
is
depressecl,
the
film
levcr
is released. It is necessarv to
prcss
rrncl
release thc filnr lever button
only
rvhen
)'ou
rvislt
to advance
film without hrrving pressccl
the ex-
posure
button
(as
in loading).
After
the
20th or 36th exposurc
hirs been
nrade,
and the counter
is
at
l,
the
filrn irdvance
lever
"vill
lock; rewind the film and
unload
the carneril
(page
l7).
Do
not open
the back of
the camera
until the
fiIm
has been
rewound into
the
film
magazine,
or the
film
rvill
be
fogged.
r6
unlooding
When
the
last
exposure
has
been made, the
counter will be at I
and the
film lever will
lock. Pull out
the
rewind knob halfway,
press
the
nnrvrND BUTToN
as
firr
as it
will
go,
and
turn the rervind knob
in the direction of
the arrorv. Clontinue
turning
the
rervind knob
until the rervincl lttrtton
stops turning. The
fihn
(except
for
an
inch or trvo of leader
strip)
is norv back
in the magarzine.
Norv open
the
back;
pull
out the rervind
knob as far as
it
rvill
go;
r'emove
the magazine.
It's
a
good idea to
get
your
exposed
film
processed
promptly.
The
Kodacraft
Minia-
ture Roll-Film
Tank makes
it
easy to devel-
op
your
own black-and-white
film.
T7
www.orphancameras.com

IS
flosh
pictures
.
.
ru'c
cas\/
uncl krts ol'fun to nrake u'ith
this
c'iuncrir. l'-laslrirrg of the lamp is contlollecl
lrv
thc
srrrc'lrlo
l'cattrrc
of the shutter. Class
Ii or
\l
{lash
litmps cun
l>e
usccl its
rvell
as
spcctllrul)ps.
'l-lic
Kotlrrk ll-(l ol
tlrc Kocluk
Stitrrclrtrcl Iilirslrolclcl iirrcl
lrcslr
lritttcrics iu'c
rrll
tlrc r'.rtlrr
r'<ltripn-tc'rrt
\
ou rrcctl f or flash
slr<rts. I
I
pltotollu,slt
Jlirttclics arc
not
uvail-
irblc,
Ilashlight
birttcrir:s
ciur be
usecl.
l'he
l;atteries
shoulcl test
at least
5 anrperes.
The flasholcler
is attachecl
by
screrving
the
thumbscrew
orr
the
stanclard
bracket
into the
tripocl
socket of
your
cAmel'il.
Be
sure to
slip
tlic
Koclirk
Single-Post
Flasholcler
AD..\prEn,
srrppliccl
u,ith
)'our
cantel'ir,
on
the
F-LAsH
posr
lreforc,
irttenlpting
to
connect
the flash-
olclc.r
corcl
to the flash
post.
Using
Closs F lomps*,
such
os
5/14
or
SF
.
set
the
synchronizer
sELECTon
on
"X,"
set tl-re
shutter
speecl at
any
speecl
up
to
and
including
L/I00,
cock
the
shtrtter
rvith
the
film
aclvi-rnce
lever,
ancl
snap
the
picttrre.
Using
Closs
M Lomps*,
such
os
No.
5 or
No.
25
.
set
the
synchronizer
sELECToR
on
"l\4,"
select
nrry
,h.itter
speecl
trp
to ancl
inclucling
l/250,
cock
the
shutter,
and
snap
the
picture.
Using
Speedlomps
.
connect
a
Kodatron
Speedlamp
(o.
sirnilar
equipnrent
rvith
no
l"g
in
the
trip
circuit)
to
the flash
post,
using
the
adapter.
lg
4Ir."
the
bottom
of the lomp
bose
is
cleon
ond
bright
before
inserting
f he
lomp
in
the flosholder.
tf
rhe
conrocl
point
is tornished,
rub
it
on
o
rough
surfoce.
t
www.orphancameras.com

Set the synchronizer
selector on
"X,"
select
a
shutter speed, cock the
shutter, and
snap
the
picture.
The
light
will flash when
the
shutter
blades
are
open at all
shutter
speeds.
nole:
Do nol
use
units floshed
by
meons
of
heovy-
duly
reloys
or solenoids.
Such units
moy
complelely
deslroy the
shuller
conlocts.
S upplem
e
nt ory Flosh-Ouldoors
. . . blue fash
bulbs are
used with
Daylight
Typ"
color
films
to reduce
excessive
contrast
with
back-
or
side-lighted
subjects in bright
sun. With
selector on
M use
No.
58
or No.
25B
fash
lamps.
A lamp-to-subject
distance
of
8l',
feet
gives
good contrast.
Use the basic
exposure
for
subjects in bright
sunlight.
Flash
exposure data are
given on
page
28,
and
on the reflector
of the
Kodak
Flasholders.
coution:
Since lomps moy
sholler
when
floshed, the
use
of o Kodok
2-woy
Floshguord
or
other shield over
the
refleclor
is recommended.
Do nol flosh
the lomps
in on
explosive
olmosphere.
Do not
inserl flosh
lomps in
the
reflector if
the
shutler
is
open-the lomp will
flosh
ond o
serious
burn moy
resull.
20
time
exposures
. . .
enable
you
to take
pictures
at night
out-
doors
or indoors
of still
subjects,
using
the
existing
light.
Night
pictures
can add
variety
to
your picture
collection.
The
"B"
setting enables
you
to
keep
the
shutter
open for
as long as required.
Place
the
camera
on a
tripod
or other firm
support.
Both
camera and subiect
must be
still
during
the
exposure.
To make a
"8"
exposure,
the focus
and
lens
opening
having
been set,
set the
shutter
on
"8,"
cock
the
shutter by
operating
the
film
ad-
vance lever,
press
the
exposure
button,
hold
it
down
for
the
exposure
time
required,
and
re-
lease
the button
to
close
the
shutter.
The
Kodak
TBI
Metal
Cable
Re-
Iease
No. 2,
available
from
your
Kodak
dealer,
can
be
used
to hold
the
shutter
open
for
as Iong
as
required.
2L
www.orphancameras.com

/atfatz
,tr,
I
lU
luv
rrr
frf_-
Kodok
combinqtion
lens
qtfochmenls
Series
VI
with the Series
VIA Lens
Hood
are
used
rvith this camera.
The VIA
Lens
Hood
must be used
to
allorv clearance
of the
camera
bed.
All
iterns
fit
the
Kodak
Adrrpter
Ring No.
29,
or the
1li-inch Kodak
Aclapter
Ring.
23
depth
of
field
Objects some
distance
in
front
of ancl beyond
tlre subject
focusecl on
rvill
be
sharp.
This
clepth
of
fielcl
varies
rvith
the lens opening
trsecl; the
smaller
the lens opening, the
great-
er
the
range of sharpness.
Your
camera is ecluipped
rvith a depth-of-
fteld
scale
so
that
you
can read this range of
sharpness
easily
before
you
take
each
pic-
ture.
The
focusing
scale combined
r,vith
the
lens opening numbers engraved
on the shut-
ter
barrel each side
of the
focusing index
comprise the
clepth-of-field scale.
The
follor,ving
example
shows
you
how
to
reacl this
scale:
Strl-rject is
12
feet
away, ex-
posure
calls
for a lens opening
of
f
/8.
Set
the
focusing
scale
with l2 opposite the
focusing
index.
Look
for
the
number
8
on
each side
of the index.
The one on the
right
is opposite
25 and the
one on
the
left is near
8.
Therefore,
all
obiects
betrveen about
8
and 25
feet
r,r'ill
be
sharp.
22
www.orphancameras.com

To assemble
a filter
or
Portra
Lens
in the
rin$,
unscrew
and
remove
the
insert;
then
place
the
filter
or
lens
in
the ring;
replace
the
insert.
The
Kodak
Lens
Hood
can
be
used
in
place
of
the
insert.
If a
Portra
Lens
and
a filter
or
a
Pola-screen
are
to
be
used
together,
a
Kodak
Retaining
Ring
is
also
necessary.
The
Kodak
Wratten
Filters
K2,
A,
Xl, and
G are
used for
darkening
the
sky and
are
used
with
panchromatic
films;
do not
use
these
fiIters
with
color
fil*.
Filters
lor
Kodachrome
Film
Kodachrome
pictures
made
in
,open
shade
under
a
clear
blue
sky,
or
on
overcast
or
\^7V
days
will
be improved
if
a Kodak
Sky-
Iight
Filter
is
used.
If
the Kodak
Daylight
Filter
for
Kodak
Typu
A
Color
Films
is
used,
Typ"
A
film
can
be
used
in daylight.
Kodok
Stondor
d Flasholder
-converts
your
Retina
to
a fash
camera.
It's
light,
rugged,
and
dependable.
A
guide
on
24
the reflector tells
you
instantly
how to
set
your
camera
for fash.
Kodok Ek]
ol vx
Floshofder
-is
adapted to all types of
flash
picture-tak-
ing. The built-in battery-condenser
system
assures
dependable lamp-firing
and longer
battery
life. The Ektalux
uses either
midget
or medium-base
lamps and
offers accessories
that
greatly expand the
versatility
of
flash
work rvith
your
camera.
Kodosfide
Proiecfors
are
made in
two
outstanding models:
the lorv-priced
but
very
efficient Koda-
slide Merit Projector,
and the
power-coolecl
Kodaslide
Pro
jector
Master
N{odel. Botlr
models have
precise
optical
systems,
ancl
Lumenized
projection
lenses, to
provide
bril-
liant
pictures.
25
www.orphancameras.com

Kodak Fl urolite Enlorger
.
for
those who ap-
preciate
fine
equipment
and who take
pride
in
turning out
first-quality
enlargements. Features
{luorescent, integrated
illumination.
Kodoslide foble
Viewer
4X
ond
Model
A
Series 2
. These
compact, Iightweight,
efficient
viewels
provide
everything
necessary
for
projecting
your
slides in a
normally lighted
room.
They are
easy to carry
and
easy to
use.
Just
plrg
them
into
the
electric line
and feed
the
slides
through
them.
Kodok
Aulo-Releose
. A delayed-action
device
that
trips
the
shutter about
l0
seconds
after
it
is
set. It
is
used with
the Kodak
Metal
Cable
Release
No.
5.
26
EASTMAN
KODAK
COMPANY
Rochesler
4,
New
York
27
www.orphancameras.com

EXPOSURE
TABTES
flosh
guide
numbers
With Kodak B-C
or Stondord Flosholder
and
Lumoclod
Reflector
Exposure guide
numbers
con be used lo
determine
ex-
posure.
Divide
lhe
numbers
in the
toble
below by the
distonce
in
feet from lomp to
subiect
to find
the f-
number. For exomple,
using
Kodqchrome
Film
Type A
with
o No.5 or 25 lomp, ond the
shutler set ot l/100
with
the
subiect 5
feet
qwoy,
the
correcl lens
opening
would
be
60+5:12
(set
the lens
opening lever to
f/I1).
*With
Kodok
Flosh Filter No.
8l C.
With
sotin-finished reflector,
use
%-stop
lorger.
28
SM or SF
,il?,l,r'
ill
|
'r'o
Kodochrome
Doylight
Type
with
blue No. 58 or 258 lomp
l
flosh
distonre
toble
With
flosh
os
the
moin
light
source.
the
lens
opening
depends
on fhe
lomp-to-subiect
distonce.
In
this
toble,
the
correcl
lens
opening
is
shown
for
vorious
distonces.
Use this
toble
with
the
Kodok
Stondord
or B-C
Flosh-
olders
with
the
Lumoclod
Reflector.
Kodochrome
Film
Type
A
Shutter
dl
l/SO
second
fl16
4V2
tl
*With
Kodok
Flosh
Filrer
No.
8lC
5M or
SF
lomp
il2
lft2.8 l il4
ils.6
|
rts
I
it
I
rort
I
,rt
I
-t-l
f/r6
28rt
|
20ft
I
14rt
I
ron
I
7{l
srt-l
3,/,r,
supplementory
flash
with
color
films
In
bright
sunlight
lighting
conlrosl
is
oflen
excessive.
More
pleosing
results
con
be
obtoined
by lighting
the
shodows
with
blue
floshlomps.
As
the
omount
of flil_in
light
is..o
motter
of
personol
preference,
ronges
ore
given.
Use fhese
settings
for
front,
side,
or bock
lighting.
Kodochrome
Film
Doylight
Type
blue
No.
58
or 258
tomp
5 to
lO feet
I
O
a t2
feef
I
e
ro 16
feet
l/.25
between
I
t
1sO
berween
I
f
7f
OO
berween
f/8
ond
f/11
|
ts.o
ond
rf8
|
ilii^-iqs.d
www.orphancameras.com
/