Page is loading ...

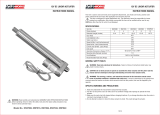
L I N E A R A C T UATO R
OWNER’S MANUAL
WARNING:
Read carefully and understand all ASSEMBLY AND OPERATION
INSTRUCTIONS before operating. Failure to follow the safety rules and other
basic safety precautions may result in serious personal injury.
Item#s 125010, 125011 & 125012

Page 1 of 5
Thank you very much for choosing a Wel-Bilt™ product. For future reference, please complete the
owner’s record below:
Model: _______________ Purchase Date: _______________
Save the receipt, warranty and these instructions. It is important that you read the entire manual to
become familiar with this product before you begin using it.
This item is designed for certain applications only. The distributor cannot be responsible for issues
arising from modification. We strongly recommend this item not be modified and/or used for any
application other than that for which it was designed. If you have any questions relative to a particular
application, DO NOT use this product until you have first contacted the distributor to determine if it
can or should be performed on the product.
For technical questions please call 1-800-222-5381.
TECHNICAL SPECIFICATIONS
Item#
125010
125011
125012
Stroke Length
3 15/16in. (100mm)
7 7/8in. (200mm)
11 13/16in. (300mm)
Rated Load Thrust
675 LBF (3000N)
Maximum Load
1350 LBF (6000N)
No-load Speed
8mm/s
Load Speed
5.5mm/s
Rated Voltage
12V DC
Mounting Hole Dia.
0.4in. (10.2mm)
Gear Ratio
1:18.5
Duty Cycle
10%
Ambient Temperature
23°F – 104°F
Protection Class
IP44
GENERAL SAFETY RULES
WARNING: Read and understand all instructions. Failure to follow all instructions listed
below may result in serious injury.
CAUTION: Do not allow persons to operate or assemble this linear actuator until
they have read this manual and have developed a thorough understanding of how the linear
actuator works.
WARNING: The warnings, cautions, and instructions discussed in this instruction
manual cannot cover all possible conditions or situations that could occur. It must be
understood by the operator that common sense and caution are factors which cannot be built into
this product, but must be supplied by the operator.

Page 2 of 5
SPECIFIC WARNINGS AND PRECAUTIONS
1 Read and understand the manual before using this linear actuator.
2 Test battery before operation to make sure the battery has adequate power to lift the linear
actuator.
3 Stop working and switch off the power before changing the direction. If you change the direction
when the motor is running, the motor may be damaged.
4 If the linear actuator is connected to the power source incorrectly, it may run exceeding its stroke,
and may run in wrong direction.
5 Do not open actuator manually. This can cause damage to the actuator.
External structure and installation diagrams:
NOTE: All the sizes mentioned in Fig. 1, 2 & 3 are in inches.
Fig. 1
Fig. 2

Page 3 of 5
WIRING DIAGRAM DC 12V two lead wires
INSTALLATION
WARNING: The load added onto the actuator must be less than or equal to the rated
load of actuator. The distributor cannot be held responsible for any injuries and/or damages caused
as a result of not complying with the clauses of this section.
1. Please ensure that the extension tube is in the "lowest position." The term "lowest position" in this
manual refers to the position in which there is no further movement towards the DC motor while the
actuator is powered on. (Please refer to fig. 4 below).
2. The front and end joints of the linear actuator should be mounted onto two fixed positions on the
main chassis. Locations of these fixed positions should be chosen according to the stroke length of
the linear actuator. Users must use caution to ensure that the two-way movement of linear actuator is
smooth and within the stroke length after it installed onto the fixed positions. Please ensure that no
obstacle exists along the travel path of the actuator.
3. After the fixed positions have been selected, install the fixtures onto these selected positions of the
main chassis. These fixtures are used to fix the front and end joints of linear actuator to the chassis.
4. Assemble the front and end joints of the linear actuator onto the two fixtures using fixture bolts.
Please ensure that the fixture bolts are able to rotate freely after this step is completed, while
Fig. 3
Fig. 4

Page 4 of 5
ensuring that the fixture bolts will not drop off either during operating or resting period.
5. The chassis of linear actuator should be fixed in the horizontal direction if it is going to be operated
in this direction and likewise for vertical operation.
6. Connect green wire to positive post (Red) and black wire to negative post (Black).
7. The operation of the linear actuator should be tested manually after the installation is completed.
Users should use caution to ensure that:
• The travel distance of the actuator is matching the requirement of the structural design.
• The up and low limit switches operate normally.
• The motor should stop when the extension tube reaches up and low limit switch positions. If the
linear actuator fails to meet any of these conditions, please repeat steps 2 to 4.
8. The entire installation is complete only if steps 1 to 6 are executed successfully.
MAINTENANCE
1 Store the linear actuator in a dry place and out of direct sunlight.
2 Clean the linear actuator with dry cloth.
DIAGRAM & PARTS LIST
NO.
Part#
Description
Qty.
1
8LINIX.253.003
MOUNTING HANDLE M10.2
1
2
GB/T818
PAN HD SCREW, BLACK M5X20
8
3
GB/T70.1
SCREW, SOCKET HD CAP, M6X
1

Page 5 of 5
4
GB/T276
BALL BEARING, 6004
1
5
8LINIX.245.008
WORM WHEEL
1
6
GB/T276
BALL BEARING, 6304
1
7
8LINIX.015.013BCP
ROD END
1
8
8LINIX.170.010
HOUSING DRIVE SLEEVE
1
9
8LINIX.170.001
PUSH ROD
1
10
8LINIX.227.005
SCREW DRIVE SHAFT
1
11
8LINIX.900.004
SHOCK PROOF SPECIAL MFG B
1
12
8LINIX.373.001
RUBBER BOOT, ROD END
1
13
Z
O-RING, ROD END
1
14
8LINIX.374.003
SEAL COMPONENTS
1
15
5LINIX.557.021
TRAVEL SWITCH COMPONENTS
1
16
8LINIX.946.011
DRIVE NUT SLEEVE
1
17
GB/T818
PAN HD SCREW, M5X16
3
18
GB/T41
HEX NUT, M5 BLACK
2
19
8LINIX.268.021
BANKING JACKET
2
20
8LINIX.950.014-01
GASKET, M10.1
1
21
Z
FLAST ARMOR TAPE
2
22
Z
PLASTIC BUSHING, M5
1
23
1LINIX.580.585
MOTOR
1
24
8LINIX.950.014-02
GASKET, M6.1
1
25
GB/T859
ELASTIC GASKET, M6
1
Note: The following parts are different for item#125010, 125011, 125012.
125010
125011
125012
8
HOUSING DRIVE SLEEVE
8LINIX.170.010-2#
8LINIX.170.010-6#
8LINIX.170.010-4#
9
PUSH ROD
8LINIX.170.011-3#
8LINIX.170.011-9#
8LINIX.170.011-6#
10
SCREW DRIVE SHAFT
8LINIX.227.005-2#
8LINIX.227.005-8#
8LINIX.227.005-3#
TRAVEL SWITCH COMPONENTS
5Linix.557.021
5Linix.557.022
5Linix.557.023
For replacement parts and technical questions, please call 1-800-222-5381.
WARRANTY
One year limited warranty
Distributed by
Northern Tool + Equipment Co., Inc.
Burnsville, Minnesota 55306-6936
NorthernTool.com
Made in China
/