Page is loading ...

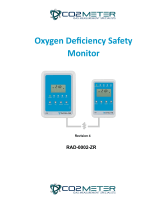
Oxygen Deficiency Safety Monitor
Model: RAD-0002-ZR
Thank you for selecting the RAD-0002-ZR Oxygen Deficiency Safety Monitor.
This monitor is designed to protect customers and workers, anywhere bulk
Nitrogen or other inert gases are used or stored.
Today, O2 alarms are required in many local state
jurisdictions to meet fire codes. The RAD-0002-ZR
is designed specifically to meet code requirements
for O2 monitoring safety. The Remote Storage
Safety 3 Alarm constantly measures and monitors
enclosed areas for lower than normal levels of
oxygen gas.
If a gas leak occurs, visible and audible alarms will
sound on the sensor unit and on the remote display
– to warn you and your employees.
The RAD-0002-ZR Oxygen Deficiency Safety Monitor is cost-effective and has many
features:
•Separate SEU (Main Sensor Unit) and RDU (Remote Display Unit) allow you to see
warning before entering an enclosed area. Up to 3 RDUs can be used.
•Large digital LCD display clearly indicates the ambient O2 concentration.
•Relay outputs to control external devices.
•Audible and Visual Alarm Indications at three separate alarm levels.
•Ability to add strobes or strobe towers for additional indication.
2.
NOTE: All the necessary mounting hardware
(screws, mounting brackets, power supply strip) are included.
All you will need is standard screwdriver, for basic installation.
*There are 3 additional universal power plugs included, so as the system
can be installed worldwide.
Product Description

1. Choose a suitable location near a wall outlet to install the SEU.
2. To install the SEU (Sensor Unit) start by making a mark about 12
inches off the floor or at eye level depending on the application.
Please ask CO2 Meter specialist for clarification.
3. Screw the mounting bracket into the wall where you placed your
mark. If you are using the wall adapter, mount the sensor unit close
to a wall outlet. (Make sure it is mounted in an area that it will not
accidentally get hit by boxes or heavy machinery).
4. Attach one end of the ethernet cable to the SEU (Sensor Unit), then
slide the Sensor Unit onto the mounted bracket on the wall. 5. Plug
in the wall adapter – the SEU (Sensor Unit) should automatically
turn on and perform a self-check.
6. Securely attach the safety strap over the power supply, to ensure it
does not become accidentally unplugged.
7. The Green light should appear and show that the SEU (Sensor Unit)
has power.
8. Over the next few minutes, all lights will flash, and resort back to green.
This means the O2 level matches the ambient O2 level in the room and
provides you with a precise, accurate percent O2 reading.
Next, the Small Remote Display Install
1. Make a mark for the RDU (Remote Display Unit) outside the room where the
SEU is and CO2 is stored. Screw the mounting bracket where the mark is.
(Should be mounted at eye level.)
a. Plug in the other end of the ethernet cable into the back of the RDU
(Remote
Display Unit)
b. Mount the RDU onto the bracket on the wall, the input on the Remote
Display Unit should be connected to the output on the SEU (Sensor Unit).
c. Place the warning signs that came with the device on the wall directly next
to the RDU. (The signs should be visible).
Installation Steps

Perform a Test
1. To test if the monitor is operating correctly, you can do a simple test. Normal
Indoor O2 Levels is about 21%.
2. To test the device, simply apply pure Nitrogen on the hole located on the top
right corner of the SEU.
3. *Verify that the alarms are sounding, and the lights are flashing, on both the
SEU and RDU.
4. Now you know the monitor is working, the alarm will stop once the O2 returns
to a normal level.
(You can also press the reset alarm button on the SEU to silence the alarm.)
Installation Example:

1. For new build installations, the sensor unit can be powered by
Power+24VDC
2. 4~20mA outputs are included for offsite CO2 monitoring
3. In the case of a power outage, the 6VDC Battery Backup can be installed
to retain the alarm settings.
4. If you have more than one door, in the CO2 Storage Area – you can also
purchase additional display units (up to three RDU’s can be displayed to a
main SEU unit - up to a maximum of 300 ft.
• Power + 24 VDC MAX– The RAD-0002-ZR is powered from 12 to 24 Volts
DC. You may use the supplied 12 Volt DC Power Adapter or other 12 to 24
Volt DC Power Source.
• Power - Ground
• Battery + Back-up battery
• Battery - Back-up battery Ground
• CL01:4-20mA 4-20 mA for O2: 0 to 25%
• GND 4-20mA GND
• CL02:4-20mA 4-20 mA for Temp: 32 to 122° F (0-50°C)
• Relay 1 – is activated by Alarm 1
• Alarm 1 Set Point can be configured for 15.5, 16, 16.5, 17, 17.5, 18, 18.5,
• 19, 19.5, 20. The default AL1 is 19.5%.
• Relay 2 – is activated by Alarm 2.
• Alarm 2 Set Point can be configured for 12.5, 13, 13.5, 14, 14.5, 15, 15.5,
16,16.5.; the default AL2 is 16.5%.
Installation Connector Options

• Relay 3 – is activated power loss of the SEU only.
• Alarm 3 – 12%
• The Peak current for all relays is 2A@30 VDC or 250 VAC.
• All relays are Single Pole Double Throw with a Common (COM), Normally
Open (NO) and Normally Closed (NC) contacts.
• All relays are Single Pole Double Throw.
• Relays are rated, 2A @ 30 VDC or 250 VAC.
RAD-0102-6 Connectors Continued
Alarm 1 controls Relay1. It has a fixed setting (5000 ppm/Time Weighted)
and cannot be re-configured.
Use Alarm 2/Relay2 to activate instant alarms and set custom alarm
configurations.
Relay 3 is used for Power loss indication only. Alarm 3 does not trigger
Relay 3.
•
Relay1_NC
Relay 1 Normally Closed Contact
(Output)
•
Relay1_COM
Relay 1 Common
(Input)

•
Relay1_NO
Relay 1 Normally Open Contact
Alarm 2 controls Relay2.
(Output)
•
Relay2_NC
Relay 2 Normally Closed Contact
(Output)
•
Relay2_COM
Relay 2 Common
(Input)
•
Relay2_NO
Relay 2 Normally Open Contact
Alarm 3 controls Relay3.
(Output)
•
Relay3_NC
Relay 3 Normally Closed Contact
(Output)
•
Relay3_COM
Relay 3 Common
(Input)
•
Relay3_NO
Relay 3 Normally Open Contact
(Output)
To insure you receive the maximum benefit from using this product, observe
these guidelines:
• Repair - Do not attempt to repair the product or modify the circuitry
by yourself. Please contact CO2Meter directly if the product needs
servicing, including the replacement or calibration of the sensor.
Contact Support@CO2Meter.com for further information.
• Cleaning - Disconnect the power before cleaning. Use a damp
cloth. Do not use liquid cleaning agents such as benzene, thinner or
aerosols, as these will damage the device.
• Maintenance – We recommend testing the communication between
the SEU and RDU under ‘DIAG” function. If these five LEDs blink
and the buzzer of SEU and RDU sound simultaneously, it indicates
that SEU and RDU work normally.
d.
Warning: Your safety is very important to us. To ensure to use the product
correctly and safety, please read these warnings and the entire User
Product Care
Safety Notes

Manual before using the product. Otherwise, the protection provided by
the equipment may be impaired. These warnings provide important safety
information and should always be observed.
1. Please handle the device carefully; do not subject the product to impact
or shock. Otherwise, this may cause the accuracy drift.
2. Do not place the unit near a heat source. Heat can cause distortion of
the unit, which may result in an explosion or fire.
3. Do not touch the exposed electronic circuitry of the device under any
circumstances, as there is the dangerous of electric shocks.
4. Please take care of cable connection between SEU and RDU. Make
sure the cable from SEU is connected into the INPUT port of RDU.
5. Please ensure the external power supply is normally supplied to
ventilation fan while the relay is working. If there is no normally power
supply to the fan, the relay will not work, which may result in potential
danger with lower O2 concentration in confined space.
Support & Warranty
Contact us: We’re here to help!
The monitor comes with a one (1) year warranty starting from the date the
monitor was shipped to the buyer.
For more information visit our website:
www.co2meter.com/pages/terms-conditions
Support@CO2Meter.com
(386) 256-4910 or (386) 256-4910 (Technical Support)
www.CO2Meter.com
CO2Meter, Inc.
105 Runway Drive
Ormond Beach, FL. 32174
/


