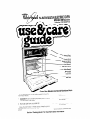
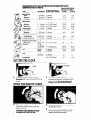
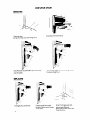
Whirlpool RB1000XK is a built-in electric oven with a variety of features to make cooking easier and more efficient. The oven has two elements, a bake element and a broil element, which can be used independently of each other or together. The oven also features an adjustable oven temperature control, a minute timer, and an automatic MEALTIMER clock. The automatic MEALTIMER clock allows you to set the oven to turn on and off at specific times, so you can cook food even when you're not home.
Whirlpool RB1000XK is a built-in electric oven with a variety of features to make cooking easier and more efficient. The oven has two elements, a bake element and a broil element, which can be used independently of each other or together. The oven also features an adjustable oven temperature control, a minute timer, and an automatic MEALTIMER clock. The automatic MEALTIMER clock allows you to set the oven to turn on and off at specific times, so you can cook food even when you're not home.


-
 1
1
-
 2
2
-
 3
3
-
 4
4
-
 5
5
-
 6
6
-
 7
7
-
 8
8
-
 9
9
-
 10
10
-
 11
11
-
 12
12


Whirlpool RB1000XK is a built-in electric oven with a variety of features to make cooking easier and more efficient. The oven has two elements, a bake element and a broil element, which can be used independently of each other or together. The oven also features an adjustable oven temperature control, a minute timer, and an automatic MEALTIMER clock. The automatic MEALTIMER clock allows you to set the oven to turn on and off at specific times, so you can cook food even when you're not home.
Ask a question and I''ll find the answer in the document
Finding information in a document is now easier with AI
Related papers
-
Whirlpool RB2OOOXK User manual
-
-
-
-
-
-
-
-
-