Page is loading ...

YOUR
*
“
READAND SAWTHISBOOK
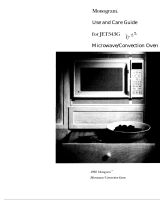
Model JVM57
,.-4. >>
,.. .
.
4(
.
.,+:
‘.*
,.
- .---- ,
>.-
-.
.
.

Before Using Your Microwave Oven
Read This Use and Care Book
it contains detailed information on the operation and
recommended maintenance of your new Microwave
Oven. Once YOUhave read the book, keep it handy to
answer any questions you may have.
If you have any additional questions concerning the
operation of your Microwave Oven, write—including
your phone number—to:
Consumer Affairs
General Electric Company
Appliance Park
Louisville, Kentucky 40225
IF YOU RECEIVED A DAMAGED OVEN, immediately
contact the retail dealer (or builder) from whom you
purchased it. They have been informed of the proper
procedure to take care of such matters and can
handle it for you.
Before You Call for Service:
Check “Common Problems” section. (See Table of
Contents for page number.) It lists many minor causes
of operating problems that you can correct yourself
and may save you an unnecessary service call.
Need Service?
In many cities, there’s a General Electric Factory Ser-
vice Center. Call, and a radio-dispatched truck will
come to your home by appointment—morning or
afternoon. Charge the work, if you like. All the centers
accept both Master Charge and Visa cards. (See Fac-
tory Service Centers in Table of Contents.)
Or look for General Electric franchised Customer
Care@ servicers. You’ll find them in the Yellow Pages
under “GENERAL ELECTRIC CUSTOMER CARE@
SERVICE”.
Register Your Oven
It is important that we the manufacturer know the
location of the Microwave Oven you are now using
should a need occur for adjustments.
Please check with your supplier to be sure he has
registered you as the owner; also send in your Pur-
chase Record Card. If you move, or if you are not the
original purchaser please write to US, stating model
and serial numbers. This appliance must be regis-
tered. Please be certain that it is.
Write to:
General Electric Company
Product Service Section
Range Marketing Operation
AP2-21O
Appliance Park
Louisville, Kentucky 40225
2
Record Model and Serial Numbers
Your General Electric Microwave Oven has a name-
plate on which is stamped the model number and
serial number. (See page 9 for location.)
Model and serial numbers are also on the Purchase
Record Card which came with your Microwave Oven.
Before sending in this card, please record the numbers
in the space provided, or get them from the nameplate
described above, and record here.
Please refer to both model and serial numbers in any
future correspondence or product service calls con-
cerning your Microwave Oven.
Model Number
Serial Number
Date Purchased
KEEP PURCHASE RECEIPT WITH THIS BOOK FOR
FUTURE REFERENCE.
Steps to Follow for Further Help
First, ‘contact the people who serviced your m[cro-
wave oven. Explain why you are dissatisfied. In most
cases, this will solve the problem.
Next, if you are stilr dissatisfied, write all the details—
including your phone number—to:
Manager, Consumer Relations
General Electric Company
WCE-312
Appliance Park
Louisville, Kentucky 40225
Finally, if your problem is still not resolved, write:
Major Appliance Consumer Action Panel
20 North Wacker Drive
Chicago, Illinois 60606
This panel, known as MACAP, is a group of inde-
pendent consumer experts under the sponsorship of
several industry associations. Its purpose is to study
practices and advise the industry of ways to improve
customer service. Because MACAP is free of industry
control and influence, it is able to make impartial
recommendations, considering each case individually.
—
—
c~enemlEkdric
Q_...LLA.alLriahtsts r.es@cu=l

Table of Contents
*
,’
\
Before Microwaving .............................................................
2
Grounding Instructions&Precautions ......................................3
Safety Tips ............
Introduction to Oven
Touch Control Panel
How to Defrost .......
How to Time Cook . .
How to Temp Cook..
. . . . . . . . .. . . . .. . . . . . . . . . . . . . . . . . . . . . . . . . . . . . . . .. . . . . . .. . . . . .
4
. . . .. .. . . . . . . . . . . .
. . . .. . . . . . . . . . . . . . . .. . . . . . . . . . . . . . . . . . . . . .
5
. .. . . . . . . . . .. .. . .. . .
. . . .. .. . . . . . .. . . . . .. .. . . .. . . . . . . . . . . . . . .
b
. . . . . . . . .. . . . .. . . . . .
. .. . . . . . .. . . . . . . . .. . . . . . . . . . . .. . . . . . . . . .
8
. . . . . . . . .. . . . .. . . . . . . . . . . . . . . . . . . . . .. .. .. . . . . .. . . . . . .. . . . . . .
9
. . . . . . . . .. . . . . . . . . . . .. . . . . . . . . . . . . . .. . . .. . . . . .. . . . . . .. . . . . .
10
The Temperature Probe ................................................... ....ll
Howto Sim'n Cook ............................................................l2
Howto Temp Hoid ..............................
...............................
13
Howto Use Memory ......................
................................
14, 15
Howto Use Hold/Timer ..............
.................................. .......
16
The Exhaust Feature .................
.................. ........................
17
Care of Your Oven
.........................................................
18, 19
Problems & Solutions .....................
.....................................
20
Factory Service Centers ........................................ ...............2l
Warranty .................................
.................. ...........
Back Cover
9
/
Grounding Instructions
For personal safety, this appliance must be properly
grounded. The power cord of this appliance is equipped with
Q
a three-prong (grounding) plug which mates with a standard
Q
three-prong (grounding) wall receptacle. (See picture, left. )
To minimize the posslbildy of severe or fatal electric shock
hazard from this appliance, the customer should have the wall
Q
receptacle and circuit checked by a qualified electrician to
make sure the receptacle is properly grounded.
Where a standard two-prong wall receptacle is encountered,
it is the personal responsibility and obligation of the customer
to have a qualified electrician replace it with a properly
grounded three-prong wall receptacle.
Do not, under any circumstances, cut or remove the third
(ground) prong from the power cord.
3

Safetv Tim to Follow
1. For personal safety the oven must be properly
grounded. See grounding instructions on Page 3 of
this book.
2. Cooking utensils may become hot because of
heat transferred from the heated food. This is espe-
cially true if plastic wrap has been covering the top
and handles of the utensil. Pot holders may be
needed.
3. Sometimes, the oven shelf can become too hot to
touch. Be careful when touching the shelf during and
after cooking.
4. “Boilable” cooking pouches and tightly closed
plastic bags should be slit, pricked or vented as di-
rected in Cookbook. If they are not, plastic could
burst during or immediately after cooking, possibly
resulting in injury. Also, plastic storage containers
should be at least partially uncovered because they
form a tight seal. When cooking with containers,
tightly covered with plastic wrap, remove covering
carefully
and direct steam away from hands and
face.
5. Don’t defrost frozen beverages in narrow necked
bottles especially carbonated ones. Even if the con-
tainer is opened, pressure can build up. This can
cause the container to burst, resulting in injury.
6. Don’t overcook. Excessive overcooking dehy-
drates potatoes, and may cause them to catch fire
causing damage.
7. If food shouid ever ignite, keep the oven door
closed. Turn off the power immediately. Touch
CLEAR/OFF or disconnect power cord or shut off
power at the fuse or circuit breaker panel.
8. Remove the temperature probe from the oven
when not using it to cook with. If you leave the probe
inside the oven without inserting it in food or liquid
and turn on microwave energy, it can create elec-
trical arcing in the oven, and damage oven walls or
shelf.
9. Remove wire twist-ties on paper and plastic
bags before placing in oven. Twist-ties sometimes
cause bag to heat, and may cause fire.
10. Boiiing eggs (in or out of the sheil) is not recom-
mended for microwave cooking. Pressure can build
up inside egg yolk and cause it to burst, resulting in
injury.
11. Do not pop popcorn in your microwave oven
unless in a special microwave popcorn accessory or
unless you use popcorn in a package labeled for
microwave ovens. Because of the heat generated,
without these precautions, the container could catch
fire.
12. Use metai oniy as directed in cookbook. Metal
strips as used on meat roasts are helpful in cooking
food when used as directed. Metal trays may be used
for TV dinners. However, when using metal in the
microwave oven, keep metai at least l-inch away
from sides of microwave oven.
13. Do not use any thermometer in food you are
microwaving unless that thermometer is designed or
recommended for use in the microwave oven.
14. Do not store flammabie materiais in an oven.
Also, do not use flammable fluids in the vicinity of
your oven.
15. Do not use your microwave oven to dry news-
papers. If overheated, they can catch fire.
16. Piastic Utensiis–Plastic utensils designed for
microwave cooking are very useful, but should be
used carefully. Even microwave plastic may not be as
tolerant of overcooking conditions as are glass or
ceramic materials and may soften or char if sub-
jected to short periods of overcooking. In longer ex-
posures to overcooking, the food and utensils may
even ignite. For these reasons: 1) Use microwave
plastics only and use them in strict compliance with
the utensil manufacturer’s recommendations. 2) Do
not subject empty utensils to microwaving. 3) Do not
permit children to use plastic utensils without com-
plete supervision.
17, Don’t operate the oven whiie empty in order t
@
prolong the life of the oven and save energy. If, by
accident, the oven should run empty a minute or two,
no harm is done.
THE HOOD:
1.
Have it instailed and properly grounded by a qual-
ified instaiier. See the special installation booklet
packed with the microwave oven.
2. The vent fan in your Spacemaker oven wiii oper-
ate automatically under certain conditions (see
Automatic Fan Feature, page 7). Whiie the fan is op-
erating caution is required to prevent the starting
and spreading of accidental cooking fires whiie the
vent fan is in use. For this reason:
A. Never ieave surface units unattended at high
heat settings. Boilover causes smoking and greasy
spillovers that may ignite and spread if vent fan is
operating. To minimize automatic fan operation,
use adequate sized utensils and use high heat set-
tings only when necessary.
B. in the event of a grease fire, smother flaming
pan on surface unit by covering pan completely
with well-fitting lid, cookie sheet or flat tray.
C. Never frame foods under the oven with the vent
fan operating because it may spread the flames.
D. Keep hood and grease fiiters clean, accordin
a
to instructions on pages 17 and 19, to maintain
good venting and avoid grease fires.
4
———

Introduction to Your Oven
1-41
.e@
@@
“,1I fl 14
/
.4-
W
---
——2-:. -.<
\*
d
.-
@
9 (. Door Handle. Oven doesn’t operate unless door is
TEMP COOK, DEFROST, SIM ‘N’ COOKTV TEMP
securely latched.
HOLD or HOLD/TIMER.
2. Door Latch. Push in to open door. 13. Hold/Timer. Two functions. Use as a kitchen
3. Window with Metal Shield. Screen allows cooking
timer or to program a no-heat period before cooking
to be viewed while leaving microwaves confined in,
or between defrost and cook. (See pages 6 and
oven.
16.)
4. Oven Light. Goes on when door is opened or
14. Function Pads. See pages 6 and 7 for detailed
description of the functions and their uses.
when oven is operating and during the hold timer
,
function. 15. Number Pads. Touch to enter Time or Temper-
I
5. Plastic Stirrer Cover. Protects the mode stirrer
ature and Power Level.
which distributes microwave energy into the oven.
6. Oven Vent.
7. Oven Sheif.
8. Micro-ThermometerTM Temperature Probe. Use
with Temperature Cook, Temp Hold and Simmer ‘N
CookTM features only.
9. Receptacle for Temperature Probe.
10. Time or Temperature Dispiay. During cooking,
shows cooking times in minutes and seconds or tem-
perature in degrees.
11. Power Levei Dispiay. Shows Power Level being
used in diaits from 1 to 10.
@
“
(
2. Cooking Function lets you know which of six
‘functions you are setting or using: TIME COOK,
16. Ciear/Off. Stops the oven and erases all set-
tings. Press to erase PF (Power Failure) from display
when first plugged in.
17. Power Levei Guide. Words above numbers in-
dicate corresponding power levels in your Micro-
wave Guide and Cookbook.
18. Start. Press after setting controls. Prevents acci-
dental starting. Always press Start last.
19.
20.
21.
Grease Fiiters.
Cooktop Light.
Hood Controis:
Fan Switch. Press once for high speed. Press
twice for low speed. Press again for off.
Lamp Switch. Push and hold lamp switch until
fluorescent lamp lights.
5
—

Features of Your Micr(
The Touch Control Panel allows you to set the oven
controls electronically with a press of the finger. It’s
designed to be easy to understand and use. Follow
these steps:
1. SELECT A MICROWAVING METHOD by touching
one of these basic cooking function pads. (The func-
tions and their uses are explained in this book.)
-
Use the following special function pads for extra flex-
ibility. (This book tells you when to use each pad.)
I
2. SET TIME OR TEMPERATURE by touching the
corresponding number pads, which give the oven
numerical instructions.
TIME-TEMPERATURE DISPLAY —
When the oven is not in use, display is dark. During
Time functions, display shows minutes and seconds.
During Temperature cooking, display shows -90° or
the internal temperature of food in degrees F. be-
tween 90° and 200:
POWER LEVEL DISPLAY
Shows what Power Level is being used. The guide
above the Power Level Pad tells you which Power
Level numbers correspond to High, Medium-High,
Medium, Low and Warm which are Power Levels
referred to in the cookbook.
3. CHANGE POWER LEVEL if you want a Power
Level other than automatic 10 (cooking) or 3 (defrost-
ing). Touch Power Level pad, then number pad
needed.
4. PRESS START BAR LAST.
THE NO-HEAT TIME FUNCTION
#
This function provides digit time display without mi-
crowave energy.
Touch HOLD/TIMER and enter numbers to program
a no-heat period before cooking or between Defrost
and Cook. When oven is not in use, can be used as a
kitchen timer. Touch HOLD/TIMER, enter time and
press Start. (See pagel 6.)
THE MEMORY FUNCTION
The memory function allows you to store simple in-
structions or complete 2, 3 or 4-step programs for fu-
ture use. Use the oven for other microwaving while it
remembers.
Touch MEMORY ENTRY/RECALL to store instruc-
tions or when you are ready to use stored instruc-
tions or want to check information in memory. (See
pages 14 and 15.)
6
——
I

ave Touch Control Panel
1
m
- THE TIME FUNCTIONS
The oven lets you mic~owave by time in 2 different
ways. Program Time Cook and Defrost with Hold for
even greater flexibility.
Touch DEFROST and enter time for uniform defrost-
ing with little or no attention. Automatic Power Level
of 3 can be changed after time entry. Display counts
DOWN in seconds. (See page 8.)
Touch TIME COOK, then enter numbers and micro-
wave to an exact time. The automatic Power Level of
10 can be changed, but only after time is entered.
Display counts DOWN in seconds. (See page 9.)
. .
.
THE TEMPERATURE FUNCTIONS
Use the automatic temperature probe to cook by
temperature in 2 ways. Temperature Cook can be
programmed with Hold for delayed start or with
Defrost.
Touch TEMP COOK then enter numbers to micro-
wave to desired internal temperature. The automatic
Power Level of 10 can be changed after temperature
is entered. Display shows internal temperature of
food in 1 degree F. increments. Oven shuts off when
preset temperature is reached. (See page 10.)
Touch SIM ‘N COOK ‘Mfor slow, temperature-con-
2
trolled simmering. Temperature and Power Level are
set automatically. Cook for as long as you like. There
is no automatic shut-off. (See page 12 and cookbook
for special slow-cook recipes.)
Touch TEMP HOLD when you want to hold just-
cooked foods at serving temperature, or to warm up
leftovers. The holding temperature between 90° and
200”F must be selected as well as a, lower Power
Level if using instead of the automatic (10) High.
There is no automatic shut-off. (See page13.)
,THE NUMBER PADS
/
/
Touch NUMBER PADS to enter Time, Temperature,
or Power Level.
CLEAR/OFF stops the oven and erases all settings.
Press START after setting controls when you are
ready to use the oven.
THE POWER LEVEL FUNCTION
The oven microwaves at 10 different power levels for
complete flexibility. If no power level is set, oven
automatically selects Power Level High (10) for time
and temperature cooking (except when using Sim ‘N
Cook cycle).
Touch POWER LEVEL and enter desired number’ to
select a new power level after completing the cook-
ing function entry. Power Level can be changed at
any time during microwaving, except when using Sim
‘N Cook ‘Mcycle. (See pagel 2.)
AUTOMATIC FAN FEATURE
Cooking appliances instaiied under the oven might,
under some heavy usage conditions, cause temper-
atures high enough to overheat some internai parts
of the microwave oven.
To prevent overheating from taking piace, the vent
fan is designed to automatically turn on at low speed
if excessive temperatures occur. Shouid this happen,
the fan cannot be manuaily turned off, but it wiii auto-
matically turn off when the internai parts have
cooied. The fan may stay on up to approximateiy 30
minutes after the range and microwave oven controis
have been turned off.
.—
—— — —

How to Defrost .”
Defrosting is one of the most important advantages
of a microwave oven. Your new oven makes defrost-
ing even easier and better. It’s microwave-fast, but
gentle enough to defrost uniformly with a minimum of
attention. The Microwave Guide & Cookbook helps
too, with step-by-step instructions for defrosting all
types of food.
The Defrost setting gives you an automatic power
level of 3, which is best for most defrosting. You may
change it if you wish, which makes Defrost a versatile
function. Power Level can be changed, but only after
time is entered.
You may open the door at any time during micro-
waving. To resume defrosting, close the door and
TIPS FOR DEFROSTING
Foods frozen in paper or plastic can be defrosted
right in the package. The Microwave Guide & Cook-
book gives you special instructions for packaging
and freezing foods which will be used in automatic 3-
step cooking programs.
For even defrosting, many foods need to be turned
over, rotated or broken up part way through the de-
frosting time. Let the oven remember for you. If you
set the oven for the first time period, it will signal
when food needs attention. Always start with min-
imum defrosting time.
“HURRY-UP” DEFROSTING
With “Hurry-Up” defrosting, food will need less time
but more frequent attention. If you want to defrost
small items in a hurry, you can raise the Power Level
after entering time by touching POWER LEVEL pad
and 7 or 10.
To defrost at Power Level 7 (Medium-High), cut total
defrosting time to %. Rotate, turn over or stir food af-
ter Yzof the new total time.
To defrost at Power Level 10 (High), cut total defrost- -.
ing time to %. Rotate, turn over or stir food fre
a
press START.
quently.
HOW TO DEFROST 2 POUNDS OF PORK CHOPS
1. Touch DEFROST. The function
legend lights up.
2. Enter Time. Touch 8 and O ,
0 . Display shows 8:00. Power
Level is automatically at 3.
3. Press START. When oven shuts
off, turn package over.
4. Touch DEFROST.
5. Enter Time. Touch 8 and O ,
0 . Display shows 8:00.
8
6. Press START. When oven shuts
off, separate pieces. Let stand to
complete defrosting.
—
—-
-—
—

How to Time Cook
Time Cooking, or cooking your food according to a pre-
determined amount of time, is probably familiar to you from
conventional cooking. With your microwave oven, however,
you preset the time and the oven turns off automatically.
Using Your Oven to Time Cook
Follow the cooking steps below to
help you learn to Time Cook
properly.
Step 1: Fill a cup % full of water
and 1 teaspoon of freeze dried cof-
fee. Use a cup that has no metal
decoration. Place cup in oven and
se door.
Step 2: Touch TIME COOK. Signal
light above TIME COOK comes on.
The read-out panel shows :0 and
Power 10.
Step 3: Select your time. Touch 1,
2, and O for a minute and 20 sec-
onds. Readout shows 1:20. If an-
other Power Level is desired touch
Power Level and the number al-
though Power Level 10 (HIGH) is
preferred for this cup of coffee.
\
Step 4: Touch START, Inside light
comes on and fan starts. Cooking
time counting down shows on dis-
play.
Step 5: When time is up, oven sig-
nals. Oven, light, and fan shut off.
Microwaving Tips
● Make sure all utensils used in
your microwave oven are labeled
“suitable for microwaving”. Check
your Cookbook for specific test to
determine “microwave-safe” uten-
sils.
. Paper towels, wax paper, and
plastic wrap can be used to cover
dishes in order to retain moisture
and prevent spattering.
. Most microwaved foods require
stirring, rotating, or rearranging.
Check your Cookbook for specific
instructions for the food you are
microwaving.
. Some foods such as unshelled
eggs and hot dogs must be
pricked to allow steam to escape
during cooking.
Questions
and Answers
Q. I set my oven for the time called
for in the recipe but at the end of
the time allowed, my dish wasn’t
done. What happened?
A. Since house power varies due
to time or location, many Time
Cook recipes give you a time range
e
prevent overcooking. Set the
n for minimum time, test the
food for doneness, and cook your
dish a little longer, if necessary.
Q. I want to cook my dish on a
Power Level other than HIGH, what
do 1need to do?
A. To change the Power Level,
touch the Power Level pad, then
touch number pad for power level
desired.
Q. Can I interrupt my Time Cook
function to check the food?
A. Yes. To resume cooking, simply
close the door and touch START.
NOTE: Microwave power will not
come on until you are ready. You
must touch START for cooking to
begin.
Q. I touched the number pads and
selected my power level. When I
touched START, however, my oven
didn’t come on. Why not?
A. The TIME COOK pad must be
touched before setting the number
pads or else your oven will not be-
gin cooking.
9

.
How to Temp Cook
For many foods, temperature cooking (Temp Cook) is
the most accurate method. Use it for cooking meat-
loaf, roasts and other foods where internal temper-
ature is the best test of doneness. Use it to heat or
reheat foods to precise serving temperature. It takes
the guesswork out of cooking, because the oven
shuts off automatically when food reaches the preset
temperature.
Temperature Cook gives you an automatic Power
Level of 10. After entering the temperature, you may
change power level.
The oven helps you with temperature cooking. If
after you press START, the oven gives a 3-second
signal, it means you selected a temperature lower
than that of the food.
If you set a temperature lower than 90° or higher
than 200°, the oven gives a 3-second signal and
shows you the incorrect figure so you can recognize
your mistake and reset.
If you forget the probe or have not attached it to the
oven correctly, or if probe needs service, the oven
gives a 3-second signal and then shuts off. All you
have to do is attach the probe and press START.
HOW TO USE A TEMPERATURE COOK
RECIPE
Temperature Cook recipes tell you where to place
the probe and attach the cable. Temperature and
power level are printed in bold type so you can read
them at a glance. Be sure to touch TEMP COOK be-
fore touching the number pads. If you need to
change the power level, do so after you have entered
the temperature.
Basic Meatloaf
BASIC MEATLOAF
HOW TO TEMPERATURE COOK BASIC MEATLOAF
POWER LEVEL: High
TEMP: 170°
APPROX. MICROW~VE TIME: 15 to 20 min.
I% Ibs. ground chuck ....... Mix together beef, on-
beef
ion, crumbs, egg, ket-
3A cup chopped onion
chup, milk and sea-
% cup fine dry bread
sonings. Mold into a
crumbs
rounded, flat loaf in 9-in.
1 egg
pie plate.
2 tablespoons
ketchup
●
1 cup milk
1 teaspoon salt
‘A teaspoon pepper
% teaspoon paprika
2 tablespoons ketchup., Spread ketchup evenly
over top of loaf.
Insert temperature probe so tip is in center of loaf.
Cover tightly with plastic wrap, arranging loosely
around probe to vent. Attach cable end into recep-
tacle. Microwave at High. Set Temp, Set 170°.
When oven signals, remove meatloaf and let stand
about 10 minutes to firm before serving. Serve in
wedges.
Makes 6 servings.
.
1. Insert Probe and insert
2. Enter Temperature.
3. Press START. Display
cable end into receptacle.
Touch 1 , 7 and O .
shows -90 until temper-
Touch TEMP COOK.
Display shows 170. Power
ature reaches 90°. Then
Level shows 10. No
it displays temperature of
change needed. food in degrees until 170°
is reached.
10
——
—.

THE MICRO-THERMOMETERTM PROBE LETS YOU COOK TO ACCURATE TEMPERATURE.
The Micro-Thermometer probe is essential when us-
the probe cable doesn’t interfere with door seal. Do
ing both the Temperature Cook and Sim ‘N Cook TM
not leave the probe in the oven if it is not inserted in
controls. When temperature cooking, insert the
food; this could cause damage to the oven.
probe at least one inch into the food which you are
cooking. When using the probe with the Sim ‘N Cook
FOODS NOT RECOMMENDED FOR USE WITH THE
settinq, insert the probe into the liquid portion of the
TEMPERATURE PROBE.
food. -
Delicate butter icings, ice cream, frozen whipped
Place food with probe in oven and insert the cable
toppings, etc., soften rapidly at warm temperatures.
Lowest setting on temperature probe is 90°. Time
end into receptacle on oven wall. If you forget the
probe or do not attach it correctly, the oven will
cook these heat sensitive foods.
sound a 3-second signal when you press START.
Most frozen foods. The probe should not be inserted
The oven will not start.
into hard foods. Defrost roasts, casseroles or con-
When needed, loop the cable and use the clip to hold
venience foods, then cook or heat them with the
probe to precise serving temperature. .
it in place. This prevents the probe from slipping out
of position. If the probe does slip out of position dur-
Batters and doughs should be observed during bak-
ing cooking, reposition the probe, press START and
ing and tested for doneness. They may also require
continue cooking. When closing the door, make sure
turning of the dish. Time cook these foods.
HOW TO POSITION THE PROBE IN TYPICAL FOODS FOR TEMPERATURE COOKING
Raw Vegetable Casserole. Position
the probe so that the tip rests on
the bottom of the dish at the cen-
ter. Set temperature for 200”.
Plates of Food. insert probe as
horizontally as possible, so tip is in
center of largest item, but not
touching a bone. Heat to 160°.
@
(
overs. Position the probe so
- tip is in center of the dish, not
touching the bottom. Heat to 150°
to 160°.
Meatloaf. Insert probe as horizon-
tally as possible, so that tip is in
center of the loaf. Set temperature
for 170”.
1
Soups and Beverages. Use the clip
to hold the probe tip in the center
of the food off the bottom of cup.
Heat cream soups to 140°, water-
based soups to 150° to 160°.
Dips. Insert probe so tip is in cen-
ter of dip. Use clip to hold it in
place, Heat sour cream dips to 90°
and cheese dips to 120°.
11
— 11—.

—
How to Use Sim ‘N CookTMControl
Setting the oven to use the “Sire ‘N Cook” control is
easy. You don’t enter time because it is a temper-
ature function. You don’t enter temperature or power
level because the oven does that automatically.
There is no automatic shut-off.
The “Sire ‘N Cook” control lets you slow-cook foods
which need long, gentle cooking to tenderize or de-
velop flavor. Food is brought to a simmer rapidly,
then the temperature probe maintains simmering at
about 180° for as long as you want. Choose this set-
ting for pot roasts, stews, or any favorite slow-cook
recipe.
If, after you press start, a 3-second signal sounds
and the oven shuts off, it means you have forgotten
the probe or have not attached it to the oven
correctly.
Casserole Suggestions for
Automatic Simmering
Your Cook Book recipes specify size of casseroles
needed for simmering certain foods. A summary of
dish sizes for a variety of foods which automatically
simmers with excellent results’is listed below.
Be sure to use the amount of water called for in the
recipe, and to cover the food. Covering retains the
steam which helps soften and tenderize the food dur-
ing microwaving.
Covering the food tightly to retain steam is so impor-
tant that we recommend that you use plastic wrap,
stretching over the top of the casserole. Gather it
loosely around the probe, allowing some space for
venting (see pictures in your cookbook). Do not use
the lids to your casseroles.
Alternately, check department stores housewares
sections for plastic or stoneware accessories de-
signed for automatic temperature cooking. These
pots have lids designed with slots cut out so the tem-
perature probe can be inserted from the outside of
the casserole through the lid directly into the food.
FOOD
Chuck Roast (5 lb.)
Beef Stew (2 lb. beef
cubes)
Chicken, Stewing or
Simmering
Chili, and other Saucy
Hamburger Mixtures
Dried Beans or Peas
soup
Pork Chops
1. Insert Probe as
directed in cookbook.
Always loop cable and
fasten with the clip so it
stays put during long
cooking.
MICROWAVE
OVENPROOF
UTENSIL
Oblong 13 x 9 x 2-in. dish
or12 x10x2-in. dish
3 to 4-qt. casserole or
4-qt. heat-tempered glass
mixing bowl
4 to 5-qt. casserole or
4-qt. heat-tempered glass
mixing bowl
5-qt. casserole
3 to 4-qt. casserole or
4-qt. heat-tempered glass
mixing bowl
5-qt. casserole
Oblong 13 x 9 x 2-in. dish
HOW TO USE SIMMER ‘N COOK ‘M CONTROL TO COOK A STEW
2. Attach Cable End into
Receptacle. Make sure
cable doesn’t get caught
in the door.
3. Touch “SIM ‘N
COOK”. The function
legend lights up.
4. Press START. Cooking
continues until you open
the door or clear the pro-
gram by touching
CLEAR-/OFF. -
12
—
—

How to UseTemp HoId
Temp Hold is an especially handy feature of your mi-
crowave oven. It lets you hold foods at serving tem-
perature, keeping them “just-cooked” hot and fresh.
With the Temp Hold feature:
1. You can select a holding temperature between
~
90° and 200”F.
2. You can select any Power Level you want.
1
Because foods tend to stay moist and tender during
v
microwaving, Temp Hold is the perfect way to keep
vegetables, casseroles, and even scrambled eggs
piping hot and ready to serve. Roasts, ham and
poultry, too, may be kept juicy and table ready with
this feature.
You can even warm up leftovers!
If you wish, you can set your oven to automatically
defrost, hold, time or temperature cook, and then
Temp. Hold. You must be sure, when you combine
Time Cook and Temp Hold, that the temperature
probe is placed in the food before starting the
microwave oven.
For temperature cooking and holding, you can
choose one finished temperature and power level for
4$
e cooking and if you want another
wer level for the Temp Hold cycle.
not turn off automatically so you
holding time. (Allow foods to hold
safe. Times vary depending on
amount.)
temperature and
Temp Hold does
can control the
only as long as
food type and
Things to remember when setting
your oven to microwave
Temp Hold.
● TO prevent spoilage, do not hold foods except
solid roasts at temperatures below 150° for more
than 2 hours.
HOW TO TEMPERATURE HOLD
+’1
1. Insert probe in food
and attach probe to oven.
(If vou have iust Tem~
*
“eked you; food, steps
.ne and two are already
done)
2. Touch TEMP HOLD.
Read out displays: O .
Select the holding tem-
perature. Oven will
automatically microwave
the food until it reaches
pre-set temperature, then
maintains temperature.
. Solid (not rolled) roasts may be held below 150°.
However, during the microwave roasting process,
a great amount of heat is stored in the roast. Keep-
ing the roast in the warm oven cavity during
TEMP/HOLD can cause a greater increase in in-
ternal temperature than when allowing the roast to
stand outside the oven on a kitchen counter. Tem-
peratures of up to 20° to 30° above the TEMP/
HOLD setting are possible. Because of this heat
storage, it is not possible to hold roasts at a rare
degree of doneness.
It is suggested that you first remove the roast from
the oven and let it stand, uncovered, for about 10 to
15 minutes before returning to TEMP/HOLD. Or, if
you know before cooking that you intend to hold a
solid roast at serving temperature, you may com-
pensate for the stored heat by undercooking the
roast. See your Cookbook for details.
How to speed up
Automatic Simmer recipes
The Automatic Simmer recipes in the Mcrowave
Guide and Cookbook were especially developed for
long slow cooking. However, you can speed up the
cooking process by using the Temp Hold feature and
following the instructions as given in the cookbook.
You can cut the time in half for most simmer-cooking
recipes with no risk of toughening because with the
temperature probe you do not exceed the recom-
mended temperature,
3. Select POWER LEVEL.
Oven will automatically
use High unless you
select another level. See
cookbook for suggested
power levels.
$/
4. Press START. The
oven will not shut off until
you touch the CLEAR/
OFF Pad.
13

How to Use Memory Function
Q
The Memory Entry/Recall pad allows you to store When the pre-set cooking function is needed, touch-
complete 2, 3, or 4-step programs or any l-step
ing Memory Entry/Recall pad once again will set the
cooking function which requires the entry of time or oven automatically for the cooking function(s) you
temperature. Just set the oven and press the Memory
previously stored in memory. Touch Start and the
Entry/Recall pad instead of Start. As Memory Entry/
oven begins microwaving this pre-set program.
Recall pad is pressed, readout becomes blank, in-
dicating that oven can now be used for other
programs.
DO THIS TOUCH THIS
YOU’LL SEE THIS HAPPENING
ON THE CONTROL PANEL
Set the control panel for the way
you want the food cooked. But Before you touch Memory Entry/
don’t press START. Use a single Recall, signal lights on the readout
setting or a program as described
above the function that you set
on page 16. Defrost, cook by time
come on. Lights go off as soon as
or temperature. . . any settings but Memory Entry/Recall pad is
the automatic simmer function
touched.
work with memory.
Leave these simple instructions with the baby sitter:
DO THIS TOUCH THIS
SHE’LL SEE THIS HAPPENIN
ON THE CONTROL PANEL
a
Put the food in oven and close the
door. Insert probe if TEMP COOK
or TEMP HOLD has been selected.
Signal lights show what kind of
microwaving you selected. (No
light shows when using HOLD/
TIMER.)
The oven will cook dinner the way
All signal lights go off, except the
the children like it. Just as if
one that confirms your first in-
Mother were there.
struction. The oven carries out the
cooking program.
Change your mind? It’s easy to clear the Memory,
Use your oven while it’s remembering. Using the
Just enter a new program, and the old instructions Memory only stores instructions. You’re free to use
are automatically erased. The oven is ready to re-
the oven for any type microwaving. Only when you
member new instructions.
touch Memory Entry/Recall and START does the
Remember: If you have any cooking program set in
oven start carrying out the stored instructions.
the oven, pressing Memory Entry/Recall pad will
store that program in oven’s memory, and will erase
a
the previous memory.
.
14
—.

Forget what you
programmed the oven
@ do? Just ask.
Your new microwave oven
Suppose you programmed the oven
will remind you of what’s
in the mornina
to defrost, hold, then cook. You stored the inforrna~
m
●
tion for later. During the day, while you were using
the oven for other things, you forgot what program
● D
you entered.
m
●
●O
@Es
● 0
m
tocome.
TO ASK BEFORE YOU START
TO ASK WHILE YOU’RE
MICROWAVING:
MICROWAVING:
1. Touch MEMORY ENTRY/RECALL. Signal lights
1. The read-out panel and cooking signal lights tell
of specific functions light up to show you which type
you how the oven is microwaving at the moment.
of cooking you selected.
2. Touch the other cooking function pads you want
2. Touch the cooking function pads you want to
to know about.
know about.
3. The answers appear in the read-out panei.
3. The answers appear in the read-out panei.
WHEN YOU WANT TO ASK THIS
TOUCH THIS
YOU’LL SEE THiS ANSWER ON
THE CONTROL PANEL
*
tered a program this morning.
What cooking did it call for?
The signal lights on the display
above TIME COOK and DEFROST
come on.
How long will defrosting be?
The read-out panel shows the
amount of total time for defrosting.
(The Defrost signal light stays on
until touching TiME COOK in the
instruction below.)
How long will cooking be?
The read-out panel shows the
amount of total time for cooking.
(The Defrost signal light goes off.)
The Time Cook signal light comes
on.
Did I ask for any hold-time in
between?
The read-out panel shows the
amount of HOLD time. (No signal
lights are on.)
15

How to Use the Hold/Timer
Your HOLD/TIMER, which oper-
are timing a three minute phone
tions. The time can range from one =
ates without microwave energy,
call, touch 3, 0, and O. The readout
second to 99 minutes and 99 sec-
has three timing functiorls.
panel shows 3:00.
ends. A HOLD, or “standing” time
It operates as a Minute Timer, it
Step 3: Touch START. The readout
may be found in some of yo-ur own
can be set to delay cooking or may
display shows the time as it counts
recipes or Cookbook.
be used as a hold setting after de-
down.
To set the oven to delay cooking
frosting. Hold/Timer can be set up
Step 4: When time is up, a signal
Up to 99 minutes follow Steps 1
to 99 minutes.
sounds. The oven turns off.
and 2 to enter hold time, then set
Step 1: Touch HOLD/TIMER pad.
time or temperature desired before
The read-out panel shows :0.
pressing START. When holding be-
fore temperature cooking, be sure
Step 2: Select the amount of time
The HOLD/TIMER can also be
probe is in food before pressing
you desire. Touch the appropriate
used to program “standing time”
START.
number pads. If, for example, you
between microwave cooking func-
How to Defrost-Hold/Time–Time Cook
TO help you become acquainted with the HOLD/TIMER feature as used with Time Cook or Temp Cook follow
Steps below to defrost a frozen casserole for 15 minutes, then hold 10 minutes and then cook 25 minutes. If US-
ing Temp Cook after Hold/Timer, be sure to insert probe correctly as shown in Temp Cook section of this book.
Step 1: Remove casserole from the
freezer and place in oven. Touch
the DEFROST pad. The readout
panel shows :0. Signal light above
DEFROST comes on.
Step 2: Touch 1, 5, 0, and O for de-
frosting time. 15:00 and Power 3
appear on readout. (Defrosting is
automatically set on Power Level 3
but can be changed by touching
POWER LEVEL pad and the new
Power Level.)
Step 4: Touch 1, 0, 0, and Oto hold
for ten minutes. 10:00 and “HOLD”
appear on the display.
Step 5: Touch the TIME COOK
pad. The display shows :0 and
Power 10 (HIGH). Signal light
above TIME COOK comes on.
Step 6: Touch 2, 5, 0, and O for
twenty-five minutes of cooking
time. 25:00 and Power 10 appear
on the display panel.
Step 7: Touch START. Power 3 and
15:00 counting down on display.
All signal lights except Defrost turn
off. When TIME COOK begins, sig-
nal light above TIME COOK
appears.
Questions
and Answers
Q. What will happen if I acciden-
tally reverse the instructions?
A. If you accidentally reverse the
sequence of programming instruc-
tions, your oven automatically
rearranges your program. Defrost-
ing always comes first, then hold,
and then the cooking function.
Q. Can I Defrost-Hold only on my
oven?
A. Sometimes you may want to de-
frost a food, hold it, and refrigerate
it to be cooked later. All you need
to do is program in Defrost and
amount of time. Then program
Hold and amount of time. Put your
thawed dish in the refrigerator and
cook later at a convenient time.
NOTE: Allow foods to remain at
room temperature only as long as
safe. Times will vary.
Q. I programmed my oven for a
specific defrosting time but it de- t
frosted longer than necessary.
What happened?
A. When instructions conflict, the
oven carries out the last instruc-
tion. You may have set the oven to
Defrost for 4 minutes, Hold/Time
for 2 minutes, and then Defrost for
6 minutes. In this case, the oven
would Defrost for 6 minutes and
a
Hold/Time for 2 minutes.
16
—.
—

The Exhaust Feature ~
.
\
I
The exhaust hood feature on your GE microwave
oven is equipped with a metal filter which collects
grease. When the fan is operated, air is drawn up
through the filter and is then discharged through
provided venting to the outside. The hood also has a
light for illuminating the counter surface.
To remove grease filter, grasp the “finger hold” on
the filter and push to the rear. The filter will drop out.
To replace grease filter, insert the filter in the top
a
me slot on the back of the opening. Push to the
~ar and upward to snap into place.
Soak, t~en agitate filter in hot detergent solution.
Don’t use ammonia or other alkali because it will
darken metal. Light brushing can be used to remove
inbedded dirt. Rinse, shake and remove moisture be-
fore replacing. Filters should be cleaned at least
once a month. Never operate your hood without the
filter in place. In situations where flaming might
occur on surfaces below hood, filter can retard entry
of flames into the unit.
17
.-
—
— — —

Care for Your Microwave Oven
Your New Microwave Oven is a Valuable Appliance,
Protect It From Misuse By Following These Rules:
● Keep your oven clean and sweet-smelling.
Opening the oven door a few minutes after cooking
helps “air-out” the interior. An occasional thorough
wiping with a solution of baking soda and water
keeps the interior fresh.
● Don’t use sharp-edged utensils with your oven.
The interior and exterior oven walls can be
scratched. The control panel can be damaged.
● Don’t remove the cover over the “stirrer” at the
top of the oven (microwave feature
4 on page 5).
You will damage the oven.
A.
BE CERTAIN POWER IS OFF BEFORE CLEANING ANY PART OF THIS OVEN.
How to Clean the Interior
Walls, floor and plastic cover. Because there is little
heat except in the food, or sometimes in the uten-
sils, spills and spatters are easy to remove. Some
spatters are easy to remove. Some spatters can be
removed with a paper towel, others may require a
damp cloth. Remove greasy spatters with a sudsy
cloth, then rinse and dry. Do not use abrasive
cleaners on oven walls. NEVER USE A COM-
MERCIAL OVEN CLEANER ON ANY PART OF
YOUR MICROWAVE OVEN.
Door-inside. Glass: Wipe up spatters daily, wash
when soiled, with a minimum of sudsy warm water.
Rinse thoroughly and dry.
Metal and plastic parts on door: Wipe frequently
with a damp cloth to remove all soil. DO NOT USE
ABRASIVES, SUCH AS CLEANING POWDERS OR
STEEL AND PLASTIC PADS. THEY WILL MAR THE
SURFACE.
Special note when using Brown ‘N Sear Dish: High
heat generated on bottom of Brown ‘N Sear Dish
can cause scorched appearing stains to bake onto
the oven shelf if grease is present. These may be re-
moved with Delete R
Polishing Cleanser by the
Drackett Products Co.
After using Delete, rinse and dry thoroughly, follow-
ing instructions on can. Do not use Delete on the
painted surfaces such as walls. It will scratch the
paint.
.
Delete may be purchased from your local dealer or
from your Authorized Service Center. Check the
“yellow pages” for location and phone number.
Delete may be sold in grocery or hardware stores,
or in the housewares section of some department
,
stores.
*
Automatic Temperature Probe. Probe is sturdy, but
care should be taken in handling. Do not twist or
bend; avoid dropping temperature probe.
Clean as soon after using as possible. To clean,
wipe with sudsy cloth, then rub lightly with plastic
scouring ball if necessary. Rinse and dry. (Or wash
in dishwasher. )
How to Clean the Exterior
Case. Clean the outside of your oven with soap and
water, then rinse and dry. The outer pane of the
window is glass. Just wipe clean with a damp cloth.
Chrome trim is best wiped with a damp cloth and
then with a dry towel.
Control Panel. Wipe with a damp cloth. Dry thor-
oughly. Do not use abrasives or sharp objects on
the panel. They can damage it.
18
— —
—

\
\\
\
Y&
....:.,............:............,.,,:
To replace hood lamp, first disconnect power at
front until it stops. Remove. Replace with same type
main fuse or circuit breaker panel or pull plug. Re-
move 2 screws from each side of lower panel and 3
screws from front edge. Lower panel until it rests on
range below. Place fingers on top near each end of
lamp. Press down and roll top of lamp gently toward
and wattage lamp. Hold lamp near each end and in-
sert prongs in sockets. Gently roll top of lamp toward
rear of range until it stops. Raise lower panel and
replace screws.
To replace your oven lamp, first disconnect power at
main fuse or circuit breaker or pull plug. Remove the
top grill by taking off 2 screws which hold it in place.
Next, remove the single screw on top left that
secures lamp housing. (On models so equipped.)
Open oven door for easier removal of the lamp hous-
ing assembly. Then grasp tab and pull out and up to
clear door hinge and front lip of oven. To remove
bulb, push it inward gently and turn to left, then pull
outward from socket. Replace with GE Lamp
# 25T8DC.
Do not attempt to operate the oven unless the grill is
@
place.
Clean off the grease and dust on hood surfaces
often. Use a warm detergent solution. About 1 table-
spoon of ammonia may be added to the water. Take
care not to touch the filters and enameled surfaces
with this. Ammonia will tend to darken metal.
19
——

Common Problems and Easy Solutions
Problem: The oven doesn’t seem to work at all.
Solution: Make sure power is on. Check to see that
3-prong plug is inserted firmly into a proper outlet.
Check the house control box to see that wall outlet
and fuses are working.
If power is on, then the oven is not accepting your
instructions. You may have entered another func-
tion, or you may have programmed functions which
cannot be combined, or you may have made a nu-
merical entry before a function entry. Touch
CLEAR/OFF.
Problem: The control panel lights up but oven
won’t turn on when 1touch START.
Solution: Check that door is securely closed. Un-
less door is closed to engage the safety interlocks,
the microwave energy cannot come into the oven.
Problem: “PF” appeared
onmy readout display.
Solution: “PF” shows on readout when you first
plug in your oven–or if the power supply has been
interrupted.
Touch CLEAR/OFF and reset the
controls.
Problem: My oven light has burned out. Can I still
use my oven?
Solution: Yes, see page 17 regarding replacement.
For safety’s sake the socket should not be left open.
General Electric service does not stock these lights.
Problem: Hood fan isn’t working right.
Solution: If it doesn’t work at all, check the main
fuse or circuit breaker. If it works but is faster than
usual, the filter may need cleaning. If fan goes on
and off, it’s probably overheating or if fan is on and
can’t be turned off, see page 7 about the Automatic
Fan Feature.
Problem: If I want to check temperature that I set
for Temp Cook or the present temperature during
Sim ‘n Cook what do I do?
Solution: Touch Temp Cook or Sim ‘n Cook pad and
temperature will be displayed on readout.
Problem: My oven displayed the “temperature set”
and a 3 second signal sounded even though I
thought I set it right.
Solution: Be sure probe is in place in oven and con-
nected at the receptacle end. If Temperature Cook
and Probe are properly set, and food temperature is
above IO” F, yet a 3 second signal still sounds, call
for service and indicate that you probably have a
problem with a probe or a wiring defect.
Problem: When using Temperature Cook, after I
touch START, a signal sounds, and oven turns off.
I’ve rechecked everything and 1 have set the oven
properly.
Solution: You have probably set an end temper-
ature which is lower than the present temperature
of the food. For example, if you set oven to heat
your cup of coffee to 150° but your coffee is already
155°, the oven turns off because the temperature
you set has been reached.
Problem: I have some TV and radio interference
while operating my microwave oven. Is anything
wrong?
Solution: Some TV and radio interference similar to
other appliance interference might be noticed while
operating the microwave oven, but does not in-
0
dicate a problem with your oven.
Problem: My food is undercooked although 1set all
the controls properly.
Solution: Food may have not been fully defrosted.
Times given in the recipe are minimum, but the den-
sity or size of food varies and thus cooking time
should be adjusted. Check recipe for special in-
structions for turning or stirring of food.
Problem: Oven gives a signal when I try to set tem-
perature and press START.
Solution: You are setting a temperature outside the
oven’s range of 90° to 200° or have not connected
the probe.
20
—- -c ——
—.—
—
/