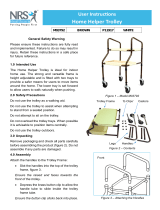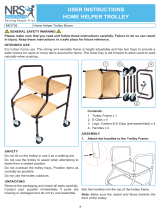
N.B. This equipment must be installed by a competent
person.
Maximum Weight on Tray: 15 kg
Do not exceed the weight limit stated – doing so could
put the user at risk.
VG798 Strolley Trolley
Fixing and Maintenance Instructions
1. Introduction
Thank you for deciding to purchase the Strolley Trolley from Aidapt. The Strolley Trolley is
manufactured from the finest materials and components available, when used correctly they
are designed to give many years of reliable trouble-free service.
Please Note: Always consult with the prescriber/Physiotherapist if you are in any doubt that
this product is suitable for your use.
2. Before Use
Please examine the item for any visible damage before use. If you see any damage or suspect a
fault, please do not use the product, but contact your supplier immediately for support. Please
dispose of all packaging carefully.
3. Assembly
Your trolley is provided to you packed in cube form.
Please examine all components for any damage before
use. If you see any damage or suspect a fault, please
contact your supplier immediately.
In this case, please do not use your product as it may
compromise the safety of the user.
The package contains the following components:
• Main trolley body
• 4 x height adjustable legs with pin clips
• 2 x detachable arms
• 2 x clip on moulded table tops
llow the instructions carefully:
1.1 Remove all the contents from the box.
1.2 Ensure that you protect the paintwork of the trolley during assembly by placing
the trolley on carpet or a large sheet of cardboard.
1.3 Take the trolley frame and place it upside down and carefully insert the tapered
section of the brown painted leg assembly into the body of the trolley frame.
1.4 Insert the leg retention clip. Ensure that the retention clip passes all the way
through.
1.5 Ensure that all four extension legs are adjusted to the same height and then
turn the frame upright.
1.6 Test the trolley for stability thoroughly and visually check that all four leg
retention clips are in place.
Do not use the leg retention clips to adjust the trolley height.
1.7 Place the two detachable arms into the locating
holes with the higher part of the arms towards
the front of the trolley.
N.B. Ensure both arms are fully located in place and
the four brass buttons pass completely through the
frame; they should protrude approximately 5 mm out
from the main frame.
1.8 Clip on both trolley trays with the flared edge
towards the front of the trolley.
Your completed trolley should now look like the image to
the right.
4. Height Adjustment
Your trolley can be adjusted in height if required.
• To adjust the height remove the lower ‘E’ clips from the extension legs and pull
each leg to the desired height. (See fig. 1.)
• Ensure that all four extension legs are evenly adjusted.
• Re-insert all ‘E’ clips facing the line of travel also ensuring that the ‘E’ clips have
passed through the product frame and extension leg and are secure. (See fig 2.)
• Never adjust the legs unevenly; this is dangerous and can seriously compromise
the safety of the user.
Check that the trolley is sitting evenly on the floor and there is no excessive rocking or
the trolley is tilting to one side. If this is the case, please do not use the trolley, but repeat
the above steps to correct the problem or contact your supplier for service support.
09/11/10
1695


