Motorola E770 Owner's manual

Category
Mobile phones
Type
Owner's manual

This manual is also suitable for

Introduction 1
Introduction 1
1Introduction
Welcome to the world of Motorola digital mobile
communications! We are pleased that you have chosen the
Motorola E770v 3G mobile phone.
Note: The graphic represented here and throughout this
manual may not accurately depict your specific phone.
www.motorola.com
Certain mobile phone features are dependent on the
capabilities and settings of your service provider’s network.
Additionally, certain features may not be activated by your
service provider, and/or the provider's network settings may
limit the feature’s functionality. Always contact your service
provider about feature availability and functionality. All
features, functionality, and other product specifications, as
well as the information contained in this user's guide are
based upon the latest available information and are believed
to be accurate at the time of printing. Motorola reserves the
right to change or modify any information or specifications
without notice or obligation.
MOTOROLA and the Stylised M Logo are registered in the US
Patent & Trademark Office.
The Bluetooth trademarks are owned by their proprietor and
used by Motorola, Inc. under license.
Java and all other Java-based marks are trademarks or
registered trademarks of Sun Microsystems, Inc. in the U.S.
and other countries.
All other product or service names are the property of their
respective owners.
Volume keys
Make Video Calls
Left Soft Key
Make & Answer
Calls
Charge up
Go handsfree
Scroll up, down,
left or right.
Press in to
select.
Right Soft Key
Turn on & off,
hang up, exit
menus
Camera Key
Clear/Back Key
1Introduction
2 Introduction
© Motorola, Inc., 2005.
Software Copyright Notice
The Motorola products described in this manual may include
copyrighted Motorola and third-party software stored in
semiconductor memories or other media. Laws in the United
States and other countries preserve for Motorola and
third-party software providers certain exclusive rights for
copyrighted software, such as the exclusive rights to
distribute or reproduce the copyrighted software.
Accordingly, any copyrighted software contained in the
Motorola products may not be modified, reverse-engineered,
distributed, or reproduced in any manner to the extent
allowed by law. Furthermore, the purchase of the Motorola
products shall not be deemed to grant either directly or by
implication, estoppel, or otherwise, any licence under the
copyrights, patents, or patent applications of Motorola or any
third-party software provider, except for the normal, non-
exclusive, royalty-free licence to use that arises by operation
of law in the sale of a product.
While Products specifications and features may be subject to
change without notice, we are making every possible effort
to ensure that user manuals are updated on a regular basis to
reflect product functionality revisions. However, in the
unlikely event that your manual version does not fully reflect
the core functionality of your product, please let us know.
You may also be able to access up-to-date versions of our
manuals in the consumer section of our Motorola web site,
at
http://www.motorola.com
.
Contents 2
Contents 3
Introduction. . . . . . . . . . . . . . . . . . . . . . . . . . . . . . . . . . . . 1
Safety Information . . . . . . . . . . . . . . . . . . . . . . . . . . . . . . 5
EU Conformance . . . . . . . . . . . . . . . . . . . . . . . . . . . . . . . 11
Recycling Information . . . . . . . . . . . . . . . . . . . . . . . . . . 12
Basics . . . . . . . . . . . . . . . . . . . . . . . . . . . . . . . . . . . . . . . 13
About This Guide. . . . . . . . . . . . . . . . . . . . . . . . . . . . . 13
Installing the USIM, SIM, or Memory Cards . . . . . . . . 13
Memory Card . . . . . . . . . . . . . . . . . . . . . . . . . . . . . . . 14
User Memory . . . . . . . . . . . . . . . . . . . . . . . . . . . . . . . 15
Battery Tips . . . . . . . . . . . . . . . . . . . . . . . . . . . . . . . . . 15
Installing the Battery . . . . . . . . . . . . . . . . . . . . . . . . . . 16
Using Your Charger. . . . . . . . . . . . . . . . . . . . . . . . . . . 16
Charging the Battery . . . . . . . . . . . . . . . . . . . . . . . . . . 17
Turning Your Phone On . . . . . . . . . . . . . . . . . . . . . . . . 17
Adjusting Volume . . . . . . . . . . . . . . . . . . . . . . . . . . . . 18
Making a Call. . . . . . . . . . . . . . . . . . . . . . . . . . . . . . . . 18
Answering a Call . . . . . . . . . . . . . . . . . . . . . . . . . . . . . 18
Changing the Call Alert . . . . . . . . . . . . . . . . . . . . . . . . 19
Viewing Your Phone Number . . . . . . . . . . . . . . . . . . . 19
Entering Text . . . . . . . . . . . . . . . . . . . . . . . . . . . . . . . . 19
Camera . . . . . . . . . . . . . . . . . . . . . . . . . . . . . . . . . . . . . . 28
Taking and Sending a Photo . . . . . . . . . . . . . . . . . . . . 28
Using Photos and Pictures . . . . . . . . . . . . . . . . . . . . . 30
Sending a Postcard. . . . . . . . . . . . . . . . . . . . . . . . . . . 31
Recording Video Clips. . . . . . . . . . . . . . . . . . . . . . . . . 33
Using Video Clips . . . . . . . . . . . . . . . . . . . . . . . . . . . . 34
Making Video Calls . . . . . . . . . . . . . . . . . . . . . . . . . . . 35
Using and Transferring Files . . . . . . . . . . . . . . . . . . . . . 39
Downloading Media Files . . . . . . . . . . . . . . . . . . . . . . 39
Playing or Viewing Media Files . . . . . . . . . . . . . . . . . . 39
Sending Media Files . . . . . . . . . . . . . . . . . . . . . . . . . . 39
Audio Player . . . . . . . . . . . . . . . . . . . . . . . . . . . . . . . . 40
Digital Audio Player. . . . . . . . . . . . . . . . . . . . . . . . . . . 41
Connecting Your Phone to Another Device . . . . . . . . . 42
Connecting a Memory Card to your computer . . . . . . 47
Vodafone live! . . . . . . . . . . . . . . . . . . . . . . . . . . . . . . . . 48
Vodafone live! . . . . . . . . . . . . . . . . . . . . . . . . . . . . . . . 48
Live Cast . . . . . . . . . . . . . . . . . . . . . . . . . . . . . . . . . . . 50
Learning to Use Your Phone. . . . . . . . . . . . . . . . . . . . . . 52
Using the Display . . . . . . . . . . . . . . . . . . . . . . . . . . . . 52
Using the 5-Way Navigation Key . . . . . . . . . . . . . . . . . 55
2Contents
2Contents
4 Contents
Using Menus . . . . . . . . . . . . . . . . . . . . . . . . . . . . . . . . 55
Using the Handsfree Speaker . . . . . . . . . . . . . . . . . . . 57
Changing a Code, PIN, or Password . . . . . . . . . . . . . . 57
Locking and Unlocking Your Phone . . . . . . . . . . . . . . 57
If You Forget a Code, PIN, or Password . . . . . . . . . . . 58
Locking and Unlocking Your Keypad. . . . . . . . . . . . . . 59
Setting Up Your Phone . . . . . . . . . . . . . . . . . . . . . . . . . . 60
Storing Your Name and Phone Number . . . . . . . . . . . 60
Setting the Time and Date . . . . . . . . . . . . . . . . . . . . . . 60
Setting a Ring Style. . . . . . . . . . . . . . . . . . . . . . . . . . . 60
Setting a Wallpaper Image . . . . . . . . . . . . . . . . . . . . . 61
Setting a Screen Saver Image . . . . . . . . . . . . . . . . . . . 61
Setting a Theme . . . . . . . . . . . . . . . . . . . . . . . . . . . . . 62
Setting Display Appearance. . . . . . . . . . . . . . . . . . . . . 63
Setting Answer Options. . . . . . . . . . . . . . . . . . . . . . . . 63
Calling Features . . . . . . . . . . . . . . . . . . . . . . . . . . . . . . . 64
Turning Off a Call Alert . . . . . . . . . . . . . . . . . . . . . . . . 64
Changing the Active Line. . . . . . . . . . . . . . . . . . . . . . . 64
Viewing Call Log . . . . . . . . . . . . . . . . . . . . . . . . . . . . . 64
Redialling a Number . . . . . . . . . . . . . . . . . . . . . . . . . . 65
Using Automatic Redial. . . . . . . . . . . . . . . . . . . . . . . . 65
Returning an Unanswered Call . . . . . . . . . . . . . . . . . . 66
Using the Notepad . . . . . . . . . . . . . . . . . . . . . . . . . . . 66
Putting a Call On Hold or Mute . . . . . . . . . . . . . . . . . . 67
Using Call Waiting. . . . . . . . . . . . . . . . . . . . . . . . . . . . 67
Using Caller ID . . . . . . . . . . . . . . . . . . . . . . . . . . . . . . 68
Calling an Emergency Number . . . . . . . . . . . . . . . . . . 68
Dialling International Numbers . . . . . . . . . . . . . . . . . . 68
Using Voicemail . . . . . . . . . . . . . . . . . . . . . . . . . . . . . 69
Phone Features. . . . . . . . . . . . . . . . . . . . . . . . . . . . . . . . 70
Navigation Guide. . . . . . . . . . . . . . . . . . . . . . . . . . . . . 70
Feature Quick Reference . . . . . . . . . . . . . . . . . . . . . . . 72
SAR Data. . . . . . . . . . . . . . . . . . . . . . . . . . . . . . . . . . . . . 91
Index . . . . . . . . . . . . . . . . . . . . . . . . . . . . . . . . . . . . . . . . 92
Safety and General Information 3
Safety Information 5
3Safety Information
IMPORTANT INFORMATION ON SAFE AND EFFICIENT
OPERATION. READ THIS INFORMATION BEFORE USING
YOUR PHONE.
1
3.1 Exposure To Radio Frequency (RF)
Energy
Your phone contains a transmitter and a receiver. When it is
ON, it receives and transmits RF energy. When you
communicate with your phone, the system handling your call
controls the power level at which your phone transmits.
Your Motorola phone is designed to comply with local
regulatory requirements in your country concerning
exposure of human beings to RF energy.
3.2 Operational Precautions
To assure optimal phone performance and make sure human
exposure to RF energy is within the guidelines set forth in the
relevant standards, always adhere to the following
instructions.
3.2.1 External Antenna Care
If your phone has an external antenna, use only the supplied
or Motorola-approved replacement antenna. Unauthorised
antennas, modifications, or attachments could damage the
phone and/or may result in non-compliance with local
regulatory requirements in your country.
Do NOT hold the external antenna when the phone is IN USE.
Holding the external antenna affects call quality and may cause
the phone to operate at a higher power level than needed.
3.2.2 Phone Operation
When placing or receiving a phone call, hold your phone as
you would a fixed line phone.
3.2.3 Body-Worn Operation: Voice
Communication
To maintain compliance with RF energy exposure guidelines, if
you wear a phone on your body when transmitting voice
communications, always place the phone in a Motorola-
supplied or approved clip, holder, holster, case, or body harness
for this phone, if available. Use of accessories not approved by
Motorola may exceed RF energy exposure guidelines.
3.Safety and General Information
3.2.4 Safety and General Information
6 Safety Information
If you do not use one of the body-worn accessories approved
or supplied by Motorola, and are not using the phone held in
the normal use position, ensure the phone and its antenna
are at least 2.5 centimetres (1 inch) from your body when
transmitting.
3.2.4 Data Operation
When using any data feature of the phone, with or without an
accessory cable, position the phone and its antenna at least
2.5 centimetres (1 inch) from your body.
3.2.5 Approved Accessories
Use of accessories not approved by Motorola, including but
not limited to batteries, antennas, and convertible covers,
may cause your phone to exceed RF energy exposure
guidelines. For a list of approved Motorola accessories, visit
our website at www.motorola.com.
3.3 RF Energy Interference/Compatibility
Note: Nearly every electronic device is susceptible to RF
energy interference from external sources if inadequately
shielded, designed, or otherwise configured for RF energy
compatibility. In some circumstances your phone may cause
interference.
Note: This device complies with Part 15 of the FCC Rules.
Operation is subject to the following two conditions: (1) this
device may not cause harmful interference, and (2) this
device must accept any interference received, including
interference that may cause undesired operation.
3.3.1 Facilities
Turn off your phone in any facility where posted notices
instruct you to do so. These facilities may include hospitals
or health care facilities that may be using equipment that is
sensitive to external RF energy.
Safety and General Information 3.3.2
Safety Information 7
3.3.2 Aircraft
Turn off your wireless device whenever instructed to do so
by airline staff. If your device offers a flight mode or similar
feature, consult airline staff about use in flight. If your device
offers a feature that automatically turns on the phone, then
turn off this feature before boarding an aeroplane or entering
an area where the use of wireless devices is restricted.
3.3.3 Medical Devices
Pacemakers
Pacemaker manufacturers recommend that a minimum
separation of 15 centimetres (6 inches) be maintained
between a handheld wireless phone and a pacemaker.
Persons with pacemakers should:
ALWAYS keep the phone more than 15 centimetres
(6 inches) from your pacemaker when the phone is
turned ON.
NOT carry the phone in the breast pocket.
Use the ear opposite the pacemaker to minimise the
potential for interference.
Turn OFF the phone immediately if you have any reason
to suspect that interference is taking place.
Hearing Aids
Some digital wireless phones may interfere with some
hearing aids. In the event of such interference, you may want
to consult your hearing aid manufacturer to discuss
alternatives.
Other Medical Devices
If you use any other personal medical device, consult the
manufacturer of your device to determine if it is adequately
shielded from RF energy. Your physician may be able to
assist you in obtaining this information.
3.4 Use While Driving
Check the laws and regulations on the use of phones in the
area where you drive. Always obey them.
When using your phone while driving, please:
Give full attention to driving and to the road. Using a
phone may be distracting in certain circumstances.
Discontinue a call if you can’t concentrate on driving.
3.5 Safety and General Information
8 Safety Information
Always use handsfree operation.
Pull off the road and park before making or answering
a call if driving conditions so require.
Responsible driving best practices can be found in the
“Wireless Phone Safety Tips” at the end of this guide and/or
at the Motorola website: www.motorola.com/
callsmart.
3.5 Operational Warnings
3.5.1 For Vehicles With an Air Bag
Do not place a phone in the area over an air bag or in the air
bag deployment area. Air bags inflate with great force. If a
phone is placed in the air bag deployment area and the air
bag inflates, the phone may be propelled with great force and
cause serious injury to occupants of the vehicle.
3.5.2 Gas or Petrol Stations
Obey all posted signs with respect to the use of radio
equipment in gas or petrol stations. Turn off your wireless
device if instructed by authorised staff.
3.5.3 Potentially Explosive Atmospheres
Turn off your phone prior to entering any area with a
potentially explosive atmosphere. Do not remove, install, or
charge batteries in such areas. Sparks in a potentially
explosive atmosphere can cause an explosion or fire
resulting in bodily injury or even death.
Note: The areas with potentially explosive atmospheres
referred to above include fuelling areas such as below decks
on boats, fuel or chemical transfer or storage facilities, areas
where the air contains chemicals or particles, such as grain,
dust, or metal powders. Areas with potentially explosive
atmospheres are often but not always posted.
3.5.4 Blasting Caps and Areas
To avoid possible interference with blasting operations, turn
OFF your phone when you are near electrical blasting caps, in
a blasting area, or in areas posted “Turn off electronic
devices.” Obey all signs and instructions.
Safety and General Information 3.5.5
Safety Information 9
3.5.5 Damaged Products
If your phone or battery has been submerged in water,
punctured, or subjected to a severe fall, do not use it until
you take it to a Motorola Authorised Service Centre to
determine if it has been damaged. Do not attempt to dry it
with an external heat source, such as a microwave oven.
3.5.6 Batteries and Chargers
Batteries can cause property damage and/or bodily injury
such as burns if a conductive material such as jewellery,
keys, or beaded chains touch exposed terminals. The
conductive material may complete an electrical circuit (short
circuit) and become hot. Take care when handling a charged
battery, particularly when placing it inside a pocket, purse, or
other container with metal objects. Use only Motorola
Original™ batteries and chargers.
Caution: To avoid risk of personal injury, do not dispose of
your battery in a fire.
Your battery, charger, or phone may contain symbols,
defined as follows:
3.6 Choking Hazards
Your phone or its accessories may include detachable parts,
which may present a choking hazard to small children. Keep
your phone and its accessories away from small children.
Symbol Definition
Important safety information will follow.
Your battery or phone should not be
disposed of in a fire.
Your battery or phone may require
recycling in accordance with local laws.
Contact your local regulatory authorities
for more information.
Your battery or phone should not be
thrown in the rubbish bin.
Your phone contains an internal lithium
ion battery.
032374o
032376o
032375o
032377o
032378o
Li Ion BATT
3.7 Safety and General Information
10 Safety Information
3.7 Seizures/Blackouts
Some people may be susceptible to epileptic seizures or
blackouts when exposed to flashing lights, such as when
watching television or playing video games. These seizures
or blackouts may occur even if a person never had a previous
seizure or blackout.
If you have experienced seizures or blackouts, or if you have
a family history of such occurrences, please consult with
your doctor before playing video games on your phone or
enabling a flashing-lights feature on your phone. (The
flashing-light feature is not available on all products.)
Parents should monitor their children's use of video games
or other features that incorporate flashing lights on the
phones. All persons should discontinue use and consult a
doctor if any of the following symptoms occur: convulsion,
eye or muscle twitching, loss of awareness, involuntary
movements, or disorientation.
To limit the likelihood of such symptoms, please take the
following safety precautions:
Do not play or use a flashing-lights feature if you are
tired or need sleep.
Take a minimum of a 15-minute break hourly.
Play in a room in which all lights are on.
Play at the farthest distance possible from the screen.
3.8 Repetitive Motion Injuries
When you repetitively perform actions such as pressing keys
or entering finger-written characters, you may experience
occasional discomfort in your hands, arms, shoulders, neck,
or other parts of your body. Follow these instructions to
avoid problems such as tendonitis, carpal tunnel syndrome,
or other musculoskeletal disorders:
Take a minimum 15-minute break every hour of game
playing.
If your hands, wrists, or arms become tired or sore
while playing, stop and rest for several hours before
playing again.
If you continue to have sore hands, wrists, or arms
during or after play, stop playing and see a doctor.
1. The information provided in this document supersedes the
general safety information in user’s guides published prior to
January 28, 2005.
EU Conformance 4
EU Conformance 11
4EU Conformance
European Union Directives Conformance Statement
Hereby, Motorola declares that this product is in compliance
with
The essential requirements and other
relevant provisions of Directive 1999/5/EC
All other relevant EU Directives
The above gives an example of a typical Product Approval
Number.
You can view your product's Declaration of Conformity
(DoC) to Directive 1999/5/EC (the R&TTE Directive) at
www.motorola.com/rtte - to find your DoC, enter the product
Approval Number from your product's label in the "Search"
bar on the Web site
IMEI: 350034/40/394721/9
0168
Type: MC2-41H14
Product
Approval
Number
5 Recycling Information
12 Recycling Information
5Recycling Information
5.1 Caring for the Environment by
Recycling
When you see this symbol on a Motorola product,
do not dispose of the product with household
waste.
5.2 Recycling Mobile Phones and
Accessories
Do not dispose of mobile phones or electrical accessories,
such as chargers or headsets, with your household waste. In
some countries or regions, collection systems are set up to
handle electrical and electronic waste items. Contact your
regional authorities for more details. If collection systems
aren’t available, return unwanted mobile phones or electrical
accessories to any Motorola Approved Service Centre in your
region.
Basics 6
Basics 13
6Basics
6.1 About This Guide
This guide describes the basic features of your Motorola
mobile phone.
To obtain another copy of this guide, see the Motorola Web
site at:
www.hellomoto.com
A Quick Start Guide for this product is also available.
6.1.1 Optional Features
This label identifies an optional network, SIM
card, or subscription-dependent feature that may
not be offered by all service providers in all
geographical areas. Contact your service provider
for more information.
6.1.2 Optional Accessories
This label identifies a feature that requires an
optional Motorola Original™ accessory.
6.2 Installing the USIM, SIM, or Memory
Cards
Caution: Do not bend or scratch your card. Avoid exposing
your card to static electricity, water, or dirt.
Your 3G USIM (Universal IC Card) contains your phone
number, service details, and contacts list/message memory.
Your phone can use GSM SIM (Subscriber Identity Module)
cards, but not all features will be available.
k
1
2
6.3 Memory Card
14 Basics
6.3 Memory Card
Insert the Memory Card next to the SIM card (see above)
underneath the phone battery.
The Memory Card provides you with a larger storage
capacity than the Phone Memory. When you download for
example pictures, sounds, video clips or Java applications,
they will be saved to the Memory Card.
Note: If you download a copyrighted file and store it on your
memory card, you can use the file only while your memory
card is inserted in your phone. You cannot send, copy, or
change copyrighted files.
To show the amount of free space on the Memory Card:
When you look at a list of files in My Files, the icon next to it
shows whether it is stored on your memory card or your
internal memory.
Note: A key over the icon indicates that the file has a
copyright lock that keeps you from saving it on external
memory, forwarding it, or editing it.
34
Find the Feature
s
> Settings > Phone Status
> Storage Devices
Press To
1 S highlight the memory card
2 s see the memory card information
= stored on internal
memory
= stored on memory
card
User Memory 6.4
Basics 15
If you have a TransFlash removable memory card,
the use of an SD adapter allows you to use it in
other devices that are compatible with SD cards
(for example, digital cameras, laptops,
mp3-players).
6.4 User Memory
Your phone stores any content that you add, like ringtones or
games, in user memory. Your service provider may store
some content in user memory before you receive the phone.
6.5 Battery Tips
Battery life depends on the network, signal strength,
temperature, features, and accessories you use.
Always use Motorola Original batteries and
battery chargers. The warranty does not
cover damage caused by non-Motorola
batteries and/or chargers.
New batteries or batteries stored for a long time may
take more time to charge.
When charging your battery, keep it near room
temperature.
When storing your battery, keep it uncharged in a cool,
dark, dry place, such as a refrigerator.
Never expose batteries to temperatures below -10°C
(14°F) or above 45°C (113°F). Always take your phone
with you when you leave your vehicle.
It is normal for batteries to gradually wear down and
require longer charging times. If you notice a change in
your battery life, it is probably time to purchase a new
battery.
Contact your local recycling centre for proper battery
disposal.
Warning: Never dispose of batteries in a fire because they
may explode.
Before using your phone, please read the battery safety
information in the Safety and General Information section
included in this guide.
k
6.6 Installing the Battery
16 Basics
6.6 Installing the Battery
Your phone is designed to use only
Motorola Original™ batteries and accessories.
6.7 Using Your Charger
The battery charger shipped with this device is specifically
designed for use with Motorola 3G mobile phones. Other
chargers might take longer to charge your battery or cause
your calls to fail during charging.
For best performance, please use the following charger kits
with this device:
SPN5202 Travel Charger EMU Rapid Switcher
- With SYN7455A UK Plug or SYN7456A Euro Plug
SYN0847 V700 EMU Vehicle Power Adapter
12
3
Charging the Battery 6.8
Basics 17
6.8 Charging the Battery
New batteries are shipped partially charged. Before using
your phone, please install and fully charge the battery as
described below. Some batteries perform best after several
full charge/discharge cycles.
Tip: You can safely leave the charger connected to your
phone after charging is complete. This will not damage the
battery.
6.9 Turning Your Phone On
Action
1 Plug the charger
into your phone.
2 Plug the other end of the charger into the appropriate
electrical outlet.
3 When your phone indicates Charge complete, remove the
charger.
Action
1 Press and hold for 2
seconds or until the display
turns on.
2 If necessary, select whether to start in Flight Mode or
not. See “Flight Mode” on page 89 for more details.
3 If necessary, press S to scroll to the User Account
you want. Then press the Select key to select the
account from the list (stored on the SIM card).
4 If necessary, enter your SIM card PIN code and press
the Ok key to unlock the SIM card.
Caution: If you enter an incorrect PIN code 3 times in
a row, your SIM card is disabled and your phone
displays SIM Blocked.
5 If necessary, enter your four-digit unlock code and
press Ok key to unlock the phone.
Tip: The unlock code is originally set to 1234. Your
service provider may change this number before you
receive your phone.
6.10 Adjusting Volume
18 Basics
6.10 Adjusting Volume
Press the up or down volume keys to:
increase or decrease earpiece
volume during a call
increase or decrease speakerphone
volume during a call
turn off an incoming call alert
increase or decrease the ringer volume setting when
the home screen is visible
Tip: At the lowest volume setting, press the down
volume key once to switch to vibrate alert. Press it
again to switch to silent alert. Press the up volume key
to cycle back to vibrate alert, then ring alert.
6.11 Making a Call
To make video calls, see page 35.
Note: You can make an emergency call even when the phone
is locked, or when a SIM card is not inserted (see page 68).
6.12 Answering a Call
When you receive a call, your phone rings and/or vibrates
and displays an incoming call message.
6 To turn off your phone at any stage, press and hold
the for 2 seconds.
Action
Press To
1 keypad keys dial the phone number
2 make the call
3 end the call and “hang up” the phone
when you are finished
Press To
1
or
answer the call
Divert or divert the call to your voicemail or call
divert number, as though your line
was busy
Changing the Call Alert 6.13
Basics 19
6.13 Changing the Call Alert
To set your Ring Style, press s > Ring Styles or Settings
> Ring Styles (see page 60).
Shortcut: In the home screen, press the down volume key to
switch the alert for incoming calls and other events to vibrate
alert, then silent alert. Press the up volume key to reset ring
alert.
Shortcut: Press and hold # to quickly change to silent
style. Press and hold # again to change back to previous
ring style.
6.14 Viewing Your Phone Number
To view your phone number from the home screen, press
K#.
While you are on a call, press Options > My Tel. Numbers.
Note: Your phone number must be stored on your SIM card
to use this feature. To store your phone number on the SIM
card, see page 60. If you do not know your phone number,
contact your service provider.
6.15 Entering Text
Some features require you to enter information. The
message centre lets you compose and send text messages.
2 end the call and “hang up” the phone
when you are finished
Press To
Options Send To
For indicator
descriptions,
see following
section.
Flashing
cursor
indicates
insertion point.
Press the Options key to open the
sub-menu.
After you enter
text press the
Send To
key to
enter recipients.
Msg SMS:0
6.15.1 Choosing a Text Entry Mode
20 Basics
6.15.1 Choosing a Text Entry Mode
Multiple text entry modes make it easy for you to enter
names, numbers, and messages. The mode you select
remains active until you select another mode.
Press # in any text entry screen to select one of the
following entry modes:
6.15.2 Setting Up a Text Entry Mode
To set your primary and secondary text entry modes, press
Options > Text Setup in a text entry view and select Primary Text or
Secondary Text, and choose:
Using Capitalisation
Press 0 in any text entry screen to change text case. The
following indicators show capitalisation status:
or
Your Primary text entry mode can be set to any
iTAP or tap mode.
or
Your Secondary text entry mode can be set to any
iTAP or tap mode, or set to None if you
don’t want a secondary entry mode.
W Numeric mode enters numbers only.
Symbol mode enters symbols only.
iTAP Let the phone predict each word as you press
keys (see page 23).
TAP Enter letters and numbers by pressing a key
one or more times.
Tap Extended Enter letters, numbers, and symbols by
pressing a key one or more times.
None Hide the Secondary setting (only available for
Secondary Setup).
= no capital letters = capitalise next letter
only
= all capital letters
Using Tap Mode 6.15.3
Basics 21
Text Entry Mode Indicators
When you select the Primary or Secondary text entry mode, the
following indicators identify the text entry setting:
Two other indicators identify Numeric (W ) or Symbol ( ) entry
modes.
6.15.3 Using Tap Mode
This is the standard mode for entering text on your phone.
Regular TAP mode cycles through the letters and number of
the key you press. Tap Extended also cycles through additional
symbols as shown in the chart on page 23.
In a text entry screen, you can press # to switch entry
mode. If you don’t see Vg or Vm then press Options > Text
Setup to set tap mode as your primary or secondary text entry
mode.
Primary Second.
Tap, no capital letters
Tap, capitalise next letter only
Tap, all capital letters
iTAP, no capital letters
iTAP, capitalise next letter only
iTAP, all capital letters
Press To
1 A keypad key one
or more times
select a letter, number, or symbol
2 keypad keys enter remaining characters
Tip: Press S right to accept a
word completion, or * to insert
a space.
6.15.3 Using Tap Mode
22 Basics
To enter text in tap mode, press a keypad key repeatedly to
cycle through the letters and number on the key. Repeat this
step to enter each letter.
When you enter 3 or more characters in a row, your phone
may guess the rest of the word. For example, if you enter prog
you might see:
If you want a different word (such as progress), continue
pressing keypad keys to enter the remaining characters.
Press S left or right to move the flashing cursor to
the left or right in a text message.
The first character of every sentence is capitalised. If
necessary, press S down to force the character to
lowercase before the cursor moves to the next
position.
If you enter or edit information and do not want to save
the changes, press to exit without saving.
Options Send To
Msg SMS:4
Block cursor
indicates
highlighted
character.
After 2 seconds,
character is
accepted and
cursor moves to
next position.
Press the
Options
key to
open the sub-menu.
Press the
Send
To
key to enter
the recipient.
T
Press
K
to
delete character
to left of
insertion point.
Options Send To
Msg SMS:4
This is a prog ram
Flashing
cursor
indicates
insertion point.
Press
S
right
to accept
program
, or
press
*
to
reject it and
enter a space
after
prog
.
Using iTAP™ Mode 6.15.4
Basics 23
Character Chart
Use this chart as a guide for entering characters with Tap
Extended.
Note: This chart may not reflect the exact character set
available on your phone. In an email address or URL editor,
1 first shows common characters for that editor.
6.15.4 Using iTAP™ Mode
Press # in a text entry view to switch to iTAP mode. If you
don’t see or , press Options > Text Setup to set iTAP
mode as your primary or secondary text entry mode.
iTAP™ software provides a predictive text entry mode that
lets you enter a word using one keypress per letter. This can
be faster than TAP, because your phone combines the
keypresses into common words.
Tip: Your phone has a text tutorial which should help you
with any problems..
1
. ? ! , @ ' - _ : ; ( ) & ` " ~ 1 0 ¿ ¡ ^ % £ $ ¥ ¤
£
+ x
* / \ | [ ] = > < # §
2
a b c 2 á à â ä ã ç
3
d e f 3 é è ê ë
4
g h i 4 í î ï
5
j k l 5
6
m n o 6 ñ ó ò ô ö õ œ
7
p q r s 7
8
t u v 8 ú ù û ü
9
w x y z 9
0
change text case, for capital letters
*
enter a space (hold to enter a return)
#
change text entry mode (hold for default)
Find the Feature Options > Text Setup > Text Tutorial
6.15.4 Using iTAP™ Mode
24 Basics
For example, if you press 7764, letter combinations
that match your key presses display:
If you want a different word (such as Progress), continue
pressing keypad keys to enter the remaining
characters.
To enter numbers quickly, press and hold a number key
to temporarily switch to numeric mode. Press the
number keys to enter the numbers you want. Enter a
space to change back to iTAP mode.
Press 1 to enter punctuation or other characters.
Entering Words
In a text entry screen, you can press # to switch entry
modes. An indicator shows which mode is active (see
page 21). If iTAP mode is not available as the Primary or
Secondary entry mode, see page 20.
Options Send to
Msg SMS:4
Prog ram
Press
S
down to see a
list of word
options.
Press
Options
key to open
message
options.
Press
Send To
key when the
message is
complete.
Press
S
up
to accept
Program
, or
press
*
to
enter
Prog
and
a space.
Options Send To
Press To
1 keypad keys (one
press per letter)
show possible letter
combinations
If alternative combinations are
available then an arrow appears
below the letters.
2 S up or down go to the previous or next
available predicted words
Press and hold S up or down
to display a popup window
showing the next four predicted
words. You can scroll up and
down through this list and then
press Select to accept the
highlighted word.
3 S right accept the predicted word
Using Numeric Mode 6.15.5
Basics 25
If you enter a word your phone does not recognise, the
phone stores it to use as one of your word options. When
you fill memory space for unrecognised words, your phone
deletes the oldest words to add new words.
6.15.5 Using Numeric Mode
In a text entry screen, press # to switch entry modes until
the W (Numeric) indicator displays.
Press keypad keys to enter the numbers you want. When you
finish entering numbers, press # to switch to another entry
mode.
6.15.6 Using Symbol Mode
In a text entry screen, press # to switch entry modes until
the (Symbol) indicator displays.
4 S left move the cursor back one letter
5 s
or
select a word
You can press keypad keys to
add more letters to the end of
the combination.
*
enter the highlighted
combination when it spells a
word
A space is automatically inserted
after the word.
Press To
Press To
1 S left, right, up
or down
highlight the symbol you want
2 S down view more symbols
Options Send To
Msg 450
.
?
!
,@
-
_
:
6.15.7 Deleting Letters and Words
26 Basics
6.15.7 Deleting Letters and Words
Place the cursor to the right of the text you want to delete,
and then:
6.15.8 Copying, Cutting, and Pasting Text
From a text entry screen:
Note:
Paste only displays once you have cut or copied some
text.
Undo only displays once you have cut, copied or pasted
some text.
Copy All Text also displays in the menu (press
Options)
when you are viewing details for a Contacts entry, Calendar
event, Vodafone live! page, text message, or Call Log entry.
3 s or the
corresponding
number key
enter the highlighted symbol
*
enter a space (hold to enter a
return)
#
change text entry mode (hold for
default)
Action
Press K to delete the last letter.
Press and hold K to clear the entire message.
Find the Feature Options > Editing Options
Press To Option Description
Copy Text Copy the text you are about to highlight
(see “Highlighting Text” on page 27).
Cut Text Cut the text you are about to highlight
(see “Highlighting Text” on page 27).
Copy All Text Copy all text in the editor.
Cut All Text Cut all text in the editor.
Paste Paste the text you cut or copied.
Delete Delete the selected text.
Undo Undo the last copy, cut, or paste in the
current text editor.
Copying, Cutting, and Pasting Text 6.15.8
Basics 27
Highlighting Text
In a text editor, to highlight and copy or cut text:
Text remains on your clipboard, available to paste, until you
copy or cut other text or until you turn off your phone.
Find the Feature Options > Editing Options > Copy Text or
Cut Text
Press To
1 S scroll to the beginning of the text
you want to copy or cut
2 Start key turn on the highlighting marker
3 S scroll to the end of the text you
want to copy or cut
4 Copy key
or
Cut key
copy or cut the text you selected
You can now paste the text in
another location or file.
7 Camera
28 Camera
7Camera
You can do much more with your phone than make and
receive calls! This section describes your phone’s camera
and video camera features.
7.1 Taking and Sending a Photo
To activate your phone’s camera, press the camera key on
the bottom right of your phone (see page 1 for exact
location), or select the camera icon on the main menu.
The active viewfinder image displays.
Point the camera lens at the photo subject.
Note: If you select Store Only you can select Print and Store to
print the picture over a Bluetooth connection, see page 43.
IMAGE
AREA
Area display
image options
Options Back
Press
S
up or
down to scroll
through available
options.
Press
S
left or
right to set
value for
available
options.
Open the
Pictures Menu
.
Go back to
previous
screen
Press
S
to
display the
image options.
Press To
1 s or the
camera key
take a photo
Tip: Press * to turn the light on or
off
2 Options
> Store Only
store the photo
or
Options > Send
or Send key
send the photo in a message
or
Options
> Discard
delete the photo and return to active
viewfinder
Taking and Sending a Photo 7.1
Camera 29
Press
Options
to open the Pictures Menu when the camera is
active. The menu can include the following options:
Tip: To assign a stored picture to a contact entry, open the
entry and press
Options > Edit > Customise > Picture. You cannot
assign pictures to entries stored on your SIM card.
Option Description
Go To Pictures View pictures and photos stored on
your phone.
Go To Video Mode Capture and view videos stored on your
phone.
Internal View/
External View
Switch between the internal (self-
portrait) and external cameras.
Light On/Off Turn the camera light on and off.
Auto-Timer Set a timer for the camera to take a
photo.
Camera Setup Open the setup menu to adjust picture
and video settings.
Resolution: Set camera resolution to
MMS (160x120 pixels), Medium (320x240
pixels) or High (640x480).
Quality: Set the quality of the picture.
Shutter Tone: Activate a tone that sounds
when you take a photo (can be set to
None, Chimp, Quack, Flix, Boing, or Click).
Mirror: Flips the image horizontally in the
viewfinder.
Switch Storage
Device
Choose to store and see pictures on
your phone or memory card.
Free Space View memory space available for
storing pictures.
Option Description
7.2 Using Photos and Pictures
30 Camera
7.2 Using Photos and Pictures
You can send your photos to other mobile phone users or
email addresses, assign photos to specific contact entries,
and use them as wallpaper or screen saver images.
7.2.1 Downloading Pictures
Your phone may contain predefined photos, pictures, and
animations. You can download and store additional images
on your phone.
If you are unable to establish a network connection with
Vodafone live!, contact your service provider.
Note: The files that you download or receive as attachments
might have a copyright lock that keeps you from forwarding
them.
To download a picture from Vodafone live!, see page 48. To
store a picture from a message, see page 74.
7.2.2 Viewing and Managing Pictures
Note: Some files might have a copyright lock that keeps you
from saving them on external memory, forwarding them, or
editing them.
To view a photo, picture, or animation stored on your phone:
Tip: You can change the way your picture list displays using
the Pictures Setup option in the Pictures Menu.
Find the Feature
s
> My Files > Pictures
Press To
1 S up or down scroll to the picture
2 s view the picture
Press s to go to full screen
view. Press s to return to
normal view.
3 S
or
view the next/previous picture
Options open the Pictures Menu to perform
other options
Sending a Postcard 7.3
Camera 31
Press
Options
to open the Pictures Menu from the picture list. The
menu can include the following options:
Note: Send, Manage and Mark are only available for photos you
have taken or pictures you have downloaded.
7.3 Sending a Postcard
The Vodafone live! Postcard service allows you to send a
picture as an MMS, which will be delivered as a real postcard
to a street address. You can send a picture that you have just
taken, or a picture already saved to your phone. You can also
include a personal greeting to the postcard.
Option Description
Send Insert selected picture in a new
message.
Apply As Set the picture as your phone’s Wallpaper
or Screen Saver, or a Picture Caller ID.
Create New Capture a new picture or create an
album of stored pictures.
Print Print a picture to a Bluetooth printer.
Manage Select from Rename, Delete, Move or Copy To
for the current picture.
Mark Current: Mark the current picture to
move, copy, assign or delete it.
All: Mark all pictures to move, copy,
assign or delete them.
Categories Set up categories for grouping your
pictures.
Assign to Category Assign the current picture to a category.
Note: This option is only available if you
have created a category.
Free Space View memory space available for
storing pictures.
Properties File Details: View picture information.
Pictures Setup Open the setup menu to adjust picture
settings.
Find the Feature s > Messaging > Create Message
> live! Postcard
or > Contacts
> Forward by live! Postcard
Option Description
7.3 Sending a Postcard
32 Camera
You can also access this option after you have taken a
picture. Press Options and select Forward by live! Postcard.
Please note that the various steps when sending the postcard
may differ slightly depending on whether you are in the My
Files Menu, Contacts Menu or Messaging Menu. The following
describes the steps for editing the Postcard from the
Messaging Menu.
.
or > My Files > Pictures
Options
> Forward by live! Postcard
Find the Feature
s
> Messaging > Create Message
> live! Postcard
Press To
1 Options > Insert choose a picture to send
2 keypad keys enter your greeting text
Note:
The maximum length for the
greeting text is 200 characters.
If the intended recipient already contains complete address
information in the contacts, do the following:
3 Address select the address of the
recipient from your Contacts
Note: Only contact entries that
contain complete address
information will show in the list.
See “Inserting a new address
entry” on page 33 for inserting a
new address entry.
4 S up or down scroll to the name of the person
you wish to send the postcard to
5 s centre key select the recipient’s name
Note: You can select more than
one recipient for your postcard.
6 Send send the postcard when you
have inserted the picture and the
recipient(s) address(es)
Press To
Inserting a new address entry 7.3.1
Camera 33
7.3.1 Inserting a new address entry
If your Contacts does not have the intended recipient’s
address, insert a new address by selecting Address and then
Options > Enter Address. Define the following information:
Once you have entered all mandatory fields, press Done. Press
Send to send the postcard.
7.4 Recording Video Clips
To record a video on your phone:
The active viewfinder image displays.
Note: The number of clips remaining is only an estimate.
Option Description
First Name: enter the recipient’s first name
(mandatory)
Last Name: enter the recipient’s last name
(mandatory)
Additional
information:
enter any other information
Address: enter the house name or number and
street name (mandatory)
City: enter the city name (mandatory)
State: enter the state name (optional)
Postal Code: enter the postal code (optional)
Country: enter the country name (optional)
Find the Feature s > Video
VIDEO
CLIP
AREA
Area displays
video options
Options Back
Press
S
up or
down to scroll
through available
options.
Press
S
left or
right to set value
for available
options.
Open the
Videos Menu
.
Back to
previous
screen.
Press
S
to
display the
video options.
7.5 Using Video Clips
34 Camera
Point the camera lens at the video subject, then: Press
Options
to open the Videos Menu when the camera is active.
The menu can include the following options:
7.5 Using Video Clips
You can download video clips with Vodafone live!, and
receive video clips in multimedia messages.
7.5.1 Downloading Video Clips
To download a video clip with Vodafone live!, see page 48. To
store a video clip from a message, see page 74.
Press To
1 s or the
camera key
start the video
Tip: You can press the Pause key to
pause video capture.
2 Stop key stop the video
3 Options
> Store Only
to store the video
To play a stored video, see page 34.
or
Send key to send the video in a message
or
Options
> Discard
delete the video and return to active
viewfinder
Option Description
Go To Videos View videos stored on your phone.
Internal View/
External View
Switch between the internal (self-
portrait) and external cameras.
Videos Setup Open the setup menu to adjust picture
and video settings.
Free Space See how much memory remains for
storing videos.
Viewing and Managing Video Clips 7.5.2
Camera 35
7.5.2 Viewing and Managing Video Clips
To play a video clip stored on your phone:
During video clip playback, press
Options
to open the Videos
Menu to perform various operation on the video:
7.6 Making Video Calls
With your phone you can make a video call to someone else
who has a video phone and see each other while you talk.
Please note that both parties participating in the video call
have to be on the 3G network and in the 3G coverage area.
Find the Feature
s
> My Files > Videos
Press To
1 S up or down scroll to the video clip
2 s start video clip playback
Option Description
Play Full Screen Stretch the video to fill the display.
Send Insert selected video in a new
message.
Create New Video Capture a new video.
Manage Select from Rename, Delete, Move or Copy
To for the current video.
Mark Current: Mark the current video to
move, copy, assign or delete it.
All: Mark all videos to move, copy,
assign or delete them.
Free Space View memory space available for
storing pictures.
Properties File Details: View picture information.
Videos Setup Open the setup menu to adjust video
settings.
Option Description
7.6.1 Making a Video Call
36 Camera
7.6.1 Making a Video Call
A quick guide to making a video call:
Options During an Active Video Call
Swapping Views
During an active video call, there are two video areas on your
phone display. The primary video area shows your image (or
the selected Camera Off Image) and the secondary video area
shows your recipient’s image. You can swap between the
video areas to place your image onto the secondary video
area, and the recipient’s image onto the primary video area.
Selecting Applications
During an active video call, you can access other
applications, such as Contacts, Calendar, My Files or Vodafone live!.
You can also send and receive messages during a video call,
or start a new video call.
Video Call Menu
Some of the options accessed from the Video Call Menu during
an active call include the following:
Press To
1 keypad keys dial the phone number
2 make the call
3 end the call and “hang up” the phone
when you are finished
Press To
Swap View swap between the primary and
the secondary video area during
a video call
Press To
More Apps access other applications during
a video call
Find the Feature Options > Video Call Menu
Press To
Select Application access applications during an
active call, such as Contacts,
Calendar or Vodafone live!
Camera On/Cam. Off change whether you want the
Camera to be on or off
Recording a Video Call 7.6.2
Camera 37
7.6.2 Recording a Video Call
Note: Recording of phone calls is subject to varying country
laws regarding privacy and recording of phone
conversations. Always obey the laws and regulations on the
use of this feature.
External View/Internal View If the Camera is on, select the
view from which the image is
captured.
Hold/Resume If the Camera is off, put audio on
hold to be able to e.g. change
different image as your Camera Off
Image. Select Resume to return to
the Video Call Menu.
Audio Mute/Unmute Audio stop sending video image
temporarily. Select Unmute Audio to
resume sending the video image
Swap View change between the primary and
secondary video area on your
phone display
Brightness/Contrast adjust the brightness/contrast
level of the display. This does not
affect the outgoing video image.
Press To
Setup set up camera settings:
Mirror: Camera captures a
“mirror” image (only applicable
in Internal View)
Status Icons: Turn status icons On/
Off in the viewfinder
Lighting Conditions: Setup the
display: Automatic, Sunny, Cloudy,
Indoor, or Night
Press To
7.6.2 Recording a Video Call
38 Camera
You can record a video call as a video clip. During a video
call:
Note: Video recording requires video compatibility with the
other caller’s video phone.
Press To
1 Options
> Record
start recording the call
Your phone displays Recording. It
records incoming video and incoming
and outgoing audio.
2 Options > Stop stop recording and store the video clip
The recording stops automatically if
the call ends or you reach your video
capture or memory limit.
To view the video clip see page 34.
Using and Transferring Files 8
Using and Transferring Files 39
8Using and Transferring Files
You can store, send, and play music, videos, and other media
files on your phone.
8.1 Downloading Media Files
To download music files:
To download other media, follow the instructions above but
replace Sounds with the type of media you want.
8.2 Playing or Viewing Media Files
To play music:
For more about playing music files, see page “Audio Player”
on page 40.
To play or view other media, follow the instructions above
but replace Sounds with the type of media you want.
Tip: You can listen to tunes on your way. Use flight mode to
make your phone safe to use even while you’re on a plane.
See page 89.
8.2.1 Viewing a full screen picture
To view a picture without any icons or soft keys showing on
the screen:
8.3 Sending Media Files
To send music:
Highlight the file you want to send and press Options > Send
> in Message.
Find the Feature s > My Files > Sounds
> Download Sounds
Find the Feature s > My Files > Sounds
and select the file you want
to play
Press To
s
view as full screen
S up or down
scroll through all the pictures as
full screen
s
return to normal view
Find the Feature s > My Files > Sounds
8.4 Audio Player
40 Using and Transferring Files
To send other media, follow the instructions above but
replace Sounds with the type of media you want.
8.4 Audio Player
You can’t use the audio player with a USB cable connected to
your phone.
Press S up or down to highlight an option:
Find the Feature s > My Files > Sounds
select the file you want to
play
Press To
S left
go to the previous file
S right
go to the next file
S down
stop
S up
continue playing
Option Description
Send Copy the file to My Album.
Apply as Ringtone Use as your phone’s ringtone.
New Create a new playlist.
View Details: View the sound file’s
information.
View Free Space: View memory space
available for storing sounds.
Manage Copy To: Copy file to another location.
Note: Manage is only available for files
that are not copyright locked.
Mark Current: Mark the current sound file to
move, copy, assign or delete it.
All: Mark all the sound files to move,
copy, assign or delete them.
Sounds Setup Open the setup menu to adjust sound
settings.
Digital Audio Player 8.5
Using and Transferring Files 41
To download songs to your phone, see page 49. To copy files
between your phone and a computer, see page 44.
Note: Your phone cannot play music files that have a bit rate
higher than 192 kbps. If you try to download or play one of
these files, your phone might show you an error or ask you
to delete the file.
8.5 Digital Audio Player
Your phone can play song files:
Use S to scroll up or down through the menu. Press s to
select an option. Use s to scroll up or down through
options. Press s to select an option. Press the appropriate
key of the S to choose a function of the audio player:
play , pause , stop , previous , next , repeat ,
shuffle , and visualiser on/off .
Tip: Once a song is chosen, you can go to Options to set the
repeat or shuffle function.
Press to stop the player.
Press S up or down to highlight an option:
Use Bluetooth Use a Bluetooth device to listen to the
music.
Hide Plays music in the background.
Find the Feature s > Entertainment
> Digital Audio Player
Option Description
options
Playlists Create or play a playlist of songs.
Artists Select an artist to show or play their
songs.
Albums Select an album to show or play its
songs.
8.6 Connecting Your Phone to Another Device
42 Using and Transferring Files
To download songs to your phone, see page 49. To copy files
between your phone and a computer, see page 44.
Note: Your phone cannot play MP3 files that have a bit rate
higher than 192 kbps. If you try to download or play one of
these files, your phone might show you an error or ask you
to delete the file. Metadata information is not supported for
MP4 formatted files."
Your phone also has a Sounds player that can play songs and
ring tones, but it cannot store playlists or other song
information. To use the Sounds player, press s > My Files
> Sounds and select the file you want to play.
8.6 Connecting Your Phone to Another
Device
You can connect your phone to a computer or
hand-held device using a USB cable or a
Bluetooth connection.
Note: Not all devices are compatible with all types
of connections. Check your external device for
specifications. The use of wireless devices and their
accessories may be prohibited or restricted in certain areas.
Always obey the laws and regulations on the use of these
products.
To make data calls through a connected computer, see
page 85.
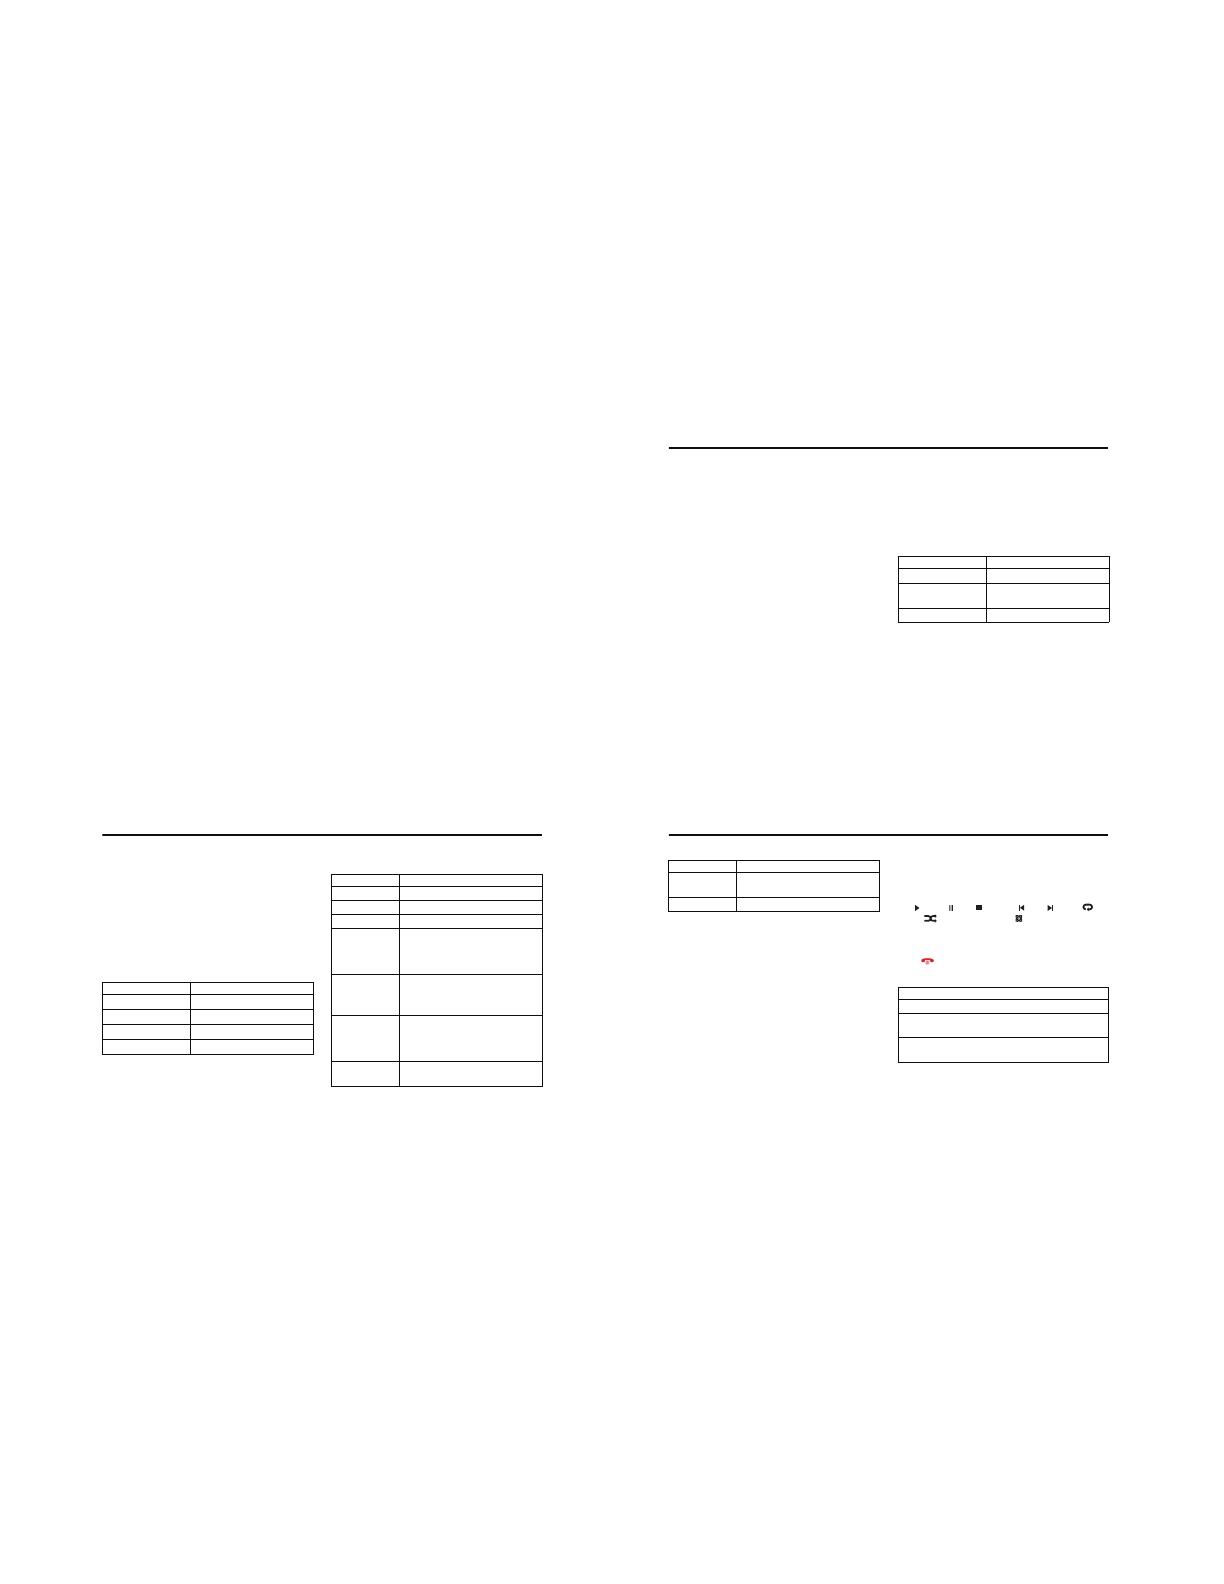
Songs Show and play individual songs.
Note: All of your phone’s songs appear
in the Songs list. Some songs do not
have any Artist, Album, or Genre
information stored, so they don’t
appear in those lists.
Genres Select a type of music to show or play
songs.
Help Show instructions on how to use the
audio player
About Show audio player version information
options
k
Setting Up a Cable Connection 8.6.1
Using and Transferring Files 43
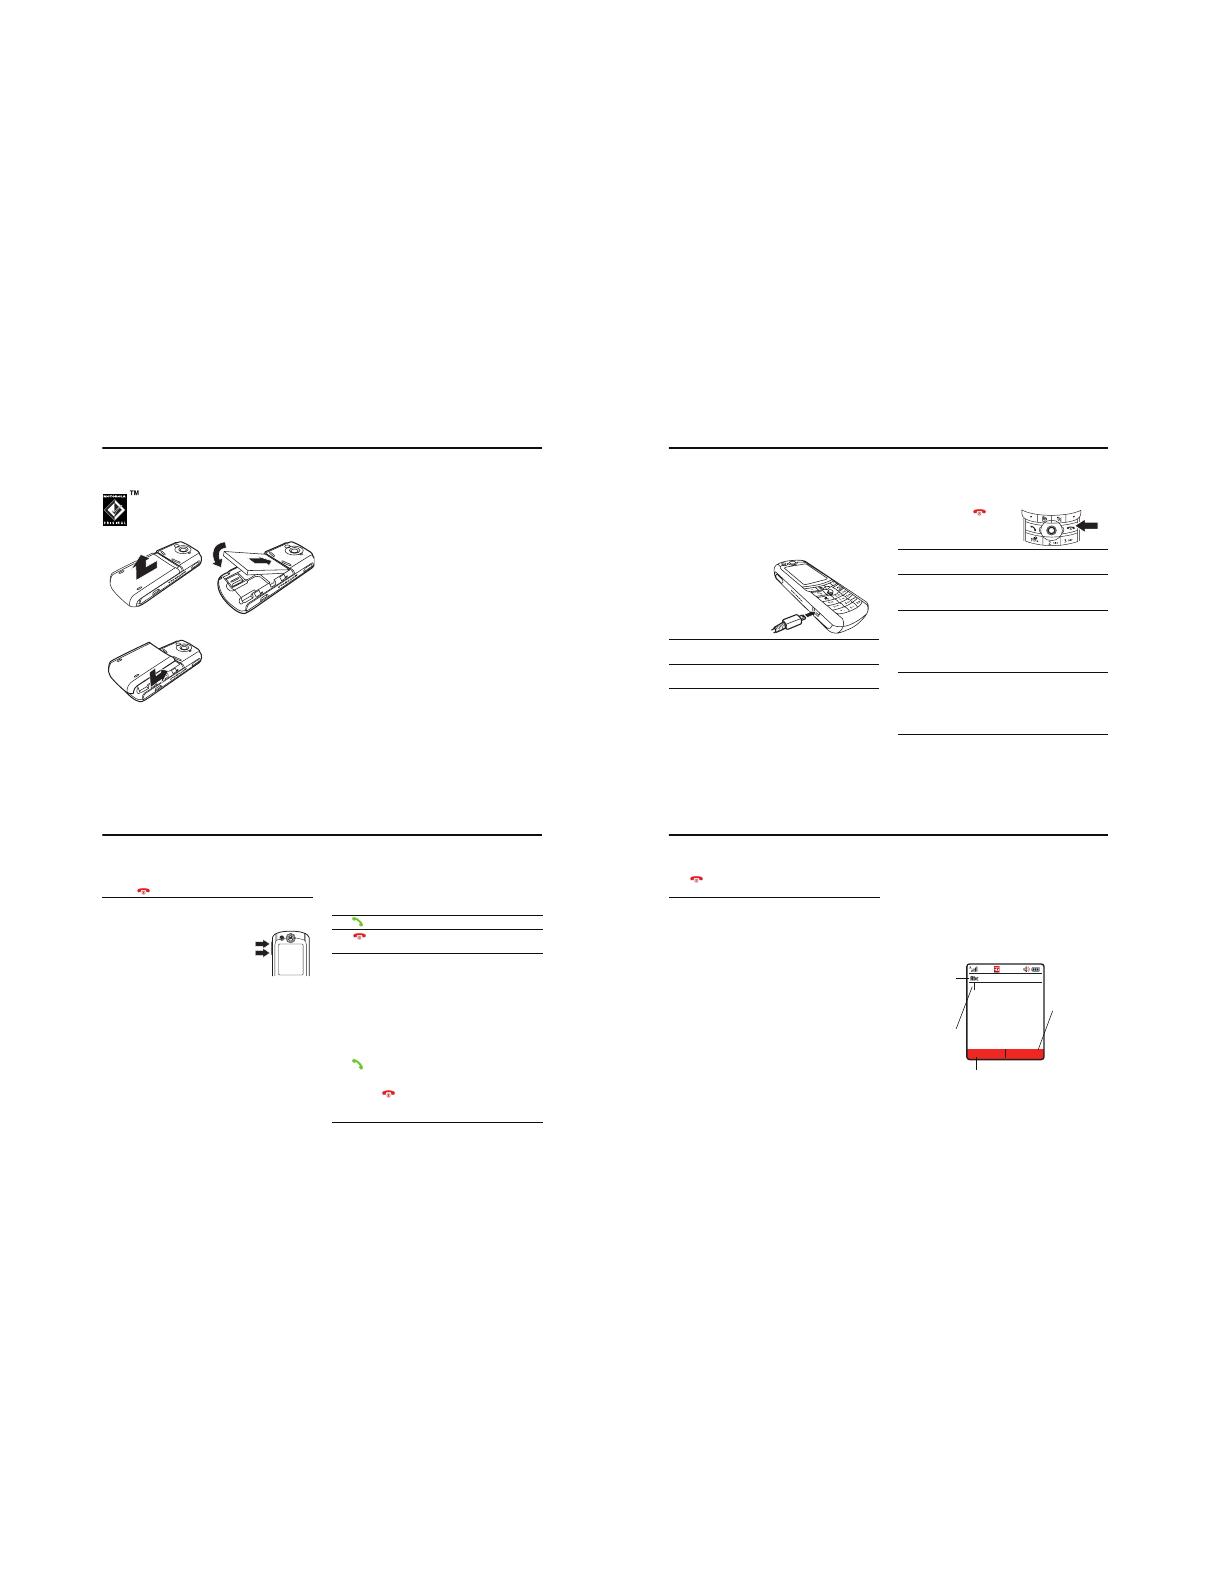
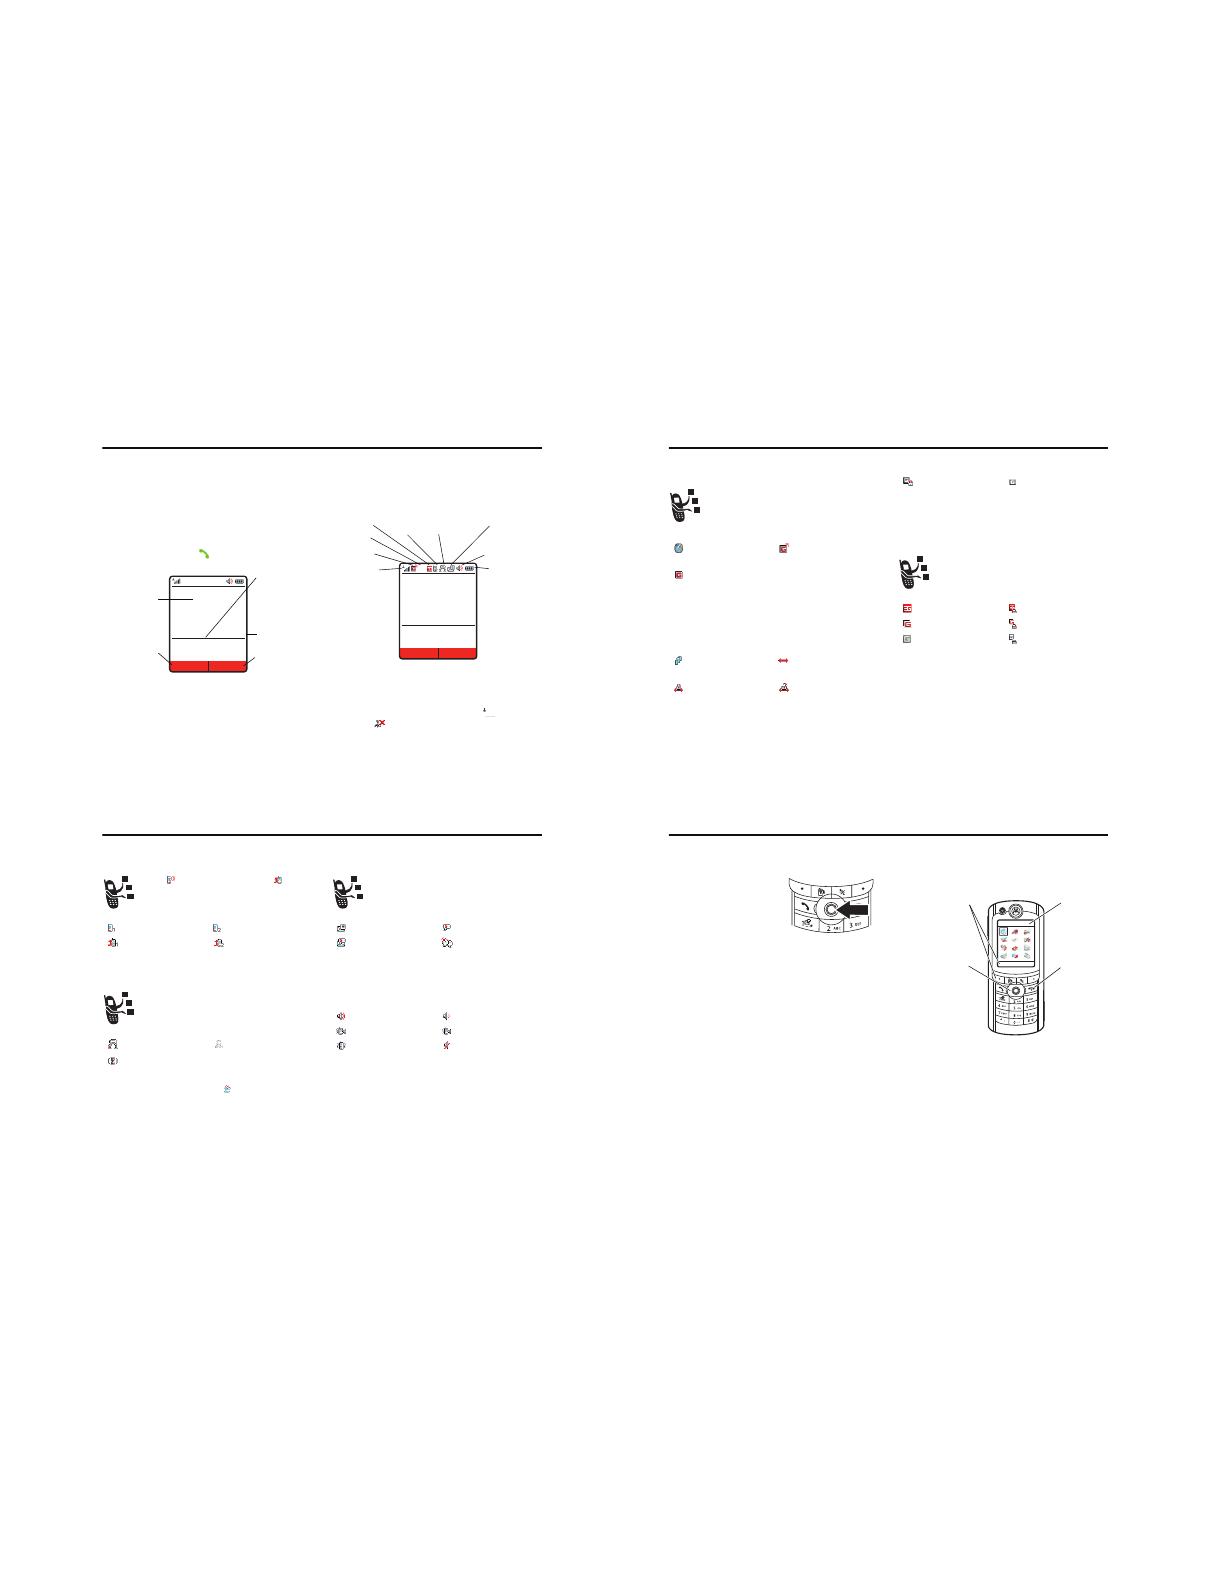
8.6.1 Setting Up a Cable Connection
Attach a Motorola Original™ USB cable to the phone and
external device as follows.
Note: Check your computer or hand-held device to determine
the type of cable you need.
8.6.2 Setting Up a Wireless Connection
For maximum Bluetooth security, you should always pair
Bluetooth devices in a safe, private environment. Your phone
supports Bluetooth
®
wireless pairing (also called linking or
bonding). You can pair your phone with a Bluetooth headset
or car kit, or pair your phone with a computer to exchange
and synchronise files.
Note: The use of wireless devices and their accessories may
be prohibited or restricted in certain areas. Always obey the
laws and regulations on the use of these products.
Turning Bluetooth Power On or Off
If Bluetooth Power is On, your phone can automatically pair
with the handsfree device you have used before. Just turn on
the device or move it near the phone.
Once you connect your phone to a Bluetooth device, your
phone "recognises" that device in the future. If a recognised
device starts a Bluetooth link with your phone, the Bluetooth
status icon appears at the top of your display.
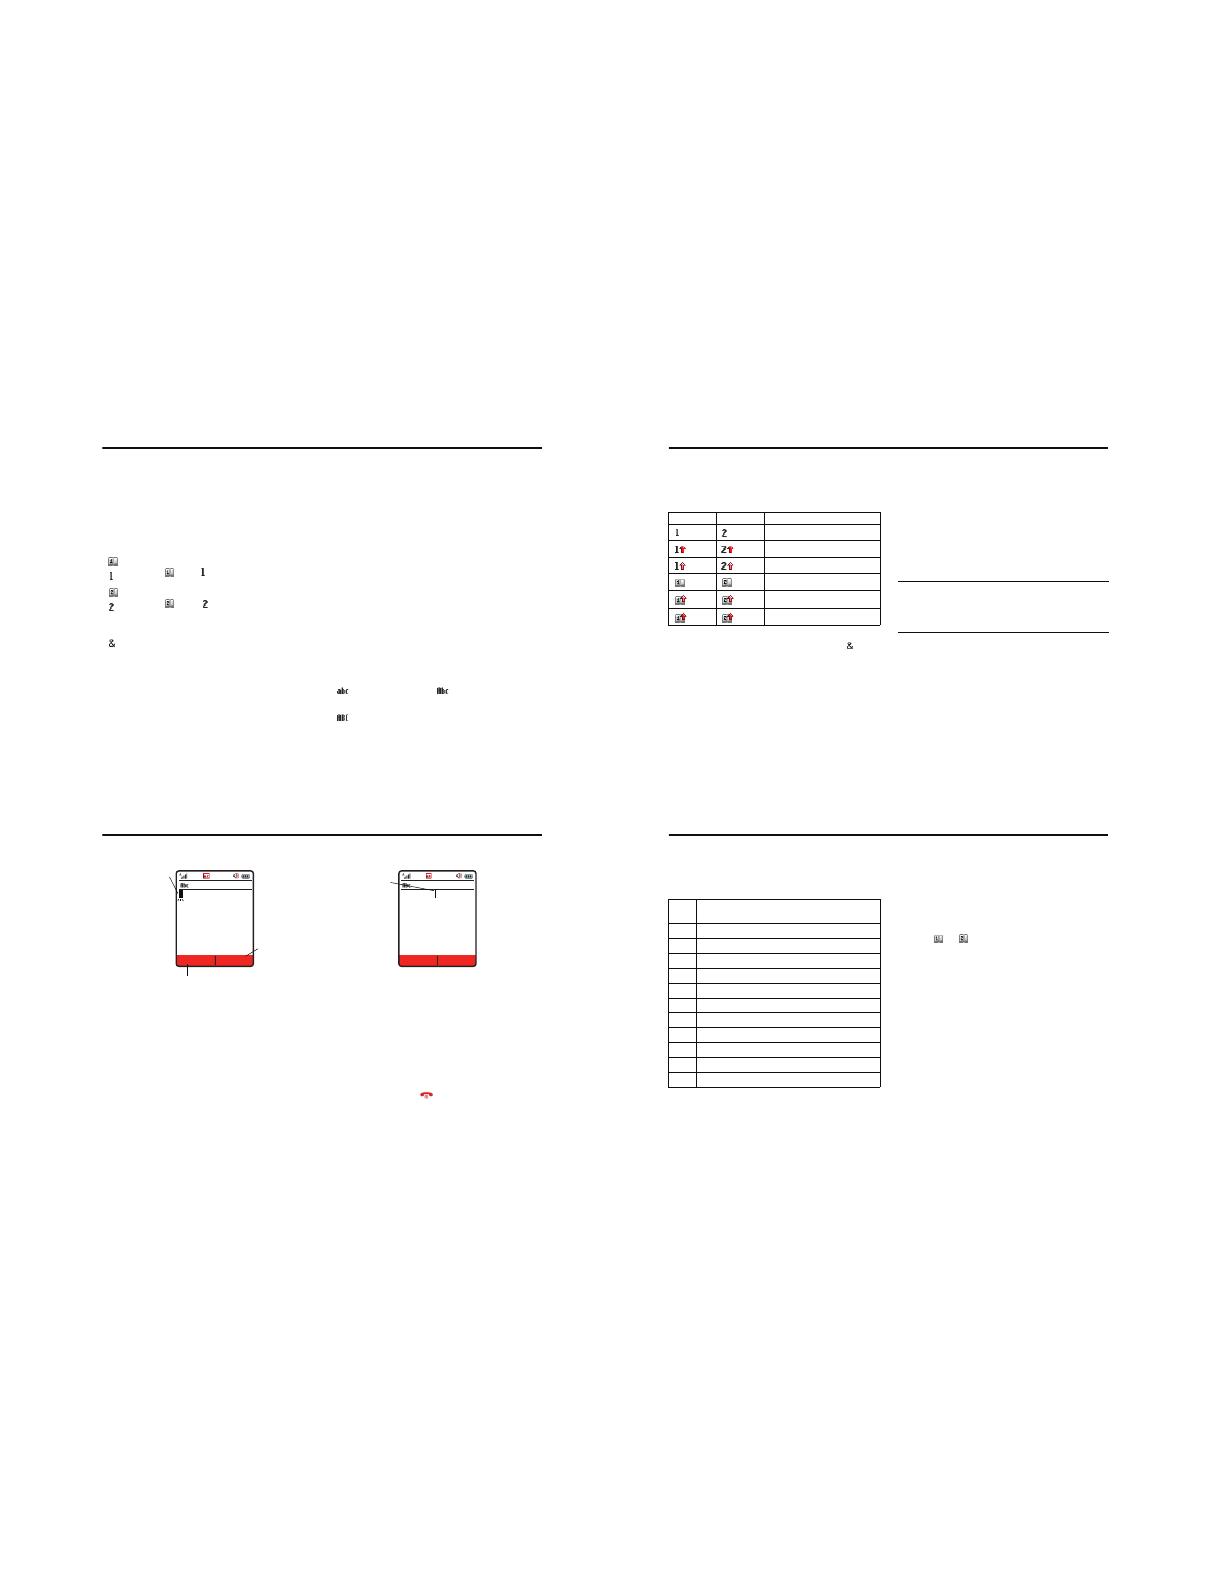
Action
1 Plug the end of the
cable with the
Motorola logo into the
phone’s accessory
connector port. Make
sure that the logo and
the phone are both
facing you.
2 Plug the other end—the USB connection—into the
USB port on the device.
Find the Feature s > Connection > Bluetooth > Setup
> Power > On
8.6.2 Setting Up a Wireless Connection
44 Using and Transferring Files
Note: To extend battery life, use the above procedure and set
Bluetooth Power to Off when not in use. Your phone will not
pair with devices until you set Bluetooth Power back to On and
pair your phone with the devices again.
Pairing With a Headset or Handsfree Device
Before you try to pair your phone with a device, make sure
the device is on and ready in pairing or bonding mode (see
the user’s guide for the device).
Your phone lists the devices it finds within range. Highlight a
device in the list and:
When your phone is paired, the Bluetooth indicator
E
shows
in the home screen.
Shortcut: After you paired with a device, you can pair with it
again by pressing Options > Use Bluetooth during a phone call or
while playing a sound file.
Note: You can’t play some copyrighted files over a Bluetooth
connection.
Tip: We can’t see the device you’re holding. For specific
information about a device, refer to the instructions that
came with it.
Copying Objects to Another Device
You can use Bluetooth pairing to copy a media
object, contact entry, calendar event, or bookmark
from your phone to a computer or other device.
Note: You cannot copy a copyrighted object.
1 Highlight the object on your phone that you want to
copy to the other device.
2 Press Options and select Copy (for media objects), Send (for
calendar events), or Share Contacts Entry (for contact
entries).
Find the Feature s > Connection > Bluetooth
> Audio Devices
> [Look For Devices]
Press To
1 Select select the device
2 Yes or Ok pair with the device
3 keypad keys enter the device passkey (such as
0000) if necessary, and then press the
Ok key
k
Setting Up a Wireless Connection 8.6.2
Using and Transferring Files 45
3 Select a recognised device name, or [Look For Devices] to
search for the device where you want to copy the object.
Sending Objects to a Printer
You can use Bluetooth pairing to send a picture,
message, phonebook entry or datebook view from
your phone to a printer.
Note: You can print A4 or US Letter size pages. To print
another size, copy the object to a linked computer and print it
from there. You can’t print Quick Notes, MMS Templates, or a
phonebook Mailing List.
Tip: After you capture a picture in the camera, you can press
the Store key and select Print and Store.
1 Highlight the object on your phone that you want to print
2 Press Options > Print. In the Calendar, you can print the
month, week or day.
3 If available, choose additional objects or print options.
4 Select a recognised printer name listed in the Printers
menu, or [Look For Devices] to search for the device to which
you want to send the object.
Advanced Bluetooth Features
A device is recognised after you pair with it once (see
page 43).
k
Features
Make
phone
visible to
other
device
Allow another Bluetooth device
to discover your phone:
s > Connection > Bluetooth > Find Me
Pair with
recognised
device
Pair your phone with a
recognised handsfree device:
s > Connection > Bluetooth
> Audio Devices > device name
Drop
pairing
with device
Highlight the device name and
press the Drop key.
k
k
k
8.6.2 Setting Up a Wireless Connection
46 Using and Transferring Files
Switch to
recognised
device
during call
During a call press
Options > Use Bluetooth to switch to a
recognised headset or car kit.
Your phone connects
automatically, or shows a list of
devices you can select.
Play sound
files on a
recognised
headset
While playing a sound file press
Options > Use Bluetooth to switch to a
recognised headset.
Your phone connects
automatically, or shows a list of
devices you can select.
Note: You cannot play some copyrighted
files over a Bluetooth connection.
Features
k
k
Move
multimedia
object to
device
Move a multimedia object to
another device.
Highlight the object, press Options
> Move, select the device name.
Caution: Moving an object deletes the
original object from your phone.
Edit device
properties
Edit the properties of a
recognised device.
Highlight the device name, press
the Edit key.
Note: The Access setting can restrict how
this device connects to your phone. You can
choose Automatic (always connects), Always
Ask (asks you before connecting), Just Once,
or Never.
Set
Bluetooth
options
Highlight the device name, press
s > Connection > Bluetooth > Setup
Features
k
k
k
Connecting a Memory Card to your computer 8.7
Using and Transferring Files 47
8.7 Connecting a Memory Card to your
computer
For details on installing a memory card see “Memory Card”
on page 14.
You can access your phone’s memory card with a PC.
Note: When your phone is connected to a computer, you can
only access the memory card through the computer.
On your phone:
1 Press s > Connection > USB > Memory Card. This directs the
USB connection to your memory card.
2 Attach the Motorola Original USB cable to the accessory
port on your phone and to an available USB port on your
computer.
Then follow these steps:
On your computer:
1 Open your “My Computer” window, where your phone’s
memory card shows as a ‘Removable Disk’ icon.
2 Click on the ‘Removable Disk’ icon to access the files on
your phone’s memory card.
3 To store the desired files onto the memory card, drag
and drop them as follows:
music files: > mobile > audio
screen savers: > mobile > picture
wallpapers: > mobile > picture
video clips: > mobile > video
4 When you finish, remove the device by selecting the
‘Safely Remove Hardware’ icon in the system tray at the
bottom of your computer screen. Then select ‘USB Mass
Storage Devices’ and ‘Stop’.
5 Select ‘USB Mass Storage Device’ then ‘OK’.
On your phone:
To return to Data as your USB default connection, press
s > Connection > USB > Data connection
9 Vodafone live!
48 Vodafone live!
9Vodafone live!
9.1 Vodafone live!
Your phone has been customised to give access to Vodafone
live!. Visit www.vodafone.com for additional information
about the services Vodafone live! offers.
To connect to the Vodafone live! service, press the Vodafone
live! key on your handset. If you have any problems
connecting to Vodafone live!, please contact Vodafone.
You have the following options while browsing:
You can also download pictures, videos, ringtones and
games from Vodafone live! and install them on your phone.
The Vodafone live! service allows you to access Web pages
and Web-based applications on your phone. If necessary,
please contact Vodafone to configure your phone.
Your phone will use a 3G connection when available,
bringing improved quality, sound, pictures and videos, as
well as increased speed when downloading games and
ringtones. This connection is indicated by a indicator.
Alternatively, your phone may use a high-speed General
Packet Radio Service (GPRS) network connection. This type
of connection is identified by a (GPRS) indicator in the
home screen that disappears when you start Vodafone live!.
If you see an (in-call) indicator during a Vodafone live!
session, your phone is using a standard voice connection.
The type of network connection your phone uses depends on
your service provider’s network. Your network connection
charges may vary depending on the type of connection used.
Note: Some features on your phone might open Vodafone
live! automatically.
Find the Feature
Press to connect
or
s
> Vodafone live!
> Vodafone live!
Option Description
Enter URL Go to a requested page.
Shortcuts View a list of shortcuts you have created.
Saved Pages View a list of pages you have saved.
History View a list of recently viewed pages.
Browser Settings Change Vodafone live! settings.
Starting Vodafone live! 9.1.1
Vodafone live! 49
9.1.1 Starting Vodafone live!
Shortcut: If you open a text message with a Web address
(URL) embedded in it, you can press
s > Go To to launch
Vodafone live! and go directly to the URL.
If you are unable to establish a network connection with
Vodafone live!, contact your service provider.
9.1.2 Interacting With Web Pages
9.1.3 Downloading Objects From a Web Page
You can download pictures, sounds, or other objects from a
Web page by selecting the link. You can store media objects
on your phone, and use them as wallpaper images, screen
saver images and event alerts.
Press To
1
or
Press s > Vodafone live!
> Vodafone live!
start Vodafone live!
2 S up or down scroll to a shortcut, service
or application
3 Select key select the item
Press To
S up or down
scroll through text, or highlight a
selectable item
Select key select the highlighted item
keypad keys, followed
by the Ok key
enter information
Tip: If you make a mistake, press
K to delete the last letter, or
press and hold K to clear all
letters.
Back key go back to the previous page
Options open the Browser Menu
9.1.4 Running Vodafone live! in the Background
50 Vodafone live!
Note:
The files that you download or receive as attachments
might have a copyright lock that keeps you from
forwarding them.
If you receive a call during the download, press the
More Apps key to answer the call without ending the
download.
To end a download in progress, press .
9.1.4 Running Vodafone live! in the
Background
Some phones are set up to run Vodafone live! in the
background when the phone registers with a network. This
lets your phone display information services messages sent
by your service provider (such as stock updates, news
headlines, or sports scores). These types of services
typically are available through subscription from your service
provider.
Setting Up Vodafone live! Messages
9.2 Live Cast
This feature may not be available in all countries.
Live Cast sends news headlines to your phone. If you are
interested in the item, you can click on the headline to view
the full article with the browser.
If there are no new messages then the headlines are hidden.
You can press the Live Cast key to make them appear. They
automatically reappear when a new headline is received.
Find the Feature
s
> Messaging
> Browser Messages
Options > MMS Setup > Service
Option Description
Off Stop all Vodafone live! messages.
Receive All Allow all Vodafone live! messages.
Restricted Allow only Vodafone live! messages
from your service centre number.
Turning Live Cast On and Off 9.2.1
Vodafone live! 51
9.2.1 Turning Live Cast On and Off
Note: When you turn off Live Cast you may also be asked if
you want to turn off cell broadcast. If you do this, then when
you reactivate Live Cast you also need to confirm that you
want to turn cell broadcast back on.
9.2.2 Setting Up Live Cast
You can set up Live Cast to suit your requirements.
Setting Ticker Speed
Set the speed at which the incoming headlines scroll across
your screen.
Selecting Channels
Choose the channels that send you headlines.
Selecting Number of Messages
Select how many messages are displayed on the home
screen.
Find the Feature
s
> Settings > Personalise
> Home Screen > Live Cast
> Turn On/Off
Find the Feature
s
> Settings > Personalise
> Home Screen > Live Cast
> Ticker Settings
Find the Feature
s
> Settings >Personalise
> Home Screen > Live Cast
> Channel Subscription
Find the Feature
s
> Settings > Personalise
> Home Screen > Live Cast
> Number of Messages
10 Learning to Use Your Phone
52 Learning to Use Your Phone
10Learning to Use Your Phone
See page 1 for a basic phone diagram.
10.1 Using the Display
The home screen is displayed when you are not on a call or
using the menu. You must be in the home screen to dial a
phone number. To dial a number from the home screen,
press the number keys and .
Note: Your home screen may look different from the display
shown above, depending on your service provider.
Labels at the bottom corners of the display show the current
soft key functions. Press the left soft key or right soft key to
perform the function indicated by the left or right soft key
label. For soft key locations see page 1.
The following status indicators can display:
1. Signal Strength Indicator
Vertical bars show the strength of the network connection.
You cannot make or receive calls when the (no signal)
indicator or (no transmit) indicator is displayed.
Date
Left Soft Key
Label
Clock
Right Soft Key
Label
Vodafone
18/03/05
Messaging V Live!!
Press S
right to see
more news,
if available.
News and graphics from
your Service Provider
12:00
Vodafone
18/03/05
Messaging V Live!!
News and graphics from
your Service Provider
12:00
5.
Active
Line
1.
Signal
Strength
2.
GPRS
3.
Data
4.
Roam
7.
Messages
8.
Ring Style
9. Battery
Level
6.
Messaging
Presence
S
Using the Display 10.1
Learning to Use Your Phone 53
2. GPRS Indicator
Shows that your phone is using a high-speed
General Packet Radio Service (GPRS) network
connection. GPRS allows faster data transfer
speeds. Indicators can include:
3. Data Transmission Indicator
Shows connection and data transmission status. Indicators
can include:
4. Roam Indicator
Shows when your phone is seeking or using
another network outside your home network.
Indicators can include:
= GPRS PDP context
activate
= GPRS attach
= GPRS packet data
available
= secure packet data
transfer
= unsecure packet data
transfer
= secure application
connection
= unsecure application
connection
= secure Circuit Switch
Data (CSD) call
= unsecure CSD call
E
= Bluetooth
®
connection
is active
= 3G home = 3G roam
= 2.5G home = 2.5G roam
= 2G home = 2G roam
10.1 Using the Display
54 Learning to Use Your Phone
5. Active Line Indicator
Shows to indicate an active call, or to
indicate when call diverting is on. Icons for dual-
line SIM cards can include:
6. Messaging Presence Indicator
Shows when Instant Messaging (IM) is active.
Indicators can include:
When a Java application is active, can display here.
7. Message Indicator
Displays when you receive a new message.
Indicators can include:
8. Ring Style Indicator
Shows the ring style setting.
9. Battery Level Indicator
Vertical bars show the battery charge level. Recharge the
battery when Low Battery displays and the battery alert
sounds.
= line 1 active = line 2 active
= line 1 active, call
divert on
= line 2 active, call
divert on
= IM active
= invisible to IM
= busy
= text message = voicemail message
= voice and text
message
= IM message
= loud ring = soft ring
= vibrate and ring = vibrate then ring
= vibrate = silent
Using the 5-Way Navigation Key 10.2
Learning to Use Your Phone 55
10.2 Using the 5-Way Navigation Key
Use the 5-way navigation key
(S) to scroll up, down, left, or
right in the menu system. Press
the centre of the key (s) to
select a highlighted menu item.
10.3 Using Menus
From the home screen, press s to enter the main menu.
Press S to scroll to and highlight a menu feature icon in the
main menu. The following icons may display in the main
menu, depending on your service provider and service
subscription options.
Select Back
Entertainment
Select highlighted
menu feature.
5-Way
Navigation Key
Scroll
up
,
down
,
left
or
right
.
Press centre
select button to
select highlighted
menu feature.
End Key
Exit menu
without
making
changes
Name of
Highlighted
Menu
Feature
Icon
10.3.1 Selecting a Menu Feature
56 Learning to Use Your Phone
10.3.1 Selecting a Menu Feature
To select a menu feature, starting from the home screen:
This example shows that from the home screen, you must
press s to open the menu, highlight and select Call Log,
then highlight and select Dialled Numbers.
Press the navigation key (S) up, down, left or right to
highlight items, and press it in (s) to select items. Press
the left/right soft keys to select the functions listed in the
bottom left and right corners of the display.
10.3.2 Selecting a Feature Option
Some features require you to select an option from a list:
Press S to scroll up or down to highlight the option
you want.
In a numbered list, press a number key to highlight the
option.
In an alphabetised list, press a key repeatedly to cycle
through the letters on the key and highlight the closest
matching list option.
When an option has a list of possible values, press S
left or right to scroll through and select a value.
Icon Feature Icon Feature
Entertainment Digital Audio Player/
SIM Tool Kit
Vodafone live! Contacts
Camera Video
Call Log Organiser & Tools
Messaging Connection
My Files Settings
Find the Feature
s
> Call Log > Dialled Numbers
Press the
Options
key to
see the
sub-menu
Options Back
Dialled Numbers
Highlighted
Option
Press
S
to
scroll down to
other options.
10] John Smith
9] Lisa Owns
8] Adda Thomas
7] Jack Bradshaw
6] Dave Thompson
5] John Smith
4] John Smith
3] John Smith
Using the Handsfree Speaker 10.4
Learning to Use Your Phone 57
When an option has a list of possible numeric values,
press a number key to set the value.
10.4 Using the Handsfree Speaker
When you activate your phone’s integrated handsfree
speaker, you can talk to the other party without holding the
phone to your ear.
Press the Speaker key to turn the handsfree speaker on or off
during a call.
When you turn the handsfree speaker on, your phone
displays Speakerphone On in the home screen. The handsfree
speaker remains on until you press the Speaker key again or
turn the phone off.
Note: The handsfree speaker is disabled when you connect
your phone to a handsfree car kit or headset accessory.
10.5 Changing a Code, PIN, or Password
Your phone’s 4-digit unlock code is originally set to 1234,
and the 6-digit security code is originally set to 000000. Your
service provider may reset these codes before you receive
your phone.
If your service provider has not reset these codes, we
recommend that you change them to prevent others from
accessing your personal information. The unlock code must
contain 4 digits, and the security code must contain 6 digits.
You can also reset your SIM card PIN code or PIN2 code, if
necessary. Your Personal Identification Number (PIN) code
protects the information stored on your SIM card.
To change a code or password:
10.6 Locking and Unlocking Your Phone
You can lock your phone manually or set the phone to lock
automatically whenever you turn it off.
To use a locked phone, you must enter the unlock code. A
locked phone still rings or vibrates for incoming calls or
messages, but you must unlock it to answer.
You can make emergency calls on your phone even when it is
locked (see page 68).
Find the Feature
s
> Settings > Security
> New Passwords
10.6.1 Locking Your Phone Manually
58 Learning to Use Your Phone
10.6.1 Locking Your Phone Manually
10.6.2 Unlocking Your Phone
Your phone’s unlock code is originally set to 1234. Many
service providers reset the unlock code to the last 4 digits of
your phone number.
At the Enter Unlock Code prompt:
10.6.3 Setting Your Phone to Lock
Automatically
You can set your phone to lock every time you turn it off:
10.7 If You Forget a Code, PIN, or
Password
Your phone’s 4-digit unlock code is originally set to 1234,
and the 6-digit security code is originally set to 000000.
Many service providers reset the unlock code to the last 4
digits of your phone number before you receive your phone.
Find the Feature
s
> Settings > Security
> Phone Lock > Lock Now
Press To
1 keypad keys enter your unlock code
2 Ok key lock the phone
Press To
1 keypad keys enter your unlock code
2 Ok key unlock your phone
Find the Feature
s
> Settings > Security
> Phone Lock > Automatic Lock
> On
Press To
1 keypad keys enter your unlock code
2 Ok key activate automatic lock
Locking and Unlocking Your Keypad 10.8
Learning to Use Your Phone 59
If you forget your unlock code, try entering 1234 or the last 4
digits of your phone number. If that does not work, at the
Enter Unlock Code prompt:
If you forget your security code, SIM card PIN code or PIN2
code, contact your service provider.
10.8 Locking and Unlocking Your Keypad
You can lock your keypad to prevent accidental key presses.
To lock your keypad, hold * for two seconds. To unlock it,
press the Unlock key (right soft key) then *.
Note: Incoming calls and messages unlock the keypad.
Press To
1 s display the unlock code bypass
screen
2 keypad keys enter your 6 digit security code
3 Ok key submit your security code
11 Setting Up Your Phone
60 Setting Up Your Phone
11Setting Up Your Phone
11.1 Storing Your Name and Phone
Number
To store or edit your name and phone number information on
your SIM card:
Shortcut: Press K# from the home screen to view or
edit your name and phone number.
Tip: If you want to see your phone number while you are on a
call press Options > My Tel. Numbers.
If you do not know your phone number, contact your service
provider.
11.2 Setting the Time and Date
Your phone uses the time and date for the Calendar.
To synchronise the time and date with the network, press s
> Settings > Initial Setup > Time and Date > Autoupdate > On.
To manually set the time and date, turn off Autoupdate, then,
press s > Settings > Initial Setup > Time and Date > time or date.
To choose an analogue or digital clock for your home screen,
press s > Settings > Personalise > Home Screen > Clock.
To turn the date on or off on your home screen, press s
> Settings > Personalise > Home Screen > Date.
11.3 Setting a Ring Style
Your phone rings or vibrates to notify you of an incoming call
or other event. This ring or vibration is called an alert.
You can select one of five different ring styles. The ring style
indicator in the display shows the current ring style (see
page 54).
To set a ring style:
Find the Feature
s
> Settings > Phone Status
> My Tel. Numbers
Find the Feature
s
> Settings > Initial Setup
> Time and Date
Find the Feature
s
> Settings > Ring Styles
> Style: style name
Setting a Wallpaper Image 11.4
Setting Up Your Phone 61
Each ring style contains settings for specific event alerts,
ringer ID, and ringer and keypad volume. To change these
settings, press s > Settings > Ring Styles > style Details.
If you select the Silent ring style, your phone will not use
Auto Answer (see page 84).
Java™ applications can make your phone vibrate or
light up. You can turn off App Vibration and App Backlight
under s > Settings > Java Settings.
To turn off alerts for messages that arrive during a call,
select s > Settings > In-Call Setup > MSG Alert > Not in Call.
11.4 Setting a Wallpaper Image
You can set a photo, picture, or animation as a wallpaper
(background) image in your phone’s home screen. The
wallpaper image displays as a faint watermark in text and
menu displays.
Your theme can set your wallpaper, see page 62.
When you set an animation as a wallpaper image, only the
first frame of the animation displays.
11.5 Setting a Screen Saver Image
The screen saver image displays when the phone is on and
no activity is detected for a specified time period.
Your theme can set your screen saver, see page 62.
Press To
1 S up or down scroll to the ring style
2 Select key select the ring style
Find the Feature
s
> Settings > Personalise
> Wallpaper
Setting Description
Picture Select the picture or animation for the
background image in your home screen, or
None for no wallpaper.
Layout Select:
Centre to centre the image on the display
Tile to repeat the image across the display
Fit-to-screen to stretch the image across the
display.
11.6 Setting a Theme
62 Setting Up Your Phone
Tip: This feature helps save your screen, but not your
battery. To extend battery life, turn off the screen saver.
You can set a photo, picture, or animation as a screen saver
image. The image shrinks to fill the display, if necessary. An
animation repeats for one minute, then the first frame of the
animation displays.
11.6 Setting a Theme
A theme is a group of image and sound files that you can
apply to your phone. Most themes include a wallpaper
image, screen saver image, and ringtone. Your phone may
come with some themes, and you can download or create
more.
To apply a theme, press s > My Files > Themes > theme.
To create a theme, press s > My Files > Themes, then press
Options > Create New.
To edit a theme, press s > My Files > Themes, highlight the
theme, then press Options > Edit.
Note: You cannot edit themes with (custom) after their
names. The (custom) means that you changed a theme
element (such as wallpaper) in another phone menu.
To delete a theme, press s > My Files > Themes, scroll to the
theme, and press Options > Delete or Delete All.
Note: You can delete only the themes you created or
downloaded.
Find the Feature
s
> Settings > Personalise
> Screen Saver
Setting Description
Picture Select the picture or animation for your
screen saver or None for no screen saver.
Delay Select how long your phone must be
inactive before the screen saver picture
displays.
Note: If this setting is longer than your
Display Timeout setting, then your display will
turn off before you see the screen saver.
Setting Display Appearance 11.7
Setting Up Your Phone 63
11.7 Setting Display Appearance
To choose a phone skin that sets the look and feel of your
phone’s display.
Your theme can set your phone’s skin see page 62.
To set your display brightness
You can set the amount of time that the display and keypad
backlights remain on, or turn off backlights to extend battery
life.
Caution: The Continuous setting can decrease battery life.
Note: To turn the backlight on or off for Java applications,
press s > Settings > Java Settings > App Backlight.
You can set the display to turn itself off when no activity is
detected for a specified time period.
11.8 Setting Answer Options
The Multi-Key option lets you answer incoming calls by
pressing any key.
Find the Feature
s
> Settings > Personalise
> Skins Menu
Find the Feature
s
> Settings > Initial Setup
> Brightness
Find the Feature
s
> Settings > Initial Setup
> Backlight
Find the Feature
s
> Settings > Initial Setup
> Display Timeout
Find the Feature
s
> Settings > In-Call Setup
> Answer Options > MultiKey
  • Page 1 1
  • Page 2 2
  • Page 3 3
  • Page 4 4
  • Page 5 5
  • Page 6 6
  • Page 7 7
  • Page 8 8
  • Page 9 9
  • Page 10 10
  • Page 11 11
  • Page 12 12
  • Page 13 13
  • Page 14 14
  • Page 15 15
  • Page 16 16
  • Page 17 17
  • Page 18 18
  • Page 19 19
  • Page 20 20
  • Page 21 21
  • Page 22 22
  • Page 23 23
  • Page 24 24
  • Page 25 25
  • Page 26 26
  • Page 27 27
  • Page 28 28
  • Page 29 29
  • Page 30 30
  • Page 31 31

Motorola E770 Owner's manual

Category
Mobile phones
Type
Owner's manual
This manual is also suitable for

Ask a question and I''ll find the answer in the document

Finding information in a document is now easier with AI