Page is loading ...

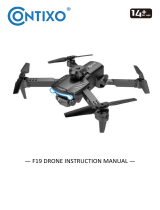
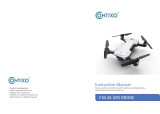
— F16 DRONE INSTRUCTION MANUAL —

Preface
------------------------------------------------------------
1
Safety Precauons
--------------------------------------------------------
1
What’s in the Box
--------------------------------------------------------
4
Remote Control Funcons
-------------------------------------
-----------------------------------------------
-------------------------------------
4
Drone Diagram
--------------------------------------------------
6
10
18
24
25
Flight Path
--------------------------------------------------
--------------------------------------------------
--------------------------------------------------
20
Palm follow
--------------------------------------------------
20
Flight
--------------------------------------------------
11
Install the Conxo F16 App
Camera Funcons
19
--------------------------------------------------
Follow Me Mode
19
--------------------------------------------------
Selfie Mode
Specificaons
Trouble Shoong
-----------------------------------------------
25
Technical Support
Entertainment mode
--------------------------------------------------------
21
Gravity Control Mode
--------------------------------------------------------
22
Gallery
--------------------------------------------------------
22

PREFACE:
Thank you for Purchasing the Conxo F16 RC Drone
The Conxo F16 Drone is a mini quadcopter that’s purposely built for drone
applicaon developers to enable you to get your custom applicaons airborne
quickly.
This development plaorm is intended to be modified by developers according to
their professional judgment. Conxo F16 drone will be shipped with pre-configured
default sengs from the factory, and will have the opon to be customized. There
are no operaonal limitaons to the kit. Developers are responsible for tesng and
ensuring the safety of their configuraon, and establishing the operang limits of
those configuraons.
F16 Drone is designed and engineered by Conxo, Inc. in Southern California,
USA. Made in China.
IMPORTANT:
Please read the instrucons carefully before allowing children, teenagers, and adults
to operate the drone. Adult supervision is advised.
SAFETY PRECAUTIONS:
Safety: F16 drone was designed and manufactured with safety in mind. Your safety
also depends on proper training and thoughul operaon. Do not set up, operate,
perform maintenance, or repair the drone without first reading and understanding
this manual and the labels on the unit.
Owner Responsibility: In order to maintain your drone properly and to ensure
operator safety, it is the responsibility of the drone owner to read and follow
these instrucons:
Follow all setup, operaon, and maintenance instrucons.
Read and follow all safety instrucons. Keep them readily available for operators.
Make sure all operators are properly trained, know how to safely operate, and are
properly supervised.
Do not operate the drone unl you are certain that all parts are in place and
operang correctly.
Carefully inspect the drone on a regular basis and perform all maintenance as
required.
Service and maintain the drone only with approved replacement parts.
Keep all instrucons with the product.
Only use this product if it can be used safely!
- 1 -

WARNING: THIS PRODUCT SHOULD ONLY BE USED BY ADULTS AND
TEENAGERS 14 YEARS AND OLDER. ADULT SUPERVISION REQUIRED
FOR CHILDREN UNDER 14 YEARS OF AGE.
WARNING: CHARGING THE DRONE BATTERY MUST BE SUPERVISED
AT ALL TIMES BY AN ADULT. UNPLUG THE BATTERY WHEN FULLY
CHARGED. DO NOT OVER-CHARGE THE BATTERY.
Thank you for Purchasing the Conxo F16 RC Drone
The Conxo F16 Drone is a mini quadcopter that’s purposely built for drone
applicaon developers to enable you to get your custom applicaons airborne
quickly.
This development plaorm is intended to be modified by developers according to
their professional judgment. Conxo F16 drone will be shipped with pre-configured
default sengs from the factory, and will have the opon to be customized. There
are no operaonal limitaons to the kit. Developers are responsible for tesng and
ensuring the safety of their configuraon, and establishing the operang limits of
those configuraons.
F16 Drone is designed and engineered by Conxo, Inc. in Southern California,
USA. Made in China.
IMPORTANT:
Please read the instrucons carefully before allowing children, teenagers, and adults
to operate the drone. Adult supervision is advised.
SAFETY PRECAUTIONS:
Safety: F16 drone was designed and manufactured with safety in mind. Your safety
also depends on proper training and thoughul operaon. Do not set up, operate,
perform maintenance, or repair the drone without first reading and understanding
this manual and the labels on the unit.
Owner Responsibility: In order to maintain your drone properly and to ensure
operator safety, it is the responsibility of the drone owner to read and follow
these instrucons:
Follow all setup, operaon, and maintenance instrucons.
Read and follow all safety instrucons. Keep them readily available for operators.
Make sure all operators are properly trained, know how to safely operate, and are
properly supervised.
Do not operate the drone unl you are certain that all parts are in place and
operang correctly.
Carefully inspect the drone on a regular basis and perform all maintenance as
required.
Service and maintain the drone only with approved replacement parts.
Keep all instrucons with the product.
Only use this product if it can be used safely!
frequency energy. If not installed and used in accordance with the instrucons,
the equipment may cause harmful interference to radio communicaons.
NOTE: This equipment has been tested and found to comply with the Federal Code
of Regulaon for a class b digital device, pursuant to part 15 of the FCC rules. These
limits are designed to provide reasonable protecon against harmful interference
in a residenal installaon. This equipment generates, uses, and can radiate radio
• However, there is no guarantee that interference will not occur in a parcular
installaon. If your equipment does cause harmful interference to radio or
television recepon(which can be determined by turning the equipment off and
on), the user is encouraged to try to correct the interference by one or more of
the following measures:
• Please note that changes or modificaons not expressly approved by the
party responsible for compliance could void the user’s authority to operate
the equipment.
• Adjust or reposion the receiving antenna.
• Increase the distance between the equipment and receiver.
• Connect the equipment into an outlet with a circuit different from that to which
the receiver is connected.
• Consult the dealer or an experienced radio/TV technician for help.
- 2 -
NO FAA LICENSE NEEDED!

Flight Safety
Fly in Open Maintain Line
Areas
of Sight
Avoid flying over or near obstacles, crowds, high voltage power lines, trees,
Recommended for indoor use or flying below 16 feet (5m).
airport s or water.
DO NOT fly near strong electromagnec sources such as power lines and
base staons as it may affect the onboard compass.
DO NOT use the drone in adverse weather condions such as rain, snow,
fog and wind speeds.
No Fly Zone
Stay away from the rotang
propellers and motors.
- 3 -

Remote Control Funcons
What’s in the Box
It’s important to understand basic flight guidelines for the safety of both
you and those around you. Don’t forget to read the safety guidelines
before flight.
·
1 Drone
·
2 Baeries
·
4 Propeller Blades
·
4
Propeller Guards
·
4
Landing Gears
· 1 Instrucon Manual
· 1 Warranty Card
· 1 USB Cable
· 1 Screwdriver
· 4 Screws
- 4 -
7
9
8
10
13
4
5
6
2

Indicator Light
Flashing red: Remote control is searching for drone signal
Steady red: The remote control is successfully connected to the drone
1. Power buon:
2. Throle Sck
3. Direcon Sck
4. 1-Key Landing
5. 1-Key Take-off with Auto-Hover
6. Fine-tuning on the le
7. Fine-tuning on the right
8. Fine-tuning forward
9. Fine-tuning backward
10. Smartphone Clip
11. Short-press to 3D roll, long-press to emergency stop
12. Short-press to enter headless mode, long-press to 1-key Return-to-Home
13. Click to switch between three speed modes
ON – Click Once, Red Light Comes flashing
OFF – Click Once, Red Light Turns Off
- 5 -
11
1312

- 6 -
Drone Diagram
1. HD Camera
2. Propeller
3. Propeller Motor
4. LED Indicator
5. Power Buon
6. Opcal Flow Camera
①. Drone Unfold
1. Unfold the front arm first.
2. Then unfold the back arm.
(Aenon: The back arms need to be extended from the boom up)
1
2
3
4
5
1
2
6

- 7 -
1. Install the Propellers
②. Drone Fold
1. Fold the back arm first.
2. Then fold the front arm.
(Aenon: The back arms need to be stowed from top to boom)
Tip! Both the propellers and motors are marked with A, B (propeller A with motor
A, propeller B with motor B).
A
B
B
A
1
2

2. Intelligent Flight Baery
3. Charge the Baery
4. Lithium Baery Charging Instrucons
a. Charging: Insert the USB cable into the USB port of the charger and connect
to the charging port of the baery to charge.
The indicator on the cable will turn to a solid red when charging. When fully
charged, the indicator on the cable will come off.
b. The drone can be charged by a travel or car charger.
c. The drone baery takes about 60-80 minutes for a full charge. Flight me
may vary from 11 to 13 minutes depending on how the drone is being used.
— To power ON, long-press the buon. To power OFF, long-press the buon.
— When the baery is at low power, the power indicator will start flashing.
At this me, return the drone immediately and charge the baery to avoid
unnecessary power failures.
Phone Charger Adapter:
5V/1A(Not included)
Charging Time:
About 80 minutes
- 8 -
Unlock the baery and pull out from the drone.

- 9 -
Install the propeller guard on the arm and ghten the screws.
5. Installaon
Install the
landing gear
to the corresponding interface.

- 10 -
Connect the front and rear propeller guard on the same side together.
Conxo F16
Install the Conxo F16 App
Search “Conxo F16” applicaon in APP Store.
Search “Conxo F16” applicaon in Google Play Store.
Required Operang Systems: IOS 8.0 or higher / Android 5.0 or higher.

- 11 -
Step 3: Connect App
— Connect your smartphone to the WiFi of the drone and check the drone’s
status on the “Conxo F16” app.
— Open the “Conxo F16” applicaon on your smartphone to access the
control interface.
Conxo - F16 - XXXX
F16
Step 2: Turn On the Remote Control & Pair with Drone
Click the power buon of the remote control to power on the remote control.
Then push the le joysck up then down. When the drone light stops blinking
and changes to a steady light, pairing is successful.
Throle Joysck
NOTE: You can connect to the drone WiFi signal at this me to view the
current drone on the Conxo F16 app.
Flight
Step 1: Turn on the drone and put down on a level surface
Turn on the drone and the lights of the drone will start blinking. Place the drone
on a level surface.

- 12 -
Direcon Joysck
Le Hand Mode Operang Method
Throle Joysck
T
u
r
n
L
e
UP
DOWN
T
u
r
n
R
i
g
h
t
F
o
r
w
a
r
d
Le
Right
B
a
c
k
w
a
r
d
Step 4: Click the seng buon to select the control mode and the quality of
picture and video

Then select the picture and video quality.
Click “ ” then click “START”.
- 13 -
Right Hand Mode Operang Method
UP
DOWN
T
u
r
n
L
e
T
u
r
n
R
i
g
h
t
F
o
r
w
a
r
d
Le
Right
B
a
c
k
w
a
r
d
Throttle Joystick Direction Joystick

Step 5: Reset to Factory Seng/Calibrate Gyroscope
— Push the joyscks into the 7 o’clock (le joysck) & 5 o’clock (right joysck)
posion.
— Lights will rapidly blink and change to a steady light.
1. Gravity Control Mode
2. Hand Gesture
3. Switch Front and Boom Camera
4. Follow Me Mode
5. Palm Follow
6. VR Split Screen
7. Headless Mode
8. Flight Path
9. Flip Screen
10. Hide/Display Buon
11. Switch Speed
12. Take Photo
13. Take Video
14. APP Control On/Off
15. Exit
16. Calibrate Gyroscope
17. Gallery
18. Entertainment Mode
19. One Key Take-off/Landing
20. Adjust Perspecve
- 14 -
APP Introducon
Or click “ ” on the app when the drone is under APP control.
12 3 4567 8 9 10
11
15
16
17
18
19
20
12
13
14

- 15 -
Take-off/Landing
Once the lights are all steady, you are ready to fly!
Landing
— Red (rear) and white (front) lights are all solid (no blinking).
Press the 1-Key landing buon or click “ ” on the app when the drone is
under APP control.
Take-off
Press the 1-Key Take-off buon or click “ ” on the app when the drone is
under APP control.
Rotang propellers can be dangerous. DO NOT start the motors when
there are people nearby.

- 16 -
The Return to Home (RTH) funcon brings the drone back to the Take Off Point.
When the drone is doing the Return to Home feature, it will fly straight back to
the home (take-off) posion according to the current drone altude. Please make
sure there is no objects (buildings or trees) in the area. It will then locate the home
(take-off) posion and then descend to the starng point.
Return-to-Home (RTH)
Return-to-home Feature Descripon
Long press “ ” buon for One-key Return To Home.
Warning: When using the emergency stop feature during flying operaon, it may
cause damage if the drone crashes or can injure people underneath the drone.
Emergency Stop: Long press ” ” buon and the drone will immediately shut
off and stop flying. An air-born unit will drop from the sky.
3D Roll: Short press “ ” buon and push the direcon joysck le or right.
The drone will roll in the air in the corresponding direcon
3D Roll/Emergency Stop
About 5 feet

Headless Mode
Don’t change your direcon. Don’t change your direcon.
The direcon of control when the drone is paired.
1. The drone defaults to Normal Mode when the drone and remote control are
matched successfully. Click “ ” buon to enter into Headless mode.
Click “ ” buon again to exit Headless mode. Or click “ ” on the app
when the drone is under APP control.
2. Normal Mode: Before takeoff, the white lights on the drone indicate the
forward-facing direcon.
3. Headless Mode: Before takeoff, the white lights on the drone indicate
the forward-facing direcon. When the drone rotates in flight, the flight
direcon is not changed.
- 17 -

While in Headless Mode, the forward direcon is the direcon the pilot faces when
the pilot pairs the drone with the remote control. If the pilot pushes the direcon
joysck forward, the drone will fly forward. If the pilot pushes the direcon joysck
backward, the drone will fly towards him/her. If the pilot moves the right sck le
or right, then the drone will also move le or right, relave to the pilot. It is very
important that the pilot does not change posions or the direcon he or she is
facing because this will cause misdirecon of the drone flight control.
When the drone dris to the right, press “” buon and the drone can be
corrected to the le.
When the drone dris to the le, press “” buon and the drone can be
corrected to the right.
When the drone dris to the front, press “” buon and the drone can be
corrected to the behind.
When the drone dris to the behind, press “” buon and the drone can be
corrected to the front.
- 18 -
Trim the Drone to Obtain More Balanced Flight
Tap “ ” on the app to take a picture. The white light in front of the drone and
the red light behind the drone will flash once, indicang the drone took a photo.
Tap “ ” on the app to take a video. The white light in front of the drone and the
red light behind the drone will flash twice, indicang the drone starts recording.
Tap “ ” on the app again to save video.
Photos and videos will be saved in the phone. DO NOT take photos while recording
video.
Camera Funcons
/