Page is loading ...

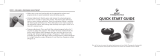
Instructions for use miniRITE R
miniRITE T
Oticon More™
Oticon Zircon
Oticon Play PX

Model overview
This booklet is valid for the Oticon More™, Oticon Zircon and Oticon Play
PX families in the following hearing aid models:
miniRITE R
miniRITE T
FW 1.3
Oticon More 1 miniRITE R GTIN: 05714464042685
Oticon More 2 miniRITE R GTIN: 05714464042678
Oticon More 3 miniRITE R GTIN: 05714464042661
Oticon More 1 miniRITE T GTIN: 05714464042685
Oticon More 2 miniRITE T GTIN: 05714464042678
Oticon More 3 miniRITE T GTIN: 05714464042661

FW 1.1
Oticon Zircon 1 miniRITE R GTIN: 05714464042890
Oticon Zircon 2 miniRITE R GTIN: 05714464042906
Oticon Zircon 1 miniRITE T GTIN: 05714464042890
Oticon Zircon 2 miniRITE T GTIN: 05714464042906
Oticon Play PX 1 miniRITE R GTIN: 05714464042920
Oticon Play PX 2 miniRITE R GTIN: 05714464042913
Oticon Play PX 1 miniRITE T GTIN: 05714464042920
Oticon Play PX 2 miniRITE T GTIN: 05714464042913
The following speakers are available for the above model:
Speaker 60
Speaker 85
Speaker 100 (Power Instrument)
Power receiver mold speaker 100 (Power Instrument)
Power receiver mold speaker 105 (Power Instrument)
MicroShell 60
MicroShell 85

Introduction to this booklet
This booklet guides you on how to use and maintain your new hearing
aids. Ensure you read this booklet carefully, including the Warnings
section. This will help you get the most benefit from your hearing aids.
Your hearing care professional has adjusted the hearing aids to meet
your needs. If you have additional questions, contact your hearing care
professional.
A hearing care professional* (hearing aid professional, audiologist,
ENT (ear, nose and throat) doctor, and hearing aid dispenser) is a
person who is appropriately educated and has proven competency
in professionally assessing hearing, selecting, fitting, and delivering
hearing instruments and rehabilitation care to persons with hearing
loss. The education of the hearing care professional is in accordance
with national or regional regulations.
*The job title may vary from country to country.


Intended use
Intended use The hearing aid is intended to amplify and transmit sound
to the ear.
Indications for use Bilateral or unilateral impaired hearing of sensorineural,
conductive or mixed type ranging from a slight (16 dB HL*)
to profound (95 dB HL*) degree of hearing loss, with an
individual frequency configuration.
Intended user Person with hearing loss using a hearing aid and their
caregivers. Hearing care professional responsible for
adjusting the hearing aid.
Intended user group Adults and children older than 36 months.
Use environment Indoor and outdoor.
Contraindications Not suitable for infants below 36 months. Users of active
implants must pay special attention when using the hearing
aid. For more information read the Warnings section.
Clinical benefits The hearing aid is designed to provide better speech
understanding to help ease communication with the aim of
improving quality of life.
* As specified by the American Speech-Language-Hearing Association, asha.org, using pure-tone average
of 0.5, 1 and 2 kHz.

IMPORTANT NOTICE
The hearing aid amplification is uniquely adjusted and optimized to your
personal hearing capabilities during the hearing aid fitting performed by your
hearing care professional.

Table of contents
About
Your hearing aid, speaker and earpiece 11
Getting started
Charging time 14
Battery performance 15
Turn hearing aids ON/OFF 16
Low battery indication 19
Identify left and right hearing aid 20
How to replace the disposable battery — size 312 22
Put on hearing aid 24
Daily use
Cleaning 26
Replace standard earpieces 28
ProWax miniFit filter 30
Clean customized earpieces 32
Replace ProWax filter 33
Hearing aid storage 34
Change volume 35
Change program 36

Continues on next page
Options
Flight mode 38
Mute your hearing aids 40
Use your hearing aid with iPhone®, iPad® and iPod® 42
Use your hearing aid with Android devices 43
Pairing and compatibility 44
Wireless accessories and other options 45
Tinnitus
Tinnitus SoundSupport™ (optional) 48
Sound options and volume adjustments 50
Limitation on use time 52
Tinnitus SoundSupport warnings 55
Warnings
General warnings 56

Table of contents
More info
Troubleshooting 68
Water & dust resistant (IP68) 72
Conditions of use 73
Technical information 76
Mobile phone 78
Warranty 85
Your individual hearing aid settings 86
Sound and LED light indicators 89
Technical Data 94

11
Your hearing aid, speaker and earpiece
Rechargeable battery
(miniRITE R only)
Wax filter
Speaker
Ear grip
Push-button
Upper part
Lower part
Microphones
LED light
Nail grip
(miniRITE T only)
About
Battery drawer
(miniRITE T only)

12 About Getting started Daily use Options Tinnitus Warnings More info
60 85 100
100
105
60
85
Standard speakers
The hearing aid uses one of the following speakers:
Power receiver-
mold speakers
MicroShell

13
The speakers use one of the following earpieces:
Standard earpieces Customized earpieces
MicroMold
VarioTherm® MicroMold
LiteTip
VarioTherm® LiteTip
Note
For details on replacing the dome, see the Replace
standard earpieces section.
VarioTherm® is a registered trademark
of Dreve.
Power dome
Grip Tip
Available in small and large, left and
right, with or without vent.
OpenBass dome
Bass dome, double vent
*Only as OpenBass dome for speaker 60
6 mm5 mm* 8 mm 10 mm 12 mm
Dome sizes

14 About Getting started Daily use Options Tinnitus Warnings More info
Charging time
(miniRITE R only)
Ensure you fully charge your hearing aids before first use and charge
them every night. That ensures you start your day with fully charged
hearing aids.
If your hearing aid’s battery is completely drained, the normal charging
time is:
3 hours 1 hour 0.5 hour
Fully charged 50% charged 25% charged
When the battery is fully charged, the charging process stops
automatically.
Charging time may vary depending on the remaining capacity of the
battery and between the left/right hearing aid.
For instructions on how to use your charger, see the charger’s
instructions for use.
Getting started

15
Battery performance
The battery performance varies depending on your individual use
and hearing aid settings. Streaming sound from a TV, mobile phone
or connectivity devices can influence this performance.
Rechargeable battery — miniRITE R only
If your rechargeable hearing aids do not perform for a full day, you
may need to have the rechargeable battery replaced. If so, contact
your hearing care professional.
If your hearing aids run out of battery, ensure you recharge them by
placing them in the charger.
Be aware that restarting the hearing aids does not give you more
usage time.

16 About Getting started Daily use Options Tinnitus Warnings More info
Turn hearing aids ON/OFF
Using the charger- miniRITE R only
Your hearing aids automatically turn ON when removed from the
charger.
The hearing aid LED light turns GREEN after approximately two seconds.
Wait until the hearing aid LED light blinks GREEN twice, confirming that
it is ready for use. Depending on your hearing aid settings, you may also
hear a start-up jingle.
Your hearing aid automatically turns OFF and starts charging when
placed in the charger. The hearing aid LED light turns ORANGE.
IMPORTANT NOTICE
If applicable, ensure that your charger is powered or that the charger’s built-
in battery is charged when the hearing aid is seated in the charging port. For
more information, see your charger’s instructions for use.

17
Using the push-button - miniRITE R only
The hearing aids can be turned ON/OFF using the push-button.
To turn ON
Press and hold the lower part of the push-button for
approximately two seconds until the hearing aid LED
light turns GREEN.
Release the push-button and wait until the hearing aid
LED light blinks GREEN twice.
The hearing aid is now turned ON.
To turn OFF
Press and hold the lower part of the push-button for
approximately three seconds until the hearing aid
LED light turns ORANGE. The hearing aid plays four
descending tones. Release the push-button and the
hearing aid is turned OFF.
For information regarding tones, see the Sound and LED light
indicators section.

18 About Getting started Daily use Options Tinnitus Warnings More info
Using the battery drawer - miniRITE T only
The battery drawer is used to turn the hearing aids ON and OFF.
To save battery life, make sure your hearing aids are switched OFF when
you are not wearing them. To perform a quick reset of hearing aid settings,
open and close the battery drawer.
Turn ON
Close the
battery
drawer with
the battery
in place.
Turn OFF
Open the
battery drawer.

19
Low battery indication
Just before the battery runs out completely, you hear four descending
tones. To extend battery performance, ensure you stop any audio
streaming.
miniRITE R: When the battery is running low, you hear three alternate
beeps. This gives you approximately two hours before the hearing aid
runs out of battery. At this point, you may continue to stream audio for
approximately one hour.
miniRITE T: When the battery is running low, you hear three alternate
beeps. This gives you approximately 15 minutes before the hearing aid
runs out of battery. At this point, Bluetooth® connectivity is turned OFF.
Three alternate beeps
= The battery is running low.
Four descending tones
= The battery has run out.
LED light
Continuous ORANGE blinks indicate low battery.

20 About Getting started Daily use Options Tinnitus Warnings More info
Identify left and right hearing aid
It is important to distinguish between the left and the right hearing aid,
as they may be programmed differently.
You can find left/right color indicators on the hearing aid itself and on
60 and 85 speakers as shown. Indicator markings (either L or R) can also
be found on 100 speakers and customized earpieces.
For 105 speakers, the indicator is found on the earpiece.
A RED indicator marks the
RIGHT hearing aid.
A BLUE indicator marks
the LEFT hearing aid.
miniRITE R
/