Page is loading ...

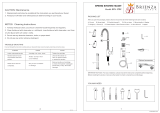
S-71, S-72, S-73, S-74 Series
INSTALLATION, OPERATION AND SERVICE INSTRUCTIONS
IMPORTANT:
INSTALLATION:
(Supply stop valves must have a 3/8” O.D. compression outlet.)
1. Apply a bead of sealant to the underside of the faucet
escutcheon.
2. Install U-channel spacers (KN-23),
spacers (KN-26) and nuts (L-36) loosely on mounting bolts.
Position deck plate (SPF-28) and mounting gasket (SPF-27)
under base through sink with in center hole towards
the back of sink basin. Secure by tightening nuts from
underside. Insert faucet supply through deck plate aligning
flat on faucet body above threaded shank with flat in deck
plate center hole. Secure faucet to deck plate by placing the
washer (K-60), locknut (SPF-38) and hex nut (SPF-26) on the
supply shank. Adjust position of faucet
to achieve optimum spray into basin. Tighten faucet securely
to basin or deck plate.
Insert faucet with flange (SPF-5)
through hole in basin. Secure faucet to basin by placing the
washer (K-60), locknut (SPF-38) and hex nut (SPF-26) on the
supply shank. Adjust position of faucet
to achieve optimum spray into basin. Tighten faucet securely
to basin.
3. Connect 4-10C mixing valve to bottom of supply shank using
supply nut provided . Make
connection to water supplies using the appropriate connectors.
4. Install grid drain (if applicable) by removing flange and tube
from drain body and inserting tail piece into trap. Apply
bead of sealant to underside of flange and insert flange and
tube through drain opening. Place bottom gasket mounting
washer and mounting nut onto flange and tube assembly.
Screw drain body on tube until tight.
5. To flush faucet, remove spray outlet, using vandal proof
wrench (LL-60K) provided with faucet. Open cold supply and
depress handle holding down for ten seconds
. Open hot supply and repeat above pro-
cedure . Allow faucet to shut
off and replace spray outlet.
Make sure the faucet has been properly installed and thor-
oughly flushed. Set the mixing valve (4-10C) to the desired
maximum temperature by inserting a 1/4” hex socket key
into the mating hex socket in center of valve and turning
counter clockwise for hotter, clockwise for colder. 110ºF
recommended unless otherwise specified.
After faucet has been operated through a number of cycles
and supply water temperature is at designed level, adjust-
ment of this feature can be made as follows.
Loosen set screw (LL-27) in cap (SPF-104), remove cap. To
increase time, remove one or more of the washers (LL-28) on
stem. To reduce time, add washers. When desired time cycle
is achieved replace cap and tighten set screw.
6 "
1
2
4 "
3
8
2 "
7
8
2 "
1
8
2 " with optional 3 hole deck plate
1
2
1 "
max.
1
8
"
7
8
"
1
2
min.
deck hole
4"
6"
optional 3 hole deck plate
2"
4"
15˚
"-14
NPSM
1
2
"-20 UNC
with spacer
1 "
1
8
without spacer
spacer
1
4
S-71/S-73
S-72/S-74
Metering Faucet

K-60 Washer
L-42 Coupling nut
LL-1 Control spindle
LL-1A Control cartridge
LL-1B Control cartridge for
quick-closing
LL-2A Cycle spindle assembly
LL-3N Upper housing
LL-4 Piston washer screw
LL-8 Cycle spindle guide
LL-11 Piston cylinder
LL-12 Piston
LL-16 Shut-off seat
LL-24 Control rod
LL-27 Handle set screw
LL-28 Cycle time washers
LL-31 Retaining ring
LL-32 Piston spring
LL-35 Thrust washer
LL-37 Shut-off washer
LL-44 Spindle guide large o-ring
LL-45 Shut-off seat o-ring
LL-46 Control spindle small o-ring
LL-47 Control spindle large o-ring
LL-48 Upper housing o-rings (three)
LL-49 Piston o-ring
LL-75 Spindle guide huva cup
LL-76 Huva cup retainer
LL-101 In-line screen
LN-100 Aerator (vandal resistant 0.5
gpm)
LN-101 Aerator (vandal resistant)
LT-4A Piston assembly
MV-10 Rubber washer
MV-107 Checks
SPF-5 Flange
SPF-26 Hex nut
SPF-38 Lock washer
SPF-103 Bushing
SPF-104 Cap
SPF-104C Cap (cold)
SPF-104H Cap (hot)
SPF-107 Spout assembly
4-10C Mechanical mixing valve
T
Order MF-KIT-W, consisting of:
LL-27W 3/32" hex socket key to remove
handle set screw
LL-60K Spray outlet wrench to remove
spray outlet (included with
faucet)
A
djustable or 1" and 1/4" open end wrench,
pliers, 5/32" hex socket key
LL-4, LL-8, LL-13, LL-24, LL-31, LL-33, LL-35,
LL-37, LL-42, LL-43, LL-44, LL-45, LL-46, LL-47,
LL-48, LL-49, LL-73, LL-75, LL-76.
LL-27
LL-28
SPF-103
SPF-107
LN-100
LN-101
LL-101
SPF-5
K-60
SPF-38
SPF-26
L-42 (S-71 only)
3/32" HEX SOCKET KEY
SPF-104
MV-10
4-10C
LL-3N
LL-48
LL-35
LL-1A
or
LL-1B
LL-1
LL-46
LL-47
LL-2A
LL-44
LL-8
LL-75
LL-76
LL-45
LL-16
LT-4A
LL-32
LL-31
LL-11
LL-4
LL-37
LL-24
LL-49
LL-12
LT-4A
LL-1A
or
LL-1B
MV-107
S-73 ONLY
S-71 and S-73 Series

K-60 Washer
L-42 Coupling nut
LL-1 Control spindle
LL-1A Control cartridge
LL-1B Control cartridge for quick-
closing
LL-2A Cycle spindle assembly
LL-3N Upper housing
LL-4 Piston washer screw
LL-8 Cycle spindle guide
LL-11 Piston cylinder
LL-12 Piston
LL-16 Shut-off seat
LL-24 Control rod
LL-27 Handle set screw
LL-28 Cycle time washers
LL-31 Retaining ring
LL-32 Piston spring
LL-35 Thrust washer
LL-37 Shut-off washer
LL-44 Spindle guide large o-ring
LL-45 Shut-off seat o-ring
LL-46 Control spindle small o-ring
LL-47 Control spindle large o-ring
LL-48 Upper housing o-rings (three)
LL-49 Piston o-ring
LL-75 Spindle guide huva cup
LL-76 Huva cup retainer
LL-101 In-line screen
LN-100 Aerator (vandal resistant
0.5 gpm)
LN-101 Aerator (vandal resistant)
LT-4A Piston assembly
MV-10 Rubber washer
MV-107 Checks
SPF-26 Hex nut
SPF-27 Deck plate gasket
SPF-28 Deck plate
SPF-38 Lock washer
SPF-103 Bushing
SPF-104 Cap
SPF-107 Spout assembly
SPF-KIT Mounting Kit
4-10C Mechanical mixing valve
T
Order MF-KIT-W, consisting of:
LL-27W 3/32" hex socket key to
remove handle set screw
LL-60K Spray outlet wrench to
remove spray outlet
(included with faucet)
A
djustable or 1" and 1/4" open end wrench,
pliers, 5/32" hex socket key, 7/16" open
end wrench
LL-4, LL-8, LL-13, LL-24, LL-31, LL-33, LL-35,
LL-37, LL-42, LL-43, LL-44, LL-45, LL-46, LL-47,
LL-48, LL-49, LL-73, LL-75, LL-76.
MV-10
4-10C
MV-107
S-74 ONLY
3/32" HEX SOCKET KEY
SPF-104
LL-3N
LL-48
LL-35
LL-1A
or
LL-1B
LL-1
LL-46
LL-47
LL-2A
LL-44
LL-8
LL-75
LL-76
LL-45
LL-16
LT-4A
LL-32
LL-31
LL-11
LL-4
LL-37
LL-24
LL-49
LL-12
LT-4A
LL-1A
or
LL-1B
LL-27
LL-28
SPF-103
SPF-107
LN-100
LN-101
LL-101
SPF-28
SPF-27
K-60
KN-23
KN-26
SPF-KIT
L-36
SPF-38
SPF-26
L-42 (S-72 only)
S-72 and S-74 Series

1. General maintenance may require the repair or replacement of the car-
tridge unit.
2. Shut off water supply to the faucet.
3. Remove cap (SPF-104) by loosening allen screw with 3/32” hex socket
key.
4. Remove cycle time washers (LL-28).
5. Using an adjustable wrench, loosen bushing (SPF-103). Remove cartridge
assembly from faucet body.
6. Slide the upper housing (LL-3N off control cartridge (LL-1A).
7. Control cartridge (LL-1A) can be either replaced or repaired at this point.
Disassemble cartridge by opening retaining ring (LL-31) and sliding down
piston cylinder (LL-11).
8. Ordinary service may only require the rebuilding of the cartridge using
the replacement o-rings and washers from KIT-LL.
9. Reassemble, reversing the above procedures.
Symmons warrants to the original purchaser that any Symmons product (excluding batteries)
when used in industrial, commercial or business use will be free of defects in material and
workmanship during normal use for a period of 5 years from the date of purchase. At our option,
we will either have you send the defective part or product prepaid to us for inspection, or we
may elect to send you the replacement part or product without investigation. A replacement for
any defective part or product, either new or refurbished (at our option), will be supplied FREE OF
CHARGE for installation by the purchaser. Defect or damage caused by the use of replacement
parts other than Symmons Genuine Replacement Parts will void this warranty. This warranty
excludes product damage due to installation error, product abuse, or product misuse whether
performed by a contractor, service company or yourself.
Damage to the chrome and/or other decorative finishes on Symmons products may be a result of
improper handling or abusive treatment. Finishes should only be cleaned with a soft, damp cloth
or sponge. Use of polish, abrasive cleaners, solvents, or acid cleaners will damage the finish and
void this warranty.
There are no other express warranties on this product and ALL WARRANTIES OF
MERCHANTABILITY AND OTHER IMPLIED WARRANTIES ARE LIMITED IN ACCORDANCE WITH
APPLICABLE LAW. SYMMONS INDUSTRIES, INC., EXPRESSLY DISCLAIMS CONTINGENT LIABILITY
AND CONSEQUENTIAL DAMAGE OF EVERY KIND. Since some states do not allow limitations on
how long an implied warranty lasts or an exclusion or limitation of incidental or consequential
damages the above limitation or exclusion may not be applicable. This warranty gives specific
legal rights. Other rights may vary from state to state.
To obtain warranty service, write to Symmons Industries, Inc., 31 Brooks Drive, Braintree, MA
02184-3804 or call our Customer Service Department at 1-800-SYMMONS. If writing to us, please
include proof of purchase, the model number of the product with a brief description of the
problem, your name, address and phone number.
Commercial Limited Warranty
Faucet runs too long or too short Timing
Remove handle - then add washers (LL-28)
to stem to shorten time or remove washers
to lengthen time.
Faucet drips
Seat washer worn or foreign matter (chips,
dirt, solder, etc.) is between washer and
seat surface.
Disassemble cartridge and remove piston
(Lt-4A). Unscrew LL-4 and clean seat washer
(LL-37). Checks S.S. pin (LL-24) for burr then
reassemble.
Faucet runs constantly
Seat washer not closing on seat surface or
seat washer and/or seat surface worn.
Remove piston (LT-4A) and spring (LL-32).
Check for burr on pin (LL-24) and check
spring. Both Lt-4A and LL-32 may have to
be replaced. Excessive wear may require
cartridge replacement LL-1A.
Not enough flow from faucet In-line screen clogged
Disassemble supply to faucet. Remove
in-line screen (LL-101) in inlet to faucet.
Rinse screen with water or de-liming agent.
Reassemble faucet supply.
Water leaks from under handle Stem washers worn
Remove cartridge and replace washers
using KIT-LL.
Faucet leaks under counter 4-10C connections not seated properly Check connections on 4-10C.
Faucet bleeding between hot and cold,
not holding consistent temperature (S-73
or S-74)
Integral checks in mechanical mixing valve
(4-10C) not operating properly
Clean or replace checks (MV-107)
Handle is loose Set screw has loosened Tighten set screw
Symmons Industries, Inc. ■ 31 Brooks Drive ■ Braintree, MA 02184
(800) 796-6667, (781) 848-2250 ■ Fax (800) 961-9621, (781) 843-3849
Website: www.symmons.com ■ Email: customerservice@symmons.com
©2007, 2008 Symmons Industries, Inc. Printed in U.S.A. ■ ZV-321 ■ 050508
/