Grill Now
Model:HB642
Manual
10m

Contents
Specifications
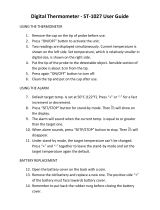
FAQ
After a successful connection, the interface
will appear as below: (HOME Interface)
Product connection diagram
Caution
Introduction to Grill Now
Instruction of Bluetooth BBQ
Thermometer and Grill Now
Grill Now Mobile App Download and Installation
Features
Product Description
Installation
Introduction
Timer Setting Display
Setting display
Data transmission
Information Display
Temperature Units Conversion
Set the timer alarm bell tone
1
1
2
2
3
3
3
5
5
7
9
9
10
10
12
12
12
13
13
Custom setting the cooking way

Grill Now
Model:HB642
Manual
Platforms for: iPhone,iPod Touch 5,iPad ,iPad mini
Eight main options and settings for barbecuingyour favorite foods
Timing and temperature alarm function
External sensor for measuring temperature
Transmits data to terminal mobile app through wireless Bluetooth
connection
Temperature measurement transmission with LED display
Internal buzzer alarm function
Features
Introduction
1
The Bluetooth BBQ Thermometer, which will be referred to as
“the thermometer” from this point on, is a kind of wireless
temperature measurement product for family cooking and outside
barbecuing. It
allow you to wirelessly monitor your food in real time
as it cooks.Featuring a warning function for safety, this Bluetooth
BBQ thermometer will help you make your cooking experience
easier and more convenient!
consists of a thermometer, a temperature-sensing
stainless steel probe, and a downloadable mobile app. Together,
these features
To ensure the correct use of this product, please be sure to read this
manual carefully before operating the thermometer. Please also be
sure to store this manual for future reference.

5
1
2
3
4
6
1.LED indicator light
2.Power button
3.Sensor interface
4.Sensor interface cover
5.Sensor probe
6.Reset
Insert the sensor pin
Product Description
Installation
2
At lea st 3cm /
1 ¼ in. de ep
Insert the probe into food
〃
at least 1 ¼ / 3CM deep
Open the battery cover and place
two 1.5V AAA batteries into the
battery holder, being sure to
notethe polarity(+and -).
Open the sensor interface cover of the thermometer andplug the
sensor pin into it. When measuring the temperature of a food item,
insert the probe into the food, ensuring that the sensor pin reaches
at least 3 cm deep.
Tip: Do not place the sensor probe directly on or near the grill for
an extended period of time.

G
r
i
l
I
G
r
i
l
I
G
r
i
l
I
Click icon
CURR ENT TEMP
CUR RENT TEM P
24
°
C
WELL DO NE
72
°
C
FISH
Chose th e food y ou need
Timer
Settin g
More
Home
Timer
Settin g
More
Home
CHI CKEN
POR K
VEA L
LAM B
HAM BURG
BEE F
TUR KEY
Foo d Choic e
FIS H
Initial interface
Instruction of Bluetooth BBQ Thermometer and Grill Now
Product connection diagram
3
Distance max. :
10m / 11 yards
Open the iTunes or Google Play App Store on your mobile device;
search for the “Grill Now” app, download, and install it.
Grill Now Mobile App Download and Installation
An icon (Grill Now)will appear on your device after installing
the software.
Please be sure that the battery has been fully installed before
operating the product. After battery installation, the green LED
light will flash.
Open Bluetooth on your mobile device or tablet (Bluetooth 4.0 is
required) and click the software icon to get into the Grill Now
app. The interface is below:
Test Mo de Sca n

CONNECT...
Test Mo de Sca n
Test Mo de Sca n
1
1
Grill Now
Grill Now
Home interface
Click on the thermometer name to connect:
4
Short press the thermometer power button (POWER).The red
LED light will intermittently flash for about 1 minute. Short press
the power button again to stop the flashing.
During the flashing of the red LED light, the Grill Now app will
automatically search for the working thermometer and display
the serial numbers of all thermometers found, as shown below:
Once the thermometer is connected with Grill Now, the red
LED light will turn off and the HomeInterfacescreen will display.
(Note: If the thermometer can't connect to the software within 1
minute, please repeat the steps above.)
24
°
C
WEL L DONE
72
°
C
FIS H
Chos e the foo d you nee d
Time r
Settin g
More
Home
CUR RENT TEM P
CURRE NT TE MP

Test Mode
If the temperature is opened but not connected to the software,
the screen below will display:
Select the “Test Mode” feature on the interface to
access Test Mode. No temperature data can be received in
Test Mode. Click the “Back” on the top right corner of the
interface to quit the Test Mode.
HOME Interface
Introduction to Grill Now
5
When the thermometer connects with the software, long press
the Power button once. A buzzer will sound,the wireless
connection will end,and the thermometer will turn off.The Grill
Now app will be back to its initial interface screen.
A buzzer will sound and the LED display will start to flash once
the food reaches the target temperature.
Press the Power button to disable the alarm.
Test Mo de Sca n
After a successful connection, the interface will appear
as below: (HOME Interface)
There are 4 main menu items on the interface of Grill Now
software:Home, Timer, Setting, and Info, Please see below for
a detailed description of each main menu item:
24
°
C
WEL L DONE
72
°
C
FIS H
Chos e the foo d you nee d
Time r
Settin g
More
Home
CUR RENT TEM P
CURRE NT TE MP

FIS H
Click icon to choose food.
6
24
°
C
WEL L DONE
72
°
C
FIS H
Chos e the foo d you nee d
Time r
Settin g
More
Home
CUR RENT TEM P
CURRE NT TE MP
Click icon, the connection will break; Grill Now will be back
to initial interface.
Test Mo de Sca n
1
Grill Now
WELL DON E
72
°
C
Click icon to choose the doneness and target temperature.
24
°
C
WEL L DONE
72
°
C
FIS H
Chos e the foo d you nee d
Time r
Settin g
More
Home
CUR RENT TEM P
CURRE NT TE MP
24
°
C
WEL L DONE
72
°
C
FIS H
Chos e the foo d you nee d
Time r
Settin g
More
Home
CUR RENT TEM P
CURRE NT TE MP
WEL L DONE
72
°
C
FIS H
Chos e the foo d you nee d
Target Tempera ture
58
°
C
Rare
MedRa re
Mediu m
Wel ldone
63
°
C
70
°
C
72
°
C
OK
Indicates the strength of wireless Bluetooth signal.
Indicate the battery life.thermometer' s
The current temperature received from the thermometer will
display on the upper, right portion of the screen. When the food's
current temperature reaches its target temperature, a buzzer
will sound.

Click “OK”to exit the warning interface.
Timer Setting Display
Click “Timer”to enter into setting interface, as below:
7
After setting the target temperature, a warning interface
will appearif the food temperature is too high. The warning
interface will appear as below:
's
73
°
C
WEL L DONE
72
°
C
FIS H
Chos e the foo d you nee d
Warning
Tempera tur e is h igh !
ok
Time r
Settin g
More
Home
CUR RENT TEM P
CURRE NT TE MP
Tim er
Tim er
Tim er
set ti me by slid ing
set ti me by slid ing
set ti me by slid ing
00:00
00:00
00:00
00
00
00
1
Star t
Star t
Star t
Rese t
Rese t
Rese t
Step 1: Click on the top left corner to add a timer.

Start
Tim er
Tim er
Tim er
Tim er
Sta rt
Star t
Star t
Star t
Star t
Star t Star t
Star t
Stop
Stop
Res et
Rese t
Rese t
Rese t
Rese t
Rese t Rese t
Rese t
Reset
set t ime by sl iding
set ti me by slid ing
set ti me by slid ing
set ti me by slid ing
00:08
00:08
00:00
00:08
46
46
12
46
1
2
2
2
1
1
1
1
1
1
1
2
War ning
Tim er 1 fi nis hed
OK
8
Tim er Tim erTim er
set ti me by slid ing set ti me by slid ingset ti me by slid ing
00:00 00:0000:00
00 0000
Tim er
set ti me by slid ing
00:00
00
Step 2: slide your finger on the edge of the clock, cook time will
show in the center of the clock.
Step 3: Click START (which will turn into STOP after
click) to start the time, when time run out, alarm will be triggered.
Click STOP to stop the timer.
Click RESET to reset the timer.
More timers can be set follow the
above steps.
Click the icon of the existing timer, then click DELETE .

Temperature Units Conversion
Setting display
9
Select Setting from the main menu to enter into setting
interface, as pictured below:
“ ”
You can toggle the temperature units to choose from
Centigrade Fahrenheit degrees as the default temperature unit.
The temperature unit in the Home interface will change according
to your selection. The following pictures are for your reference:
“ ”
24
75
°
°
C
F
WEL L DONE
WEL L DONE
72
162
°
°
C
F
FIS H
FIS H
Chos e the foo d you nee d
Chos e the foo d you nee d
Time r
Settin g
More
Home
Time r
Settin g
More
Home
CUR RENT TEM P
CURRE NT TE MP
CUR RENT TEM P
CURRE NT TE MP

Input digit
Input digit
Input digit
Input digit
Rare ℃
Rare ℃
Rare ℃
Rare ℃
MedRare ℃
MedRare ℃
MedRare ℃
MedRare ℃
Medium ℃
Medium ℃
Medium ℃
Medium ℃
Welldone ℃
Welldone ℃
Welldone ℃
Welldone ℃
OK
OK
Delete
Delete
30
30
30
38
40
40
40
40
50
50
50
50
60
60
60
60
1
1
4
4
7
7
2
2
5
5
8
8
0
0
3
3
6
6
9
9
ABC
ABC
DEF
DEF
GHI
GHI
JKL
JKL
MNO
MNO
WXY Z
WXY Z
TUV
TUV
PQR S
PQR S
Timer Alarm
Temperature Alarm
Press Timer Alarm to set the timer alarm bell tone, which
will ring as your default Grill Now alarm. The interface will
display like the picture below:
“ ”
10
Custom setting the cooking way
If the food is not in the list, you need to click on the top right
corner to add your food.
Click the grey temperature, you will find a numeric keypad below,
the temperature will become black after you input the value. Set
the other temperature follow this step.
Set the timer alarm bell tone

Delete
24
°
C
WEL L DO NE
72
°
C
Cho se the fo od you ne ed
Time r
Settin g
More
Hom e
CUR RENT TE MP
CURRENT TEMP
Input digit
Rare ℃
MedRa re ℃
Mediu m ℃
Wel ld one ℃
38
38
45
45
62
62
80
80
1
4
7
2
5
8
0
3
6
9
ABC DEF
GHI JKL MNO
WXYZTUVPQ RS
Input digit
Rare ℃
MedRa re ℃
Mediu m ℃
Wel ld one ℃
OK
OK
OK
Delete
Delete
Input digit
Rare ℃
MedRare ℃
Medium ℃
Welldone ℃
38
45
62
80
11
After finishing setting the temperature, click the blank space,
you will find an interface, click . The interface below:
Click the icon on the top left corner,exit the customer
setting interface. The interface below:
Customer setting mode's Target temperature setting and tone
setting is the same step as the other food setting step.
If you need to delete the customer setting mode, click the
icon , the click the delete .

Contact Us
Caution
Data transmission
Information Display
Click “More”to enter into interface, as below:
12
The thermometer transmits temperature values to Grill Now
every 2 seconds with green LED flashing.
The thermometer sendsthe battery power value to Grill Now
every 5 minutes.
Please pay attention to safety when you use this device to avoid
injury. The probe should be stored out of the reach of children
after use.
Be sure to switch the thermometer off after use to save power
consumption. Please remove the battery from the unit between
extended periods of inactivity
Cleaning instructions: Wipe the probe with a damp cloth, then
wipe dry after use. Store in a dry location.
Please properly dispose of any used or depleted batteries.

Question1
Question2
Question3
Wireless transmission frequency: 2.4GHZ
Wireless communication distance:10m/11yards
Update time of temperature data: about 2S
Temperature measuring range:0℃~200℃/32℉~400℉
Temperature measuring accuracy:±1℃(2℉)
Heat resistance value of sensor probe :<250℃/480℉
Heat resistance value of wire:<450℃/840℉
Using temperature range:-10℃~50℃/14℉~122℉
Storage temperature range:-20℃~60℃/-4℉~140℉
Power Supply:2pcs 1.5V AAA battery
Specifications:
FAQ
13
Answer: When the low battery power indicator is displayed
on the Grill Now, please replace the batteries in the unit to ensure
continued normal product use.
“ ”
What do I do when the “Low Battery” indicator appears?
Answer: The internal temperature of the food can't be measured
properly if the probe is not inserted correctly—be sure that the
probe is inserted at least 3 cm deep into the food's outer surface.
Please insert it again!
Why are the current temperature readings low?
Please press the Reset button to reset the system.Answer: “ ”
How do I reset the system?

Version:A0
Address: 788 Yijing Road, Shengzhou City,
Zhejiang Prov.China
Tel: 575 83363170 Fax: +86 (0)575 83263637+86 (0)
Web: www.babeitech.com E mail: sales @ mieo .com
Babei Sapience Technology CO.,Ltd.
/