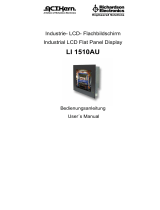
Canvys MD-DFM19-ENDO Datasheet

Category
LED displays
Type
Datasheet
Users Manual: DFM19HBV
2007 Richardson Electronics GmbH
Division A.C.T. Kern
2
Table of Contents
Table of Contents .................................................................................................................................... 2
Illustrations............................................................................................................................................... 2
About This Manual................................................................................................................................... 3
Application and Functional Description ................................................................................................... 4
Some Basic Facts.................................................................................................................................... 4
Intended Use ........................................................................................................................................... 4
Functional Description ............................................................................................................................. 4
Product Features DFM19HBV-SDI ......................................................................................................... 4
Product Features DFM19HBV-HDI ......................................................................................................... 4
Explanation of Symbols Used On The Devices, Safety Information ....................................................... 5
Explanation of information and symbols on the monitor nameplate. ...................................................... 5
General Notes on Electrical Safety ......................................................................................................... 6
To connect the cables ........................................................................................................................... 11
To connect the cables ........................................................................................................................... 12
Cable Management (only with stand OP-DFM19-ENDO)..................................................................... 13
Kensington® Anti-Theft Security Lock Slot ........................................................................................... 13
Adjust the Two-Way Ergonomic Stand (only with stand OP-DFM19-ENDO) ....................................... 14
Controls & Functions ............................................................................................................................. 15
The OSD Wheel Knob ........................................................................................................................... 15
On-Screen Display ................................................................................................................................ 16
OSD – Main Menu Display .................................................................................................................... 16
Menu Picture (VGA or DVI) ................................................................................................................... 16
Menu Picture (Video)............................................................................................................................. 17
Menu Color Mode .................................................................................................................................. 17
Menu Source (MD-DFM19HBV-SDI) .................................................................................................... 17
Menu Source (MD-DFM19HBV-HDI) .................................................................................................... 18
Menu Management................................................................................................................................ 18
Menu Memory Setting ........................................................................................................................... 18
Cleaning and Disinfection...................................................................................................................... 19
Equipment Surface ................................................................................................................................ 19
Connection Cables ................................................................................................................................ 19
Appendix................................................................................................................................................ 20
Technical Information*........................................................................................................................... 20
Specification of the medical flat screen DFM19HBV............................................................................. 20
Timings .................................................................................................................................................. 21
External Dimensions.............................................................................................................................. 22
Support and Service .............................................................................................................................. 23
Repairs: ................................................................................................................................................. 23
Product Warranty................................................................................................................................... 23
Disposal................................................................................................................................................. 24
Illustrations
Illustration 1 – Type Rate Label of the Display........................................................................................ 5
Illustration 2 – Connectors and cabling of DFM19HBV-SDI.................................................................. 11
Illustration 3 – Connectors and cabling of DFM19HBV-HDI ................................................................. 12
Illustration 4 – Cable Management........................................................................................................ 13
Illustration 5 – Adjust the two-way ergonomic stand ............................................................................. 14
Illustration 6 – OSD Wheel Knob and LED Indicator............................................................................. 15
Illustration 7 – Timings........................................................................................................................... 21
Illustration 8 – External Dimensions (landscape front view).................................................................. 22
Illustration 9 – External Dimension (right side view) ............................................................................. 22
Illustration 10 – External Dimensions (left side view)............................................................................ 22
Illustration 11 – External Dimension (portrait front view)....................................................................... 22
Users Manual: DFM19HBV
2007 Richardson Electronics GmbH
Division A.C.T. Kern
3
Thank you very much for purchasing the DFM19HBV, a medical safety approved TFT-LCD Display. In
order to use your display correctly, please read the users manual carefully and take notice of the
danger, warning and caution notices.
About This Manual
This user manual is intended as an aid in setting up and operating the flat-screen display. We have
thoroughly verified all information and hints.
The safety information given in this manual is classified as follows:
Manufacturer
Richardson Electronics GmbH
Division A.C.T. Kern
Raiffeisenstr. 5
D-78166 Donaueschingen
Germany
Tel: +49 (0)771 / 8300-0
Fax: +49 (0)771 / 8300-80
Email: medical@actkern.de
Internet: www.actkern.info , www.flatmedic.de
Specifications are subjected to change without notice.
Revision Document Name Author Date
1.2 Manual DFM19HBV-SDI V1.2_en MK/GA 2007-10-10
1.1 Manual DFM19HBV-SDI V1.1_en MK/GA 2007-05-30
1.0 Manual DFM19HBV-SDI V1.0_en MK/GA 2007-01-11
WARNING:
Indicates a hazard. If not avoided, the hazard can result in death or serious injury.
DANGER:
Indicates an imminent hazard. If not avoided, the hazard will result in death or serious injury.
CAUTION:
Indicates a potential hazard. If not avoided, this hazard may result in minor personal injury or
product/property damage.
Users Manual: DFM19HBV
2007 Richardson Electronics GmbH
Division A.C.T. Kern
4
Application and Functional Description
Some Basic Facts
The medical safety approved DFM19HBV is a versatile monitor designed for ergonomic and easy
handling. The liquid-crystal display (LCD) monitor supports the most common resolutions from
640x480 (VGA) up to 1280x1024 (SXGA) and presents high-brightness, sharp, low-radiation images.
With the OSD wheel knob on the bottom right side of the display, the display parameters can be easily
adjusted.
Intended Use
The intended use of the DFM19HBV is to display medical imaging data and endoscopy applications.
It is not allowed to operate the DFM19HBV with power supplies other than the supplied LIEN
Electronics AC Adapter Model LE-0312B130W or Medi Power AD-2480MB.
Only this combination of display and power supply is approved for use in the medical environment.
The flat-panel display and the power supply must not be used outdoors or in areas where an explosion
hazard may occur. The DFM19HBV display is a medical device as defined in the Council Directive
93/42/EEC about medical devices and is class I equipment (MDD).
Functional Description
The medical flat-screen display is built into a slim and ergonomic housing. The monitor displays 16.7
Million colors with a resolution of 1280x1024 pixels. The DFM19HBV is equipped with a IPX1
protection against water drops.
The display is controlled either analog via a 15-pin D-sub VGA signal cable, digital via a DVI cable or
video via different video cables. The signal is equivalent to the analog and digital standard signals of
your PC. After connection of the signal the flat-screen display automatically adapts, as far as possible,
to the VGA signal and presents a stable and centered image. Additional display parameters, such as
brightness and contrast, can be adjusted via the on-screen menu.
Product Features DFM19HBV-SDI Product Features DFM19HBV-HDI
19“ TFT Liquid Crystal Display 19“ TFT Liquid Crystal Display
protection glass, IPX1 protection glass, IPX1
high brightness high brightness
high contrast ratio high contrast ratio
remote control port remote control port
power management power management
170° / 170° viewing angles 170° / 170° viewing angles
Optimum resolution 1280 x 1024 (SXGA) Optimum resolution 1280 x 1024 (SXGA)
16.7 million colors 16.7 million colors
VGA and DVI input DVI input (DVI-I, DVI-D)
S-Video, Composite Video, YPbPr/YCbCr,
SD-SDI
S-Video, Composite Video, YPbPr/YCbCr,
HD-SDI
VESA 100 VESA 100
user-friendly OSD-Menu with intuitive wheel-
knob
user-friendly OSD-Menu with intuitive wheel-
knob
DDC2B Plug & Play DDC2B Plug & Play
Kensington Lock Kensington Lock
CAUTION:
The VESA 100 adapter according to VESA standard is available on the rear cover for wall or
swivel-arm mounting. The user is responsible for correct installation of the display.
Users Manual: DFM19HBV
2007 Richardson Electronics GmbH
Division A.C.T. Kern
5
Explanation of Symbols Used On The Devices, Safety Information
Explanation of information and symbols on the monitor nameplate.
Illustration 1 – Type Rate Label of the Display
Manufacturer:
Richardson Electronics GmbH
Division A.C.T. Kern
Raiffeisenstraße 5
D-78166 Donaueschingen
Tel.: +49 (0) 771 / 83 00-0 Fax: +49 (0) 771 / 83 00-80
Product Name:
Model No:
DFM19HBV-SDI
DFM19HBV-HDI
MD-DFM19HBV-SDI / MD-DFM19HBV-HDI
GOD971FMII / GOK971FMII
Standard medical display + Video (SD-SDI)
Standard medical display + Video (HD-SDI)
Power Rating
24Vdc 3.0A
The medical-grade flat-screen display must only be operated with the power
supply Lien LE-0312B130W or Medi Power AD-2480MB that is shipped with
the device and provides the required voltage. (see also item 2)
Serial No.: Serial Number
EN 60601-1
UL 60601-1
CAN/CSA 22.2
The device fulfills the requirements of the medical standard EN 60601-1
and cUL 60601-1 and CAN/CSA 22.2 No.601.1
The symbol indicates compliance with the medical standard EN 60601-1
and cUL 60601
Consult User’s Manual!
Refer to the user manual and observe the safety information and instructions
explaining how to put the monitor into service.
!
Users Manual: DFM19HBV
2007 Richardson Electronics GmbH
Division A.C.T. Kern
6
General Notes on Electrical Safety
Connecting medical electrical equipment to other medical electrical devices and/or other non medical
electrical devices, be it for diagnostic or therapeutic purposes or for monitoring, creates a medical
electrical system. The standard EN 60601-1-1 and cUL 60601 describes the requirements for these
systems.
These systems must be composed of devices that comply either with the standard EN 60601-1 and or
cUL 60601 or with the applicable IEC / ISO standard (PCs, for instance, must meet the requirements of
the standard IEC 60950) or that are equipped with additional safety features, such as a protective earth
conductor, isolating transformer or electrically isolated interface (e.g. optocoupler). This applies to
devices of protection class I or II. It is not permitted to integrate protection class 0 devices in medical
electrical systems.
In the patient environment, the following maximum enclosure leakage currents (current flowing
between two device enclosures or between the enclosure of a device and the protective earth
conductor) are permitted for medical devices:
normal condition: 0.1 mA
single fault condition: 0.5 mA (e.g. protective earth conductor interrupted)
Before putting the system into service for the first time, a specialist is required to check that these
values are not exceeded.
If the enclosure leakage current of a device or of the system exceeds the limit values stated above,
additional protective measures, such as connection to protective earth conductor, isolating
transformers or conductive castors, must be implemented to correct this problem.
Safety Information
DANGER:
Explosion Hazard – The display including the power supply is not designed for use in areas
of medical locations where an explosion hazard may occur.
In appropriate usage of flammable anesthetics, skin cleansing agents and disinfectants the
medical Displays of the DFM series can be used risk less in surgical rooms and intensive
care units.
It is not permitted to operate the devices in the presence of flammable substances (e.g. gas).
WARNING:
Shock Hazard — Use only following medical power supply:
Medical Power Supply Model Lien LE-0312B130W AC-Input: 100 – 240V~, 50 – 60Hz ,
DC-Output: +24V= / 5.41A
or Medical Power Supply Model Medi Power AD-2480MB, AC-Input: 100 – 240V~, 50 – 60Hz ,
DC-Output: +24V= / 3.33A
Users Manual: DFM19HBV
2007 Richardson Electronics GmbH
Division A.C.T. Kern
7
WARNING:
Personal Injury — Medical electrical devices may be connected to other devices or to parts
of systems only when it has been made certain that there is no danger to the patient, the
user, or the environment as a result.
In those instances where there is any element of doubt concerning the safety of connected
devices, the user must contact the manufacturers concerned or other informed experts as to
whether there is any possible danger to the patient, the operator, or the environment as a
result of the proposed combination of devices.
Connecting medical electrical devices to other medical electrical devices and/or other non-
medical electrical devices creates a medical system which must comply with the system
standard
EN 60601-1-1 / cUL 60601. Before putting the system into service, a specialist is required to
ascertain its conformity with the system standard.
WARNING:
Personal Injury — Before putting the device into service, check all cables for signs of
damage. Damaged cables must be replaced immediately with the original manufacturer’s
cables. The safety information and certificates do not apply when cables from other
manufacturers are used.
Do not open the flat-screen display or perform any service interventions. This may render
your warranty claims null and void. Only authorized technicians are permitted to service the
flat-screen display.
Do not put the flat-screen display into service
- when liquids have entered the device,
- when it was dropped and the housing is damaged.
The flat-screen display including the power supply has no special protection against the ingress of
water (dripping, splashing water). Do not immerse the devices into liquids
- Disconnect the power supply from the power line before cleaning. Use a moist cloth.
- Disconnect the flat-screen display from the power supply before cleaning.
WARNING:
Equipment Failure — Magnetic and electrical fields are capable of interfering with the proper
performance of the devices. For this reason make sure that all devices operated in the
vicinity comply with the relevant EMC requirements. X-ray equipment, MRI devices, radio
systems, and cellular telephones are possible sources of interference as they may emit
higher levels of electromagnetic radiation.
Keep the system away from these devices and verify its performance before use.
Users Manual: DFM19HBV
2007 Richardson Electronics GmbH
Division A.C.T. Kern
8
WARNING:
Risk of Suffocation — Dispose of the packaging material, observing the applicable waste-
control regulations and keeping it out of children's reach.
CAUTION:
Personal Injury — All devices used must comply with the applicable IEC/EN or ISO standard
(PCs, for instance, must comply with IEC 60950). This applies to custom designs in particular
CAUTION:
Personal Injury, Equipment Damage — Check that the ambient conditions specified by the
manufacturers of the different devices are ensured.
Before cleaning the flat-screen display, turn it off and remove the 24VDC connector or the
power supply connection cable. Do not spray liquid cleaning agents directly onto the display.
Spray the cleaning agent onto a cloth and wipe the display clean without exerting any
pressure.
Do not place any objects on the signal cables. Route the signal cables and the power cable
to the flat-screen display such that they do not present a stumbling hazard.
CAUTION:
Equipment Damage — Do not set up the flat-screen display in the immediate vicinity of a
window. Rain, water, humidity and sunlight may damage the flat-screen display.
Choose a flat, solid surface to set up the flat-screen display.
Do not exert pressure on the LCD. Excessive pressure may permanently damage the display.
For safe storage of the flat-screen display, a temperature between -20°C and +60°C must be
ensured. Temperatures above or below this range may permanently damage the flat-screen
display. Always store your flat-screen display in its original shipping box.
WARNING:
Personal Injury — During intracardiac application, it is recommended to connect the
individual devices to the room’s potential equalization system via separate potential
equalization cables.
For intracardiac application, the application guidelines for medical electrical devices set
forth in the German standard VDE 0753, part 2, must be observed.
Users Manual: DFM19HBV
2007 Richardson Electronics GmbH
Division A.C.T. Kern
9
Manufacturers declaration of compliance with standards and
directives
Manufacturer
Richardson Electronics GmbH
Division A.C.T. Kern
Raiffeisenstraße 5 Tel.: +49 (0) 771 / 8300-0
D-78166 Donaueschingen Fax: +49 (0) 771 / 8300-80
Manufacturer declaration of compliance with standards and regulations
Certification that the medical Monitor
DFM19HBV-SDI
DFM19HBV-HDI
is developed, manufactured and tested according to the following guidelines, which are fixed by the
council of European Community:
EN 60601-1-2: 1993 EMC – Emission & EMC – Immunity
EMC-Tests have been carried out using standard cables with cables length of up to 2,5 meters. If
longer cables are used, additional tests might be necessary to prove compliance with the EMC-
directive.
IEC 601-1
IEC 601-1: 1988 + A1: 1991 + A2: 1995 = EN 60601-1: 1990 + A1: 1993 + A2: 1995
MEDICAL ELECTRONIC EQUIPMENT
PART1: GENERAL REQUIREMENTS FOR SAFETY
93/42/EWG
Users Manual: DFM19HBV
2007 Richardson Electronics GmbH
Division A.C.T. Kern
10
Your Medical Display DFM19HBV
Before you start to install your medical display, make sure the carton box is not damaged and that all
equipment is delivered completely.
Transport Damage
If the equipment has obviously been damage in transit, make a written report immediately upon arrival
of the goods and notify the shipping agent. The shipping agent must be informed of hidden damage in
transit in writing within 2 work days.
Unpacking
Before unpacking the flat-screen display, prepare a suitable area for it’s set-up. This should be a flat,
solid and clean surface in the vicinity of a wall outlet. Although the flat-screen display consumes only
little energy, you should choose a location that affords sufficient ventilation. Furthermore, the air vents
should not be covered to prevent overheating. Choose a location where the display will not be
frequently exposed to direct sunlight or other strong sources of light. The light reflects on the display,
dazzling you, and you will have problems seeing the displayed information.
After unpacking the display, check whether the shipment is complete and all items are intact:
flat-screen display DFM19HBV
User's Manual
medical-grade power supply
VGA (D-Sub 15 pin) standard cable
DVI-D (DVI-D 18 pin) standard cable
S-Video cable
Power cord
If items are missing or damaged, contact your dealer immediately. Keep the packaging material and
the shipping carton for storage or shipment of the display.
Setup and positioning
No tools are required to set up the DFM19HBV. Simply follow the instructions outlined in the next few
pages. Connectors for the signal cables and power are located on the back of the panel. Please refer
to the diagram on this page for the connector configuration.
Set up the DFM19HBV in a location where all connections are easily accessible.
The base of the flat-screen display requires a flat and solid surface (horizontal max. +5°) with good
ventilation. Choose a location where sunlight or other bright light does not directly fall on the display.
The flat-screen display should not be exposed to excessive heat, humidity or direct sunlight, because
this could cause damage to the device.
Users Manual: DFM19HBV
2007 Richardson Electronics GmbH
Division A.C.T. Kern
11
Illustration 2 – Connectors and cabling of DFM19HBV-SDI
To connect the cables
1 24V DC connector
The power input on your flat screen is marked with DC IN 24V please put the 24V connector (4-pin)
into this slot. You will feel a little click if the connection is done correctly. Connect your power supply
with the power outlet.
2 Analog input connector (VGA)
Connect the 15pin D-Sub VGA cable to this connector and to your graphic adapter.
3 Digital input connector (DVI)
Connect the DVI cable to this connector and to your graphic adapter.
4 Control input connector (GPIO DIN-9)
5 Component/RGBS input connector
Connect a component video cable to this connector and a component video output device (f.e. DVD,
High Definition (HD), RGBS video image)
6 Component/RGBS output connector
7 S-Video input connector
S-Video signal input. Connect a S-Video signal cable to this connector and a S-Video output video
device.
8 S-Video output connector
9 CVBS Video input connector
Composite signal input. Connect a composite video cable to this connector and a video output
device.
10 CVBS/Composite Video output connector
11 SD-SDI input connector
Connect SDI video connector and a SDI video output device with a 75-Ohm coaxial cable
(e.g. Camcorder)
12 SD-SDI output connector
CAUTION:
When you disconnect the cord/cables, be sure to hold the connector and not the cable itself.
Users Manual: DFM19HBV
2007 Richardson Electronics GmbH
Division A.C.T. Kern
12
Illustration 3 – Connectors and cabling of DFM19HBV-HDI
To connect the cables
1 24V DC connector
The power input on your flat screen is marked with DC IN 24V please put the 24V connector (4-pin)
into this slot. You will feel a little click if the connection is done correctly. Connect your power supply
with the power outlet.
2 Digital input connector (DVI-I)
Connect the DVI cable to this connector and to your graphic adapter.
3 Digital input connector (DVI-D)
Connect the DVI cable to this connector and to your graphic adapter.
4 Control input connector (GPIO DIN-9)
5 Component/RGBS input connector
Connect a component video cable to this connector and a component video output device (f.e. DVD,
High Definition (HD), RGBS video image)
6 Component/RGBS output connector
7 S-Video input connector
S-Video signal input. Connect a S-Video signal cable to this connector and a S-Video output video
device.
8 S-Video output connector
9 CVBS Video input connector
Composite signal input. Connect a composite video cable to this connector and a video output
device.
10 CVBS/Composite Video output connector
11 HD-SDI input connector
Connect SDI video connector and a SDI video output device with a 75-Ohm coaxial cable
(e.g. Camcorder)
12 HD-SDI output connector
CAUTION:
When you disconnect the cord/cables, be sure to hold the connector and not the cable itself.
Users Manual: DFM19HBV
2007 Richardson Electronics GmbH
Division A.C.T. Kern
13
Cable Management (only with stand OP-DFM19-ENDO)
The DFM19HBV has built-in cable guides and cover to help you organize and route the cables neatly
on your desktop space. The cable cover is located on the back of the monitor stand and it is opened
by gently pulling it off the stand. Under the cover, the cables can be held in
position by numerous clips. There are several ways to route the cables and you may use any way you
find suitable for your situation. However, the routing method illustrated by the drawing on the right is
recommended to give the best result in most situations both aesthetically and functionally. Once the
cables are in position, gently snap the cover back on to the stand.
Illustration 4 – Cable Management
Kensington® Anti-Theft Security Lock Slot
The DFM19HBV is equipped with a security lock slot compatible to Kensington® security lock type.
The security cable lock may be available thru your dealer or it can be purchased at most computer
peripheral stores near you.
Users Manual: DFM19HBV
2007 Richardson Electronics GmbH
Division A.C.T. Kern
14
Adjust the Two-Way Ergonomic Stand (only with stand OP-DFM19-ENDO)
Adjust the two-way (tilt and pivot) ergonomic stand of your DFM19HBV for your maximum viewing
comfort. To minimize eye fatigue, we suggest you allow a minimum viewing distance of 18 inches.
Illustration 5 – Adjust the two-way ergonomic stand
(1) Tilt the LCD panel upward
(2) Lift the Panel to the top
(3) Rotate the LCD panel by 90 degrees.
(4) Replace the LCD panel to the bottom while in the portrait orientation.
CAUTION:
In order to protect the LCD, be sure to hold the edge of bezel whenever you adjust it and do
not touch the screen.
CAUTION
:
When setting the LCD to portrait orientation, lift the LCD panel to the top of the tilt stand as
shown in the figure below and rotate it by 90 degrees.
Users Manual: DFM19HBV
2007 Richardson Electronics GmbH
Division A.C.T. Kern
15
Controls & Functions
The OSD Wheel Knob
The OSD Wheel Knob is a multi-functional device located behind the LED Indicator on the right side of
the front bezel. It has three movements - rotate upward, rotate downward and press inward as a
button.
Rotate Downward : Move Up/Right, Increase
Rotate Upward : Move Downward/Left, Decrease
Button Press : Execute, Do, Save
Illustration 6 – OSD Wheel Knob and LED Indicator
(1) Turn On and OFF
Press the OSD wheel knob in order to turn ON the DFM19HBV if the LED indicator is off.
In order to turn OFF, press the OSD wheel knob for 2 seconds until the LED indicator turns off as
well.
(2) LED Indicator
This LED indicator turns green when the power is switched ON and the power cord is properly
attached. It turns orange when the monitor goes into a power saving mode (standby). Please
refer to the power management section of this manual for more information.
OSD - On Screen Display usage
While the monitor is turned ON (LED indicator is green and image on the screen), pressing on the
Control Dial (OSD wheel knob) activates the OSD. While the OSD menu is active, use the three way
movements of the control dial to adjust the settings.
- rotate downward: move up / right, increase
- rotate upward: move downward / left, decrease
- button press: Execute, Do, Save
Mode Power consumption (only flat screen) LED indicator
ON Approx. 60,0 W Green
STANDBY Approx 15,0 W Orange
OFF Off, no light
Users Manual: DFM19HBV
2007 Richardson Electronics GmbH
Division A.C.T. Kern
16
On-Screen Display
The OSD menu is activated by pressing the Control Dial inward and you can select and adjust the
function of your choice by rotating and clicking the Control Dial. The main menu displays a list of
submenu icons and the current video input mode. Rotate the dial to move the highlights to the control
you would like to adjust, then press the Control Dial inward to select that control or to activate that
function. Depending on the control you selected, a submenu of the control with a status bar will
appear. Rotate the Control Dial to adjust the control.
When you have finished making the adjustments, the setting is saved automatically by exiting the
control function. If you do not touch the control dial for 3 seconds, the OSD is automatically exited
saving your current settings.
OSD – Main Menu Display
The OSD menu is displayed with icons, adjustment items, and setting values as shown below.
The charts below display the function tree and brief explanations of the functions.
The Main Menu consists of followings menu points:
Exit
Close the OSD screen
Auto Setup
Automatically adjusts the display according horizontal and vertical adjustments,
position, frequency and phase. It takes only a couple of seconds. After that you
have a perfect image. For the digital input DVI, this function is not available.
Brightness
Adjusts the brightness of the full screen at the range from 0 to 100.
Rotating the control dial up/down to adjust the brightness any time while the
OSD is off
Picture
The picture menu allows to make changes of the picture
Color Mode
Allows to select color mode or color temperature
Source
Allows to select the input signals of the display: VGA, DVI, S-Video,
Composite, Component, RGBS and SDI
Management
Contains several adjustments in order to change miscellaneous properties of
your display, e.g. language, OSD position etc.
Memory Setting
Allows to store five different user-defined settings like brightness, contrast etc.
Menu Picture (VGA or DVI)
The picture menu allows making changes of the picture. Following sub menus are available:
Exit
Returns to Main Menu
Contrast
Adjusts the contrast of the full screen at the range from 0 to 100.
Black Level
Adjust black level of the screen. The larger the value is, the brighter the brightness
of the background contrast is, and vice versa. Adjustable at the range from 0 to 100.
Display
Adjust the horizontal position of the display. When rotating Control dial clockwise,
the display moves to the left, and vice versa. For the digital input DVI, this function
is not available.
Adjust the vertical position of the display. When rotating Control dial clockwise, the
display moves upward, and vice versa. For the digital input DVI, this function is not
available.
Clock/Phase
Make “Phase” and “Clock” adjustments, if any flickers, blurs, or horizontal stripes on
screen. Adjustable at the range from 0 to 100. For the digital input DVI, this function
is not available.
Users Manual: DFM19HBV
2007 Richardson Electronics GmbH
Division A.C.T. Kern
17
Menu Picture (Video)
The picture menu allows to make changes of the picture. Following sub menus are available:
Exit
Returns to Main Menu
Contrast
Adjusts the contrast of the full screen at the range from 0 to 100.
Black Level
Adjust black level of the screen. The larger the value is, the brighter the brightness
of the background contrast is, and vice versa. Adjustable at the range from 0 to 100.
Saturation
Adjust saturation of the screen. The larger the value is, the more intensive is the
specific hue. Adjustable at the range from 0 to 100.
Hue
Adjust gradation of colour. Adjustable at the range from 0 to 100.
Sharpness
Adjust sharpness of the screen. The larger the value is, the outline gets sharper. To
make characters look sharper, set a large value. To make pictures and images look
finer, set a small value. Adjustable at the range from 0 to 10.
Menu Color Mode
Selects the color mode or color temperature.
Exit
Returns to Main Menu
Normal
Adjust preset color temperature of Cool, Neutral, Warm or User for customized
red, green and blue levels: The user can adjust and set tones.
- R Adjust red and equivalent colors at the range from 0 to 100. The greater the
value is, the deeper the color is, and vice versa.
- G Adjust green and equivalent colors at the range from 0 to 100. The greater
the value is, the deeper the color is, and vice versa.
- B Adjust blue and equivalent colors at the range from 0 to 100. The greater
the value is, the deeper the color is, and vice versa.
Gamma
Adjust of gamma value (Gamma 1.8, Gamma 2.0, Gamma 2.2, Gamma 2.4)
Menu Source (MD-DFM19HBV-SDI)
Selects the Input signal of your display. The signal is not auto detected, so you have to choose the
input signal manually between VGA, DVI, S-Video, Composite Video, Component (YPbPr/YCbCr),
RGBS or SDI.
Exit
Returns to Main Menu
Analog VGA
Select D-Sub 15-pin input signal (analog)
Digital
Select DVI 24-pin input signal (digital)
S-Video
Select S-Video input signal (Video)
Composite
Select Composite (CVBS) input signal (Video)
YPbPr/YCbCr
Select Component input signal (Video)
RGBS
Select RGBS input signal (Video)
SDI
Select SDI input signal (Video)
Users Manual: DFM19HBV
2007 Richardson Electronics GmbH
Division A.C.T. Kern
18
Menu Source (MD-DFM19HBV-HDI)
Selects the Input signal of your display. The signal is not auto detected, so you have to choose the
input signal manually between DVI-I, DVI-D, S-Video, Composite Video, Component (YPbPr/YCbCr),
RGBS or HD-SDI.
Exit
Returns to Main Menu
Analog DVI-I
Select DVI 24-pin input signal (analog)
Digital DVI-I
Select DVI 24-pin input signal (digital)
Digital DVI-D
Select DVI 24-pin input signal (digital)
S-Video
Select S-Video input signal (Video)
Composite
Select Composite (CVBS) input signal (Video)
YPbPr/YCbCr
Select Component input signal (Video)
RGBS
Select RGBS input signal (Video)
HD/HD-SDI
Select HD-SDI input signal (Video)
Menu Management
Utility contains several adjustments in order to change miscellaneous properties of your display, e.g.
language, OSD position etc.
Exit
Returns to Main Menu
Scaling
Select one scale from the followings to display images: Full, 1:1, 4:3, 16:9, Full
16:9. When using scaling function in expanding direction other than 1:1, image
will be expanded and thus blur. In Full 16:9 scale, image will be expanded in
height and cut in width.
OSD Display
Adjust the OSD position on the screen.
OSD H. Position: When rotating Control dial clockwise, OSD moves to the right,
and vice versa.
OSD V. Position: When rotating Control dial clockwise, OSD moves downward,
and vice versa.
Language
Selecting this control, then rotate the Control Dial to select the language you
want: English, French, German, Italian, Spanish, Japanese. Press the Control
Dial to execute when selected
Recall
Initialize the data such as display position and automatic adjustment data to
factory default
Menu Memory Setting
Allows to store five different user-defined settings like brightness, contrast etc
Exit
Returns to Main Menu
Memory Save
Saves the current settings into the display memory. You can save five different
settings (USER1, USER2…)
Memory Load
Loads the previous user save data. Choose “default” to recall the original preset
data.
Users Manual: DFM19HBV
2007 Richardson Electronics GmbH
Division A.C.T. Kern
19
Cleaning and Disinfection
Equipment Surface
Wipe the equipment surface down with a moist cloth; do not allow liquid to enter the equipment. All
cleaning agents and disinfectants commonly used in hospitals are suitable. Do not use abrasive
products.
Connection Cables
Disconnect the cables from the device and remove the power connector before cleaning or
disinfection. When disconnecting the cable, be sure to pull on the connector, not on the cable.
Clean the cable by rubbing it down with a cloth moistened with soap water. Use a disinfectant for
disinfection. Do not immerse the cable in liquid.
WARNING:
Shock Hazard — Disconnect the power supply from the power line and all display connection
cables before cleaning or disinfection.
Do not reconnect the devices to the power line or to other devices before all cleaned parts
are completely dry.
CAUTION:
Personal Injury, Equipment Damage — Strictly observe the instructions for use of the
cleaning agents and disinfectants supplied by the manufacturers.
Users Manual: DFM19HBV
2007 Richardson Electronics GmbH
Division A.C.T. Kern
20
Appendix
Technical Information*
(* Applicable after a minimum warm-up time of 30 minutes)
Specification of the medical flat screen DFM19HBV
Module 19 Inch SXGA-TFT-LCD, diagonal 48,3 cm
Active Area 376 mm horizontal x 301 mm vertical
Resolution 1280 x 1024
Pixel pitch 0,294 mm x 0,294 mm
Response Time 12ms
Colors 16.7 Million
Viewing angle 178° / 178° horizontal / vertical
Contrast ratio 600:1 typical
Brightness 300cd/m² typical
Analog Input Signal 0.7 Vpp/75 Ohm
Horizontal sync and composite sync signal: TTL level 2.5~5.5V
(plus . minus)
Vertical sync signal: TTL level 2.5~5.5V (plus . minus)
Input Signal DFM19HBV-SDI VGA, DVI
S-Video
BNC connector: Composite signal
BNC connector: Component signal / RGBS signal
SD-SDI connector: Compliant to SMPTE-259M, NTSC, PAL
Input Signal DFM19HBV-HDI DVI-I, DVI-D
S-Video
BNC connector: Composite signal
BNC connector: Component signal / RGBS signal
HD-SDI connector: Compliant to SMPTE-292M, NTSC, PAL
Power consumption 24V= (60W / 15W Standby)
Power management according to VESA
®
DPMS
Medical Power Supply MEDICAL POWER SUPPLY
Medi Power AD-2480MB, AC-Input: 100 – 240V~, 50 – 60Hz ,
DC-Output: +24V= / 3.33A
or
Lien LE-0312B130W AC-Input: 100 – 240V~, 50 – 60Hz ,
DC-Output: +24V= / 5.41A
Dimension Width 432mm x Depth 251mm x Height 466mm (landscape)
Weight 9,2 kg
Temperature Rage Operation: C to ~ 35°C
Storage: -20°C ~ +60°C
Humidity: Operation: 20% ~ 80%, (no condensation)
Storage: 10% ~ 90%, (no condensation)
Plug & Play VESA® DDC2B
Approvals UL60601-1, CSA C22.2 No. 601.1, TÜV (EN60601-1), FCC, CE
Options Stand base OP-DFM19-ENDO
Despite high quality controls of the panel manufacturer sometimes defect pixels can not be avoided.
Compare with specification of panel manufacturer.
Users Manual: DFM19HBV
2007 Richardson Electronics GmbH
Division A.C.T. Kern
21
Timings
Illustration 7 – Timings
Caution: 1600x1200 is a downscaled pseudo-timing!
  • Page 1 1
  • Page 2 2
  • Page 3 3
  • Page 4 4
  • Page 5 5
  • Page 6 6
  • Page 7 7
  • Page 8 8
  • Page 9 9
  • Page 10 10
  • Page 11 11
  • Page 12 12
  • Page 13 13
  • Page 14 14
  • Page 15 15
  • Page 16 16
  • Page 17 17
  • Page 18 18
  • Page 19 19
  • Page 20 20
  • Page 21 21
  • Page 22 22
  • Page 23 23
  • Page 24 24
  • Page 25 25
  • Page 26 26
  • Page 27 27
  • Page 28 28
  • Page 29 29
  • Page 30 30
  • Page 31 31
  • Page 32 32
  • Page 33 33
  • Page 34 34
  • Page 35 35
  • Page 36 36
  • Page 37 37
  • Page 38 38
  • Page 39 39
  • Page 40 40
  • Page 41 41
  • Page 42 42
  • Page 43 43
  • Page 44 44
  • Page 45 45
  • Page 46 46
  • Page 47 47
  • Page 48 48
  • Page 49 49
  • Page 50 50
  • Page 51 51
  • Page 52 52
  • Page 53 53
  • Page 54 54
  • Page 55 55
  • Page 56 56
  • Page 57 57
  • Page 58 58
  • Page 59 59
  • Page 60 60
  • Page 61 61
  • Page 62 62
  • Page 63 63
  • Page 64 64
  • Page 65 65
  • Page 66 66
  • Page 67 67
  • Page 68 68
  • Page 69 69
  • Page 70 70
  • Page 71 71
  • Page 72 72
  • Page 73 73
  • Page 74 74
  • Page 75 75
  • Page 76 76
  • Page 77 77
  • Page 78 78
  • Page 79 79
  • Page 80 80
  • Page 81 81
  • Page 82 82
  • Page 83 83
  • Page 84 84
  • Page 85 85
  • Page 86 86
  • Page 87 87
  • Page 88 88
  • Page 89 89
  • Page 90 90
  • Page 91 91
  • Page 92 92
  • Page 93 93
  • Page 94 94
  • Page 95 95
  • Page 96 96
  • Page 97 97
  • Page 98 98
  • Page 99 99
  • Page 100 100
  • Page 101 101
  • Page 102 102
  • Page 103 103
  • Page 104 104
  • Page 105 105
  • Page 106 106
  • Page 107 107
  • Page 108 108
  • Page 109 109
  • Page 110 110
  • Page 111 111
  • Page 112 112
  • Page 113 113
  • Page 114 114
  • Page 115 115
  • Page 116 116
  • Page 117 117
  • Page 118 118
  • Page 119 119
  • Page 120 120
  • Page 121 121
  • Page 122 122
  • Page 123 123
  • Page 124 124
  • Page 125 125

Canvys MD-DFM19-ENDO Datasheet

Category
LED displays
Type
Datasheet

Ask a question and I''ll find the answer in the document

Finding information in a document is now easier with AI