Page is loading ...

CKD Corporation
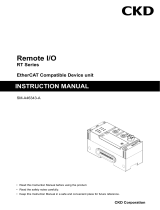
Remote I/O
RT Series
System Construction
• Read this Instruction Manual before using the product.
• Read the safety notes carefully.
• Keep this Instruction Manual in a safe and convenient place for future reference.
SM-A46342-A
INSTRUCTION MANUAL
INSTRUCTION MANUAL

SM-A46342-A PREFACE
i 2023-02-13
PREFACE
Thank you for purchasing CKD's "RT Series". This Instruction Manual contains basic matters such as
installation and usage instructions in order to ensure optimal performance of the product. Please read
this Instruction Manual thoroughly and use the product properly.
Keep this Instruction Manual in a safe place and be careful not to lose it.
Product specifications and appearances presented in this Instruction Manual are subject to change
without notice.
• This product is intended to be used by persons with sufficient knowledge and experience in the
following areas.
CKD shall not be responsible for accidents caused by persons who selected or used the product
without knowledge or sufficient training with respect to them.
- Electricity (qualified electrician or equivalent)
- The industrial network communications used
- FA systems in general
- Each of the systems that use manifold solenoid valves, IO-Link, etc.
• Since there are a wide variety of customer applications, it is impossible for CKD to be aware of all
of them.
•
Depending on the application or usage, the product may not be able to exercise its full
performance or an accident may occur. It is the responsibility of the customer to check the product
specifications and decide how the product shall be used in accordance with the application and
usage.
• The PC software RTTools
CKD does not offer any warranties whatsoever regarding information provided in relation to this
software. This includes any warranties regarding descriptions, accuracy, safety, marketability, and
fitness for particular uses or purposes.
CKD Corporation shall not be responsible for any damage arising from the software.
The names of companies and products in this text are the registered trademarks or trademarks of their
respective companies.

SM-A46342-A SAFETY INFORMATION
ii 2023-02-13
SAFETY INFORMATION
When designing and manufacturing any device incorporating the product, the manufacturer has an
obligation to ensure that the device is safe. To that end, make sure that the safety of the machine
mechanism of the device, the pneumatic or water control circuit, and the electric system that controls
such mechanism is ensured.
To ensure the safety of device design and control, observe organization standards and relevant laws
and regulations, which include the following:
ISO4414, JIS B8370, JFPS2008 (the latest edition of each standard),
the High Pressure Gas Safety Act, Industrial Safety and Health Act, other safety rules, organization
standards, and relevant laws and regulations.
In order to use our products safely, it is important to select, use, handle, and maintain the products
properly.
Observe the warnings and precautions described in this Instruction Manual to ensure device safety.
Although various safety measures have been adopted in the product, improper handling may lead to an
accident. To avoid this:
Thoroughly read and understand this Instruction Manual before using the product.
To explicitly indicate the severity and likelihood of potential harm or damage, precautions are classified
into three categories: "DANGER", "WARNING", and "CAUTION".
DANGER
Indicates an imminent hazard. Improper handling will cause death or
serious injury to people.
WARNING
Indicates a potential hazard. Improper handling may cause death or
serious injury to people.
CAUTION
Indicates a potential hazard. Improper handling may cause injury to people
or damage to property.
Precautions classified as "CAUTION" may still lead to serious results depending on the situation.
All precautions are equally important and must be observed.
Other general precautions and tips on using the product are indicated by the following icon.
Indicates general precautions and tips on using the product.

SM-A46342-A SAFETY INFORMATION
iii 2023-02-13
Precautions on Product Use
DANGER
Do not use the product for the following applications:
• Medical devices involved in sustaining or managing people's lives or physical health
• Mechanisms and mechanical devices used for the purpose of moving and transporting people
• Important safety parts for mechanical devices
WARNING
The product must be handled by a qualified person who has extensive knowledge and
experience.
The product is designed and manufactured as a device or part for general industrial machinery.
Use the product within the specifications.
The product must not be used beyond its specifications.
This product is intended for use in general industrial machinery, equipment or parts. It is not
intended for use outdoors (except for products with outdoor specifications) or for use under the
following conditions or environments.
• Use for applications where safety is required
• In applications for nuclear power, railroad systems, aviation, ships, vehicles, and medical
equipment
• In applications for equipment that directly touches beverages or food
• For safety measures for amusement equipment, emergency shut-off circuits, press machines,
or brake circuits
• Use for applications where life or assets could be significantly affected, and applications where
special safety measures are required
(An exception will be made if the customer consults with CKD prior to use and understands the
specifications of the product. However, even in that case, safety measures must be taken to avoid
danger in case of a possible failure.)
Never modify or additionally machine this product.
These may cause failure or malfunction. In addition, they are not covered by our warranty.
Do not handle the product or remove pipes and devices until safety is confirmed.
The product may operate in an unexpected way, causing injury to people or damage to equipment.
• Inspect and service the machine and devices only after confirming the safety of the entire
system. Also, turn off the energy source (air supply or water supply) and power to the relevant
facility. Release compressed air from the system and use extreme care to avoid water or
electric leakage.
• Since there may be hot or live parts even after operation has stopped, use extreme care when
handling the product or removing pipes and devices.
• When starting or restarting a machine or device that has pneumatic components, make sure
that a safety measure (such as a pop-out prevention mechanism) is in place and system
safety is secured.
Observe the warnings and cautions on the following pages to prevent accidents.

SM-A46342-A CONTENTS
iv 2023-02-13
CONTENTS
PREFACE ........................................................................................................................... i
SAFETY INFORMATION .................................................................................................. ii
Precautions on Product Use .......................................................................................... iii
CONTENTS ...................................................................................................................... iv
INSTRUCTION MANUAL FOR THIS PRODUCT .......................................................... vii
List of Related Instruction Manuals .............................................................................. vii
TERMS RELATED TO THE "SYSTEM CONSTRUCTION" ......................................... viii
1. SYSTEM OVERVIEW ............................................................................................ 1
1.1 Features ............................................................................................................... 2
1.2 External Dimensions ............................................................................................ 3
1.3 System Structure ................................................................................................. 4
System structure............................................................................................. 4
Position of the device unit .............................................................................. 5
1.4 Component Devices of the System ..................................................................... 6
List of units for the system.............................................................................. 6
Related software ............................................................................................ 8
Accessory list .................................................................................................. 8
1.5 System Specifications ........................................................................................ 10
1.6 Power Supply Unit ..............................................................................................11
External dimensions ......................................................................................11
Names and functions of each part ............................................................... 12
Unit specifications ........................................................................................ 13
How to calculate the supplied power............................................................ 14
Power supply when multiple power supply units are used .......................... 16
1.7 End Units ........................................................................................................... 17
External dimensions ..................................................................................... 17
Names and functions of each part ............................................................... 18
Unit specifications ........................................................................................ 18
2. DESIGN ................................................................................................................ 19
3. INSTRUCTIONS FOR USE ................................................................................. 20
4. INSTALLATION AND WIRING ............................................................................ 22
4.1 Installation .......................................................................................................... 22
Degree of protection ..................................................................................... 22
Installation environment ............................................................................... 22
Assembly ...................................................................................................... 23
Installation .................................................................................................... 26
4.2 Wiring ................................................................................................................. 31
Power supply wiring ..................................................................................... 31
5. POWERING UP .................................................................................................... 34
6. SETTINGS ............................................................................................................ 35
6.1 Overview ............................................................................................................ 35
Using PC software ........................................................................................ 35
Using industrial network communication ...................................................... 35
6.2 List of Common Settings for Device unit ........................................................... 36
7. I/O ASSIGNMENT ................................................................................................ 37
7.1 Important Notes for When Using a Variable I/O Unit ......................................... 37

SM-A46342-A CONTENTS
v 2023-02-13
8. COMMON SYSTEM FUNCTIONS ....................................................................... 38
8.1 Remote I/O System Diagnostic Information Function ....................................... 38
8.2 CH/Point/Port Diagnostic Information Function and Unit Diagnostic
Information Function .......................................................................................... 39
8.3 Error Log Function ............................................................................................. 40
Error log contents ......................................................................................... 40
Error log filtering ........................................................................................... 42
Error log monitoring ...................................................................................... 42
Error log clearing .......................................................................................... 42
Error log output ............................................................................................. 42
Error log settings .......................................................................................... 43
8.4 Function for Output Settings in the Event of a Communication Error ............... 44
To set the same operation for all units at once ............................................ 44
To set individual operations for each unit ..................................................... 44
9. PC SOFTWARE OPERATION ............................................................................. 45
9.1 From Installation to Start-Up .............................................................................. 45
9.2 PC Software RTTools Specifications ................................................................. 46
Operating environment ................................................................................. 46
9.3 Function List ....................................................................................................... 46
9.4 Screen Changes ................................................................................................ 48
9.5 Main Window ..................................................................................................... 49
"Unit configuration" main tab ........................................................................ 49
"I/O Monitor" main tab .................................................................................. 49
"I/O Memory" main tab ................................................................................. 50
"Error" main tab ............................................................................................ 50
"Exp/Imp Settings" main tab ......................................................................... 51
9.6 Sub Windows ..................................................................................................... 51
"Unit current state" tab ................................................................................. 51
"Unit Setting" tab .......................................................................................... 52
"Connector-each sets" tab (digital input units only) ..................................... 53
"CH/point/port-each sets" tab ....................................................................... 54
"Forced I/O setting" tab ................................................................................ 55
"ISDU" tab (IO-Link master unit only)........................................................... 56
"Get error" tab (IO-Link master unit only) ..................................................... 56
10. PRACTICAL EXAMPLE ...................................................................................... 57
10.1 System Structure ............................................................................................... 57
10.2 Prior Checking ................................................................................................... 58
10.3 Operations in the Master-Side Configuration Tool ............................................ 59
10.4 I/O Assignment in PDO Communication ........................................................... 59
10.5 Operations in the PC software ........................................................................... 60
10.6
Checking the State of EtherCAT Communication, and Starting Control from
the Upper Master ............................................................................................... 61
11. MAINTENANCE AND TROUBLESHOOTING .................................................... 62
11.1 Maintenance ...................................................................................................... 62
Inspection ................................................................................................... 63
Cleaning ...................................................................................................... 63
11.2 Troubleshooting ................................................................................................. 64
Troubleshooting flowchart .......................................................................... 64
Troubleshooting list ..................................................................................... 65
12. APPENDIX: LIST OF REMOTE I/O SYSTEM OPERATIONS IN THE EVENT
OF A FAULT ......................................................................................................... 70
12.1 Communication Error ......................................................................................... 70
12.2 Each Connection Line Error .............................................................................. 71

SM-A46342-A CONTENTS
vi 2023-02-13
13. WARRANTY PROVISIONS ................................................................................. 72
13.1 Warranty Conditions .......................................................................................... 72
13.2 Warranty Period ................................................................................................. 72

SM-A46342-A INSTRUCTION MANUAL FOR THIS PRODUCT
vii 2023-02-13
INSTRUCTION MANUAL FOR THIS PRODUCT
The manuals related to the Remote I/O RT Series are separated by purpose as follows.
(1) Entire RT remote I/O system, and the PC software
(2) Device unit for each industrial network
(3) Each I/O unit
"Remote I/O RT Series Instruction Manual: System Construction" is mandatory. Other manuals are not
mandatory but must be referred to according to the units used.
(1) Entire RT remote I/O system, and the PC software
(2) Device unit for each industrial network
Remote I/O RT Series Instruction Manual: System
EtherCAT Compatible Device Unit Instruction Manual
Digital I/O Unit Instruction Manual
Analog I/O Unit User's Manual
IO-Link Master Unit Instruction Manual
EtherNet/IP Compatible Device Unit Instruction Manual
(3) Each I/O unit
Purpose RTXTools
Manual RTXTools
Analog I/O Unit Instruction Manual
List of Related Instruction Manuals
Instruction
Manual No.
Instruction Manual name
Description
SM-A46342
Remote I/O RT Series Instruction Manual:
System Construction (this manual)
Instruction manual for the entire remote I/O RT Series
system
Includes explanations of the PC software RTTools, the
power supply unit RT-XP24A01N, and the End unit RT-
XEE□N00N.
SM-A71112
EtherNet/IP Compatible Device unit Instruction
Manual
Instruction manual for the EtherNet/IP compatible device
unit RT- XTENN00N
SM-A46343
EtherCAT Compatible Device unit Instruction
Manual
Instruction manual for the EtherCAT compatible device
unit RT-XTECN00N
SM-A46344
IO-Link Master Unit Instruction Manual
Instruction manual for the IO-Link master unit RT-
XLMSA08N
SM-A46345
Digital I/O Unit Instruction Manual
Instruction manual for the digital I/O unit RT-
X□DG□□□□
SM-A46347
Analog I/O Unit Instruction Manual
Instruction manual for the analog I/O unit RT-X□AGA0 2N
Always read the instruction manual for each product connected to the remote I/O RT Series.
The product types that can be connected are:
• Upper master units in each industrial network (connected to a device unit)
• IO-Link devices (connected to the IO-Link master unit)
• Other sensors/actuators (connected to a digital I/O unit, analog I/O unit, or IO-Link master
unit)

SM-A46342-A TERMS RELATED TO THE "SYSTEM CONSTRUCTION"
viii 2023-02-13
TERMS RELATED TO THE "SYSTEM
CONSTRUCTION"
Term
Definition
Remote I/O system
Devices for industrial networks.
As a communication unit, a device unit can be used with any combination of functional units; digital
I/O, analog I/O, and IO-Link master units.
Entire remote I/O system
Refers to the remote I/O system's overall hardware configuration.
Configuration tool for upper
masters
Configuration software for the industrial network for upper masters (e.g. PLCs).
(For example, for EtherCAT, it refers to Sysmac Studio by Omron Corporation, TwinCAT by
Beckhoff, etc.)
PC software
Refers to RTTools, a piece of dedicated PC software for settings and checking the status of a
remote I/O system. Use a commercially available USB cable to connect it to the device unit.
Device unit
In a remote I/O system, a unit that functions as an interface between an industrial network and
each connected I/O unit.
EtherCAT compatible device
unit
Device unit compatible with EtherCAT as an industrial network.
EtherNet/IP compatible device
unit
Device unit compatible with EtherNet/IP as an industrial network.
Unit
Generic term for I/O unit, device unit, power supply unit, and End unit.
I/O unit
In a remote I/O system, a unit that is connected to a device unit and is something other than a
power supply unit or End unit.
Fixed I/O unit
I/O unit with a fixed size assigned to the upper master.
E.g.) Digital I/O unit, analog I/O unit
Variable I/O unit
I/O unit with a size assigned to the upper master that varies depending on the use.
E.g.) IO-Link master unit
Digital I/O unit
In a remote I/O system, an I/O unit that functions as a digital input or output.
Analog I/O unit
In a remote I/O system, an I/O unit that functions as an analog input or output.
IO-Link master unit
In a remote I/O system, a unit that functions as an IO-Link master.
Power supply unit
In a remote I/O system, a unit that functions as a supply power for the device unit and I/O units.
End unit
In a remote I/O system, a unit that is connected at the left or right end.
Input unit
Generic term for a digital input or analog input unit in a remote I/O system.
Output unit
Generic term for a digital output or analog output unit in a remote I/O system.
Input/output unit
In a remote I/O system, a generic term for a unit that performs digital input/output or analog
input/output.
Connected I/O unit
Refers in particular to I/O units that are connected to a device unit to form a remote I/O system.
CH
Basic unit for counting connections to external devices (e.g. analog I/O units) that input and output
numerical values.
Port
Basic unit for counting connections with communication functions, such as IO-Link communication.
Point
Basic unit for counting connections for bit information, such as digital I/O units.
CH/point/port number
Number of a CH/point/port in the I/O units.
Connector
Hardware connector. The shape and size are indicated. For example, M12.
Unit ID
Identifier that indicates the functional type of the unit. It is used during automatic recognition of the
I/O units that make up the system, and for logging functions.
Consists of eight hexadecimal digits. The digits consist of the following:
Top 4 digits: unit type, bottom 4 digits: input data size or output data size.
Unit position number
Position number of the device units and I/O units in the remote I/O system.
The device unit is 0. The numbers of the I/O units are as follows:
- If the device unit is at the left end of the remote I/O system: The I/O unit directly connected to the
device unit = 1, and the numbers increase from left to right
- If the device unit is between groups of I/O units: The I/O unit at the left end of the remote I/O
system = 1, and the numbers increase from left to right
Output power supply
Power supply to the external output device.
Unit/input power supply
Power supply for connected I/O units and external input devices.
Process data
In an industrial network, a generic term for data that is transmitted cyclically.
Error code
In the remote I/O system diagnostic information or CH/point/port diagnostic information, this
displays a hexadecimal number as 8 bits (Note 1) or 16 bits (Note 2) when the corresponding bits
are on.
Note 1: For remote I/O system diagnostic information.
Note 2: For unit diagnostic information or CH/point/port diagnostic information.
Error log function
Function by which the device unit logs faults (errors) in itself or units connected to it. It logs the

SM-A46342-A TERMS RELATED TO THE "SYSTEM CONSTRUCTION"
ix 2023-02-13
Term
Definition
errors in its own non-volatile memory. A history of up to 255 errors can be stored. It is also possible
to just log errors that meet specified conditions.
Error log filter function
Function for just logging errors that meet specified conditions.
Log filter function settings
In the device unit's error logging function, set which filters are enabled in the function for just
logging specific errors.
Log filter (error type) settings
Set the error type to be filtered if log filter (error type) is enabled as a filter.
Log filter (unit ID) settings
Set the unit ID to be filtered if log filter (unit ID) is enabled as a filter.
Log filter (unit position
number) settings
Set the unit position number to be filtered if log filter (unit position number) is enabled as a filter.
Log filter (CH/point/port
number) settings
Set the CH/point/port number to be filtered if log filter (CH/point/port number) are enabled as a
filter.
Error type
Type of the error (fault) recognized by the device unit.
Used for remote I/O system diagnostic information and error logging functions. The types are:
System error, hardware error, user operation waiting, power failure, unit output error, unit input
error
Unit configuration error
Error that occurs if the device unit does not automatically recognize a connected I/O unit correctly
when it is powered on, or if it detects a change in the number of connected I/O units during
operation.
Remote I/O system diagnostic
information function
Diagnostic information that indicates the types of errors occurring in the entire remote I/O system.
The device unit's DIP switch SW8 setting is used to select whether to add it to the data sent to the
master in cyclic communication.
CH/point/port diagnostic
information
Diagnostic information for each CH/point/port of the unit.
There are 16 bits per CH/point/port, and each bit corresponds to a different type of fault. If there is
a fault, the function is 1 (on). The type of fault varies depending on the unit type.
Unit diagnostic information
Data obtained by OR-ing together all the CH/point/port diagnostic information (16 bits) for all
CH/points/ports of the unit. If a fault is occurring, the value of the unit diagnostic information will be
greater than 0.
Communication error
operation setting
Function that determines whether the outputs of all I/O units (Note 1) will be kept or cleared when
a communication error (industrial network communication or internal bus communication) occurs,
or whether the behavior will follow the individual settings of the I/O units.
Note 1: Refers to a digital output, IO-Link master unit (when in digital output mode), or analog
output.
ON/OFF operation count
monitoring function
Function by which the device unit reads and records all the count values of all connected units
(digital I/O unit) that have an ON/OFF operation count function. The monitoring itself is performed
by each I/O unit.
Analog input/output value byte
order specification function
Function by which the device unit changes the byte order of the analog input/output values of
connected analog I/O units according to the "analog value byte order" setting.
Forced setting function
Function to forcibly configure an I/O unit's input or output settings via the PC software.
Power monitoring function
Function by which the device unit monitors the respective voltages of the unit/input power and
output power being supplied from the power supply unit closest to the device unit itself (on the left
when facing it). In the event of an error, a unit/input or output power failure error will occur.
User operation waiting
Error that occurs if the system is not behaving as intended due to a setting change or error, and is
restored by powering it off and on again.
Memory read/write error
Error that occurs if the various types of memory cannot be read from or written to, or the data that
has been read is incorrect.
Factory setting error
Error that occurs if the device unit's serial number or MAC address is the initial value.
Initialized set memory
Error that occurs when the setting memory is initialized and the system started up while the device
unit's DIP switch SW5 (initialize parameters on start-up) is off.

SM-A46342-A 1. SYSTEM OVERVIEW
1 2023-02-13
1. SYSTEM OVERVIEW
The remote I/O RT Series is a device for various industrial networks.
By attaching various types of units (such as digital I/O, analog I/O, IO-Link master) to a device unit for
each network, the remote I/O RT Series can be connected to a master for various industrial networks.
If connecting the PC software (free of charge) to the device unit via USB, it is possible to check the
information and status of the entire RT Series remote I/O system, and the settings and status of each
unit.
The remote I/O system is controlled through an industrial network from external devices such as PLCs.
Also, the devices are mounted inside or outside the equipment to make them more intelligent or require
less wiring.
The control panel can be smaller by wiring the master and the remote I/O system with an industrial
network and installing the remote I/O system outside the control panel.
PC software
RTXTools
RT Series remote I/O system
Slave unit
Power supply unit
I/O units
Left end unit
USB cable
To industrial network master
Industrial network
Right end unit

SM-A46342-A 1. SYSTEM OVERVIEW
2 2023-02-13
1.1 Features
Features include:
• Device unit that supports various industrial networks. (As of January 2023, EtherCAT and EtherNet/IP
are supported.)
• One device unit and up to 17 I/O units can be connected to a remote I/O system.
• More power supply units can be added to suit the current consumption of the device unit, I/O unit,
and external loads.
• Diagnostic information for the entire remote I/O system can be cyclically transmitted to an upper
master via an industrial network.
• It is possible to specify what output operation to perform in the event of a communication error either
for all the units together or separately for each one.
• The settings for the entire remote I/O system can be configured using industrial network
communication or the PC software (free of charge).
• A device unit can log its own or connected I/O units' errors to its own non-volatile memory.
In addition, it is possible to use the PC software to save the time series data to a file.
• An IO-Link master unit can be installed and IO-Link devices connected to it.
Supports both IO-Link process data communication (cyclic communication) and ISDU communication
(message communication).
IO-Link port-to-port communication cycle times can be synchronized.
• Service data for the IO-Link devices can be accessed via the IO-Link master unit.
• Various other monitoring functions are supported.
• Using the PC software, it is possible to check the information and status of the entire remote I/O
system, and the settings, status, current values, etc. of each unit.

SM-A46342-A 1. SYSTEM OVERVIEW
3 2023-02-13
1.2 External Dimensions
Unit: mm
p = number of I/O
units
r = number of
power supply
units
The total width of the remote I/O must be 963 mm or less.
An example of a configuration with total width close to 963 mm is as follows:
E.g.)
Unit name
Quantit
y
Width (mm) per
unit
Width (mm)
End unit (left end)
1
31
31
Power supply unit (e.g.: 2 units)
2
27
54
Device unit
1
46.1
46.1
I/O unit
17
46.1
783.7
End unit (right end)
1
31
31
Total
945.8

SM-A46342-A 1. SYSTEM OVERVIEW
4 2023-02-13
1.3 System Structure
System structure
Remote I/O system
Each industrial network
To higher-level master
Power supply
unit
Left end unit
Slave unit
I/O units
Right end unit
The system consists of the following units:
Unit type
Restrictions on the connection position in
the remote I/O system
Restrictions on the number of units in the
remote I/O system
Left End unit
Left end of the remote I/O system.
1
The width of the
entire remote I/O
system must be
963 mm or less
Device unit
Connected on the right of the left End unit.
1
Input unit
Located between the left End unit and right End
unit.
A total of up to 17
Output unit
Input/output unit
IO-Link master unit
Power supply unit
Directly connected to the right of the left End unit
Note: When adding more, they can be
connected anywhere in the remote I/O
system.
1 (required on the left)
More can be added as required
(No restrictions on the number of
units that can be added, as long
as the entire width stays within
963 mm)
Right End unit
Right end of the remote I/O system.
1

SM-A46342-A 1. SYSTEM OVERVIEW
5 2023-02-13
Position of the device unit
The device unit can be placed either on the right or left of the I/O unit.
◼ Unit position numbers
Unit position numbers are assigned to the device unit and I/O units (Note 1).
Note 1: This does not include the power supply units (left end and additional).
Since the maximum number of I/O units is 17, the unit position numbers are from 1 to 17 (device unit =
0).
The unit position numbers are as follows, depending on the position of the device unit:
Position of the device
unit
Order of unit position numbers
Example of unit position numbers
On the left of all I/O units
The device unit = 0, and the designations
continue in ascending order to the right
Unit position number
0
1
2
3
4
On the right of a group of
I/O units, or between
groups of them
The device unit = 0,
the I/O unit at the left end of the remote I/O
system = 1, then the designations go in
ascending order to the right
Unit position number
1
2
0
3
4
◼ Internal buses of the remote I/O system
In the remote I/O system, power and communication are both shared between the device unit and
multiple I/O units via internal buses.
電源
電源
Power
Comm.
電源
電源
Power
Comm.
Power and communication

SM-A46342-A 1. SYSTEM OVERVIEW
6 2023-02-13
1.4 Component Devices of the System
List of units for the system
◼ Device unit
Unit name
Model No.
Unit type
Main
function
Connector
style
Number of
CH/points
Assigned I/O
size
Polarity
EtherCAT compatible
device unit
RT-XTECN00N
Device unit
EtherCAT
-
-
-
-
◼ I/O units
There are fixed I/O units and a variable I/O unit.
Fixed I/O units
These are I/O units with a fixed size assigned to the upper master.
Unit name
Model No.
Unit type
Main function
Connector
style
Number of
CH/points
Assigned I/O
size
Polarity
Digital I/O unit
RT-XADGA16A
Input
Digital
M12
16 points
2 bytes
PNP
RT-XADGA16B
16 points
2 bytes
NPN
RT-XADGB08A
M8
8 points
1 byte
PNP
RT-XADGB08B
8 points
1 byte
NPN
RT-XBDGA16A
Output
M12
16 points
2 bytes
PNP
RT-XBDGA16B
16 points
2 bytes
NPN
Analog I/O unit
RT-XAAGA02N
Input
Analog
M12
2 CH
4 bytes
-
RT-XBAGA02N
Output
2 CH
4 bytes
-
Variable I/O unit
This is an I/O unit with a size assigned to the upper master that is not fixed, but varies depending on the
devices connected.
Unit name
Model No.
Unit type
Main function
Connector
style
Number of
CH/points
Assigned I/O
size
Polarity
IO-Link master unit
RT-XLMSA08N
IO-Link
IO-Link master
M12
8 ports
Variable (up to
64 bytes / up to
64 bytes) (Note
1)
-
Note 1: The default process data size per port is input 4 bytes / output 4 bytes.
◼ Other units
Unit name
Model No.
Unit type
Main function
Connector
style
Number of
CH/points
Assigned
I/O size
Polarity
Power supply unit
RT-XP24A01N
Power supply
24 V power input
Supplies the following
to inside the system
- Unit/input: 24 VDC
±10%, 3 A
- Output: 24 VDC
+10%-5%, 3 A
M12
-
-
-
End unit
RT-XEELN00N
End (direct)
Direct
screw
mounting
Left end,
FG ground
-
-
-
-
RT-XEERN00N
Right end
-
-
-
-
RT-XFELN00N
End (DIN)
DIN rail
mounting
Left end,
FG ground
-
-
-
-
RT-XFERN00N
Right end
-
-
-
-

SM-A46342-A 1. SYSTEM OVERVIEW
7 2023-02-13
Reference: Structure of model Nos.
RT-X(1)(2)(3)(4)(5)
(1) : Unit type
Model
No. (1)
Unit type
Description
T
Device unit
Unit for connecting to an industrial network
A
Input unit
Unit for performing input
B
Output unit
Unit for performing output
L
IO-Link master unit
Unit that functions as an IO-Link master
E
End unit
(Direct screw mounting)
Unit directly mounted with screws at the left or right end of the remote I/O
system
Note: If using RT-XVVB□□□□, this End unit must be used.
F
End unit
(DIN rail mounting)
Unit mounted with a DIN rail at the left or right end of the remote I/O system
Note: If using RT-XVVA□□□□, this End unit must be used.
P
Power supply unit
Unit that powers the units in the remote I/O system
(2) : Main function
Model
No. (2)
Main function
Applicable unit types
EC
EtherCAT
For device unit
DG
Digital
Input units or output units
AG
Analog
Input units or output units
MS
Master
For IO-Link master units
EL
Left end
For End units (direct screw or DIN rail mounting)
ER
Right end
For End units (direct screw or DIN rail mounting)
24
24 V power supply
For power supply units
(3) : Connector style
Model
No. (3)
Connector style
Applicable unit types
A
M12
For digital input units, digital output units, analog input units, analog output
units, IO-Link master units, and power supply units
B
M8
For digital input units
N
No connector specified
For device unit
(4) : Number of CH/points
Model
No. (4)
Number of CH/points
Applicable unit types
01
1 CH/point
For power supply units
02
2 CH/points
For analog input units and analog output units
08
8 CH/points
For digital input units (M8 type only) and IO-Link master units
16
16 CH/points
For digital input units (M12 type only) and digital output units
00
Number of CH/points
cannot be specified
For device unit and End units
(5) : Polarity
Model
No. (5)
Polarity
Applicable unit types
A
PNP
For digital input units and digital output units
B
NPN
For digital input units and digital output units
N
Polarity cannot be
specified
For analog input units, analog output units, IO-Link master units, power
supply units, and End units

SM-A46342-A 1. SYSTEM OVERVIEW
8 2023-02-13
Related software
Software name
Function
How to get
PC software RTTools
Use it by connecting the PC to the USB port
(micro-B) on the device unit with a commercially
available USB cable.
The main functions include:
- Settings
- Monitoring current values
- Maintenance
Refer to "9. PC SOFTWARE OPERATION" for
more information.
Download the installer from the CKD website
below (Search by the model number):
https://www.ckd.co.jp/kiki/jp/
Remote I/O System Dedicated
Profile
A profile for the remote I/O system, in accordance
with the industrial network used.
E.g.) ESI file: Use it by importing it into the
EtherCAT master's configuration tool.
Download it from the CKD website below
(Search by the model number):
https://www.ckd.co.jp/kiki/jp/
Accessory list
◼ Parts that need to be provided by the user
Name
Specifications
Recommended
Power cable
(For power supply unit)
Cable with M12 socket round connector, 4-core, for
DC, straight to open-end-cable
XS2F-D421-□80-F made by OMRON
Corporation
I/O cable
(For digital input unit)
Cable with M8 plug round connector, 3-core, for
DC, straight to open-end-cable
XS3H-M321-3□□-R made by OMRON
Corporation
I/O cable
(For IO-Link master unit)
Cable with M12 plug round connector, 4-core, for
DC, straight to open-end-cable
XS2H-D421-□G0-A made by OMRON
Corporation
EtherCAT communication cable
(For EtherCAT compatible device
unit)
Cable with M12 plug round connector, 4-core, for
DC, straight to RJ45
XS5W-T421-□MC-SS made by OMRON
Corporation
Cable with M12 plug round connector, 4-core, for
DC, straight to open-end-cable
XS5H-T421-□M0-K made by OMRON
Corporation
USB cable for configuring
settings (commercial product)
(For the PC software)
USB (A) male <=> USB (micro-B) male
Length: 1.0 m
-
Mounting screws
Required for direct screw mounting
M5 x 0.8, 4 pcs
Length 20 mm or more
-
◼ Standard accessories
Name
Specifications
Model No.
(Can also be
purchased from
CKD)
Waterproof cap for device
unit's USB connector
One is included with a device unit as a standard accessory
RT-CM12
Tie rod
Two dedicated tie rods are included with a power supply unit as a standard accessory
RT-TR-P
Two tie rods are included with each of the following as a standard accessory: Device
unit, digital I/O unit, analog I/unit, and IO-Link master unit
RT-TR-1
Two dedicated tie rods are included with a right End unit as a standard accessory
RT-TR-E
Hexagon socket head bolt
for tightening tie rods
Two hexagon socket head bolts (M4 x 20) for tightening tie rods are included with a
left End unit as a standard accessory
-

SM-A46342-A 1. SYSTEM OVERVIEW
9 2023-02-13
◼ Parts that can be purchased from CKD
The following optional parts can be purchased:
Name
Model No.
Specifications
Auxiliary
bracket
Direct
screw
mounting
RT-SPB
- Attach to the unit with two M3 x 8 screws
- Direct screw mounting using two M5 hexagon socket head bolts
One is required for every four units, including the device unit
Auxiliary
bracket
DIN rail
mounting
RT-SPA
- Attach to the unit with two M3 x 8 screws
One is required for every four units, including the device unit
Waterproof
cap
For M12
connectors
RT-CM12
Applicable units: Device unit, digital I/O unit (M12 connector style), analog I/O unit,
and IO-Link master unit
Can achieve the following degree of protection: IP65/IP67
For M8
connectors
RT-CM8
Applicable unit: M8 connector style on a digital input unit
Can achieve the following degree of protection: IP65/IP67
Nameplate
RT-NP
Small resin plate for attaching to a connector face
For all units

SM-A46342-A 1. SYSTEM OVERVIEW
10 2023-02-13
1.5 System Specifications
Item
Description
Working temperature range
-10°C to +55°C
Ambient atmosphere
No corrosive gases or heavy dust
Degree of protection
IP65/IP67
Communication specifications
Depend on the device unit
Number of device unit that can be
connected
1
Number of power supply units that
can be connected
1 required. More can be added according to the required current consumption.
No limit on the number of power supply units, provided no more are connected than the hardware
limit allows.
Number of I/O units that can be
connected
1 to 17 units
Number of hard connectable units
The width of the entire remote I/O system must not exceed 963 mm
Mounting method
Either direct screw mounting or DIN rail mounting.
Reset method
By powering off the 24 V unit/input power and 24 V output power to the power supply unit, then
powering them on again.
◼ LED blinking statuses
The blinking statuses of the LEDs on the front of the remote I/O system's units are as follows for all units:
Blinking status
Blinking timing
Blinking (fast)
ms
Blinking (slow)
ms
ms
Blinking (once)
ms
ms
ms
Blinking (twice)
ms
ms
ms
ms
A video is available to show how the LEDs actually blink. If
necessary, refer to the video at the following URL (Search by
the model number):
https://www.ckd.co.jp/kiki/jp/
/