1
Statement
Thank you for purchasing this product. ZOSI is committed to providing our customers with a high quality, reliable
security solution. ZOSI cannot assume responsibility for any consequences resulting from the use thereof.
Before Installation
This product may require cabling. It is strongly suggested to test all products and parts before installation and cabling.
Applications
The system is a standalone system. It need to connect with any monitor to start live view (Such as PC monitor, TV etc.)
By adding a 3.5” SATA hard drive to the DVR, you can record&playback videos.
By connecting the DVR to the Internet, you can view the cameras anywhere anytime.
Note
This instruction is used to guide you install the system and remote surveillance, more instructions and details can be
downloaded from https://support.zositech.com/.
Tech Support
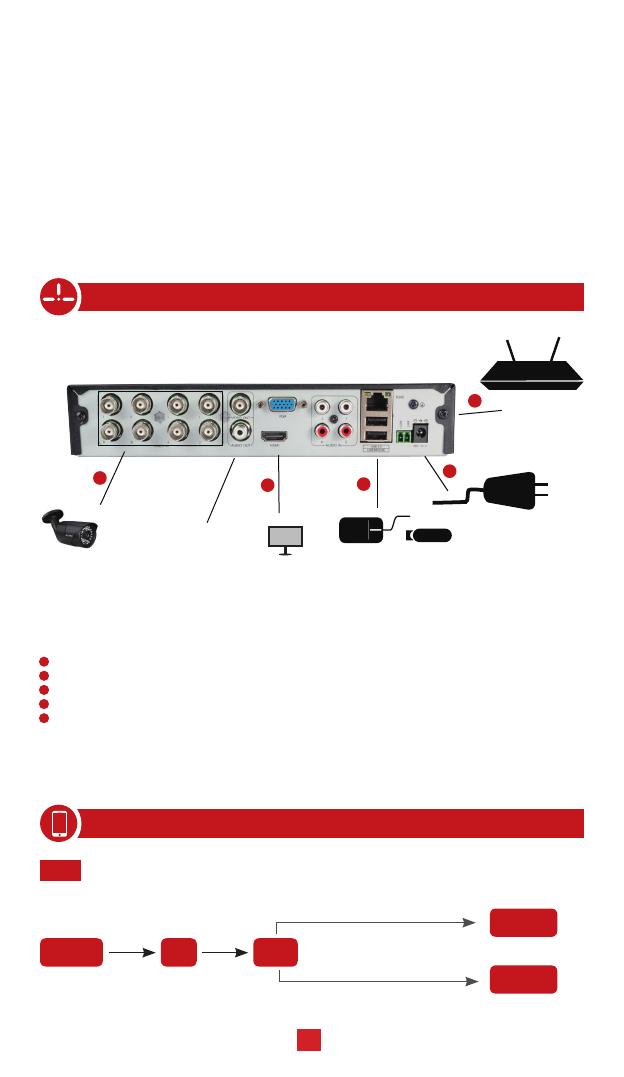
8 channel conguration shown. 4/16 channel will have the respective number of video inputs.
*Not included/sold separately
Monitor/TV
(VGA/HDMI)
Within seconds, you should see the Wizard Setting.
Then set password login to the DVR . (Password must be at least 6 characters long)
Note: If you forgot your password, please contact us to reset your password.
Connect the Camera to DVR and Plug Camera to power.
Connect monitor to the DVR with HDMI,VGA,BNC port
Connect the DVR to Router with an Ethernet cable
Plug the mouse to the USB port
Plug DVR to power
2
5
3
3
1
2
4
5
1. Connecting your system
2. View on Smartphone
Router
Power Port
Camera
1
Mouse & USB
BACK UP
Video & Audio Out
4
Step 1
Connect the DVR to the Internet
Fibre Optic DSL
Router
DVR/NVR
PC
RJ45 cable
WIFI or RJ45 Cable
A: How to connect DVR to LAN ?


