Page is loading ...

Two-wheeled Motorcycle F-ACT EVO
User’s Instruction and Maintenance Manual
KEEWAY Motorcycle Co., Ltd

- 1 -
Content ................................................................. 错误!未定义书签。
Preface .............................................................................. - 3 -
Preparation Data ................................................................. - 4 -
Inspection/Adjustment ........................................................... - 36 -
Inspection and maintenance of electrical system ..................................... - 50 -
1. Battery/charging system .......................................................... - 52 -
1.1 Preparing documents ......................................................... - 52 -
1.2 Failure diagnosis ........................................................... - 53 -
1.3 Battery ..................................................................... - 54 -
1.4 Charging System ............................................................. - 55 -
1.5 Rectifier ................................................................... - 56 -
1.6 Magnetor Charging Coil ...................................................... - 56 -
1.7 Magnetor Lighting Coil ...................................................... - 57 -
2. Ignition System .................................................................. - 60 -
2.1 Material Preparation ........................................................ - 60 -
2.2 Failure Diagnosis ........................................................... - 61 -
2.3 Ignition System Inspection .................................................. - 62 -
2.4 CDI Group ................................................................... - 64 -
2.5 Ignition Coil ............................................................... - 64 -
2.6 Trigger ..................................................................... - 65 -
3. Activation System ................................................................ - 67 -
3.1 Material Preparation ........................................................ - 67 -
3.2 Failure Diagnosis ........................................................... - 68 -
3.3 Starting Motor .............................................................. - 68 -
3.4 Starting Relay .............................................................. - 70 -
4. Bulbs/Switches/Meters ............................................................ - 73 -
4.1 Material Preparation ........................................................ - 73 -
4.2 Failure Diagnosis ........................................................... - 73 -
4.3 Headlight Bulb Replacement .................................................. - 73 -
4.4 Front Turn Signal Lamp Bulb Replacement ..................................... - 74 -
4.5 Taillight Bulb Replacement .................................................. - 74 -
4.6 Meters ...................................................................... - 75 -
4.7 Power Lock .................................................................. - 75 -
4.8 Speaker .......................................................................... 76
4.9 Handle switch ..................................................................... 76
The check and maintenance of the chassis ...................................................... 77
5. Brake ................................................................................. 80
5.1 Maintenance instructions ............................................................. 80
5.3 Front hydraulic brake ............................................................ - 82 -
5.4 Rear hub brake ................................................................. - 83 -
6. Body cover ......................................................................... - 87 -
7. Front wheel/front suspension ........................................................... - 92 -
7.1 Preparation data ................................................................ - 92 -
7.2 Fault diagnosis ................................................................. - 92 -

- 2 -
7.3 Front wheel ................................................................... - 93 -
7.4 Direction handle................................................................ - 96 -
7.5 Front fork ..................................................................... - 96 -
8. Rear wheel/rear suspension ........................................................... - 100 -
8.1 Preparation data ............................................................... - 100 -
8.2 Fault diagnosis ................................................................ - 100 -
8.3 The rear wheel ............................................................. - 101 -
8.4 Rear muffler .................................................................. - 102 -
9. Tank/seat cushion ................................................................... - 106 -
9.1 Preparation data ............................................................... - 106 -
9.2 Fault diagnosis ................................................................ - 106 -
9.3 Tank/seat cushion .............................................................. - 107 -
Check and maintenance of the engine ..................................................... - 108 -
10. Lubricating system................................................................. - 111 -
10.1 Preparation data .............................................................. - 111 -
10.2 Fault diagnosis ............................................................... - 111 -
10.3 Machine oil pump ............................................................ - 112 -
11.1 Preparation data .............................................................. - 115 -
Operation precautions ............................................................. - 115 -
11.2 Fault diagnosis ............................................................... - 115 -
11.3 Disassembly of carburetor ...................................................... - 116 -
11.4 Assembly and adjustment ...................................................... - 118 -
12. Cylinder cover .................................................................... - 121 -
12.1 Preparation materials .......................................................... - 121 -
12.2 Failure diagnosis ............................................................. - 121 -
12.3 Cylinder cover ............................................................... - 121 -
12.4 Checking of cylinder cover ..................................................... - 122 -
12.5 Assembly of cylinder cover ..................................................... - 122 -
Thirteenth, Cylinder block and piston ..................................................... - 124 -
13.1 Preparation materials .......................................................... - 124 -
13.2 Failure diagnosis ............................................................. - 125 -
13.3 Cylinder block ............................................................... - 125 -
13.4 Piston ...................................................................... - 126 -
13.5 Assembly of piston ........................................................... - 128 -
14.1 Preparation of materials ........................................................ - 131 -
14.2 Failure diagnosis ............................................................. - 131 -
14.3 Left crankcase cover .......................................................... - 132 -
14.4 Driving plate ................................................................ - 132 -
14.5 Clutch/Driven wheel .......................................................... - 134 -
14.6 Disassembly of clutch and driven wheel ........................................... - 136 -
14.7 Assembly ................................................................... - 139 -
14.8 Feet start mechanism .......................................................... - 139 -

- 3 -
Preface
This maintainence manual mainly describes the maintainence essentials of the
Qiangjiang QJ50T-21T.
The Preparation Data include all the operation precautions, please read this
maintainence manual carefully before any operation.
Check & Adjustment mainly describes the essentials of check and adjustment,
vehicle safety and the performance maintenance method of various components.
Check & Adjustment should be implemented from the time of periodic check.
The content after Chapter I mainly describe the assembly, disassembly and
check essentials of motor, complete vehicle and electric fittings.
Every Chapter is accompanied by an exploded view, system diagram, and failure
diagonosis and instructions during the editing.
Notice:
Actual product may differ from the photo or illustration on the manual. The style
or structure of the vehicle shall be subject to other changes without further notices.
KEEWAY Motorcycle Co., Ltd

- 4 -
Preparation Data
General Safety Maintenance Regulations
Specification Sheet Failure Diagonosis
General Safety
Carbon Monoxide (CO)
If the motor has to been started, make sure the working space is well ventilated, the motor can not be run in closed
space.
Caution
The exhaust gas contains toxic gas carbon monoxide (CO), which may render people unconscious or even cause
death.
The motor should be run in the open space, if in closed space, the gas scavenging system shall be used.
Gasoline
The vehicle shall be worked in a well ventilated place, no smoking or naked lights in working place or
gasolince-stored place.
Storage Battery
Storage battery may emit explosive gas, which should be far away from sparkles, naked fire and smoking areas.
The space shall be well ventilated when charging the battery.
Storage battery containes sulphuric acid (electrolyte). It will cause serious burns if it gets on the skin or eys.
Therefore, protective clothing and face mask should be worn in operation.
——Please flush with water immediately if the electrolyte gets on the skin.
——Immediately flush with large amounts of water for at least 15 minutes and seek medical attention
immediately if the electrolyte gets on the eyes.
The electrolyte is tocix. If swallow any of such electrolyte by mistake, immediately drink large amounts of water,
milk and milk of magnesia (a kind of laxative antacid) or vegetable oil and seek medical attention. Keep it out of
reach of children.
Users shall not disconnect the storage battery during the adjustment of complete vehicle, otherwise may cause
internal damage to the components of the whole vehicle.

- 5 -
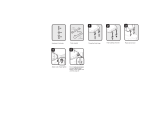
Maintenance Regulations
During the maintence of the motorcycle, please use the metric instruments whenever possible, improper
instruments may cause damage to the motorcycle.
Before the maintainence operation of disconnecting or opening the protecting plate, please eliminate the pollution
outside the parts or assembly parts to prevent the pollution fall into the motor, bottom plate or brake system.
After disconnecting and before measuring the wear value, please
purge the components and blow through with the air compressor.
The rubber parts may deteriorate because of aging, which is
extremely damaged by solvents or oil. Therefore it should be
checked before reassembly and replaced when necessary.
When loosing the components which have many assembly parts,
the loosing sequence should be from exterior to interior, and the
samll assembly part should be loosed first.
The complex assembly part such as speed gear box shall be
stored in proper sequence for the easy assemble in the future.
Special attention should be paid to the important attachment
postions before disassembly. The non-used components should
be replaced in time before disassembly.

- 6 -
The length of bolt or screw is different in terms of assembly parts
and protective plate. It should be installed in the right position, if
confused, place the bolt into the hole to check whether it fits or
not.
When installing the oil seal, please fill the grease lubricant into
the oil seal groove, and check the oil seal is smooth or not,
otherwise it may damage the oil seal.
When installing the rubber hose (fuel oil, vacuum or coolant), the
end of the rubber hose shall be inserted into the connection
bottom, so that the hose clamp has enough space to grip the
connection. The rubber of plastic dust cover shall be put into the
original design position.
Disassembly of ball bearing: use the instrument to withstand one
or two (inside and outside) bearing race ring. If the strength is
only used on one race ring (no matter inside or outside), it may
cause damage to bearing when disassembling and the bearing has
to be replaced.

- 7 -
The loose cable is the potential electric safety hazard. After
clamping the cable, please check the following one to ensure
the electric safety;
The wire clip is not allowed to bend towards the welding spot
direction;
Please bind the cables at the specified position;
The cable can not be routed on the end or closed angle of the
frame;
The cable can not be routed on the end of bolt or screw;
The cable routing shall be kept away from a heat source or
the place which may clip the cable when moving;
Over tightening or over loosening shall be avoided when the
cable is routed along the cocket handle, and no contacting
with the adjacent components in any steering position;
The cable routing shall be smooth without twisting or
knotting;
Please confirm if there is any damage to the connector
assembly sheath or any excessive expansion of the connector
assembly before the butt joint of the onnector assembly;
If the cable is placed on the closed angle or corner, please use
tape or hose to protect;
Please use the tape to wrap the cable after repairing;
The control wire shall be free from twisting or knotting. Any
damage to the control wire may cause inadequate control;

- 8 -
Motorcycle Identification
1.The motorcycle indentification number is printed on the
frame ① , please see Figure 1-1. Indentification number:
LBB11B05?????????. The ninth number of the vehicle
indentification number is the chek code, the tenth one year code
and the eleventh one assembly factory code. The frame
nameplate is riveted on the left side ② of the frame.
Figure 1-1
2.The engine series number ① is printed on the outer shell
of crankcase, please see Figure 1-2.
Figure 1-2
Important Notices:
1.Please use the pure components manufactured by Qiangjiang. Use the components not complying with the
design specifications of Qiangjiang Company may cause damage to the engine.
2.Use only the metric instruments to do the maintainence operation. The metric bolt, nut and screw are not
interchangeable with the British fastener.
3.When reassembling, new washer, O ring, split pin and locking plate should be replaced.
4.When tightening bolt or nut, unless otherwise specified, bolt with larger diameter or near the inner side should
be tightened first, then along the diagonal line, gradually tighten the bolt to stated torque.
5.Wash the disassembled parts with cleaning solution. Lubricate all the sliding surfaces before assembling.
6.After assembling, please check all the components are assembled and operated in a proper way.
7. Eliminate the pollution and oil before measuring, and add the recommended lubricant onto the oil site when
assembling.
8. If the engine and drive system need to be stored for a long time after disassembling, please spread lubricant
onto the surface of the parts to prevent rusting and dust.

- 9 -
Special Tools
Special tools are the specially designed tools used for special positions in order to assemble or disassemble
certain parts of the motorcycle. Proper special tools are essential in terms of the complete and proper adjustment
and assembling. The special tools can assemble and disassemble parts safely, dependably and quickly, which can
improve working efficiency by saving labor and energy.
1 Tools used for the overhaul of engine
When assembling and disassembling the engine, specially designed tools are needed to properly assemble and
disassemble some parts.
The special tools list to assemble and disassemble the engine parts and the corresponding physical figure,
please see Table 1-1 and 1-2.
Table 1-1
Name
Note
special socket wrench
clutch clamper
flywheel extractor
proof stick
bearing disassembling tool
bearing assembling tool
oil seal assembler/disassembler
dismantling tool handle
piston pin pulling off device
piston ring opening pliers
spark plug socket wrench
measuring the thickness of clutch
cylinder diameter determinator
dial gauge
Used for assembling and disassembling Flywheel Bolt, Figure 1-3
Figure 1-4
Figure 1-5
Figure 1-6
Figure 1-7
Figure 1-8
Figure 1-9
Figure 1-10
Figure 1-11
Figure 1-12
Figure 1-13
Figure 1-14
Figure 1-15
Measuring the inside diameter of piston pin hole,Figure 1-16
Continuation Table 1-2
Figure 1-3 Figure 1-4

- 10 -
Figure 1-5 Figure 1-6
Figure 1-7 Figure 1-8
Figure 1-9 Figure 1-10
① Handle
Figure 1-11 Figure 1-12

- 11 -
①Opening pliers ②Piston
Figure 1-13 Figure 1-14
Figure 1-15 Figure 1-16
2.Tools used for the overhaul of chassis
The special tools list to assemble and disassemble the chassis parts and the corresponding physical figure,
please see Table 1-11 and 1-18.
Table 1-17
Name
Note
torque wrench
inner hexagonal wrench
socket wrench
micrometer
magnetic frame, V-block
dial gauge
vernier caliper
spring retaining ring pliers
knocker screwdriver
front fork oil seal assembling tool
front fork seal driver
steering nut wrench
Figure 1-19
Figure 1-20
Figure 1-21
Figure 1-22
Figure 1-23
Figure 1-24
Figure 1-25
Figure 1-26
Figure 1-27
Figure 1-28
Figure 1-29
Figure 1-30
(1)Universal tool for the overhaul of chassis
Continuation Table 1-18

- 12 -
Figure 1-19 Figure 1-20
Figure 1-21 Figure 1-22
Figure 1-23 Figure 1-24
Figure 1-25 Figure 1-26
Figure 1-27 Figure 1-28
(2)Special tool for the overhaul of chassis: front fork seal driver.

- 13 -
Figure 1-29
(3)steering nut wrench.
Figure 1-30
3.Tools used for electrical parts
The special tools list to test the electrical parts and the corresponding physical figure, please see Table 1-31
and 1-32.
Table 1-31
Name
Note
avometer
ignition tester
Figure 1-33
Figure 1-34
Continuation Table 1-32
Figure 1-33
Figure 1-34

- 14 -
Specification Table (QJ50T-21T)
Model
QJ50T-21T
Engine
Type of engine
QJ1E40QMB-4
Full length mm
1860
Type of fuel
lead-free gasoline
(93/95)
Full width mm
680
Number of
cylinders
1
Full height mm
1198
Inside
diameter*stroke
49.2×39.2
Wheelbase mm
1290
Total
displacement
49.3cc
Weight of vehicle
kg
(Curb weight)
front axle
40
Initiate mode
Electric/foot initiate
Rear axle
59
Cooling system
Wind cooling
Total
99
Lubrication type
Separating lubrication
Wheel
specification
Front
wheel tyre
120/70-12
Front
wheel rim
3.50×12
Air cleaner
3XG
Rear
wheel tyre
130/70-12
Rear
wheel rim
3.50×12
Fuel tank
capacity
5.6L
Driving mechanism
Type of
clutch
Dry centrifugal type
Carburetor model
PZ19JB
Variable
speed
mechanism
infinite variable speed
Performance
Idling speed -rpm
1800±100rpm/min
Driving type
belt transmission
Maximum torque
4.0N.m/6500rpm
Electrical installation
Storage
battery
capacity
/Type
12V-3AH/dry-charged
Maximum
horsepower
2.7kW/6500 rpm
Magneto
capacity
89.6W/5000rpm
Compression
ratio
6.9:1
Spark plug
BR8HSA
Maximum speed
45km/h
Spark plug
gap
0.6-0.7mm
Brake
apparatus
Front brake disc
Diameter(mm)
φ190mm
Ignition type
CDI
Rear brake drum
inside diameter
(mm)
φ175mm

- 15 -
QJ50T-21T

- 16 -
No
Yes
No
Yes
Yes
No
Y
trigg
er
windi
ng es
No
Failure Diagnosis
Failure diagnosis procedure when the engine fails to start or start difficultly
Engine fails to start or start difficultly
Check the ignition system
Remove the spark plug, check the electrodes of spark plug are carbon connected
Do the spark plug spark over test
To clean out carbon
Faint or no spark between electrodes
Strong blue or bluish violet spark from the electrodes
Screw off the spark plug cap, do high-voltage wire spark over test
Use ignition timing light to test whether engine ignition is timing
Strong blue spark
Faint or no spark
Check if the spark plug, spark plug cap fails
Check the
supply of
ignition
power
Check if
there is short
circuit or
broken
circuit of
ignition coil
Check if there
is short circuit
or broken
circuit of the
internal system
of ignition
system
Check if the
CDI ignition
apparatus
fails
Use the cylinder
pressure gauge to test
the cylinder
compression pressure
Check if there
is fuel in the
fuel tank
Cylinder
compression
pressure
normal
Cylinder
compression
pressure
insufficient
To
fill
the
fuel
No contact magneto ignition system
1. Check if there is short
circuit or broken circuit of
ignition power winding
2. Check if there is short
circuit or broken circuit of
trigger winding
1. Check if the CDI ignition
apparatus fails
2. Check if the magneto
flywheel and trigger
winding loosen
Loosen carburetor fuel
draining screw, check if
there is fuel draining
from the carburetor
overflow pipe

- 17 -
Yes
No
Spark plug electrode is moist
Spark plug electrode is dry
Check if there is oil leaking from
carburetor
Instill small amount of fuel into the cylinder to
have an experimental starting
1. Check if there is gap
between the carburetor float
needle valve and valve seat
because of other materials
2. Check if the conical
surface of the carburetor
float needle valve is worn
into step shape
3. Check if the carburetor
float breaks
4. Check if the carburetor
float is too low
Check if the air
cleaner blocks
The engine stops after
running a very short time
Work continuously after
starting
The carburetor inside
blocks or the float is
too high
Carburetor starting
device (starting richer
system) fails
1. Check if there is gas leaking
in external connections of the
engine
2. Check if the piston ring sticks
in ring groove or insufficient
elasticity
3. Check the wearability of
piston ring and cylinder
1. Check if the venthole of
fuel tank cover blocks
2. Check if the fuel filter and
fuel cock block
3. Check if the fuel cock
works well
4. Check if the carburetor inlet
port blocks
5. Check if the carburetor
floater is too high
Remove the
spark plug to
test

- 18 -
Yes
No
Yes
No
Yes
No
No
Yes
Yes
No
The engine overheat failure diagonosis procedure
Engine overheat
Check if the operation method is proper
1. Check if the fuel No. is too low
or the fuel is out of date
2. Check if the engine runs at high
speed or overload for a long time
Check the cooling system
Air cooled engine
Check if the cooling fins are stained with silt or too much oil
Wash
Check if the cooling fans and
wind scoop break (compulsive
air cooled engine)
Check and
eliminate
Use ignition timing light to test
whether engine ignition is timing
1. Check if the CDI
ignition apparatus
fails
2. Check if the
magneto flywheel
and trigger winding
loosen
Check if the clutch slips
Clutch slips
To treat the clutch
slip failure
accordingly

- 19 -
Remove the spark plug, watch the color of spark
plug insulator cluster and determine the mixture ratio
of the combustible gas mixture in accordance with
the different abnormal appearances
Spark plug insulator cluster is white, the
exhaust muffler smokes or blast when the
engine is running at medium and low speed, the
accelerating ability is bad, idle speed is unstable
and tends to stop easily, relatively normal when
running at high speed.
spark plug insulator cluster is brown
Spark plug insulator cluster is
white, the engine is intermittent
when accelerating, carburetor
backfires and the engine power is
insufficient etc
combustible gas mixture is too strong
1. Check if the air cleaner blocks
2. Check if the carburetor starting
device (starting richer system)
works well
3. Check if the carburetor float is
too low
the mixture ratio of the
combustible gas mixture is proper
Check if the vent of
cylinder and exhaust
muffler block because
of too much carbon
Check lubricating
system
combustible gas mixture is
too weak
Two-stroke engine
lubricating system
1. Check if the fuel
cock works well
2. Check if the
carburetor float is too
high
3. Check if the orifices
and pore canals on the
carburetor block
1. Check if the fuel in the
crankcase is insufficient
2. Check if the viscosity of fuel
in the crankcase is too low or the
fuel is too dirty
3. Check if the fuel filter blocks
4. Check if the fuel pump works
well
5. Check if the lubricating oil
path blocks
/