Page is loading ...

Calisto
™
Pro Series
Home Phone with Multi-function
Bluetooth
®
Headset
User Guide
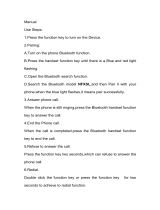
Ignore Answer
In co mi ng C al l
Jo hn S mi th
12 3- 45 6- 78 90

Page 2
Please refer to the Safety Instructions on page 53 for important product
safety information prior to installation or use of this product.
With the Calisto Pro Series product, you get maximum flexibility for
handling all of your calls:
Answer landline and VoIP calls using either the handset, the built-in
speakerphone, or the wireless headset.
Use the headset with other devices enabled with Bluetooth
®
technology, such as your Bluetooth mobile phone.
This User Guide provides comprehensive information on how to use
your Calisto Pro Series and all of its features.
Tip: For a quick reference to common features, see the QuickTips card,
located under the base of your Calisto Pro Series. When you see this symbol
next to a topic in this User Guide, it means that you can find a quick
reference for this topic on the QuickTips card.
•
•

Page i
Contents
Components . . . . . . . . . . . . . . . . . . . . . . . . . . . . . . . . . . . . . . . . . . 2
Setup . . . . . . . . . . . . . . . . . . . . . . . . . . . . . . . . . . . . . . . . . . . . . . . . 4
Hooking up the base . . . . . . . . . . . . . . . . . . . . . . . . . . . . . . . . . . 4
Completed system . . . . . . . . . . . . . . . . . . . . . . . . . . . . . . . . . . . 4
Installing the handset battery. . . . . . . . . . . . . . . . . . . . . . . . . . . . 5
Charging the handset . . . . . . . . . . . . . . . . . . . . . . . . . . . . . . . . . 5
Charging the headset . . . . . . . . . . . . . . . . . . . . . . . . . . . . . . . . . 5
Wearing the headset and handset . . . . . . . . . . . . . . . . . . . . . . . . 6
Replacing the handset battery. . . . . . . . . . . . . . . . . . . . . . . . . . . 7
Powering the Headset On and Off . . . . . . . . . . . . . . . . . . . . . . . . . . 8
Powering your headset on . . . . . . . . . . . . . . . . . . . . . . . . . . . . . . 8
Powering your headset off . . . . . . . . . . . . . . . . . . . . . . . . . . . . . . 8
Using Your Headset with Your Handset . . . . . . . . . . . . . . . . . . . . . . 9
Placing calls . . . . . . . . . . . . . . . . . . . . . . . . . . . . . . . . . . . . . . . . 9
Receiving calls . . . . . . . . . . . . . . . . . . . . . . . . . . . . . . . . . . . . . . 9
Adjusting call volume . . . . . . . . . . . . . . . . . . . . . . . . . . . . . . . . . 10
Switching calls between handset, headset, and speakerphone 10
Ending calls . . . . . . . . . . . . . . . . . . . . . . . . . . . . . . . . . . . . . . . . 11
Locating the headset from the handset . . . . . . . . . . . . . . . . . . . 11
Using Your Calisto Headset with Your Mobile Phone . . . . . . . . . . . 12
Pairing your Calisto headset with your mobile phone . . . . . . . . 12
Placing calls . . . . . . . . . . . . . . . . . . . . . . . . . . . . . . . . . . . . . . . 13
Receiving calls using your headset . . . . . . . . . . . . . . . . . . . . . . 14
Adjusting call volume using your headset . . . . . . . . . . . . . . . . . 14
Ending calls using your headset . . . . . . . . . . . . . . . . . . . . . . . . 14
Additional mobile phone/headset features . . . . . . . . . . . . . . . . 15
Using the Phonebook . . . . . . . . . . . . . . . . . . . . . . . . . . . . . . . . . . . 16
Adding a contact manually . . . . . . . . . . . . . . . . . . . . . . . . . . . . 16
Assigning speed dials and ring tones . . . . . . . . . . . . . . . . . . . . 17
Adding a contact from a call . . . . . . . . . . . . . . . . . . . . . . . . . . . 18
Editing a contact . . . . . . . . . . . . . . . . . . . . . . . . . . . . . . . . . . . . 18
Editing names and numbers . . . . . . . . . . . . . . . . . . . . . . . . . . . 18
Quickly finding a contact . . . . . . . . . . . . . . . . . . . . . . . . . . . . . . 19

Page ii
Deleting a contact . . . . . . . . . . . . . . . . . . . . . . . . . . . . . . . . . . . 19
Chain dialing . . . . . . . . . . . . . . . . . . . . . . . . . . . . . . . . . . . . . . . 19
Calling Features: Basics . . . . . . . . . . . . . . . . . . . . . . . . . . . . . . . . . 20
Caller ID. . . . . . . . . . . . . . . . . . . . . . . . . . . . . . . . . . . . . . . . . . . 20
Speakerphone . . . . . . . . . . . . . . . . . . . . . . . . . . . . . . . . . . . . . . 20
Last number redial . . . . . . . . . . . . . . . . . . . . . . . . . . . . . . . . . . 20
Muting a call . . . . . . . . . . . . . . . . . . . . . . . . . . . . . . . . . . . . . . . 21
Using speed dial keys . . . . . . . . . . . . . . . . . . . . . . . . . . . . . . . . 21
Receiving a second incoming call . . . . . . . . . . . . . . . . . . . . . . . 22
Tips for mobile calls . . . . . . . . . . . . . . . . . . . . . . . . . . . . . . . . . . 22
Viewing and editing the Call Log . . . . . . . . . . . . . . . . . . . . . . . . 23
Table 1: Headset button functions . . . . . . . . . . . . . . . . . . . . . . . 24
Table 2: Headset alerts
. . . . . . . . . . . . . . . . . . . . . . . . . . . . . . . 24
Table 3: Handset screen icons . . . . . . . . . . . . . . . . . . . . . . . . . 25
Settings . . . . . . . . . . . . . . . . . . . . . . . . . . . . . . . . . . . . . . . . . . . . . 26
Adjusting the ringer volume . . . . . . . . . . . . . . . . . . . . . . . . . . . . 26
Turning the ringer off . . . . . . . . . . . . . . . . . . . . . . . . . . . . . . . . . 26
Selecting a ring tone . . . . . . . . . . . . . . . . . . . . . . . . . . . . . . . . . 26
Adjusting the screen contrast . . . . . . . . . . . . . . . . . . . . . . . . . . 27
Setting the date and time . . . . . . . . . . . . . . . . . . . . . . . . . . . . . 27
Setting the default language . . . . . . . . . . . . . . . . . . . . . . . . . . . 28
Turning the keypad tone on or off . . . . . . . . . . . . . . . . . . . . . . . 28
Locking the keypad . . . . . . . . . . . . . . . . . . . . . . . . . . . . . . . . . . 28
Switching between tone dialing and pulse dialing . . . . . . . . . . . 29
Voicemail . . . . . . . . . . . . . . . . . . . . . . . . . . . . . . . . . . . . . . . . . . . . 30
Setting up quick voicemail . . . . . . . . . . . . . . . . . . . . . . . . . . . . . 30
Checking voicemail . . . . . . . . . . . . . . . . . . . . . . . . . . . . . . . . . . 30
Transferring Outlook Contacts into Phonebook . . . . . . . . . . . . . . . 31
System requirements . . . . . . . . . . . . . . . . . . . . . . . . . . . . . . . . 31
Installing the software . . . . . . . . . . . . . . . . . . . . . . . . . . . . . . . . 31
Using the Outlook
®
Phonebook Utility . . . . . . . . . . . . . . . . . . . . 32
Phonebook storage . . . . . . . . . . . . . . . . . . . . . . . . . . . . . . . . . . 34
Creating an Outlook contact . . . . . . . . . . . . . . . . . . . . . . . . . . . 34
Editing an Outlook contact . . . . . . . . . . . . . . . . . . . . . . . . . . . . 35
Deleting an Outlook contact . . . . . . . . . . . . . . . . . . . . . . . . . . . 36
Restoring your phonebook . . . . . . . . . . . . . . . . . . . . . . . . . . . . 36

Page iii
Customizing the Outlook Phonebook Utility . . . . . . . . . . . . . . . 36
Viewing your updated contacts on your handset . . . . . . . . . . . . 36
Answering Calls from Your Computer’s VoIP Program . . . . . . . . . . 37
System requirements . . . . . . . . . . . . . . . . . . . . . . . . . . . . . . . . 37
Installing the VoIP Utility software . . . . . . . . . . . . . . . . . . . . . . . 37
Using the PerSonoCall VoIP Utility . . . . . . . . . . . . . . . . . . . . . . . 39
Using the Handset with the Charging Base . . . . . . . . . . . . . . . . . . 40
Locating the handset from the charging base . . . . . . . . . . . . . . 40
Registering your handset with the charging base . . . . . . . . . . . 40
Using a Different Headset . . . . . . . . . . . . . . . . . . . . . . . . . . . . . . . 41
Pairing with a new headset . . . . . . . . . . . . . . . . . . . . . . . . . . . . 41
Using a corded headset . . . . . . . . . . . . . . . . . . . . . . . . . . . . . . 41
Troubleshooting . . . . . . . . . . . . . . . . . . . . . . . . . . . . . . . . . . . . . . . 42
Product Specifications . . . . . . . . . . . . . . . . . . . . . . . . . . . . . . . . . . 48
Headset specifications . . . . . . . . . . . . . . . . . . . . . . . . . . . . . . . 48
Handset specifications . . . . . . . . . . . . . . . . . . . . . . . . . . . . . . . 48
Help/Contact . . . . . . . . . . . . . . . . . . . . . . . . . . . . . . . . . . . . . . . . . 49
Technical assistance . . . . . . . . . . . . . . . . . . . . . . . . . . . . . . . . . 49
Warranty . . . . . . . . . . . . . . . . . . . . . . . . . . . . . . . . . . . . . . . . . . . . 49
Limited warranty . . . . . . . . . . . . . . . . . . . . . . . . . . . . . . . . . . . . 49
FCC/Regulatory Notices . . . . . . . . . . . . . . . . . . . . . . . . . . . . . . . . 50
FCC Compliance Class B Digital Device . . . . . . . . . . . . . . . . . . 50
FCC Declaration of Conformity . . . . . . . . . . . . . . . . . . . . . . . . . 50
Canadian Compliance . . . . . . . . . . . . . . . . . . . . . . . . . . . . . . . 51
Federal Communications Commission (FCC) Part 68 Statement 51
Industry Canada CS-03 Declaration of Conformity . . . . . . . . . . 52
Safety Instructions . . . . . . . . . . . . . . . . . . . . . . . . . . . . . . . . . . . . . 53

Page iv

Page 1
Contents
When you open the package, the battery, cables, and adapter can be
found in the compartment beneath the Calisto charging base.
Product & Accessories Documentation
Charging base Getting Started Guide
QuickTips Card
(stored under base)
Handset/Phone
Headset
Handset/Phone battery
Handset/Phone battery
door
AC power adapter
Telephone cord
USB cable
Cable splitter
(to use your phone jack with
more than one phone)
Software CD
Note: For information on optional accessories and replacement parts, visit
www.plantronics.com/calistopro.

Page 2
Components
Volume button
Waist clip
Corded headset jack
Ignore Answer
Incoming Call
John Smith
123-456-7890
Soft keys
(to select screen
options)
Menu navigation
Call end button
Keypad
Handset button
(illuminated when
handset is active)
Speakerphone button
(illuminated when
speakerphone is active)
Talk/Flash button
HANDSET
For descriptions of these
icons, see page 2
5.
Keypad lock
Voicemail
speed dial
OK/Select button
Speaker for
speakerphone
Battery
compartment
access

Page 3
Handset locator button
Headset
charging
contact
Handset charging cradle
CHARGiNG BASE
HEADSET
Earloop
Indicator light
Headset button
Eartip
Noise-
canceling
microphone
Headset
charging
cradle

Page 4
Setup
Hooking up the base
Remove the QuickTips card from
under the base.
Plug the AC power adapter into the
bottom of the Calisto base, and then
plug it into an available wall outlet.
Route the AC power adapter cable
under the cable holder as shown.
Plug one end of the telephone cable into the Calisto base and the
other end into an available wall telephone jack. If needed, use the
splitter included to share the wall jack with another device.*
Route the phone line cable under the cable holder as shown.
To use the VoIP capability, plug smaller end of the USB cable into
the Calisto base and the other end into an available USB port on
your computer.
Insert the Calisto Pro Series CD-ROM into your computer,
and follow the onscreen instructions. If the CD-ROM doesn’t
automatically play, double-click the My Computer icon on
the Windows desktop and choose the CD-ROM. Then run the
program Setup.exe.
* For use with a 4-wire 2-line wall outlet (RJ14C) a 2-line, 3-way jack adapter is required. Like most
landline phones, DSL users will need a DSL filter.
Completed system
1.
2.
3.
4.
5.
6.
7.

Page 5
Installing the handset battery
Place the battery for the handset into the battery compartment.
Plug the battery pack connector into the white jack inside the
handset.
Slide the battery cover onto the handset and place the handset
onto the base to charge it. The screen could take up to 10 minutes
to show the charge indicator.
Charging the handset
IMPORTANT: Charge the handset for 16 hours minimum before using
it the first time, or until the full battery icon is displayed in the
upper right-hand corner of screen.
To charge your headset,
press firmly onto the charging
connector until a click is
heard and the headset
indicator light turns solid red.
Charging the headset
Place the headset onto the base as shown above. Press down firmly
to begin charging. The headset indicator light should light up solid red
while charging, and light up solid blue when fully charged in the base.
IMPORTANT: Charge the headset in the base for 3 hours minimum
before using it the first time, or until the headset indicator light turns
solid blue.
1.
2.
3.
To access battery door

Page 6
Tip: Place the handset and headset in the cradle regularly to keep charged, or
when the battery icon on the screen indicates a low charge . The headset
beeps every 30 seconds when the battery is low. The handset screen displays
a full battery icon in the upper right-hand corner of the screen when the
handset is fully charged. The headset indicator light glows solid blue when the
headset is in the charging cradle and is fully charged.
Wearing the headset and handset
Figure 1
Figure 2
Figure 3
Headset: You can wear the headset on
either ear. Flip the earloop to the side
and twist to position it over your left or
right ear (Figure 1). Point the microphone
toward your mouth (Figure 2). The ear
tip should fit comfortably in the opening
of your ear canal. You may need to
adjust it to find a comfortable and
secure fit.
Handset: Slide the waist clip onto your
belt or your waistband. Handset is worn
upside-down so you can lift it and view
the display (Figure 3).

Page 7
Replacing the handset battery
If you notice that the talk time on the handset is decreasing, you
probably need to replace the handset battery. Contact Plantronics
Support for information on battery pack replacement. (See “Technical
assistance” on page 49.)
Note: The headset battery is not replaceable.
Using the tip of a pen, firmly press the hole
located at the bottom of the handset battery
cover (see image) to remove the cover.
1.
Remove the old battery from the compartment.2.
Place the new battery into the battery
compartment.
3.
Plug the battery pack connector into the white mating jack inside
the compartment.
4.
Slide the battery cover onto the handset and
place the handset onto the base to charge it.
5.
Charge the new battery for a minimum of 16 hours before using it
the first time.
6.

Page 8
Powering the Headset On and Off
The headset automatically powers on when it is charging. You do not
need to power it off between uses.
Powering your headset on
Press and hold for 2 seconds until you
hear 4 ascending beeps in the headset.
When the headset is powered on,
the indicator light flashes blue every
10 seconds.
Powering your headset off
Press and hold the Headset button for 4 seconds until the
indicator light flashes red and you hear 4 descending beeps.
Tip: It is not necessary to power off your headset between uses. When you
are not using your headset, you can simply store it on the charging base.
However, you may want to power off your headset if you are using it away
from home and want to save battery power.

Page 9
Using Your Headset with Your Handset
Tip: When using your handset and headset, the headset must be within
33 feet of the handset, and the handset must be within 300 feet of the
charging base. You can also place calls from the headset or speakerphone
when the handset is in the charging base.
Note: Your headset is paired with the Calisto handset by default, so you can
use them together right away.
Placing calls
To call using: Do the following:
Handset
Dial the number and press Talk/Flash .
Tip: You can also press Talk/Flash first and
then dial the number.
Speakerphone
Press Speakerphone . When you hear
the dial tone, dial the number.
Headset Dial the number on handset.
Press the Headset button for under
1 second to switch to the headset.*
Tip: When you’re on a call using the headset,
an icon appears on the handset screen.
1.
2.
*There may be a 1-2 second delay between pressing the button and hearing the sound in the headset.
Receiving calls
To answer a call using: Do the following:
Handset
Press Talk/Flash on the handset.
Speakerphone
Press Speakerphone on the handset.
Headset When you’re using the headset, a triple beep
signals an incoming call. Press the Headset
button for under 1 second or until you
hear a single high beep. The headset icon
appears on the screen.
Tip: To answer a second incoming call, see “Receiving a second incoming
call” on page 22.

Page 10
Adjusting call volume
Handset Headset
During a call, press up or down to adjust
call volume when you are using your
handset, speakerphone, or headset.
Press up (towards the indicator light) or
down (towards the microphone) to adjust
call volume during a call.
Tip: For your comfort and health, always listen to calls at a moderate volume.
For complete safety information, see page 53.
Switching calls between handset, headset, and
speakerphone
To switch call: Do the following:
Handset or Speakerphone ➔
Headset
Press the Headset button for
under 1 second or until you hear
a single high beep. The Handset
or Speakerphone key is no longer
illuminated, and is now displayed
on the screen.
Headset or Speakerphone ➔
Handset
Press Handset . The key lights
up when the handset is active.
Handset or Headset ➔
Speakerphone
Press Speakerphone . The key
lights up when the speakerphone is
active.

Page 11
Ending calls
To end a call, press either of the following buttons:
Handset Headset
Press End .
Press for under 1 second or until you
hear a single high beep.
Locating the headset from the handset
You can determine whether your headset is within range (up to 33 feet)
of your handset.
On the main screen, press Menu
(left soft key).
Use the navigator to highlight Initial Setup,
and press Select (right soft key).
Highlight Headset/Base, and press Select
(right soft key).
Highlight Locate Headset, and press Select (right soft key).
Tip: If your headset is more than 33 feet away from your handset, your screen
displays “Headset Out of Range.” While searching for your headset, you can
carry your handset with you until the screen displays “Headset Within Range.”
1.
2.
3.
4.

Page 12
Using Your Calisto Headset with Your
Mobile Phone
The Calisto headset functions like a traditional Bluetooth
®
headset
when used with your mobile phone. It has the ability to operate
completely separate from the Calisto handset/phone and has many
of the same features as the most popular Bluetooth headsets on the
market, including voice dialing (if your mobile phone supports this
feature) and redial.
Pairing your Calisto headset with your mobile
phone
To use the Calisto headset with your Bluetooth compatible mobile
phone, the headset first needs to be paired with that device. You will
need to refer to the user’s manual for your mobile phone for specifics
on how to pair Bluetooth devices. You can also refer to the Plantronics
website to see if there are instructions specific to your mobile phone.
www.plantronics.com/easytopair
Tip: Note that your headset can be connected to both your handset and a
mobile phone at the same time, so you can make and answer calls from both
using the headset.
You need to pair the headset with your mobile phone only once.
Before you begin, make sure your mobile phone is Bluetooth
compatible. You may need to refer to the user’s guide for your
mobile phone to find out this information.
Turn the headset off by pressing and holding the Headset
button for 4 seconds, until you hear 4 descending beeps. After the
headset is powered off, remove it.
Refer to your mobile phone’s user’s manual for specific instructions
about activating Bluetooth pairing.
When your mobile phone is searching for Bluetooth devices, press
and hold the Headset button on the headset for 4 to 6 seconds
or until the indicator light flashes red and blue.
1.
2.
3.
4.

Page 13
When the mobile phone detects the headset, select Calisto PLT
from the list of found devices.
When the mobile phone prompts you for a passcode, enter “0000”
on the mobile phone keypad as shown.
Tip: When using the headset with your mobile phone for the first time, it is
recommended that you do it out of range from the Calisto handset and base.
Once you have successfully received and answered calls with your mobile
phone, bring the headset back within range to answer both landline and
mobile calls.
Tip: You can pair your headset with more than one mobile phone, but you
can use your headset with only one mobile phone at a time. Your headset
will automatically connect to the mobile phone that is powered on and within
range of your headset. If more than one mobile phone is on and within range
of your headset, the headset will connect to the last mobile phone with which
it was used.
Placing calls
Once your headset is on and connected to your mobile phone, dial
the number and press Talk/Send on the mobile phone. The call
automatically connects to your headset.
Some mobile phones require pressing the Headset button
to activate the call in the headset. If the call is not automatically
transferred to the headset, press the Headset button for under
1 second or until you hear a single beep.
5.
6.
1.
2.
Press for 1 second.Press for 1 second.
Your headset is now paired
with your mobile phone.
The two devices work
together whenever they
are in range of each other.
Maximum range is
33 feet.

Page 14
Receiving calls using your headset
When you’re using the headset,
a triple beep signals an incoming
call. Press the Headset
button for under 1 second or
until you hear a single high beep.
Tip: You can use the headset to answer a second incoming call; see
“Receiving a second incoming call” on page 22.
Adjusting call volume using your headset
Press up or down to adjust call volume
when you are using your headset (do
not press inward).
Tip: For your comfort and health, always listen to calls at a moderate volume.
For complete safety information, see page 53.
Ending calls using your headset
Press inward for under
1 second
/