PRESONUS Eris E44 Owner's manual

Category
Supplementary music equipment
Type
Owner's manual

This manual is also suitable for

The PRESONUS Eris E44 are high-definition MTM studio monitors, featuring a nested MTM (midwoofer-tweeter-midwoofer) design that delivers accurate response, expanded frequency range, and the widest stereo field available in their class. They provide balanced XLR and ¼” TRS, and unbalanced RCA inputs, continuously variable HF and MF controls, and low cut filter. With its acoustic space settings and acoustic tuning controls, the Eris E44 gives you the flexibility to adapt the sound to your room and taste.

The PRESONUS Eris E44 are high-definition MTM studio monitors, featuring a nested MTM (midwoofer-tweeter-midwoofer) design that delivers accurate response, expanded frequency range, and the widest stereo field available in their class. They provide balanced XLR and ¼” TRS, and unbalanced RCA inputs, continuously variable HF and MF controls, and low cut filter. With its acoustic space settings and acoustic tuning controls, the Eris E44 gives you the flexibility to adapt the sound to your room and taste.

English
Eris
Series E44 / E66
High-Definition MTM Studio Monitors
Owners Manual
www.presonus.com
®
1 Overview1
1.1 Introduction1
1.2 Summary of Eris E44/E66
Features2
1.3 What is in the box3
2 Hookup4
2.1 Rear Panel Connections
and Controls4
2.1.1 Inputs4
2.1.2 Power 4
2.1.3 Acoustic Tuning
Controls5
2.2 Hookup Diagrams6
2.2.1 Basic Setup6
2.2.2 Advanced Setup with
Speaker Switching7
3 Tutorials8
3.1 Monitor Placement8
3.1.1 Badge Rotation9
3.2 Input Gain Setting10
3.3 Equalizer Setting Suggestions10
3.4 Acoustic Space Setting
Suggestions11
4 Resources12
4.1 Technical Specifications12
4.2 Troubleshooting14
4.3 Warranty15
Table of Contents
1 Overview
1.1 Introduction
Eris™ Series E5 and E8
Owners Manual
1 Overview
1.1 Introduction
Thank you for purchasing the PreSonus
Eris E44/E66 studio monitors. The
E44 and E66 active monitors feature
a nested MTM (midwoofer-tweeter-
midwoofer) design that delivers
accurate response, expanded
frequency range, and the widest
stereo field available in their class.
We encourage you to contact us at
225-216-7887 (9 a.m. to 5 p.m. Central
Time) with questions or comments
regarding your PreSonus Eris E44/
E66. PreSonus Audio Electronics
is committed to constant product
improvement, and we value your suggestions highly.
We believe the best way to achieve our goal of constant
product improvement is by listening to the real experts:
our valued customers. We appreciate the support you
have shown us through the purchase of this product and
are confident that you will enjoy your Eris E44/E66!
ABOUT THIS MANUAL: We suggest that you use this manual
to familiarize yourself with the features, applications, and
correct connection procedures for your Eris E44/E66 before
connecting it to the rest of your studio gear. This will help
you avoid problems during installation and setup.
Throughout this manual you will find Power User Tips
that can quickly make you an Eris expert. In addition
to the Power User Tips, you will find several tutorials
that cover monitor placement as well as setting the
Input Level, EQ, and Acoustic Space controls.
1 Overview
1.2 Summary of Eris E44/E66 Features
Eris™ Series E5 and E8
Owners Manual
1.2 Summary of Eris E44/E66 Features
Nested MTM design provides smooth
on- and off-axis response
Dual 4.5/6.5” Woven composite LF Drivers produce a
more dynamic output than conventional designs
1.25” silk dome HF Driver
Supports Horizontal and Vertical speaker placement
LF Amplifier Power: 50W / 80W
HF Amplifier Power: 40W / 60W
Balanced XLR and ¼” TRS, and Unbalanced RCA inputs
Continuously Variable HF and MF Controls (-6 to +6dB)
Low Cut Filter (Flat, 80Hz,100Hz)
Acoustic Space settings (Flat, -2 dB, -4 dB)
compensates for room placement
RF interference, Output-current Limiting, Over-
temperature, and Subsonic filter protection
External mains fuse
Power: 110-120V ~50/60 Hz or 220-240V ~50/60 Hz
1 Overview
1.3 What is in the box
Eris™ Series E5 and E8
Owners Manual
1.3 What is in the box
In addition to this manual, your Eris E44/
E66 package contains the following:
(1) PreSonus Eris E44 or E66 powered studio monitor
(1) IEC power cable
(6) Foam feet to be placed on the bottom of
the speaker to improve isolation
2 Hookup
2.1 Rear Panel Connections and Controls
Eris™ Series E5 and E8
Owners Manual
2 Hookup
2.1 Rear Panel Connections and Controls
2.1.1 Inputs
Line-level Inputs. The Eris E44/E66 provides a choice of three
inputs: two balanced (XLR and ¼ TRS) and one unbalanced
(RCA). These inputs accept a line-level signal from your audio
source and feed that signal to the monitor’s built-in power
amplifiers. These inputs are provided to allow for flexible
connectivity and not for connecting multiple sources to your
speakers simultaneously. Please connect only one source to
your Eris E44/E66.
Power User Tip: If your audio source provides balanced
XLR or ¼” TRS (tip-ring-sleeve) outputs, use one of the
corresponding balanced Eris inputs, since balanced cables
are resistant to induced noise from radio-frequency or
electromagnetic interference (RFI or EMI). If the audio source
has unbalanced ¼” TS (tip-sleeve) outputs, use a ¼”-to-RCA
adapter or adapter cable. Always use the shortest cable
possible to minimize the risk of induced RFI or EMI noise.
Input Gain: Sets the level of the input signal before it is
amplified.
2.1.2 Power
IEC Power Connection: Your Eris E44/E66 accepts a standard
IEC power cord.
Warning: Do not remove the center grounding prong or use a
ground-lift adapter, as this could result in electric shock.
E66
RCA
Unbalanced
Balanced
ACOUSTIC
SPACE
-4dB
-2dB
0dB
Flat
80Hz
100Hz
LOW
CUTOFF
100-120V~,50-60Hz,T2AL
220-240V~,50-60Hz,T1AL
160W
POWER
AC SELECT
ACOUSTIC TUNING
INPUT
-6dB
+6dB
MID
HIGH
-6dB
+6dB
INPUT
GAIN
MIN
MAX
U
ACOUSTIC
SPACE
-4dB
-2dB
0dB
LOW CUTOFF
MID FREQ
HIGH FREQ
ACOUSTIC SPACE
-4dB
-2dB
0dB
20 800Hz
-6dB
+6dB
0dB
10kHz
-6dB
+6dB
0dB
1kHz
0dB
-3dB
Flat
80Hz
100Hz
Sleeve:
Ground
Ring:
[-]
Tip:
[+]
12
3
Ground
XLR TRS
[-]
[+]
E66
RCA
Unbalanced
Balanced
ACOUSTIC
SPACE
-4dB
-2dB
0dB
Flat
80Hz
100Hz
LOW
CUTOFF
100-120V~,50-60Hz,T2AL
220-240V~,50-60Hz,T1AL
160W
POWER
AC SELECT
ACOUSTIC TUNING
INPUT
-6dB
+6dB
MID
HIGH
-6dB
+6dB
INPUT
GAIN
MIN
MAX
U
ACOUSTIC
SPACE
-4dB
-2dB
0dB
LOW CUTOFF
MID FREQ
HIGH FREQ
ACOUSTIC SPACE
-4dB
-2dB
0dB
20 800Hz
-6dB
+6dB
0dB
10kHz
-6dB
+6dB
0dB
1kHz
0dB
-3dB
Flat
80Hz
100Hz
2 Hookup
2.1 Rear Panel Connections and Controls
Eris™ Series E5 and E8
Owners Manual
Power Switch. This is the On/Off switch. The power status is
indicated by an LED on the front of the cabinet.
AC Select Switch. The input-power voltage is set at the
factory to correspond with the country in which it was
shipped. Use this switch only if you are using your Eris
speakers in a country that uses a different standard voltage
than is used in the country where you purchased your Eris
E44 or E66.
2.1.3 Acoustic Tuning Controls
High: Boosts or cuts all frequencies above 10 kHz
by ±6 dB.
Power User Tip: The High control on the Eris E44/E66
is a high-shelf EQ and attenuates or boosts frequencies
above 10 kHz. This EQ is much like the treble control on a
car stereo: It raises or lowers the gain on all frequencies
above the specified cutoff frequency. Shelving EQs
can make big changes to the sound very quickly by
adding or removing an entire range of frequencies.
Mid: Boosts or cuts frequencies around 1 kHz by ±6 dB.
The Mid control is a peak EQ that lets you boost
or cut a specified frequency band (in this case,
a band about two octaves wide, centered at 1
kHz). Its capable of more subtle changes.
Low Cutoff: Rolls off the level of all frequencies below the
specified frequency (80 or 100 Hz) at a slope of -12 dB/
octave. Can be defeated by setting it to Flat, in which case,
the monitor’s natural rolloff takes over.
Acoustic Space: Cuts the level of all frequencies below 800
Hz by the specified amount (-2 or -4 dB) to compensate for
the bass boost that occurs when the monitor is placed near
a wall or corner. Can be defeated by setting it to 0 dB.
E66
RCA
Unbalanced
Balanced
ACOUSTIC
SPACE
-4dB
-2dB
0dB
Flat
80Hz
100Hz
LOW
CUTOFF
100-120V~,50-60Hz,T2AL
220-240V~,50-60Hz,T1AL
160W
POWER
AC SELECT
ACOUSTIC TUNING
INPUT
-6dB
+6dB
MID
HIGH
-6dB
+6dB
INPUT
GAIN
MIN
MAX
U
ACOUSTIC
SPACE
-4dB
-2dB
0dB
LOW CUTOFF
MID FREQ
HIGH FREQ
ACOUSTIC SPACE
-4dB
-2dB
0dB
20 800Hz
-6dB
+6dB
0dB
10kHz
-6dB
+6dB
0dB
1kHz
0dB
-3dB
Flat
80Hz
100Hz
2 Hookup
2.2 Hookup Diagrams
Eris™ Series E5 and E8
Owners Manual
2.2 Hookup Diagrams
2.2.1 Basic Setup
2 Hookup
2.2 Hookup Diagrams
Eris™ Series E5 and E8
Owners Manual
2.2.2 Advanced Setup with Speaker Switching
0
Sceptre S6
Eris E44
Eris E44
E44
RCA
Unbalanced
TRS
Balanced
ACOUSTIC
SPACE
Flat
80Hz
100Hz
ACOUSTIC
SPACE
LOW
CUTOFF
100-120V~,50-60Hz,T1AL
220-240V~,50-60Hz,T500mAL
100W
POWER
AC SELECT
-6dB
+6dB
0
MID
HIGH
-6dB
+6dB
-4dB
-2dB
0dB
INPUT
GAIN
MIN
MAX
U
-4dB
-2dB
0dB
ACOUSTIC TUNING
INPUT
E44
RCA
Unbalanced
TRS
Balanced
ACOUSTIC
SPACE
Flat
80Hz
100Hz
ACOUSTIC
SPACE
LOW
CUTOFF
100-120V~,50-60Hz,T1AL
220-240V~,50-60Hz,T500mAL
100W
POWER
AC SELECT
-6dB
+6dB
0
MID
HIGH
-6dB
+6dB
-4dB
-2dB
0dB
INPUT
GAIN
MIN
MAX
U
-4dB
-2dB
0dB
ACOUSTIC TUNING
INPUT
345678
OUT
IN
12V
-
+
OUT IN
19-26 48kHz 11-18
15-18
96kHz
11-14
25-32 48kHz 17-24
21-24
96kHz
17-20
L
R
Main Out Mic/Line Inputs
IN
OUT
1
2
3
4
5
6
7
8
SS
Studio 192
Temblor T10
3 Tutorials
3.1 Monitor Placement
Eris™ Series E5 and E8
Owners Manual
3 Tutorials
3.1 Monitor Placement
Ideally, near-field monitors should be placed
so that the tweeters are at the same height
as your ears when you are mixing.
Eris E44 and E66 speakers can be placed vertically or
horizontally; when placed vertically, they should form a
mirror-image pair, with the tweeters on the outside.
When placed horizontally, the tweeters should be on top.
3 Tutorials
3.1 Monitor Placement
Eris™ Series E5 and E8
Owners Manual
The speakers should be separated so that the tweeters
form an equilateral triangle with your head. The
monitors should be “toed in, or angled, so that they
are pointed at you, not pointed straight ahead.
3.1.1 Badge Rotation
The logo badge on your Eris E44 and E66 can rotated
to match their orientation in your studio. Once you
have positioned your monitors in the orientation
that works the best for you, simply use your fingers
to twist the logo so that it is right side up.
60˚ 60˚
180º range
3 Tutorials
3.2 Input Gain Setting
Eris™ Series E5 and E8
Owners Manual
3.2 Input Gain Setting
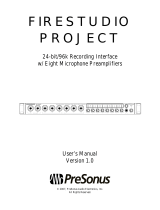
The best place to start is to set the Input Level control at its
unity gain position (labeled “U”). That means the level of the
signal reaching the amplifier is the same as the level of the
signal entering the monitor’s input. This ensures a good, strong
signal level without amplifying any extraneous noise. Make
sure that the gain controls on your audio source have been
optimized for maximum signal level and minimum noise. This
process is called gain staging, and you can learn about it from
many online sources. You should always set the Input Gain on
your Eris monitor so that all other level controls in the system
needn’t be turned way up or way down to achieve a
comfortable listening volume.
If setting the input gain to Unity is unsatisfactory, you can
try different settings, but remember that it’s better to avoid
settings above U if possible. If the volume is too loud at
unity gain, feel free to turn the Input Gain control down
a bit—but not so far that you have to crank your audio
sources output level to its maximum setting. If you set it
too low, you’ll have to crank your audio source’s output
level way up, which will increase the audible noise from
your source signal. If you set it too high, any noise in the
signal will be amplified, which you don’t want, either!
Again, if you properly gain-stage your audio source, setting
Input Gain to U or slightly lower should work fine.
Once the monitor’s Input Gain control is set, leave it
alone; don’t use it as a system-volume control. Leave
that job to your audio devices output-level control.
3.3 Equalizer Setting Suggestions
The Eris E44/E66 provides three EQ controls in its Acoustic
Tuning section: High, Mid, and Low Cutoff. (There’s also
an Acoustic Space control, which is covered in the next
section.) In general, setting the High control to 0 (no boost
or cut) will produce the best results. However, if the sound
is generally too bright or shrill, try turning this control down
below 0; if the sound is too dull and lifeless, try turning it
up above 0. It’s always better to cut than to boost and to
use the smallest cut or boost needed to get the job done.
The Mid control is a mid-frequency peak filter that boosts
or cuts frequencies centered on 1 kHz and extending
about one octave above and below that frequency. Again,
setting this control to 0 will generally produce the best
results. If you want to emulate a car stereo, try turning it
down below 0 to approximate the common smiley face
E66
RCA
Unbalanced
Balanced
ACOUSTIC
SPACE
-4dB
-2dB
0dB
Flat
80Hz
100Hz
LOW
CUTOFF
100-120V~,50-60Hz,T2AL
220-240V~,50-60Hz,T1AL
160W
POWER
AC SELECT
ACOUSTIC TUNING
INPUT
-6dB
+6dB
MID
HIGH
-6dB
+6dB
INPUT
GAIN
MIN
MAX
U
ACOUSTIC
SPACE
-4dB
-2dB
0dB
LOW CUTOFF
MID FREQ
HIGH FREQ
ACOUSTIC SPACE
-4dB
-2dB
0dB
20 800Hz
-6dB
+6dB
0dB
10kHz
-6dB
+6dB
0dB
1kHz
0dB
-3dB
Flat
80Hz
100Hz
3 Tutorials
3.4 Acoustic Space Setting Suggestions
Eris™ Series E5 and E8
Owners Manual
EQ curve. On the other hand, if you want to emulate a
cheap portable radio, try turning it up above 0. Try not
to boost much, since this can add noise to the signal.
The Low Cutoff control rolls off the low frequencies
below the specified frequency (80 or 100 Hz). Engage
this control if you are using a subwoofer in conjunction
with the Eris E44/E66 monitors, and set it to the same
frequency as the crossover to the subwoofer. If you’re
not using a subwoofer, set the control to Flat. If you
want to emulate a cheap radio, engage this control
at 80 or 100 Hz while boosting the Mid control.
Power User Tip: Do not use the EQ controls on
your Eris monitor to correct problems in your mix.
While this changes what you hear in the control
room, it has no effect on your recorded audio.
3.4 Acoustic Space Setting Suggestions
When a monitor is placed close to a wall, or in a corner,
the low frequencies tend to be emphasized more than
if the monitor is far from any room boundary; this effect
is called “boundary bass boost. It is most pronounced
if the monitor is in a corner and less pronounced,
but present, if the monitor is near one wall.
To compensate for this bass boost, the Eris E44/
E66 provides an Acoustic Space switch that cuts all
frequencies below 800 Hz by a fixed amount.
If the monitors are close to the corners of the room, start by
setting the Acoustic Space switch to -4 dB, which provides
the most bass attenuation.
If the monitors are close to the back wall, try setting the
Acoustic Space switch to -2 dB for less attenuation.
If the monitors are far from any wall, there will
be no bass boost, so set the switch to 0 dB.
4 Resources
4.1 Technical Specifications
Eris™ Series E5 and E8
Owners Manual
4 Resources
4.1 Technical Specifications
INPUTS (E44 and E66)
1- Balanced XLR
1- Balanced ¼” TRS
1- Unbalanced RCA
PERFORMANCE
Frequency Response
E44 55 Hz to 22 kHz
E66 45 Hz to 22 kHz
Crossover Frequency
E44 2.9 kHz
E66 2.4 kHz
LF Amplifier Power
E44 50W
E66 80W
HF Amplifier Power
E44 35W
E66 65W
Peak SPL at 1M
E44 103 dB
E66 106 dB
LF Drivers
E44 dual 4.5” Woven composite
E66 dual 6.5” Woven composite
HF Driver
E44 1.25” silk dome
E66 1.25” silk dome
4 Resources
4.1 Technical Specifications
Eris™ Series E5 and E8
Owners Manual
Input Impedance
E44 and E66 10 kΩ
USER CONTROLS
Volume Range
E44 and E66 A-type taper
MF Control
E44 and E66 Variable (-6 to +6 dB)
HF Control
E44 and E66 Variable (-6 to +6 dB)
Low Cut
E44 and E66 Flat, 80 Hz, 100 Hz
Acoustic Space
E44 and E66 Flat, -2 dB, -4 dB
PROTECTION (E44 and E66)
RF interference
Output-current limiting
Over-temperature
Turn-on/off transient
Subsonic filter
External mains fuse
POWER
E44 and E66 100-120V ~50/60 Hz or 220-240V ~50/60 Hz
CABINET
E44 and E66 Vinyl-laminated MDF
PHYSICAL
(Width/Height/Depth)
E44 7” x 7” x 14.3” (180 mm x 180 mm x 365 mm)
E66 8.5” x 9.8” x 18.1” (215 mm x 250 mm x 460 mm)
Weight
E44 11.9 lb (5.4 kg)
E66 23.4 lb (10.6 kg)
4 Resources
4.2 Troubleshooting
Eris™ Series E5 and E8
Owners Manual
4.2 Troubleshooting
No Power. First ensure that your Eris E44/E66 is plugged
in. If its connected to a power conditioner, verify that
the power conditioner is turned on and functioning.
If problem still exists, disconnect the power cable from your
E44/E66 and check the fuse on the back panel of your E44/
E66. The fuse housing is located directly beneath the IEC
power cable connection. A blown fuse may look black on
the inside or the wire inside might appear broken. A very
black fuse is a sign that something may have shorted out. Try
replacing the fuse with a new one. The type of fuse needed
for your monitor is listed below the power inlet. Be sure to use
the correct fuse for the set input-power voltage. If the fuse
blows again, you will need to contact PreSonus for a repair.
No audio. If your Eris E44/E66 appears to power on but
you hear no sound when playing audio from your audio
source (the lights are on but nobodys home), first make
sure that the cable connecting your audio source to the
monitor is working correctly. Also, verify that the Input Gain
control is set to provide enough amplitude for the signal.
Hum. Usually, hum is caused by a ground loop. Verify
that all audio equipment is connected to the same
power source. If you are not using a power conditioner,
we highly recommend that you add one. Not only will
this help to minimize hum, it will better protect your
equipment from power surges, brownouts, etc.
Use balanced cables whenever possible. If your
audio device does not offer a balanced output, you
can connect it to a direct box, which will provide
a ground-lift switch and a balanced output.
Finally, make sure that your audio cables are not run near
power cables, and use cables that are the appropriate length
for your application. Using cables that are too long not
only increases the risk of noise, it increases the likelihood
that the cables are coiled, which will essentially create an
antenna that picks up all kinds of audio interference.
4 Resources
4.3 Warranty
Eris™ Series E5 and E8
Owners Manual
4.3 Warranty
PreSonuss warranty obligations for this hardware
product are limited to the terms set forth below:
How Consumer Law Relates To This Warranty:
THIS WARRANTY GIVES YOU SPECIFIC LEGAL RIGHTS,
AND YOU MAY HAVE OTHER RIGHTS THAT VARY FROM
STATE TO STATE (OR BY COUNTRY OR PROVINCE). OTHER
THAN AS PERMITTED BY LAW, PRESONUS DOES NOT
EXCLUDE, LIMIT OR SUSPEND OTHER RIGHTS YOU MAY
HAVE, INCLUDING THOSE THAT MAY ARISE FROM THE
NONCONFORMITY OF A SALES CONTRACT. FOR A FULL
UNDERSTANDING OF YOUR RIGHTS YOU SHOULD CONSULT
THE LAWS OF YOUR COUNTRY PROVINCE OR STATE.
PreSonus Products And EU Statutory Warranty:
When you purchase PreSonus products, European Union
consumer law provides statutory warranty rights in
addition to the coverage you receive from the PreSonus
limited warranty. A summary of the EU Statutory
Warranty and the PreSonus Limited Warranty is below:
EU Consumer Law PreSonus Limited Warranty
Repair or Replacement
Coverage For
Defects present when customer
takes delivery
Defects arising after customer takes delivery
Warranty Period
2 years (minimum) from
original date of purchase (unless
superseded by PreSonus)
1 year from original date of purchase (unless superseded
by PreSonus)
Cost of Coverage Provided at no additional cost Included at no additional cost
Who to contact to
make a claim
The seller PreSonus technical support for your region
What This Warranty Covers:
PreSonus Audio Electronics, Inc., (“PreSonus”) warrants
defects in material and workmanship in PreSonus-branded
products under normal use. This Limited Warranty
applies only to hardware products manufactured by
or for PreSonus that can be identified by the PreSonus
trademark, trade name, or logo affixed to them.
4 Resources
4.3 Warranty
Eris™ Series E5 and E8
Owners Manual
Exclusions and Limitations:
This warranty does not cover the following:
1. Damage caused by accident, abuse, improper
installation, failure to follow instructions in the
applicable owner’s manual or improper operation,
rental, product modification, alteration, or neglect.
2. Damage from improper grounding, faulty
wiring (AC and signal), faulty equipment, or
connection to a voltage range outside published
specifications (see applicable owner’s manual).
3. Damage to drivers or diaphragm assemblies
found to have burnt voice coils from over/under
driving or signal surge from another device.
4. Damage occurring during shipment or improper handling.
5. Damage caused by repair or service performed
by persons not authorized by PreSonus.
6. Products on which the serial number has
been altered, defaced, or removed.
7. Products purchased from an un-authorized PreSonus
dealer (products that have transferable warranties are
excluded from this provision provided the customer
and the product are registered with PreSonus).
Who This Warranty Protects:
This Warranty protects only the original retail purchaser of
the product (products that have transferable warranties
are excluded from this provision provided the customer
and the product are registered with PreSonus)
How Long This Warranty Lasts:
The Warranty begins on the original date of purchase
from the retail purchaser and the duration is as follows:
1-Year Limited Warranty
Product Category Model Transferable
Recording Interfaces
AudioBox iOne, AudioBox iTwo, AudioBox Stereo, AudioBox Studio, AudioBox
USB, AudioBox VSL (1818, 44, 22), FireStudio Project, FireStudio Mobile,
FireStudio Mobile Studio, Music Creation Suite
No
Pre-amplifiers
ADL600, ADL700, BlueTube DP V2, DigiMax D8, Eureka, RC500, StudioChannel,
TubePre V2
No
StudioLive Mixers SL-1642, SL-2442, SL-1602, SLM16.4.2 AI, SLM24.4.2 AI, SLM32.4.2AI No
Monitoring & Controlling
Eris, Central Station Plus, FaderPort, HP4, HP60, Monitor Station, Monitor
Station V2, Sceptre, Temblor
No
Signal Processing ACP88 No
Accessories Covers, Dolly, PRM1 mic, Sub Pole, Breakout Cables, Power Supplies, M10 Kit No
3-Years Limited Warranty
Product Category Model Transferable
Live Sound StudioLive AI 328, 312, 315, 18S Yes
What PreSonus Will Do:
PreSonus will repair or replace, at our sole and
absolute option, products covered by this warranty
at no charge for labor or materials. If the product
must be shipped to PreSonus for warranty service,
the customer must pay the initial shipping charges.
PreSonus will pay the return shipping charges.
How to Get Warranty Service (USA):
1. You must have an active user account with PreSonus
and your hardware must be on file with your
account. If you do not have an account, please
go to: http://www.presonus.com/registration
and complete the registration process.
2. Contact our Technical Support Department at
(225) 216-7887 or log a support ticket at: http://
support.presonus.com. TO AVOID THE POSSIBILITY
OF SENDING IN A PRODUCT THAT DOES NOT HAVE
A PROBLEM, ALL SERVICE REQUESTS SHALL BE
CONFIRMED BY OUR TECH SUPPORT DEPARTMENT.
3. The return authorization number as well as
shipping instructions shall be provided after your
service request is reviewed and confirmed.
4. The product should be returned for service in the original
product packaging. Products may be shipped in a
manufactured “flight or “road” style cases but PreSonus
will NOT cover any shipping damage to these cases.
Products that are not shipped in the original product
package or a manufactured case may not receive a
warranty repair, at PreSonuss sole discretion. Depending
on the product model and the condition of your
original packaging, your product may not be returned
to you in the original packaging. The return shipping
box may be a generic box that has been fitted for that
model tested if the original gift box is not available.
How to Get Warranty Service (outside of USA):
1. You must have an active user account with PreSonus and
your hardware must be on file with your account. If you do
not have an account, please go to: http://www.presonus.
com/registration and complete the registration process.
2. Contact the Technical Support/Service Department
for your region at http://www.presonus.com/buy/
international_distributors and follow procedures
provided by your PreSonus contact.
Limitation of Implied Warranties:
ANY IMPLIED WARRANTIES, INCLUDING WARRANTIES
OF MERCHANTABILITY AND FITNESS FOR A
PARTICULAR PURPOSE, ARE LIMITED IN DURATION
TO THE LENGTH OF THIS WARRANTY.
Some states, countries, or provinces do not allow
limitations on how long an implied warranty lasts,
so the above limitation may not apply to you.
  • Page 1 1
  • Page 2 2
  • Page 3 3
  • Page 4 4
  • Page 5 5
  • Page 6 6
  • Page 7 7
  • Page 8 8
  • Page 9 9
  • Page 10 10
  • Page 11 11
  • Page 12 12
  • Page 13 13
  • Page 14 14
  • Page 15 15
  • Page 16 16
  • Page 17 17
  • Page 18 18
  • Page 19 19
  • Page 20 20
  • Page 21 21
  • Page 22 22
  • Page 23 23
  • Page 24 24

PRESONUS Eris E44 Owner's manual

Category
Supplementary music equipment
Type
Owner's manual
This manual is also suitable for

The PRESONUS Eris E44 are high-definition MTM studio monitors, featuring a nested MTM (midwoofer-tweeter-midwoofer) design that delivers accurate response, expanded frequency range, and the widest stereo field available in their class. They provide balanced XLR and ¼” TRS, and unbalanced RCA inputs, continuously variable HF and MF controls, and low cut filter. With its acoustic space settings and acoustic tuning controls, the Eris E44 gives you the flexibility to adapt the sound to your room and taste.

Ask a question and I''ll find the answer in the document

Finding information in a document is now easier with AI