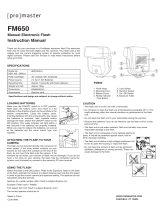
Page is loading ...

Thank
you for
purchasing
the
Olympus
OM77AF.
The
OM77AF
is a
fully
automatic
SLR
camera which incorporates the very latest in photographic technology in an incredibly
compact form. Autofocus, programmed exposure modes and an optional Power Flash
Grip 300 all facilitate problem-free photography. In addition, connected to a Full-
Synchro Flash F280, the world's first flash unit capable of synchronizing with any
shutter
speed
up to
1/2000
sec.,
the
OM77AF
offers
the
user
a
simple,
error-free
method
of
attaining
professional-level results
in
areas
such
a
fill-in
flash
photography.
Before using
the
camera,
please
study
this
instruction
manual
carefully
with
the
OM77AF
in front of you, so that you can get the very best performance and service life from your
new camera.
The following symbols are used during explanation of operating procedures.
Correct
Incorrect
Operation
Operation order
Automatic
operation
Attention
Press lightly
Lamp on
Lamp blinking
1

Table of Contents
Preparations before Taking Pictures
........
3
• Loading the Power Flash Grip 300
Batteries
......................
4
• Loading the Power Grip 100 Batteries
.....
7
•
Mounting
an AF
Lens
..............
9
Taking Photographs
I
...............
.
11
•
Turning
on the
Power
..............
12
•
Loading
the
Film
................
13
•
Taking Photographs
..............
16
•
Rewinding the Film
...............
20
Taking Photographs
II
................
22
• Taking a Continuous Series of Shots
....
23
•
Using
the
Power Focus
............
24
•
Using
the
Program
Shift
............
27
•
Using
the
Focus
Lock System
........
30
•
Using
the
AE Lock
...............
32
•
Using
the
Reset
Button
............
34
•
Using
the Self-Timer
...............
35
•
Using
an OM Lens
.................
37
Taking Photographs
III
..............
40
•
Using
the
Power
Flash
Grip
300
.......
41
• Using the Full-Synchro Flash F280
......
44
• Using the T20 and T32 Electronic
Flashes
......................
48
•
Using
a
Conventional Auto
Flash
.......
51
To
Take Better Photographs
...........
54
•
Autofocus (AF)
.................
55
•
Program
.....................
57
• TTL Direct "OTF" Light Metering
.......
63
•
Viewfinder Display
...............
64
•
LCD
Panel
.....................
65
•
OM
Lenses
....................
66
•
OM AF System
..................
67
•
Notes
on
Using
the
OM77AF
with Previous
OM System Units
................
68
Handling
Care
....................
69
Storage
Care
....................
70
Questions
and
Answers
..............
71
Description
of
Controls
..............
73
Main Specifications
of the
OM77AF
.......
76
Main Specifications of Power Grip 100
.......
78
Main Specifications of Power Flash
Grip
300
.......................
78
2

Preparations before Taking Pictures
3

Loading the Power Flash Grip 300 Batteries
Remove the battery cover on the bottom of the
grip.
Do not use different types of batteries, or new and old batteries at the same time. Remove the
batteries if you are not likely to use the camera for a long time.
1
4

2
Insert the batteries in the correct directions and
replace the cover.
To remove the grip, slide the grip lock knob and
push down on the grip.
4 LR03 (AAA) batteries
5

and and then push up until it locks.
Note: Slide the power switch OFF when loading batteries or replacing the grip.
6
To replace the grip, align with the indicators

Remove the battery cover on the bottom of the
grip.
Loading the Power Grip 100 Batteries
1
2
Insert the batteries in the correct directions and
replace the cover.
7
4 LR03 (AAA) batteries

To remove the grip, slide the grip lock knob and
push down on the grip.
To replace the grip, align with the indicators
and and then push up until it locks.
8

Mounting an AF Lens
To mount an OM lens, refer to page 37.
Remove the rear lens cap and the body cap.
1
9

2
3
it locks. Do not touch the lens release button
when mounting the lens.
Remove the front lens cap.
Removing the Lens:
Press the lens release button and turn the lens
counterclockwise.
10
Align the red dots and slowly rotate the lens until

Taking Photographs I
With autofocus and programmed exposure, the OM77AF puts the fascinating world of SLR
photography at your fingertips; a perfect shot is only a press of the shutter release away.
11

Turning on the power
Slide the power switch ON.
1
Film speed and battery condition are shown for
1.5 sec.
OK
Battery power below 50 %
Change the batteries.
When power is switched ON, the lens is set to and all functions reset (see page 28).
12

Loading the Film
Loading
and
film-speed
selection
for DX
film
are
automatic.
Use only lSO 100 when using non-
DX film.
Make sure film is DX type.
To open the back, press the locking button and
slide the release knob.
2
1
13

3
Avoiding direct sunlight, insert the film cartridge.
Take care not to touch the shutter curtain with
your finger or the film leader.
4
5
Align the film leader with the mark and gear the
sprocket teeth to the film perforations.
Close the camera back and ....
14

The film is automatically wound on until the exposure counter
reads 1.
When the film is incorrectly loaded, blinks. Reload the film.
Film type confirmation is possible through the
window in the camera back.
15

Taking Photographs
Press the shutter release halfway to activate the
viewfinder display.
1
(The display continues for 30 sec.)
Frame your subject.
2
Do not touch the front-most part of the lens.
16

Place your subject in the center of the autofocus
frame.
3
Press the shutter release halfway to focus.
4
Under-exposure
warning:
blinks.
Over-exposure
warning:
blinks.
17
A green light indicates the subject is in focus. (A
red light indicates autofocus is not possible.)

5
Press down on the shutter release.
The
film
is
automatically
advanced
one
frame.
In poor light conditions, the autofocus illuminator
is automatically activated to determine the correct
distance. However, there are some cases depending
on the type of lenses used in which it cannot be
used. Even in these conditions the subject distance
can be determined when using the F280.
18

When battery power falls below 50 %, blinks after each shot, and charge time is increased
when using the Power Flash Grip 300; therefore, changing the batteries is recommended.
19

Rewinding the Film
1
Film rewind is also automatic.
Confirm that you have reached the end of the film.
R blinks.
While sliding locking knob , press the rewind
button .
2
20
/