Page is loading ...

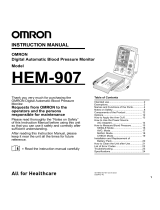
Solar Charging
Manual Inflation Blood Pressure Monitor
Model HEM-SOLAR
• Instruction Manual
• Mode d’emploi
• Gebrauchsanweisung
• Manuale di istruzioni
• Manual de instrucciones
• Gebruiksaanwijzing
• РУКОВОДСТВО ПО ЭКСПЛУАТАЦИИ
EN
FR
DE
IT
ES
NL
RU
IM-HEM-4500-SOLE-01-03/09
5322504-1A
AR
Rev.10 2008/11/28
HEM-4500-SOLE_main.book Page 1 Tuesday, February 3, 2009 1:30 PM

2
Contents
Contents
Before using the unit
Introduction..................................................................................3
Important Safety Information......................................................4
1. Overview..................................................................................7
2. Preparation............................................................................11
2.1 Connecting/Replacing/Charging the Batteries ..................11
Operating instructions
3. Using the Unit........................................................................17
3.1 How to Sit Correctly When Taking a Measurement ..........17
3.2 Applying the Arm Cuff.......................................................19
3.3 Taking a Reading..............................................................22
4. Quick Reference Guide ........................................................26
Care and maintenance
5. Handling Errors and Problems............................................27
5.1 Error Messages.................................................................27
5.2 Troubleshooting ................................................................29
6. Maintenance and Storage ....................................................31
7. Optional Parts .......................................................................33
8. Technical Data.......................................................................34
9. Some Useful Information about Blood Pressure ...............37
HEM-4500-SOLE_main.book Page 2 Tuesday, February 3, 2009 1:30 PM

3
Introduction
EN
Introduction
Thank you for purchasing the OMRON HEM-SOLAR Upper Arm Blood
Pressure Monitor.
The OMRON HEM-SOLAR is a manual inflation blood pressure
monitor, operating on the oscillometric principle. It measures your blood
pressure and pulse rate simply and quickly.
The OMRON HEM-SOLAR also recharges the battery using Solar
Power. Allowing for use in various situations and locations.
Please read this instruction manual thoroughly before
using the unit. For specific information about your own
blood pressure, CONSULT YOUR DOCTOR.
Before using the unit
HEM-4500-SOLE_main.book Page 3 Tuesday, February 3, 2009 1:30 PM

4
Important Safety Information
Important Safety Information
Consult your doctor during pregnancy, arrhythmia and arteriosclerosis.
Please read this section carefully before using the unit.
Warning:
Indicates a potentially hazardous situation which, if not avoided, could
result in death or serious injury.
(General Usage)
• Always consult your doctor. Self-diagnosis of measurement results
and self-treatment are dangerous.
• People with severe blood flow problems, or blood disorders, should
consult a doctor before using the unit. Cuff inflation can cause internal
bleeding.
(Battery Usage)
• If battery fluid should get in your eyes, immediately rinse with plenty of
clean water. Consult a doctor immediately.
(AC Adapter Usage)
• Never plug in or unplug the power cord from the electric outlet with
wet hands.
Caution:
• Indicates a potentially hazardous situation which, if not avoided, may
result in minor or moderate injury to the user or patient or damage to
the equipment or other property.
(General Usage)
• Do not leave the unit unattended with infants or persons who cannot
express their consent.
• Do not use the unit for any purpose other than measuring blood
pressure.
• Do not disassemble the unit, arm cuff or inflation bulb.
• Use only the approved arm cuff for this unit. Use of other arm cuffs
may result in incorrect measurement results.
• Do not inflate the arm cuff over 299 mmHg.
• Do not use a mobile phone near the unit. This could cause a
malfunction.
HEM-4500-SOLE_main.book Page 4 Tuesday, February 3, 2009 1:30 PM

5
Important Safety Information
EN
(Battery Usage for “AAA” batteries only)
• If battery fluid should get on your skin or clothing, immediately rinse
with plenty of clean water.
• Use only two “AAA” size batteries with this unit. Do not use other
types of batteries.
• Do not insert the batteries with their polarities incorrectly aligned.
• Replace old batteries with new ones immediately. Replace both “AAA”
batteries at the same time.
• Remove “AAA” batteries if the unit will not be used for three months or
more.
• Do not use new and used batteries together.
(Rechargeable battery Usage)
• Do not use If the Rechargeable battery gets wet.
• Do not charge the battery below/above 0°C to 40°C.
• Use only the original Rechargeable battery designed for this unit.
Please refer to Chapter 7.
(AC Adapter Usage)
• Use only the original AC adapter designed for this unit. Use of
unsupported adapters may damage and/or may be hazardous to the
unit.
• Plug the AC adapter into the appropriate voltage outlet.
• Do not use the AC adapter if the unit or the power cord is damaged.
Turn off the power and unplug the power cord immediately.
General Precautions
• Do not operate unit in a moving vehicle (car, airplane).
• Do not apply strong shocks and vibrations to or drop the unit and arm
cuff.
• Do not take measurements after bathing, drinking alcohol, smoking,
exercising or eating.
• Do not forcibly bend the arm cuff or bend the air tube excessively.
• When removing the air tube, pull on the edge of the tube at the
connection with the main unit not the middle of the tube.
• Do not inflate the arm cuff when it is not wrapped around your arm.
• Do not wash the arm cuff or immerse it in water.
HEM-4500-SOLE_main.book Page 5 Tuesday, February 3, 2009 1:30 PM

6
Important Safety Information
• Read and follow the “Important information regarding Electro
Magnetic Compatibility (EMC)” in the Technical Data Section.
• Read and follow the “Correct Disposal of This Product” in the
Technical Data Section when disposing of the device and any used
accessories or optional parts.
HEM-4500-SOLE_main.book Page 6 Tuesday, February 3, 2009 1:30 PM

7
1.Overview
EN
1. Overview
Main unit
A. Display
B. I/O button (Power switch)
C. Air connector cap for cuff
D. Air connector for cuff
E. Air connector for inflation bulb
F. Air connector cap for inflation
bulb
G. AC Adapter jack
H. AC Adapter jack cap
I. Battery compartment
J. Solar panel
A
B
I
J
D
C
E
F
G
H
HEM-4500-SOLE_main.book Page 7 Tuesday, February 3, 2009 1:30 PM

8
1.Overview
Arm Cuff
Inflation Bulb
K. Arm cuff
(Medium cuff: arm circumference 22-32 cm)
L. Air Tube
M. Air Plug
N. Air Release Button
O. Air Tube
P. Air Inflation Bulb
Q. Air Plug
LK
M
O
P
N
Q
HEM-4500-SOLE_main.book Page 8 Tuesday, February 3, 2009 1:30 PM

9
1.Overview
EN
Display
R. Systolic blood pressure
S. Diastolic blood pressure
T. Deflation symbol
U. Reinflation symbol
V. Rechargeable battery indicator
W. Heartbeat symbol
1. Flashes during measurement
2. If flashing after measurement
completed, indicates blood
pressure out of recommended
range*
X. Pulse display
Y. Battery low symbol
* Note: If your systolic or diastolic
pressure is outside the
standard range (above 135/
85 mmHg) the Heartbeat
symbol ( ) will blink.
Please refer to Chapter 3.3.
R
W
Y
S
T
U
X
V
HEM-4500-SOLE_main.book Page 9 Tuesday, February 3, 2009 1:30 PM

10
1.Overview
Package contents (others)
Z. Storage case
AA. AC adapter
AB. Rechargeable battery
• Instruction manual
• Guarantee card
• Blood pressure pass
AA
AB
Z
HEM-4500-SOLE_main.book Page 10 Tuesday, February 3, 2009 1:30 PM

11
2.Preparation
EN
2. Preparation
2.1
Connecting/Replacing/Charging the Batteries
To make use of the Charging function, first insert the Rechargeable
battery, attach the AC adapter, then charge up the battery.
Connecting the Rechargeable Battery
1. Turn the main unit upside down.
2. Slide the battery cover in the
direction of the arrow while
pressing the ribbed part of the
cover.
3. Connect the Rechargeable
battery to the main unit.
Note: When replacing the
Rechargeable battery,
pull the cables and
disconnect the
Rechargeable battery
from the main unit.
HEM-4500-SOLE_main.book Page 11 Tuesday, February 3, 2009 1:30 PM

12
2.Preparation
4. Put the battery cover back in
place.
Slide the battery cover as
indicated, until it clicks into
place.
5. Insert the AC adapter plug into the AC adapter jack, then plug
the AC adapter into an electrical outlet.
6. After the battery is fully
charged, remove the AC
adapter plug from the monitor
and close the AC adapter jack
cap.
Notes:
• The orange LED is lit while
the battery is being charged
by the AC adapter. After the
battery is fully charged, the
orange LED goes out.
• Charge up the Rechargeable battery with the AC adapter
before taking a measurement for the first time or in case the
Rechargeable battery becomes low or empty.
HEM-4500-SOLE_main.book Page 12 Tuesday, February 3, 2009 1:30 PM

13
2.Preparation
EN
Rechargeable battery Life & Charging
The Rechargeable battery life can be confirmed in the bottom left corner
of the display.
Notes:
• Charge the Rechargeable battery as soon as the Rechargeable
battery indicator shows low.
• When the Rechargeable battery indicator goes out, the Rechargeable
battery is empty or not connected. Connect and charge up the
Rechargeable battery.
• In case of using two “AAA” size batteries together with the
Rechargeable battery, the Rechargeable battery indicator ( ) starts
flashing then lights up when the Rechargeable battery is empty.
• In case of using two “AAA” size batteries together with the
Rechargeable battery, the battery low symbol ( ) starts flashing
then lights up when the “AAA” batteries are exhausted.
• Use two disposable “AAA” size batteries to avoid the unit turning off
after the Rechargeable battery becomes empty.
• This devices operates on rechargeable battery, two “AAA” size
batteries, or by AC adapter.
• Two “AAA” size batteries are not included.
Full power
Half remaining
Remaining power is low.
Charge the Rechargeable battery ahead
of time.
The Rechargeable battery is empty. The
unit turns off after 30 seconds.
Recharge the rechargeable battery or
insert two “AAA” size batteries instead.
HEM-4500-SOLE_main.book Page 13 Tuesday, February 3, 2009 1:30 PM

14
2.Preparation
How to Charge the Battery
When the Rechargeable battery indicator shows remaining power is low
( ) on the display, charge the battery.
1. Open the window and face the
Solar panel to the sunlight
near the window.
2. The orange LED is lit while the
battery is being charged by
solar power.
Caution:
• When charging the battery, disconnect the air tubes of the arm
cuff and the inflation bulb, make sure to close two air connecter
caps and AC adapter jack cap.
• Charge the battery inside with the direct rays of the sun near a
window. The battery won't be charged by room light. Do not
leave the unit outdoors and avoid getting the unit wet from rain.
• If the Rechargeable battery life becomes extremely short, it might
be a temporary problem with the capacity. Charge the battery
with the AC adapter.
• To keep the Rechargeable battery capacity longer, avoid frequent
short charges.
• The Rechargeable battery might be empty after purchasing or in
case the unit has not been used for more than a month. Charge
the battery with the AC adapter once. Then the Rechargeable
battery will be ready for use.
HEM-4500-SOLE_main.book Page 14 Tuesday, February 3, 2009 1:30 PM

15
2.Preparation
EN
Charging time and the Capacity of the Rechargeable battery
To charge the battery the following conditions are needed.
Note: The capacity might change depending upon the weather
situation.
Weather Lux
To fully charge
the battery
4 hours continuous
charge with a southern
exposure
Clear
more than
80000lux
35 hours
continuous charge
40 measurements
Fair
50000lux
90 hours
continuous charge
20 measurements
Cloudy
20000lux
600 hours
continuous charge
5 measurements
HEM-4500-SOLE_main.book Page 15 Tuesday, February 3, 2009 1:30 PM

16
2.Preparation
Installing/Replacing the “AAA” size Batteries
1. Turn the main unit upside down.
2. Slide the battery cover in the
direction of the arrow while
pressing the ribbed part of the
cover.
3. Install or replace two “AAA”
size batteries so that the
+ (positive) and - (negative)
polarities match the polarities
indicated on the battery
compartment.
4. Put the battery cover back in
place.
Slide the battery cover as
indicated, until it clicks into
place.
If the battery low symbol ( ) appears
on the display, replace both batteries at
the same time.
- When the battery low symbol ( ) starts to blink, you will still be
able to use the unit for a short while. You should replace the
batteries with new ones ahead of time.
- When the symbol ( ) remains lit, the batteries are exhausted. You
should replace the batteries with new ones at once.
• Remove the batteries if the unit will not be used for three months or
more.
• Dispose of batteries according to applicable local regulations.
Two new “AAA” alkaline batteries will last for approximately 1500
measurements, when used to take two measurements a day.
HEM-4500-SOLE_main.book Page 16 Tuesday, February 3, 2009 1:30 PM

17
3.Using the Unit
EN
3. Using the Unit
3.1
How to Sit Correctly When Taking a Measurement
Correct posture during measurement is necessary to get accurate
results.
Notes:
• Measurements should be taken in a quiet place and you should be in
a relaxed, seated position. Make sure that the room is not too hot or
too cold.
• Avoid eating, drinking alcohol, smoking, or exercising for at least 30
minutes before taking a measurement.
• Do not move or talk during measurement.
Correct
Posture
Remove tight fitting clothing from
your upper arm, and any thick
clothing such as a sweater.
Do not place the cuff over thick
clothes and do not roll up your
sleeve if it is too tight.
Sit upright
with your
back straight.
Place your arm on a table so
that the cuff will be at the same
level as your heart.
The gap between the
chair and the top of the
table should be between
25cm to 30cm.
Operating instructions
HEM-4500-SOLE_main.book Page 17 Tuesday, February 3, 2009 1:30 PM

18
3.Using the Unit
Incorrect Posture
These situations could lead to higher blood pressure
values due to strain or the arm cuff being lower than the
heart.
If the arm cuff is at a lower position than your heart use
cushions etc., to adjust the height of your arm.
• Arched back (leaning forwards)
• Sitting cross-legged
• Sitting on a sofa or at a low table
so that you tend to lean forward
HEM-4500-SOLE_main.book Page 18 Tuesday, February 3, 2009 1:30 PM

19
3.Using the Unit
EN
3.2
Applying the Arm Cuff
Notes:
• Be sure to wrap the arm cuff correctly so that you get accurate results.
• Measurements can be taken in light clothing. However, please remove
thick clothes, such as sweaters, before taking a reading.
• You can take a measurement on either your left or right arm. The
blood pressure can differ between the right arm and the left arm and
therefore also the measured blood pressure values can be different.
Omron recommends to always use the same arm for measurement. If
the values between the two arms differ substantially, please check
with your doctor which arm to use for your measurement.
Taking measurements on the left arm
1.
Open two Air connector caps, then insert the air plugs of the arm
cuff and the inflation bulb into their respective air connectors.
Note: Be sure to use the appropriate size arm cuff. Should
you require a small cuff, ensure that the small bulb is
used together with the small cuff. Please refer to
Chapter 7.
HEM-4500-SOLE_main.book Page 19 Tuesday, February 3, 2009 1:30 PM

20
3.Using the Unit
2. Put your left arm through the cuff
loop.
Note: If the cuff is not assembled,
pass the end of the cuff
furthest from the tubing
through the metal D-ring to
form a loop. The smooth
cloth should be on the inside
of the cuff loop.
3. Position the arm correctly.
4. When the cuff is positioned correctly, close the fabric fastener
FIRMLY.
1) The air tube should run
down the inside of your
forearm and be in line with
your middle finger.
2) The bottom of the cuff
should be approximately 1
to 2 cm above your elbow.
3) Apply the cuff to your
upper arm so that the
coloured marker (blue
arrow under tube) is
centered on the middle of
your inner arm and points
down the inside of the
arm.
HEM-4500-SOLE_main.book Page 20 Tuesday, February 3, 2009 1:30 PM
/