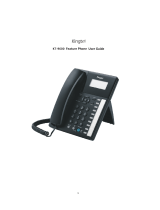
Panasonic KX-TDA30 User manual

Category
IP phones
Type
User manual
Thank you for purchasing the Panasonic Hybrid IP-PBX, KX-TDA30.
Please read this manual carefully before using this product and save this manual for future use.
Model no. KX-TDA30
Hybrid IP-PBX
Installation Manual
SD Logo is
a trademark.
2 Installation Manual
System Components
Available Proprietary Telephones
The Hybrid IP-PBX supports all of the Panasonic KX-T7000 and KX-TD7000 series:
• Digital/Analogue proprietary telephones (e.g., KX-T7625, KX-T7630, KX-T7633, KX-
T7636)
• Portable stations (e.g., KX-TD7590, KX-TD7690)
• DSS consoles (e.g., KX-T7640)
• Single line telephones (e.g., KX-T7710)
Note
The Hybrid IP-PBX does not support the following telephones:
• KX-T30800 series Proprietary Telephones and DSS consoles
• KX-T61600 series Proprietary Telephones and DSS consoles
System Components Table
Model Description
Main Unit KX-TDA30 Main Unit
Trunk Cards KX-TDA3180 4-Port Analogue Trunk Card (LCOT4)
KX-TDA3193 4-Port Caller ID Card (CID4)
KX-TDA3280 2-Port BRI Card (BRI2)
KX-TDA3480 4-Channel VoIP Gateway Card (IP-GW4)
Extension Cards KX-TDA3171 4-Port Digital Extension Card (DLC4)
KX-TDA3172 8-Port Digital Extension Card (DLC8)
KX-TDA3173 4-Port Single Line Telephone Extension Card (SLC4)
KX-TDA3174 8-Port Single Line Telephone Extension Card (SLC8)
Other Cards KX-TDA3161 4-Port Doorphone Card (DPH4)
KX-TDA3162 2-Port Doorphone Card (DPH2)
KX-TDA3166 8-Channel Echo Canceller Card (ECHO8)
KX-TDA3168 Extension Caller ID Card (EXT-CID)
KX-TDA3191 2-Channel Message Card (MSG2)
KX-TDA3196 Remote Card (RMT)
Cell Stations (CSs) KX-TDA0141CE 2-Channel Cell Station Unit for DECT Portable Station
KX-TDA0141 2-Channel Cell Station Unit for 2.4 GHz Portable Station
Proprietary Equipment KX-A236 Additional AC Adaptor and AC Cord
KX-A228 S/M-type Back-up Battery Cable
KX-T30865 Doorphone
Installation Manual 3
• KX-T123200 series Proprietary Telephones and DSS consoles
• KX-T7500 Digital Portable Station
• KX-TD7500 DECT Portable Station
For the equipment (e.g., Add-on Key Module, USB Module, Headset
*1
) that can be connected
to a particular telephone, refer to the telephone's manual.
For other equipment that can be connected to the Hybrid IP-PBX, refer to "1.2.2 System
Connection Diagram".
Abbreviations in this manual
Proprietary telephone: PT
Digital proprietary telephone: DPT
Analogue proprietary telephone: APT
Portable station: PS
Single line telephone: SLT
Notice
• There are some optional service cards and features that are not available for certain
countries/areas. Consult your certified Panasonic dealer for detailed instructions.
• The power supply capacity of the Hybrid IP-PBX may differ from the values described
in this manual depending on the model number. Please consult your dealer for
detailed information.
*1
The KX-T7090 headset can be connected to the KX-T7000, KX-T7200, KX-T7300, KX-T7400, and KX-T7500 (except for KX-
T7560/KX-T7565) series telephones.
4 Installation Manual
Important Safety Instructions
SAFETY REQUIREMENTS
When using your telephone equipment, basic safety precautions should always be followed to
reduce the risk of fire, electric shock and injury to persons, including the following:
1. Read and understand all instructions.
2. Follow all warnings and instructions marked on the product.
3. Unplug this product from the wall outlet before cleaning. Do not use liquid cleaners or
aerosol cleaners. Use a damp cloth for cleaning.
4. Do not use this product near water, for example, near a bathtub, wash bowl, kitchen sink,
or laundry tub, in a wet basement, or near a swimming pool.
5. Do not place this product on an unstable cart, stand, or table. The product may fall,
causing serious damage to the product.
6. Slots and openings in the cabinet and the back or bottom are provided for ventilation; to
protect it from overheating, these openings must not be blocked or covered. The openings
should never be blocked by placing the product on a bed, sofa, rug, or other similar
surface. This product should never be placed near or over a radiator or other heat source.
This product should not be placed in a built-in installation unless proper ventilation is
provided.
7. This product should be operated only from the type of power source indicated on the
product label. If you are not sure of the type of power supply to your home, consult your
dealer or local power company.
8. This product is equipped with a 3-wire earthing type plug, a plug having a third (earthing)
pin. This plug will only fit into an earthing type power outlet. This is a safety feature. If you
are unable to insert the plug into the outlet, contact your electrician to replace your
obsolete outlet. Do not defeat the safety purpose of the earthing type plug.
9. Do not allow anything to rest on the power cord. Do not locate this product where the cord
will be abused by people walking on it.
10. Do not overload wall outlets and extension cords as this can result in the risk of fire or
electric shock.
11. Never push objects of any kind into this product through cabinet slots as they may touch
dangerous voltage points or short out parts that could result in a risk of fire or electric
shock. Never spill liquid of any kind on the product.
12. To reduce the risk of electric shock, do not disassemble this product, but take it to a
qualified person when some service or repair work is required. Opening or removing
covers may expose you to dangerous voltages or other risks. Incorrect reassembly can
cause electric shock when the appliance is subsequently used.
13. Unplug this product from the wall outlet and refer servicing to qualified service personnel
under the following conditions:
a) When the power supply cord or plug is damaged or frayed.
b) If liquid has been spilled into the product.
c) If the product has been exposed to rain or water.
d) If the product does not operate normally by following the operating instructions. Adjust
only those controls that are covered by the operating instructions because improper
adjustment of other controls may result in damage and will often require extensive
work by a qualified technician to restore the product to normal operation.
e) If the product has been dropped or the cabinet has been damaged.
Installation Manual 5
f) If the product exhibits a distinct change in performance.
14. Avoid using a telephone (other than a cordless type) during an electrical storm. There may
be a remote risk of electric shock from lightning.
15. Do not use the telephone to report a gas leak in the vicinity of the leak.
SAVE THESE INSTRUCTIONS
6 Installation Manual
Precaution
• Keep the unit away from heating appliances and electrical noise generating devices such
as fluorescent lamps, motors and televisions. These noise sources can interfere with the
performance of the Hybrid IP-PBX.
• This unit should be kept free of dust, moisture, high temperature (more than 40 °C) and
vibration, and should not be exposed to direct sunlight.
• Never attempt to insert wires, pins, etc. into the vents or other holes of this unit.
• If there is any trouble, disconnect the unit from the telephone line. Plug an SLT into the
telephone line. If the telephone operates properly, do not reconnect the unit to the line until
the trouble has been repaired by an authorised Panasonic Factory Service Centre. If the
telephone does not operate properly, chances are that the trouble is in the telephone
system, and not in the unit.
• Do not use benzene, thinner, or the like, or any abrasive powder to clean the cabinet. Wipe
it with a soft cloth.
For users in Germany only
• When the unit is working, the noise is less than 70 dB (A) according to DIN 45635 Part 19.
For users in New Zealand only
• This equipment shall not be set to make automatic calls to the Telecom '111' Emergency
Service.
• The grant of a Telepermit for any item of terminal equipment indicates only that Telecom
has accepted that the item complies with minimum conditions for connection to its
network. It indicates no endorsement of the product by Telecom, nor does it provide any
sort of warranty. Above all, it provides no assurance that any item will work correctly in all
respects with another item of Telepermitted equipment of a different make or model, nor
does it imply that any product is compatible with all of Telecom's network services.
• This equipment is not capable, under all operating conditions, of correct operation at the
higher speeds for which it is designed. Telecom will accept no responsibility should
difficulties arise in such circumstances.
• Some parameters required for compliance with Telecom's Telepermit requirements are
dependent on the equipment (PBX) associated with this modem. In order to operate within
the limits for compliance with Telecom's Specifications, the associated PBX equipment
shall be sent to ensure that modem calls are answered between 3 and 30 seconds of
receipt of ringing.
• IMPORTANT NOTICE
Under power failure conditions, the wireless telephones may not operate. Please ensure
that separate telephone, not dependent on local power, is available for emergency use in
emergencies.
For users in Australia only
• No External TRC Terminal is provided due to an Internal Link between PE and TRC.
WARNING
• THIS UNIT MAY ONLY BE INSTALLED AND SERVICED BY QUALIFIED
SERVICE PERSONNEL.
Installation Manual 7
• WHEN A FAILURE OCCURS WHICH EXPOSES ANY INTERNAL PARTS,
DISCONNECT THE POWER SUPPLY CORD IMMEDIATELY AND RETURN
THIS UNIT TO YOUR DEALER.
• DISCONNECT THE TELECOM CONNECTION BEFORE
DISCONNECTING THE POWER CONNECTION PRIOR TO RELOCATING
THE EQUIPMENT, AND RECONNECT THE POWER FIRST.
• THIS UNIT IS EQUIPPED WITH AN EARTHING CONTACT PLUG. FOR
SAFETY REASONS THIS PLUG MUST ONLY BE CONNECTED TO AN
EARTHING CONTACT SOCKET WHICH HAS BEEN INSTALLED
ACCORDING TO REGULATIONS.
• TO PREVENT THE RISK OF FIRE OR ELECTRIC SHOCK, DO NOT
EXPOSE THIS PRODUCT TO RAIN OR MOISTURE.
• THE POWER SUPPLY CORD IS USED AS THE MAIN DISCONNECT
DEVICE. ENSURE THAT THE SOCKET-OUTLET IS LOCATED/
INSTALLED NEAR THE EQUIPMENT AND IS EASILY ACCESSIBLE.
CAUTION
DANGER OF EXPLOSION EXISTS IF BATTERY IS INCORRECTLY REPLACED.
REPLACE ONLY WITH THE SAME OR EQUIVALENT TYPE RECOMMENDED BY THE
MANUFACTURER. DISPOSE OF USED BATTERIES ACCORDING TO THE
MANUFACTURER’S INSTRUCTIONS.
MODEL No.:
SERIAL No.:
The serial number of this product may be found on the label affixed to the
side of the unit. You should note the model number and the serial number
of this unit in the space provided and retain this book as a permanent
record of your purchase to aid in identification in the event of theft.
DATE OF PURCHACE
NAME OF DEALER
DEALER'S ADDRESS
DEALER'S TEL. NO.
For your future reference
8 Installation Manual
The KX-TDA30E, the KX-TDA30NE, the KX-TDA30GR, and the KX-TDA30CE are
designed to interwork with the:
• Analogue Public Switched Telephone Network (PSTN) of a European country
• Pan-European Integrated Services Digital Network (ISDN) using ISDN basic rate access
We, Panasonic Communications Co., Ltd./Panasonic Communications Company (U.K.) Ltd., declare
that this equipment is in compliance with the essential requirements and other relevant provisions of
Directive 1999/5/EC.
If you want to get a copy of the original Declaration of Conformity of our products which relates to the
R&TTE, please contact to our web address:
http://doc.panasonic-tc.de
Installation Manual 9
Introduction
This Installation Manual is designed to serve as an overall technical reference for the
Panasonic Hybrid IP-PBX, KX-TDA30. It provides instructions for installing the hardware, and
programming the Hybrid IP-PBX using the KX-TDA Maintenance Console.
The Structure of this Manual
This manual contains the following sections:
Section 1 System Outline
Provides general information on the Hybrid IP-PBX, including the system capacity and
specifications.
Section 2 Installation
Describes the procedures to install the Hybrid IP-PBX. Detailed instructions for planning
the installation site, installing the shelves and optional service cards, and cabling of
peripheral equipment are provided. Further information on system expansion and
peripheral equipment installation is included.
Section 3 Guide for the KX-TDA Maintenance Console
Explains the installation procedure, structure, and basic information of the KX-TDA
Maintenance Console.
Section 4 Troubleshooting
Provides information on the Hybrid IP-PBX and telephone troubleshooting.
About the Other Manuals
Along with this Installation Manual, the following manuals are available:
Feature Guide
Describes all basic, optional and programmable feature of the Hybrid IP-PBX, and step-
by-step instruction for performing system programming using a proprietary telephone or a
personal computer (PC).
User Manual
Provides operating instructions for end users using PTs, SLTs, PSs, or DSS Consoles.
Trademarks
• Microsoft and Windows are either registered trademarks or trademarks of Microsoft
Corporation in the United States and/or other countries.
• Intel and Pentium are trademarks or registered trademarks of Intel Corporation or its
subsidiaries in the United States and other countries.
• All other trademarks identified herein are the property of their respective owners.
• Screen shots reprinted with permission from Microsoft Corporation.
10 Installation Manual
Precautions for Users in the United Kingdom
FOR YOUR SAFETY, PLEASE READ THE FOLLOWING TEXT CAREFULLY.
This appliance is supplied with a moulded three pin mains plug for your safety and
convenience. A 5 amp fuse is fitted in this plug. Should the fuse need to be replaced, please
ensure that the replacement fuse has a rating of 5 amps and that it is approved by ASTA or BSI
to BS1362.
Check for the ASTA mark or the BSI mark on the body of the fuse.
If the plug contains a removable fuse cover, you must ensure that it is refitted when the fuse is
replaced. If you lose the fuse cover, the plug must not be used until a replacement cover is
obtained. A replacement fuse cover can be purchased from your local Panasonic Dealer.
IF THE FITTED MOULDED PLUG IS UNSUITABLE FOR THE SOCKET OUTLET IN YOUR
PREMISES, THEN THE FUSE SHOULD BE REMOVED AND THE PLUG CUT OFF AND
DISPOSED OF SAFELY. THERE IS A DANGER OF SEVERE ELECTRICAL SHOCK IF THE
CUT OFF PLUG IS INSERTED INTO ANY 13 AMP SOCKET.
If a new plug is to be fitted, please observe the wiring code as shown below. If in any doubt,
please consult a qualified electrician.
WARNING
THIS APPLIANCE MUST BE EARTHED.
IMPORTANT: The wires in this mains leads are coloured in accordance with the following
code:
Green-and-yellow: Earth
Blue: Neutral
Brown: Live
As the colours of the wires in the mains lead of this apparatus may not correspond with the
coloured markings identifying the terminals in your plug, proceed as follows.
The wire that is coloured GREEN-AND-YELLOW must be connected to the terminal in the plug
that is marked with the letter E or by the safety earth symbol or coloured GREEN or
GREEN-AND-YELLOW.
The wire that is coloured BLUE must be connected to the terminal that is marked with the letter
N or coloured BLACK.
The wire that is coloured BROWN must be connected to the terminal that is marked with the
letter L or coloured RED.
Installation Manual 11
How to replace the fuse: Open the fuse compartment with a screwdriver and replace the fuse
and fuse cover.
This equipment should be used on PSTN lines requiring 2-wire Loop calling unguarded
clearing with Loop Disconnect or DTMF address signalling.
The equipment must be connected to direct extension lines and a payphone should not be
connected as an extension.
999 and 112 can be dialled on the apparatus after accessing the Exchange line for the purpose
of making outgoing calls to the BT emergency (999) and (112) service.
During dialling, this apparatus may tinkle the bells of other telephones using the same line. This
is not a fault and we advise you not to call Fault Repair Service.
12 Installation Manual
Table of Contents
1 System Outline ..............................................................................15
1.1 System Highlights................................................................................................. 16
1.1.1 System Highlights.................................................................................................... 16
1.2 Basic System Construction.................................................................................. 18
1.2.1 Main Unit................................................................................................................. 18
1.2.2 System Connection Diagram...................................................................................19
1.3 Options................................................................................................................... 21
1.3.1 Options....................................................................................................................21
1.4 Specifications........................................................................................................ 23
1.4.1 General Description................................................................................................. 23
1.4.2 Characteristics......................................................................................................... 25
1.4.3 System Capacity ..................................................................................................... 26
2 Installation .....................................................................................29
2.1 Before Installation................................................................................................. 30
2.1.1 Before Installation.................................................................................................... 30
2.2 Installation of the Hybrid IP-PBX ......................................................................... 32
2.2.1 Unpacking ............................................................................................................... 32
2.2.2 Names and Locations.............................................................................................. 33
2.2.3 Opening/Closing the Covers ................................................................................... 34
2.2.4 Installation of the SD Memory Card........................................................................ 38
2.2.5 Frame Earth Connection......................................................................................... 39
2.2.6 Backup Batteries Connection..................................................................................40
2.2.7 Installing/Removing the Optional Service Cards..................................................... 41
2.2.8 Types of Connectors................................................................................................ 44
2.2.9 Wall Mounting (KX-TDA30)..................................................................................... 46
2.2.10 Wall Mounting (AC Adaptor).................................................................................... 48
2.2.11 Lightning Protector Installation................................................................................ 50
2.3 Installation of the Trunk Cards............................................................................. 53
2.3.1 LCOT4 Card............................................................................................................ 53
2.3.2 CID4 Card ............................................................................................................... 55
2.3.3 BRI2 Card................................................................................................................ 56
2.3.4 IP-GW4 Card........................................................................................................... 59
2.4 Installation of the Extension Cards ..................................................................... 61
2.4.1 DLC4 Card .............................................................................................................. 61
2.4.2 SLC4 Card............................................................................................................... 63
2.4.3 DLC8 Card .............................................................................................................. 65
2.4.4 SLC8 Card............................................................................................................... 67
2.5 Installation of the Other Cards............................................................................. 69
2.5.1 DPH4 Card.............................................................................................................. 69
2.5.2 DPH2 Card.............................................................................................................. 72
2.5.3 ECHO8 Card........................................................................................................... 75
2.5.4 MSG2 Card ............................................................................................................. 76
2.5.5 EXT-CID Card.......................................................................................................... 77
2.5.6 RMT Card................................................................................................................ 78
2.6 Connection of Extensions.................................................................................... 79
2.6.1 Maximum Cabling Distance of the Extension Wiring (Twisted Cable)..................... 79
Installation Manual 13
2.6.2 Parallel Connection of the Extensions .....................................................................80
2.6.3 Extra Device Port (XDP) Connection.......................................................................81
2.6.4 Digital Extra Device Port (Digital XDP) Connection.................................................82
2.6.5 First Party Call Control CTI Connection...................................................................84
2.7 Connection of DECT Portable Stations................................................................85
2.7.1 Overview..................................................................................................................85
2.7.2 Procedure Overview ................................................................................................87
2.7.3 Site Planning............................................................................................................89
2.7.4 Before Site Survey ...................................................................................................93
2.7.5 Site Survey Using the KX-TD7590...........................................................................96
2.7.6 After Site Survey......................................................................................................99
2.7.7 Connecting the Cell Station to the Hybrid IP-PBX.................................................100
2.7.8 Wall Mounting ........................................................................................................106
2.8 Connection of 2.4 GHz Portable Stations..........................................................108
2.8.1 Overview................................................................................................................108
2.8.2 Procedure Overview ..............................................................................................109
2.8.3 Site Planning..........................................................................................................111
2.8.4 Before Site Survey.................................................................................................115
2.8.5 Site Survey.............................................................................................................117
2.8.6 After Site Survey....................................................................................................120
2.8.7 Connecting the Cell Station to the Hybrid IP-PBX.................................................121
2.8.8 Wall Mounting ........................................................................................................126
2.9 Connection of Doorphones and Door Openers ................................................128
2.9.1 Connection of Doorphones and Door Openers .....................................................128
2.10 Connection of Peripherals ..................................................................................134
2.10.1 Connection of Peripherals......................................................................................134
2.11 Auxiliary Connection for Power Failure Transfer..............................................138
2.11.1 Auxiliary Connection for Power Failure Transfer.....................................................138
2.12 Starting the Hybrid IP-PBX..................................................................................140
2.12.1 Starting the Hybrid IP-PBX ....................................................................................140
3 Guide for the KX-TDA Maintenance Console ........................... 143
3.1 Overview...............................................................................................................144
3.1.1 Overview................................................................................................................144
3.2 Connection...........................................................................................................145
3.2.1 Connection.............................................................................................................145
3.3 Installation of the KX-TDA Maintenance Console.............................................147
3.3.1 Installing and Starting the KX-TDA Maintenance Console ....................................147
3.3.2 Structure of the KX-TDA Maintenance Console ....................................................151
3.3.3 Hybrid IP-PBX Configuration .................................................................................152
3.3.4 Hybrid IP-PBX Maintenance..................................................................................153
4 Troubleshooting.......................................................................... 155
4.1 Troubleshooting...................................................................................................156
4.1.1 Installation..............................................................................................................156
4.1.2 Connection.............................................................................................................157
4.1.3 Operation...............................................................................................................159
4.1.4 Using the Reset Button..........................................................................................161
4.1.5 Troubleshooting by Error Log.................................................................................163
Index .................................................................................................. 171
14 Installation Manual
Installation Manual 15
Section 1
System Outline
This section provides general information on the Hybrid
IP-PBX, including the system capacity and
specifications.
1.1 System Highlights
16 Installation Manual
1.1 System Highlights
1.1.1 System Highlights
Networking Features
This Hybrid IP-PBX supports the following networking features:
Virtual Private Network (VPN)
VPN is a service provided by the telephone company. It uses an existing line as if it were
a private line.
Voice over Internet Protocol (VoIP) Network
The PBX can connect to another PBX via an IP-type private network. In this case, voice
signals are converted into IP packets and sent through this network.
Built-in Small Call Centre Features
An incoming call distribution group can be used as a small call centre with the following
features:
Queuing Feature
When a preprogrammed number of extensions in an incoming call distribution group are
busy, additional incoming calls can wait in a queue. While calls are waiting in the queue,
the calls are handled by the Queuing Time Table, which can be assigned for each time
mode (day/lunch/break/night).
Log-in/Log-out
Incoming call distribution group members can join (Log-in) or leave (Log-out) the groups
manually. While logged-in, a member extension can have a preprogrammed time period
automatically for refusing calls after completing the last call (Wrap-up).
VIP Call
It is possible to assign a priority to incoming call distribution groups. If an extension
belongs to multiple groups and the extension becomes idle, queuing calls in the groups
will be distributed to the extension in priority order.
Computer Telephony Integration (CTI) Features
Connecting a personal computer (PC) to this Hybrid IP-PBX (via a DPT, or via a Server PC on
a LAN) enables extension users to make use of advanced features by using the stored data in
the PC or in the Server PC.
Voice Mail Features
This Hybrid IP-PBX supports Voice Processing Systems (VPS) with DTMF Integration as well
as DPT (Digital) Integration.
Portable Station (PS) Features
PSs (e.g., KX-TD7690) can be connected to this Hybrid IP-PBX. It is possible to use the Hybrid
IP-PBX features using the PS like a PT. A PS can also be used in parallel with a wired
telephone (Wireless XDP Parallel Mode). In this case, the wired telephone is the main
telephone and the PS is the sub telephone.
1.1 System Highlights
Installation Manual 17
PC Phone/PC Console Features
This Hybrid IP-PBX supports the connection of a PC Phone and a PC Console. The Hybrid IP-
PBX provides advanced features by using a PC Phone and a PC Console.
1.2 Basic System Construction
18 Installation Manual
1.2 Basic System Construction
1.2.1 Main Unit
The main unit is equipped with 4 hybrid extension ports. For system expansion, optional
service cards can be installed, and an additional AC adaptor can also be connected.
Construction of Main Unit
Main Unit
Main Board
1.2 Basic System Construction
Installation Manual 19
1.2.2 System Connection Diagram
Doorphone & Door Opener
BGM/Music On Hold (MOH)
Pager/
Speaker
Batteries
Voice Processing
System
KX-T7636/
KX-T7633
Remote PC
PC
Printer
Router
IP-type
Private Network
Trunk (Telephone Company Lines)
Analogue/BRI
Hybrid IP-PBX
PC
SLT
CSPS
Wireless Phone
Fax Machine
PC
USB
APT
DPT
ISDN Telephone
Amplifier
Server PC
PC
PC
SLT
DPT
1.2 Basic System Construction
20 Installation Manual
Main Board
RMT
(KX-TDA3196)
SLT Wireless Phone Fax Machine
PCKX-T7636/KX-T7633 DSS
Console
Doorphone & Door Opener
IP-type
Private Network
Station Message
Detail Recording (SMDR)
PC
Router
ISDN BRI Line
ISDN BRI Line
(Digital Trunk)
(Digital Trunk)
ISDN BRI Line
(Digital Trunk)
LCOT4
(KX-TDA3180)
DLC8
(KX-TDA3172)
DLC4
(KX-TDA3171)
SLC8
(KX-TDA3174)
SLC4
(KX-TDA3173)
DPH4
(KX-TDA3161)
DPH2
(KX-TDA3162)
ECOH8
(KX-TDA3166)
EXT-CID
(KX-TDA3168)
MSG2
(KX-TDA3191)
IP-GW4
(KX-TDA3480)
BRI2
(KX-TDA3284)
Analogue
Analogue
Trunk
Trunk
Analogue
Trunk
Telephone
Company
SLT Wireless Phone Fax Machine
Hybrid IP-PBX
DPT
APT DPT DSS Console
Voice
Processing
System
Voice
Processing
System
Radio
Amplifier Pager/Speaker
PC
LAN
Server PC
CID4
(KX-TDA3193)
CS PS
4 Hybrid
Extension Port
CS PS
AC Adaptor
Optional
AC Adaptor
Batteries
Mountable Equipment
  • Page 1 1
  • Page 2 2
  • Page 3 3
  • Page 4 4
  • Page 5 5
  • Page 6 6
  • Page 7 7
  • Page 8 8
  • Page 9 9
  • Page 10 10
  • Page 11 11
  • Page 12 12
  • Page 13 13
  • Page 14 14
  • Page 15 15
  • Page 16 16
  • Page 17 17
  • Page 18 18
  • Page 19 19
  • Page 20 20
  • Page 21 21
  • Page 22 22
  • Page 23 23
  • Page 24 24
  • Page 25 25
  • Page 26 26
  • Page 27 27
  • Page 28 28
  • Page 29 29
  • Page 30 30
  • Page 31 31
  • Page 32 32
  • Page 33 33
  • Page 34 34
  • Page 35 35
  • Page 36 36
  • Page 37 37
  • Page 38 38
  • Page 39 39
  • Page 40 40
  • Page 41 41
  • Page 42 42
  • Page 43 43
  • Page 44 44
  • Page 45 45
  • Page 46 46
  • Page 47 47
  • Page 48 48
  • Page 49 49
  • Page 50 50
  • Page 51 51
  • Page 52 52
  • Page 53 53
  • Page 54 54
  • Page 55 55
  • Page 56 56
  • Page 57 57
  • Page 58 58
  • Page 59 59
  • Page 60 60
  • Page 61 61
  • Page 62 62
  • Page 63 63
  • Page 64 64
  • Page 65 65
  • Page 66 66
  • Page 67 67
  • Page 68 68
  • Page 69 69
  • Page 70 70
  • Page 71 71
  • Page 72 72
  • Page 73 73
  • Page 74 74
  • Page 75 75
  • Page 76 76
  • Page 77 77
  • Page 78 78
  • Page 79 79
  • Page 80 80
  • Page 81 81
  • Page 82 82
  • Page 83 83
  • Page 84 84
  • Page 85 85
  • Page 86 86
  • Page 87 87
  • Page 88 88
  • Page 89 89
  • Page 90 90
  • Page 91 91
  • Page 92 92
  • Page 93 93
  • Page 94 94
  • Page 95 95
  • Page 96 96
  • Page 97 97
  • Page 98 98
  • Page 99 99
  • Page 100 100
  • Page 101 101
  • Page 102 102
  • Page 103 103
  • Page 104 104
  • Page 105 105
  • Page 106 106
  • Page 107 107
  • Page 108 108
  • Page 109 109
  • Page 110 110
  • Page 111 111
  • Page 112 112
  • Page 113 113
  • Page 114 114
  • Page 115 115
  • Page 116 116
  • Page 117 117
  • Page 118 118
  • Page 119 119
  • Page 120 120
  • Page 121 121
  • Page 122 122
  • Page 123 123
  • Page 124 124
  • Page 125 125
  • Page 126 126
  • Page 127 127
  • Page 128 128
  • Page 129 129
  • Page 130 130
  • Page 131 131
  • Page 132 132
  • Page 133 133
  • Page 134 134
  • Page 135 135
  • Page 136 136
  • Page 137 137
  • Page 138 138
  • Page 139 139
  • Page 140 140
  • Page 141 141
  • Page 142 142
  • Page 143 143
  • Page 144 144
  • Page 145 145
  • Page 146 146
  • Page 147 147
  • Page 148 148
  • Page 149 149
  • Page 150 150
  • Page 151 151
  • Page 152 152
  • Page 153 153
  • Page 154 154
  • Page 155 155
  • Page 156 156
  • Page 157 157
  • Page 158 158
  • Page 159 159
  • Page 160 160
  • Page 161 161
  • Page 162 162
  • Page 163 163
  • Page 164 164
  • Page 165 165
  • Page 166 166
  • Page 167 167
  • Page 168 168
  • Page 169 169
  • Page 170 170
  • Page 171 171
  • Page 172 172
  • Page 173 173
  • Page 174 174
  • Page 175 175
  • Page 176 176

Panasonic KX-TDA30 User manual

Category
IP phones
Type
User manual

Ask a question and I''ll find the answer in the document

Finding information in a document is now easier with AI