Badger Basket Empress Round Baby Bassinet Assembly Instruction
- Category
- Baby furniture
- Type
- Assembly Instruction

2.1/0917/TG
MODEL NUMBERS*:
EMPRESS ROUND BABY BASSINET
83901 - Pink/White
83902 - White with
3 Gingham Belts
83903 - Ecru/Leaf Print
If you need product parts,
see below or Page 2!
Assembly Instructions. Adult Assembly Required.
Read all instructions before use.
This manual is part of the product and
must be kept for future reference.
VERSION CODE*:
2.1/0917/TG
* These numbers are needed if
replacement parts are requested
FOR REPLACEMENT PARTS:
Go to our web site: http://www.badgerbasket.com/parts
Or scan QR code at right with your smartphone

2.1/0917/TG
BEFORE YOU BEGIN ASSEMBLY:
Check all parts and hardware. If anything is missing or not
satisfactory, please DO NOT call the store or return the
product to them. Please go online to
http://www.badgerbasket.com/parts
for assistance. Most problems are resolved promptly
without you needing to leave home. When contacting us,
please have this instruction manual, your product model
number, and your product version code ready.
Your Product Model Number: See Cover Page
Your Product Version Code is: 2.1/0917/TG
NOTE: Assemble your Empress bassinet
in the room where you intend to use it
unless your doorways are
wider than 30 inches.
CARE INSTRUCTIONS:
Wipe bassinet frame and vinyl/foam mattress clean with a damp
cloth and mild detergent as needed. Bedding can be machine
washed on cold, gentle cycle, and air dried or tumble dry on low
or no heat. Iron on lowest setting for polyester/cotton.
Secure all snaps/straps/tabs before washing.
Additional tted sheets are available and sold separately.
White Sheets (2/pack) are Model #83998
Ecru/Leaf Print Sheets (2/pack) are Model #83999
Badger Basket Company, PO Box 227, Edgar, WI 54426-0227 USA • Web: www.badgerbasket.com
Toll-Free (Mon-Thurs 7:30 AM-3:30 PM CST): 1-800-236-1310
Phone: 1-715-352-2311 • Fax: 1-715-352-3163

2.1/0917/TG
• SUFFOCATION HAZARD - Infants can suffocate:
» in gaps between an extra pad and the side of the bassinet,
» on soft bedding.
NEVER add a mattress, pillow, comforter, or padding. Use ONLY the pad and/or bedding provided by the
manufacturer. If a sheet is used with the pad, use only the one provided with the bassinet or one that is from Badger
Basket Company or one that is specically designed to t the dimension of the mattress provided. ALWAYS use a
sheet that ts securely on the mattress and wraps around the mattress corners. Only a tted sheet, mattress pad and/
or waterproof pad should be used under the baby.
• Use ONLY the bedding designed for this bassinet from Badger Basket Company. Secure the bedding as instructed
in this manual and check regularly to ensure it remains properly attached.
• READ ALL INSTRUCTIONS before use of this product.
• Keep instructions for future use.
• Use only the parts and hardware provided by Badger Basket.
• Hardware may include small parts. Choking Hazard! Keep unassembled parts out of the reach of small children.
• Do not use the product if it is damaged, broken, torn, or missing parts.
• TO REDUCE THE RISK OF SIDS: pediatricians recommend that healthy infants be placed on their backs to
sleep, unless otherwise advised by your physician.
• DO NOT move or carry the bassinet with your baby inside of it.
• DO NOT allow other children or pets to climb or lean into or onto the bassinet when your infant is inside.
• DO NOT attach or place toys with strings in or around the bassinet. Strings can cause strangulation or choking.
• Keep bassinet away from stoves, heaters, camp res/ames, replaces, stairs, open windows, running or standing
water, and any other hazard which could cause injury to your baby.
• Be sure that your baby’s sleep space is a safe distance from windows and any curtains, shades, blinds, or window
coverings or decorations that may pose a danger from dangling or loose fabrics and cords.
• NEVER use plastic bags inside the basket such as to cover the mattress.
• Bassinet should always be placed on a rm, at surface. It should never be placed near stairs or on tables or elevated
surfaces.
• No product is a replacement for adult supervision.
• DO NOT allow anyone to climb, stand on, or play on or inside of this product. It is not a step stool or ladder.
• BE AWARE of what items are in the area around the bassinet that your child can reach, grab, or pull that could be
a choking, electrical, strangulation, injury, or other type of hazard.
• DO NOT make adjustments to the bassinet while child is inside.
• NEVER place the bassinet near re nor open ame nor other sources of intense heat.
• NEVER place infants to sleep on pillows, sofa cushions, adult beds, waterbeds, beanbags, or any other surface not
specically designed for infant sleep.
• Remove pillows, sheepskins, pillow-like stuffed toys and products not intended as infant bedding from the bassinet
when your infant is sleeping.
• Do not overdress your baby. Cover the baby with a thin covering, such as a crib blanket, receiving blanket or other
blanket specically designed for infants, which covers only up to the baby’s chest, and tuck the covering around the
mattress. For newborns, consider swaddling. Consider using a wearable blanket.
• Check periodically for loose threads or stitching which could cause gagging or choking.
FALL HAZARD: To help prevent falls, please note this
bassinet is a safe place for your newborn to sleep until Baby is
20 lbs. (9.09 kg), OR when Baby can push up, roll over,
or crawl - whichever limit comes rst.
WARNING - FAILURE TO FOLLOW
THESE WARNINGS AND THE
INSTRUCTIONS COULD RESULT
IN SERIOUS INJURY OR DEATH:

Ax2 - Right Leg Bx2 - Left Leg Cx2 - Leg Brace
Dx2 - Shelf Rail
Hx1 - Bed Bottom Ix1 - Bed Body
Fx1 - Upper Canopy Pole
Jx4 - Wheel
Gx1 - Canopy Hoop
Kx1 - Vinyl/Foam Pad Lx1 - Fitted Fabric Sheet
Mx1 - Fabric Liner/Skirt Nx1 - Fabric Canopy
Px8 - Short Bolt with
Regular Nut
Qx8 - Long Bolt with
Regular Nut
Ox1 - Mesh Shelf
Phillips Screwdriver
TOOL REQUIRED
(NOT INCLUDED)
Ex1 - Curved Lower Canopy Pole
Φ8X28mm
Wrench
TOOL REQUIRED
(INCLUDED)
Φ8X43mm

×2
1
QX8
2
PX4
- Carefully note the angle and positions of the RIGHT and LEFT LEGS (PARTS A and B). If
assembled incorrectly, you will not be able to do STEP 4.
- Use WRENCH and SCREWDRIVER to tighten all bolts and nuts firmly, but do not
overtighten
- Repeat this step to assemble the second set of legs
- The "finished" side of the MESH SHELF (PART O) should be facing up.
- Use SCREWDRIVER to tighten all bolts and nuts firmly, but do not overtighten

3.2 - Unfold the BED BODY (PART I)
3.1 - Remove and discard the
plastic caps used for shipping
3.3 and 3.4 - Connect the frame ends to form a circle. The two locking silver buttons MUST
snap through the holes to secure the frame! You may find it easiest to hold the frame
perpendicular to the floor and apply downward pressure to help the parts snap into place.
Please do this on carpeting or use the product carton to protect the frame from damage
4
3
4.3- There are holes in the fabric of the BED
BODY (PART I) to accommodate the TABS
for the legs and the BRACKET for the canopy
that are on the BED BOTTOM (PART H)
4.1- First, snap the BED BODY (PART I) onto the
four legs (PARTS A and B). The BODY MUST BE
SECURELY HELD BY ALL FOUR LEG BRACKETS!
4.2- Next, Unfold the BED
BOTTOM (PART H)
4.4- Insert the BED BOTTOM
(PART H) into the BED BODY
(PART I) with the LEG TABS facing
down (see STEPS 5 and 6 )

6
5
- FOR STEPS 5 AND 6: get all of the BOLTS (PART P) started, then you may need to push on the
legs and adjust the body to align all the tabs to secure them.
- Use WRENCH and SCREWDRIVER to tighten all bolts and nuts firmly, but do not overtighten
- Secure ALL FOUR bolts (PART P) in this step. Not all of them are shown in the diagrams!
PX4

7
- Turn the bassinet upside down on a carpeted surface or on top of the product
carton so as not to soil or damage it in this step.
- After firmly inserting the wheels, turn the bassinet right side up again to
continue assembly

8
9
- Dress the FABRIC LINER/SKIRT (PART M) onto the
BED BODY (PART I).Position the opening for the
canopy in the correct position where the canopy
bracket is (see STEP 9).
- Insert the VINYL/FOAM PAD (PART K) into the
FABRIC FITTED SHEET(PART L) and then place them
into the bassinet.
Canopy has two height positions. Choose one of these holes.
You can change from one height position to the other at any
time. Always be sure the metal button snaps into the hole
securely

N
N
83902
83901 83903
11
10
Dress the FABRIC CANOPY (PART N) onto the CANOPY HOOP
(PART G) and secure the fabric grip tabs around the metal frame
—FOR MODELS 83901 AND 83903—you have completed assembly
—FOR MODEL 83902 ONLY—thread the fabric belt of your choice
through the belt loops on the skirt and tie it in a bow at the front of the
bassinet. When the belt is in place,you have completed assembly
Detail of canopy attachment
NOTE: Model 83902
is shown on Page 1
Detail of Model 83902 belt loops
-
 1
1
-
 2
2
-
 3
3
-
 4
4
-
 5
5
-
 6
6
-
 7
7
-
 8
8
-
 9
9
-
 10
10


Badger Basket Empress Round Baby Bassinet Assembly Instruction
- Category
- Baby furniture
- Type
- Assembly Instruction
Ask a question and I''ll find the answer in the document
Finding information in a document is now easier with AI
Related papers
-
Badger Basket 8390x Assembly Instruction
-
-
-
-
-
-
-
-
-
Other documents
-
 FINLEY STORAGE OTTOMAN 42Inch Large Modern Elegant Soft Tufted Leather Rectangle Storage User manual
-
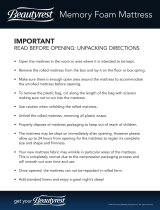 Beautyrest 700753694-1030 User guide
-
GEM Wooden Kitchen Set White Operating instructions
-
Afoxsos HDMX802 User manual
-
Kmart 42712893 User manual
-
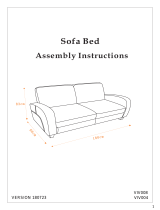 Julian Bowen VIV104 Assembly Instructions
-
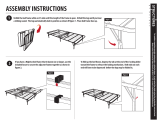 Malouf ST22FF14HD Assembly Instructions
-
 Tailgate360 BBAG-3 Operating instructions
-
 Trademark Innovations BBAG-4X4-REDBU Operating instructions
-
ANGELES HOME 69542-8CK-HW User manual


