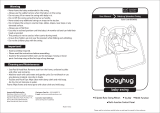
Page is loading ...

3
Prevent serious injury or death: Failure to follow these
warnings and the assembly instructions could result in serious
injury or death.
• PLEASE SAVE OWNER’S
MANUAL FOR FUTURE USE.
• THIS PRODUCT REQUIRES
ADULT ASSEMBLY. Follow
assembly instructions
carefully. If you experience
any difficulties, please contact
the Customer Service
Department.
FALL HAZARD: To prevent falls,
stop using the product in lowest
2 recline positions when:
• The infant begins to roll over
or
• the child can pull up on sides
(approx. 5 months)
• TO PREVENT SERIOUS
INJURY OR DEATH FROM
INFANTS FALLING OR BEING
STRANGLED IN STRAPS:
• Always secure infant in the
restraint system provided. After
fastening buckles, adjust belts to
get a snug fit around your infant.
• Never leave infant
unattended in swing.
• Discontinue use of swing
when infant attempts to climb
out or becomes too active.
• Discontinue use of product
when infant can roll over or
push up on hands and knees.
• Never carry swing with infant
in it.
• Discontinue use of swing
when infant attempts to climb
out or reaches 30 pounds
(13.6 kg).
• ALWAYS place swing on
floor. Never use on any
elevated surface.
SUFFOCATION HAZARD:
Infants have suffocated:
• On added pillows, blankets
and extra padding.
• ONLY use the pad provided by
the manufacturer.
• NEVER place extra padding
under or beside infant.
• Never place baby face down in
product.
• To reduce the risk of SIDS,
pediatricians recommend healthy
infants be placed on their backs
to sleep, unless otherwise
advised by your physician.
• STRANGULATION HAZARD:
• Child can strangle in loose
restraint straps. NEVER
leave child in product when
straps are loose or undone.
• DO NOT place swing in any
location where there are
cords, such as window blind
cords, drapes, phone cords,
etc.

4
• Strings can cause
strangulation! DO NOT place
items with a string around
your child’s neck, such as
hood strings or pacifier cords.
• DO NOT suspend strings over
the product or attach strings
to toys.
• DISCONTINUE USING YOUR
SWING should it become
damaged or broken.
• Seat pad for use only with this
product.
• DO NOT place product near
water and moisture. Do not use
the product near possible wet
areas, such as a bathtub,
shower, wash basin, sink,
laundry tub, swimming pool, wet
basement, etc.
• DO NOT use the AC adapter if it
has been exposed to liquids, has
been dropped, or is damaged.
• Protect the power cord. Place it
so it is not walked on or pinched
by furniture or other items.
• DO NOT use with an extension
cord.
• Use only power cord provided.
• Only use the two lowest recline
positions for sleep.
• Always use product with seat
pad assembled.

5
FOR SAFE BATTERY USE:
Keep the batteries out of children’s reach.
Any battery may leak battery acid if mixed with a different battery
type, if inserted incorrectly (put in backwards) or if all batteries are
not replaced or recharged at the same time. Do not mix old and new
batteries. Do not mix alkaline, standard (carbon-zinc) or rechargeable
(nickel-metal hydride, nickel-cadmium) batteries.
Any battery may leak battery acid or explode if disposed of in fire or
an attempt is made to charge a battery not intended to be recharged.
Never recharge a cell of one type in a recharger made for a cell of
another type.
Discard leaky batteries immediately. Leaky batteries can cause skin
burns or other personal injury. When discarding batteries, be sure to
dispose of them in the proper manner, according to your state and
local regulations.
Remove batteries before storing product for a prolonged period of
time. Batteries left in the unit may leak and cause damage.
Recommended type batteries—alkaline disposables, 5-D (LR20-
1.5V). NEVER mix battery types. Change batteries when product
ceases to operate satisfactorily.

6
Changes or modifications not expressly approved by the party
responsible for compliance could void the user’s authority to operate
the equipment.
NOTE: This equipment has been tested and found to comply with the
limits for a Class B digital device,pursuant to Part 15 of the FCC
Rules. These limits are designed to provide reasonable protection
against harmful interference in a residential installation. This
equipment generates, uses and can radiate radio frequency energy
and, if not installed and used in accordance with the instructions, may
cause harmful interference to radio communications.
However, there is no guarantee that interference will not occur in a
particular installation. If this equipment does cause harmful
interference to radio or television reception, which can be determined
by turning the equipment off and on, the user is encouraged to try to
correct the interference by one or more of the
following measures:
• Reorient or relocate the receiving antenna.
• Increase the separation between the equipment and receiver.
• Connect the equipment into an outlet on a circuit different from that
to which the receiver is needed.
• Consult the dealer or an experienced radio/TV technician for help.
This Class B digital apparatus meets all requirements of the Canadian
Interference-Causing Equipment Regulations. CAN ICES-3 (B) /NMB-3
(B).

11
This model may not include some
features shown below. Check
that you have all the parts for this
model BEFORE assembling your
product. If any parts are missing,
call Customer Service.
Tools required:
Philips Screwdriver
Este modelo podría no incluir algunas de
las características que se
indican a continuación. Verifique que
tenga todas las piezas de este modelo
ANTES de armar el producto. Si falta
alguna pieza, llame al Departamento de
Servicio al Cliente.
Herramienta requerida:
destornillador Philips
ALL MODELS • TODOS LOS MODELOS
2-A Parts list • Lista de piezas
Toy style may vary
Los estilos de los juguetes
pueden variar
2X
3X
2X
Six sided hole
Oval shaped hole
Agujeros de seis costados
Agujeros ovalados

12
3-A Frame Assembly • Ensamblaje del armazón
1. Ponga las pies en el piso. Ponga
los tubos de la pata con el
armazón de las pilas en ambos
pies como se indica.
1. Lay feet on floor. Insert battery
housing leg tubes into both feet
as shown.
2X
Feet
Battery housing
Pies
Armazón de las pilas
Button
Button
Botón
Botón
SNAP!
¡CRAC!
SNAP!
¡CRAC!

13
2. Ponga los otros tubos de la pata
en ambos pies como se indica.
2. Insert the other leg tubes into
both feet as shown.
Button
Botón
SNAP!
¡CRAC!
SNAP!
¡CRAC!
Button
Botón

14
3-B Attaching Swing Arms
• Sujetar los brazos del columpio
1. Ponga el brazo del columpio con
bisagra simple en el armazón
con los botones en línea con el
agujero del armazón como se
indica.
1. Insert the single hinge swing arm
into the housing with buttons
lining up with the hole in the
housing as shown.
SNAP!
¡CRAC!
Button
Botón
Hole
Agujero

15
2. Attach hanger tube with double
hinge until the buttons snap into
place as shown.
2. Sujete el tubo del colgante con
bisagra doble hasta que los
botones se traben en su lugar
como se indica.
SNAP!
¡CRAC!
3. Fasten the screw as shown into
hanger mount.
3. Sujete el tornillo como se indica
en el montante del colgante.

18
2. Insert the hanger tube with the
oval-shaped holes into the swing
arm bracket as shown.
2. Ponga el tubo del colgante con
los agujeros ovalados en el
soporte del brazo del columpio
como se indica.
1. Insert the hanger tube with the
six-sided holes into the swing
arm bracket as shown.
1. Ponga el tubo del colgante en los
agujeros de seis costados en el
soporte del brazo del columpio
como se indica.electrónicos en
el mismo lado.
3-D Attaching Seat to Frame
• Sujetar el asiento en el armazón
2X
Six sided hole
Oval shaped hole
Agujeros de seis
costados
Agujeros ovalados

19
3. Insert a bolt through the holes
in the swing arm bracket as
shown. Tighten bolt with the
wrench provided. Repeat with
the other bolt on the other
bracket.
3. Ponga un perno a través de los
agujeros en el soporte del brazo
del columpio como se indica.
Apriételo con la llave. Repita el
proceso en el otro perno en el
otro soporte.

20
4. Attach plastic cover over tubes
as shown until it snaps into
place.
5. CHECK to make sure the cover
is attached by pulling up on it.
SNAP!
ENCLENCHEZ!
¡CLIC!
4. Sujete la funda de plástico
sobre los tubos hasta que se
trabe en su lugar.
5. VERIFIQUE para asegurarse de
que la funda esté sujetada
tirándola hacia arriba.

21
6. Place assembly onto the side
and insert the hanger tube into
the sides of the seat tube until it
clicks into place.
CHECK to make sure hanger
tubes are attached by pulling on
them.
6. Coloque el columpio en el lado
y ponga el tubo del colgante en
los costados del asiento hasta
que se trabe en su lugar.
VERIFIQUE para asegurarse que
los tubos del colgante estén
sujetados tirándolos.
SNAP!
ENCLENCHEZ!
¡CLIC!
SNAP!
ENCLENCHEZ!
¡CLIC!

22
3-E Mobile • Móvil
WARNING
• Possible entanglement injury. Keep out of baby’s reach. Remove
mobile from product when baby begins to push up on hands and
knees. Recommended use from birth to 5 months.
• This mobile is intended for visual stimulation and is not intended to
be grasped by the child.
• Always attach all provided fasteners (strings, straps, clamps, etc.)
tightly to the product according to the instructions. Check frequently.
• Do not add additional strings or straps to attach to any other
product.
• The mobile is not a carry handle. Never use mobile to lift or carry
product.
ADVERTENCIA
• Posibilidad de lesiones debido a enredos. Manténgase fuera del
alcance del bebé. Saque el móvil del producto cuando el bebé
comience a pararse sobre las manos y las rodillas. Se recomienda
el uso desde el nacimiento hasta los 5 meses.
• Esta móvil sirve para la estimulación visual y no debe ser agarrada
por el niño.
• Siempre sujete todos los sujetadores provistos (cordones, correas,
abrazaderas, etc.) firmemente al producto de acuerdo con las
instrucciones. Verifíquelos con frecuencia.
• No añada cordones ni correas adicionales para conectar con
cualquier otro producto.
• El móvil no es una manija para el transporte. Nunca use el móvil
para levantar o transportar el producto.
Toy style may vary
Los estilos de los juguetes
pueden variar
3X

23
2. Attach toys to mobile by sliding
ropes on toys into slots in
mobile.
2. Sujete los juguetes al móvil
deslizando las sogas de los
juguetes en las ranuras del
móvil.
1. Attach elastic loop on the mobile
around the hook on the mobile
arm.
1. Sujete el nudo de elástico en el
móvil alrededor del gancho en el
brazo del móvil.

24
4. Twist mobile around
counter-clockwise and lock
mobile in place over child area
of swing.
4. Gire el móvil en el sentido
opuesto a las agujas del reloj y
trábelo en su lugar sobre el lugar
del niño en el columpio.
Small
Pequeño
Large
Grande
Head
end
Extremo
de la
cabeza
3. With small tab inside of mobile
towards the head end of the
swing, insert the tabs into the
grooves in the mobile mounts
and push down.
3. Con la pequeña lengüeta en el
interior del móvil hacia el
extremo de la cabeza del
columpio, inserte las lengüetas
en las ranuras en los montantes
del móvil y empuje hacia abajo.

28
4-D Installing Batteries (not included)
• Instalar las pilas (no se incluyen)
1. With baby out of swing, open
the battery compartment lid by
inserting a key into the slot.
Insert four D (LR20 -1.5V)
batteries. Replace battery lid.
CHECK that the batteries are
put in correctly. Your swing
will not run if the batteries are
put in backwards. Refer to
WARNINGS, For Safe Battery
use.
1. Con el bebé fuera del
columpio, abra el
compartimento de la pila
insertando una llave en la
ranura. Ponga cuatro pilas
tamaño D (LR20 - 1,5V). Vuelva
a poner la tapa de las pilas.
VERIFIQUE que las pilas
estén puestas correctamente.
El columpio no funcionará si las
pilas estén puestas al revés.
Consulte las ADVERTENCIAS,
por uso seguro de las pilas.

29
WARNING Product does not recharge batteries. When AC
adapter is in use, batteries will automatically shut off.
DO NOT place product near water and moisture. Do not use the product
near possible wet areas, such as a bathtub, shower, wash basin, sink,
laundry tub, swimming pool, wet basement, etc.
DO NOT use the AC adaptor if it has been exposed to liquids, has been
dropped, or is damaged.
Protect the power cord. Place it so it is not walked on or pinched by furni-
ture or other items.
WARNING Strangulation Hazard: Keep this cord out of the
reach of children. DO NOT use with an extension cord.
Use only power cord provided.
4-E To Use Wall Plug
• Usar un tomacorriente de la pared

31
WARNING avoid serious injury from falling or
sliding out. Always use seat belt. After fastening buckles, adjust belts to get
a snug fit around your infant.
TO TURN SWING ON:
Press On /Off button or press any speed from 1 to 6. When pressing On/Off
button, it automatically starts with the last speed setting that was selected
before the swing was turned off.
Observe the swinging motion for a minute. It takes time for the
swing to adjust to a setting. Change setting if needed.
A small, quiet baby will swing higher on each setting than a larger, more
active baby.
Your seat may be stopped at any time the motor is running without damaging
the motor. Push swing to restart.
If your swing motor stops operating by itself, a protective device
may have been activated. Turn off motor, wait three minutes, then restart
swing.
TO TURN SWING OFF: Press On /Off button.
4-F Starting Swing (6 Speed)
• Activar el columpio (6 velocidades)

33
SPEED - Press On /Off button or
press any speed from 1 to 6. When
pressing On/Off button, it
automatically starts with the last
speed setting that was selected
before the swing was turned off.
VELOCIDAD - Oprima el botón
encendido/apagado u oprima cual-
quier velocidad de 1 a 6. Cuando
oprime el botón de encendido/apa-
gado, arranca automáticamente
con la última velocidad que se
seleccionó antes de que se apagó
el columpio.
ON/OFF POWER - Press to turn
ON and turn OFF. Press button to
stop swing motion.
ENCENDIDO/APAGADO - Oprima
para ENCENDER y APAGAR.
Oprima el botón para detener el
movimiento del columpio.
MUSIC - Push “Music” button to
turn on music. Push button again
to advance to next track. There are
10 songs.
MÚSICA – Empuje el botón
“Música” (Music) para activar la
música. Empuje el botón de nuevo
para pasar a la pista siguiente. Hay
10 canciones.
/