Page is loading ...

1919
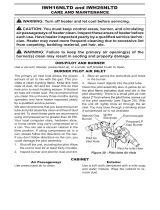
CARE AND MAINTENANCE
WARNING: Turn off heater and let cool before servicing or cleaning.
CAUTION: You must keep control areas, burner, and circulating air passageways of heater clean. Inspect
these areas of heater before each use. Have heater inspected yearly by a qualied service technician. Heater
may need more frequent cleaning due to excessive lint from carpeting, bedding material, pet hair, etc.
ODS/PILOT AND BURNER
• Use a vacuum cleaner, pressurized air, or a small, soft bristled brush to clean.
CLEANING BURNER PILOT AIR INLET HOLE
We recommend that you clean the unit every 2,500 hours of operation or every three months. We also recommend
that you keep the burner tube and pilot assembly clean and free of dust and dirt. To clean these parts we recommend
using compressed air no greater than 30 PSl. Your local computer store, hardware store, or home center may carry
compressed air in a can. You can use a vacuum cleaner in the blow position. If using compressed air in a can, please
follow the directions on the can. If you don’t follow directions on the can, you could damage the pilot assembly.
1. Shut off the unit, including the pilot. Allow the unit to cool for at least thirty minutes.
2. Inspect burner and pilot for dust and dirt.
3. Blow air through the ports/slots and holes in the burner. Also clean the pilot assembly. A yellow tip on the pilot
ame indicates dust and dirt in the pilot assembly. There is a small pilot air inlet hole about two inches from
where the pilot ame comes out of the pilot assembly (see Figure 24). With the unit off, lightly blow air through
the air inlet hole. You may blow through a drinking straw if compressed air is not available.
CABINET
Air Passageways
• Use a vacuum cleaner or pressurized air to clean.
Exterior
• Use a soft cloth dampened with a mild soap and water mixture.
• Wipe the cabinet to remove dust.
Figure 24 - Pilot Inlet Air Hole

2020
TROUBLESHOOTING
WARNING: If you smell gas:
• Shut off gas supply.
• Do not try to light any appliance.
• Do not touch any electrical switch; do not use any phone in your building.
• Immediately call your gas supplier from a neighbor’s phone. Follow the gas supplier’s instructions.
• If you cannot reach your gas supplier, call the re department.
IMPORTANT: Operating heater where impurities in air exist may create odors. Cleaning supplies, paint, paint re-
mover, cigarette smoke, cements and glues, new carpet or textiles, etc., create fumes. These fumes may mix with
combustion air and create odors.
WARNING: Only a qualied service technician should service and repair heater.
CAUTION: Never use a wire, needle, or similar object to clean ODS/pilot. This can damage ODS/ pilot unit.
Note: All troubleshooting items are listed in order of operation.
Problem Possible Cause Corrective Action
When ignitor button is
pressed in, there is no spark
at ODS/pilot
1. Ignitor electrode is positioned
wrong. Ignitor electrode is
broken.
2. Ignitor electrode is not
connected to ignitor cable.
3. Ignitor cable is pinched or
wet.
4.
Broken
ignitor cable.
5. Bad piezo ignitor.
1. Replace electrode.
2. Replace ignitor cable
3. Free ignitor cable if pinched
by any metal or tubing.
Keep ignitor cable dry.
4. Replace ignitor cable.
5. Replace piezo ignitor.
When ignitor button is pressed in
there is a spark at ODS/pilot but no
ignition.
1. Gas supply is turned off or
equipment shutoff valve is
closed.
2. Control knob not fully
pressed in while pressing
ignitor button.
3.
Air in gas lines when installed.
4. ODS / pilot is clogged.
5. Gas regulator setting is not correct.
6. Control knob not in PILOT position.
7. Depleted gas supply (propane).
1. Turn on gas supply or open
equipment shutoff valve.
2. Fully press in control knob while
pressing ignitor button.
3. Continue holding down control
knob. Repeat igniting operation
until air is removed.
4. Clean ODS/pilot (see Care
and Maintenance, page 19) or
replace ODS/pilot assembly.
5. Replace gas regulator.
6. Turn control knob to PILOT
position.
7. Contact local propane/LP gas
company.

2121
Problem Possible Cause Corrective Action
ODS/pilot lights but ame goes out
when control knob is released.
1. Control knob is not fully
pressed in.
2. Control knob is not pressed
in long enough.
3. Equipment shutoff valve is
not fully open.
4. Thermocouple connection is
loose.
5. Thermocouple damaged.
6. Control valve damaged.
1. Press in control knob
fully.
2. After ODS/pilot lights,
keep control knob pressed
in 30 seconds.
3. Fully open equipment
shutoff valve.
4. Hand tighten until snug,
and then tighten ¼ turn
more.
5. Replace thermocouple.
6. Contact customer service.
Burner(s) does not light after ODS/
pilot is lit.
1. Burner orice is clogged.
2. Burner orice diameter is
too small.
3. Inlet gas pressure is too low.
1. Clean burner orice (see
Care and Maintenance,
page 19).
2. Contact customer service.
3. Contact your gas supplier.
Delayed ignition of burner(s). 1. Manifold pressure is too low.
2. Burner orice is clogged.
1. Contact your gas supplier.
2. Clean burner (see
Care and Maintenance,
page 19).
Burner backring during combus-
tion.
1. Burner orice is clogged or
damaged.
2. Burner is damaged.
3. Gas regulator is damaged.
1. Clean burner orice (see
Care and Maintenance,
page 19).
2. Contact dealer or customer
service.
3. Replace gas regulator.
High yellow ame during burner
combustion.
1. Not enough air.
2. Gas regulator is defective.
3. Inlet gas pressure is too low.
1. Check burner for dirt and
debris. If found, clean
burner (see Care and
Maintenance, page 19).
2. Replace gas regulator.
3. Contact your gas supplier.
Gas odor during
combustion.
1. Foreign matter between
control valve and burner.
2. Gas leak. (See Warning
Statement at top of
page 20).
1. Take apart gas tubing
and remove foreign matter.
2. Locate and correct all
leaks (see “Checking
Gas Connections,”
page 13).

2222
Problem Possible Cause Corrective Action
Slight smoke or odor during initial
operation
1. Residues from
manufacturing process.
1. Problem will stop after a few
hours of operation.
Heater produces a whistling noise
when burner is lit.
1. Turning control knob to
high (5) position when
burner is cold.
2. Air in gas line.
3. Air passageways on
heater are blocked.
4. Dirty or partially clogged
burner orice.
1. Turn control knob to low (1)
position and let warm up for a
minute.
2. Operate burner until air is removed
from line. Have gas line checked by
local gas company.
3. Observe minimum installation
clearances (Fig. 4, page 10)
4. Clean burner (see Care and
Maintenance, page 19).
Heater produces a clicking/ticking
noise just after burner is lit or shut
off.
1. Metal is expanding while
heating or contracting
while cooling.
1. This is common with most heaters.
If noise is excessive, contact
qualied service technician.
White powder residue forming
within burner box or on adjacent
walls or furniture.
1. When heated, the
vapors from furniture
polish, wax, carpet
cleaners, etc., turn into
white powder residue.
1. Turn heater off when using furniture
polish, wax, carpet cleaner or
similar products.
Heater produces unwanted odors.
1. Heater is burning vapors
from paint, hair spray,
glues, etc. See
IMPORTANT statement,
page 20.
2. Gas leak. See Warning
Statement at the top of
page 20.
3. Low fuel supply.
1. Ventilate room. Stop using odor
causing products while heater is
running.
2. Locate and correct all leaks (see
“Checking Gas Connections,”
page 13).
3. Rell supply tank (Propane /LP
models).
Heater shuts off in use
(ODS operates).
1. Not enough fresh air is
available.
2. Low line pressure.
3. ODS/pilot is partially
clogged.
1. Open window and/or door for
ventilation.
2. Contact local gas supplier.
3. Clean ODS/pilot (see Care
and Maintenance, page 19).
Gas odor exists even
when control knob is in OFF posi-
tion.
1. Gas leak. See Warning
Statement at top of
page 20.
2. Control valve is
defective.
1. Locate and correct all leaks
(see “Checking Gas Connections”,
page 13).
2. Contact customer service.
Moisture/condensation
noticed on windows.
1. Not enough combustion/
ventilation air.
1. Refer to “Air for Combustion and
Ventilation” requirements, page 7.

232323
IMPORTANT SAFETY INFORMATION
ACCESSORIES
Purchase these heater accessories from your local dealer.
If they can not supply these accessories, contact Williams
Furnace for information.
EQUIPMENT SHUTOFF VALVE
For all models. Equipment shutoff valve with 1/8 in. NPT tap.
(see gure 1)
Optional FAN Kit - 2295
The optional fan kit has 3 settings ON/OFF/Auto.
(see gure 2).
FLOOR MOUNTING STAND
For locating heater on the oor, away from a wall. Complete
installation instructions provided with oor
mounting stand. (see gure 3)
gure 1
gure 2
gure 3
REPLACEMENT PARTS
NOTE: Use only original replacement parts. This will protect your warranty coverage for parts replaced under
warranty.
PARTS UNDER WARRANTY
Contact authorized dealers of this product. If they can’t supply original replacement parts, call Customer Service at
909-825-0993 for referral information.
When calling Customer Service or your dealer, have ready:
• Your name
• Your address
• Model and serial number of your heater
• How heater was malfunctioning
• Type of gas used (Propane/LP or Natural gas/NG)
• Purchase date
• Usually, we will ask you to return the defective part to the factory
PARTS NOT UNDER WARRANTY
Contact authorized dealers of this product. If they can’t supply original replacement part(s) call Customer Service
at 909-825-0993 for referral information.
When calling Customer Service have ready:
• Model number of your heater
• The replacement part number
/