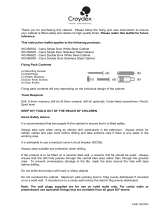
Thank you for purchasing this Croydex stainless steel cabinet. Please follow the fixing and care
instructions to ensure your cabinet is fitted safely and retains its high quality finish. Please retain
this leaflet for future reference.
This instruction leaflet applies to the following products:
WC736005 Anton Single Door Std SS Cabinet
WC746005 Colorado Single Door Lrg SS Cabinet
WC756105 Anton Double Door Std SS Cabinet
WC776105 Colorado Double Door Lrg SS Cabinet
WC766105 Avisio Double Door Corner SS Cabinet
WC806305 Eden Freestanding Drawer Unit
WC796005 Nile Tall SS Cabinet
WC826005 Tara Single Door Sliding SS Cabinet
WC836005 Severn Circular Mirror SS Cabinet
WC846005 Trent Lockable SS Medicine Cabinet
WC856005 Avon Single Door Small SS Cabinet
WC866105 Avon Double Door Small SS Cabinet
Fixing Pack Contents
(a) Mounting Screws
(b) Wall Plugs
(c) Plastic Washers
(d) Face Mounting Door Knob Screws
(e) Face Mounting Door Knobs
(f) Edge Mounting Door Knob Screws
(g) Edge Mounting Door Knobs
Fixing pack contents will vary depending on the individual design of the cabinet.
Tools Required
Drill; 6.5mm masonry drill bit (6.5mm ceramic drill bit optional); Cross-point screwdriver; Pencil;
Spirit level
KEEP DIY TOOLS OUT OF THE REACH OF CHILDREN
Home Safety Advice
It is recommended that two people fit the cabinet to ensure that it is fitted safely.
Always take care when using an electric drill, particularly in the bathroom. Always check for
hidden cables and pipe work before drilling and take extreme care if there is any water in the
working area.
It is advisable to use a residual current circuit breaker (RCCB).
Always wear suitable eye protection when drilling.
If the product is to be fitted on a ceramic tiled wall, a ceramic drill bit should be used. Always
ensure that the drill hole passes through the central tiled area rather than through the grouted
area. To prevent unnecessary damage to the tile, mask the area around the hole with tape
before drilling.
CAB 034 R01

Do not strike the product with hard or sharp objects. Do not place hot objects against the glass
surfaces
Do not overload the cabinet. Maximum safe working load is 10kg evenly distributed if mounted
on to a solid wall. If mounted on to a cavity wall reduce the load to 5kg evenly distributed.
Note: The wall plugs supplied are for use on solid walls only. For cavity walls or
plasterboard use specialist fixings that are available from all good DIY stores.
Fixing Instructions
1. Hold the cabinet against the wall in its desired location. Check
that the cabinet is straight and level using a spirit level. Open the
doors and mark the wall through the holes in the back of the
cabinet with a pencil (see Fig 2).
Mounting holes
2. Using a 6.5mm masonry drill, drill the holes in the marked
positions to a depth of 35mm and insert the wall plugs into the
holes in the wall.
3. Hold the cabinet against the wall and align the holes in the back
of the cabinet with the wall plugs - make sure the pre-drilled door
knob locating holes, on the bottom edge of the doors, are pointing
downwards. Insert the mounting screws through the holes in the
back of the cabinet and screw into the wall plugs.
Fi
g
2
4. For handles positioned on the front of the cabinet use
the face mounting door knobs. Place a plastic washer
over the end of each door knob and insert the end of
each door knob into the holes on the mirrored side of the
doors or front face of the drawer units. Secure the door
knobs in place using the door knob screws – DO NOT
over-tighten the screws (see Fig 3).
5. For handles positioned on the bottom edge of the doors
use the edge mounting door knobs. Insert the screw into
the bottom of the handle and screw into the pre-drilled
hole of the door frame -DO NOT over-tighten the screws
(see fig 4).
6. Assembling the casters to the Free Standing Drawer
Unit. Lay the drawer unit on its back and and fix the
casters in position using the screws provided (see fig 5).
Product Care Advice
To retain the best quality finish, clean product regularly with a soft damp cloth.
Do not use abrasive or chemical cleaners, as these will damage the product.
For details of the other items in the Croydex range please visit our website: www.croydex.co.uk
Please retain this leaflet for future reference.
Croydex Limited, Central Way, Andover, Hants, SP10 5AW, UK
Tel: +44 (0) 1264 365881. Fax: +44 (0) 1264 356437
Website: www.croydex.co.uk
. E-mail: [email protected].
CAB 034 R01
-
 1
1
-
 2
2
Croydex WC766105YW Installation guide
- Type
- Installation guide
- This manual is also suitable for
Ask a question and I''ll find the answer in the document
Finding information in a document is now easier with AI
Related papers
Other documents
-
 HiB shower seat Fitting Instructions
-
Kmart 42942009 User manual
-
 Argos 239/2352 Assembly Instructions Manual
-
 HiB Xenon 50 Installation Leaflet
-
Jacuzzi PD42000 Installation guide
-
Southbend 32BC User manual
-
Thermador Range PRDS48 User manual
-
Jacuzzi PD50000 User guide
-
Southbend 32BC Owner's manual
-
Jacuzzi PD42000 Installation guide


