Page is loading ...

21/09/2016
Manufactured By
ROBAND AUSTRALIA PTY LTD
OPERATING INSTRUCTIONS
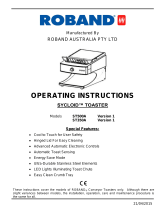
SYCLOID™ TOASTER
Models:
ST500A
ST350A
Version 2
Version 2
Includes:
Alternative Colours:
…R, …B
International models:
…-Gxx, …-Fxx, & …-Mxx
Special Features:
Cool to Touch for User Safety
Hinged Lid For Easy Cleaning
Advanced Automatic Electronic Controls
Automatic Bread Sensing
Energy Saving Mode
Ultra-Durable Stainless Steel Elements
LED Lights Illuminating Toast Chute
Easy Clean Crumb Tray
These instructions cover the models of ROBAND
®
Conveyor Toasters only. Although there are
slight variances between models, the installation, operation, care and maintenance procedure is
the same for all.

®
®
®

CONTENTS
INTRODUCTION ..................................................................................................... 1
GENERAL PRECAUTIONS ..................................................................................... 1
PACKAGE CONTENTS ........................................................................................... 2
COMPLIANCE ......................................................................................................... 2
INSTALLATION ....................................................................................................... 3
OPERATION............................................................................................................ 5
GENERAL SAFETY ................................................................................................. 9
CLEANING, CARE & MAINTENANCE .................................................................. 10
TROUBLESHOOTING ........................................................................................... 12
SENSOR TEST MODE .......................................................................................... 13
SPECIFICATIONS ................................................................................................. 13
APPENDIX A ......................................................................................................... 14
WARRANTY .......................................................................................................... 15

Page: 1
INTRODUCTION
Congratulations on your purchase of this quality ROBAND
®
product. With proper
care and management your new purchase will give you years of trouble free
service.
By reading these instructions carefully you can ensure that this machine is used
and maintained properly, helping your new investment to perform well for you now,
and to continue performing in the many years to come.
GENERAL PRECAUTIONS
This machine must only be operated by qualified person(s) who are fully versed in the
operating and safety instructions described in this manual. Service personnel should
be instructed to familiarise themselves with any and all safety instructions described
in this manual prior to commencement of any maintenance or service.
In the case of new personnel, training is to be provided in advance. These machines
should not be operated by persons (including children) with reduced physical, sensory
or mental capabilities, or lack of experience or knowledge, unless they have been
given supervision or instruction concerning the safe use of the appliance by a person
responsible for their safety.
These machines are heating units, and as with any commercial heating unit the
surfaces on these Toasters will get hot. Always be careful when near an
operating Toaster, and ensure that any risk to unwary customers or staff is
minimised with additional signage if necessary. Due to the obvious heat hazard
Roband recommends that these units be kept out of reach of children. Do not allow
children to play with these units.
These Toasters are for use with bread products without spreads or fillings. The
performance of this unit cannot be guaranteed for non-bread product such as Pizza,
or for unusually thick bread products.
The machine should be disconnected from all power and allowed to cool before
cleaning.
Roband will accept no liability if;
Non-authorised personnel have tampered with the machine.
The instructions in this manual have not been followed correctly.
Non-original spare parts are used.
The machine is not cleaned correctly, with the right product.
There is any damage to the unit.
The machine has been modified in any way.

Page: 2
PACKAGE CONTENTS
All care is taken when packing and Roband ensures that every unit is functional and
undamaged at the time of packaging.
The Package of this Conveyor Toaster should include:
1) One Sycloid
TM
Conveyor Toaster (appropriate model)
2) One Crumb Tray
3) This Manual
Any damage to the machine as a result of freight must be reported to the Freight
Company and to the agent responsible for the dispatch of said unit within 24 hours of
receipt. No claims will be accepted or entertained after this period.
RCM:
Roband
®
products have been designed and manufactured to comply with any and
all specifications set out by the Australian Communications and Media Authority
(ACMA) in regards to Electromagnetic Compatibility. As testament to such
compliance these units bear the RCM symbol.
For further information contact the Australian Communications Authority, PO Box
13112, Law Courts, Melbourne VIC 8010.
CE:
Roband
®
products bearing the CE compliance mark have been designed and
manufactured to comply with European Standards and Directives
COMPLIANCE

Page: 3
INSTALLATION
Remove all the packaging materials, tape and all protective plastic from the machine.
Clean off any glue residue left over from the protective plastic using methylated spirit.
Place the toaster on a firm level surface in the required position.
The toaster is insulated and contains an internal cooling fan so that it remains safe to
touch externally while operating. Good ventilation is required for this to function
correctly.
Please ensure that there is 50mm clearance on each side and 100mm clearance at
the back of the toaster as a minimum. If the toaster is situated near other hot
equipment these clearances should be increased accordingly.
For access to the toast chute ensure that any nearby objects on the side of the
toaster don’t intrude forward of the side openings blocking access to remove toast.
It is preferable that the toaster is placed in a position so that it is clear on all sides.
The clearances shown should be used as an absolute minimum. Always strive
towards greater clearances.
Figure 1: Minimum Installation Clearances

Page: 4
NOTE: The toaster is not designed to be installed on top of other cooking
equipment.
Remove the crumb tray packaging and insert the crumb tray into the toaster. If it
has been removed for cleaning, please ensure that it has been replaced prior to
use.
Figure 2: Install the Crumb Tray
MAINS POWER
Before connecting the toaster to the mains power supply, ensure that the controls
are in the OFF position.
AUSTRALIAN MODELS
ST350A: Plug the toaster into a standard single phase 10 amp power point.
ST500A: Plug the toaster into a standard single phase 15 amp power point.
INTERNATIONAL MODELS
ST350A-GXX and ST500A-GXX: Plug the toaster into a standard 13 amp UK
power point, Type G.
ST350A-FXX and ST500A-FXX: Plug the toaster into a standard 16 amp
European power point, Type F.
ST350A-MXX and ST500A-MXX: Plug the toaster into a standard 15 amp South
African power point, Type M.
The machine is now ready for operation. Please read the next section for further
information.

Page: 5
OPERATION
Figure 3: Control Panel
Front Panel Controls
Item
Description
Function
1
Top Cover Latch
Pull to release and open top cover
2
Main On/Off Switch
Switches toaster on and off
3
Green Pilot Light
Indicates power is on
4
Red Pilot Light
Indicates conveyor speed is locked
5
Speed Control Knob
Changes speed of conveyor
6
Toasting Amber Pilot Light
Indicates toasting and energy saving
7
Bun Mode Amber Pilot Light
Indicates bun mode is active
8
Bun Mode Switch
Switches bun mode on and off
SWITCHING YOUR TOASTER ON
The main on/off switch is located at the front left hand side of the machine on the
underside of the front housing. After switching on, the green pilot light will indicate
the machine is on.

Page: 6
WARM UP CYCLE
After switching on, the toaster will begin its Warm-Up Cycle. During warm up, the
elements will be powered at 100% and the amber pilot light will flash quickly.
The conveyor will switch on after 3 minutes of warm up. The toaster takes about 10
minutes to reach a constant cooking temperature.
Note: As a safety precaution the toaster will start in Normal Operation mode and
will not warm up if the main switch is on when the mains power is supplied.
NORMAL OPERATION
After the warm-up cycle, the toaster is ready to use. The amber pilot light and the
conveyor will remain on.
The toaster will remain in normal operation mode as long as it is being used. A
sensor monitors when bread is placed on the bread chute. If the toaster has not
been used for a period of time it will automatically enter into three stages of energy
saving modes.
TOASTING
Set the speed control knob to about 5 as an initial speed setting. Place 1 or 2 slices
of bread on the bread chute and check the results when finished.
Adjust the speed control if required. This can be adjusted faster or slower to
achieve lighter or darker cooking as required.
SPEED LOCKING
If desired, the toaster can be locked at any conveyor speed.
To lock a conveyor speed, perform the following steps.
1. Rotate the speed control knob fully to the left, then fully to the right, rapidly,
and keep repeating until the red pilot light flashes quickly.
2. While the red pilot light is flashing set the conveyor speed to the desired
position and release the knob.
3. After 10 seconds of no rotation the speed will be locked to the set position
and the red pilot light will remain on indicating that the speed is locked.
To unlock a locked conveyor speed, perform the following steps.
1. Rotate the speed control knob fully to the left, then fully to the right, rapidly,
and keep repeating until the red pilot light is switched off.
2. The conveyor will be unlocked and the red pilot light will switch off.
BUN MODE
If you want to toast buns you can place the toaster into Bun Mode.
The bun mode switch is located at the front right hand side of the machine on the
underside of the front housing.

Page: 7
When bun mode is switched on the element power will be reduced to a level
suitable for buns and the amber bun mode pilot light will be switched on.
Note: The toaster is designed for buns up to 110mm diameter and
30mm thick. Be sure to load your buns on the chute with the cut face
up.
Cooking will continue in this configuration as it does in normal
operation, however, the energy saving features will be disabled.
ENERGY SAVING
During normal operation the toaster monitors toasting activity. If the toaster detects
that activity has stopped, it will gradually shut down in three stages as follows.
1 Motor Saving Mode
After the toaster has been idle for a period of 5 minutes the conveyor motor turns
off to save energy. The elements will remain on. The conveyor automatically
restarts when bread is placed on the chute.
2 Energy Saving Mode
After the toaster has been idle for a period of 30 minutes, it will enter Energy Saving
Mode.
During energy saving mode the element power is reduced to save power and the
conveyor remains off. This will be indicated by the flashing toasting amber pilot
light. The toaster automatically wakes up from energy save mode when bread is
placed on the chute.
When waking up from energy save mode the elements will be switched back to
100% power. The amber pilot light will flash quickly the same way it does when the
toaster warms up. The conveyor will move the bread into the cooking cavity, and
will index on and off until full operating temperature has been reached. When at full
temperature the conveyor will move continuously.
3 Sleep Mode
After the toaster has been idle for a period of 70 minutes it will enter Sleep Mode.
During sleep mode the elements are shut down completely and the conveyor will
remain off. This will be indicated by the flashing toasting amber pilot light. The
toaster automatically wakes up from sleep mode when bread is placed on the
chute.
When waking up from sleep mode the toaster enters into a full warm up cycle in the
same way it does when the toaster is turned on for the first time at the start of
operation.

Page: 8
FAULT MODES
In the event of a fault, the machine will enter Fault Mode.
During fault mode, power to the elements and the conveyor will be shut down until
the fault is rectified.
Some lights will flash depending on the fault. Please check the Troubleshooting
section for help on identifying a fault.
1 Cover Open
If the cover is opened during operation, power to the elements and the conveyor
will be turned off immediately. The toasting amber and red pilot light will flash
alternately.
When the cover is closed the machine will resume normal operation.
The cover should not be opened during normal operation, only when cool.
2 Motor Failure
If the motor fails, power to the elements will be turned off immediately. The toasting
amber and red pilot light will flash together.
Call for assistance from a licensed service agent.
3 Over Temperature
If the toaster cooling system is compromised and the internal temperature reaches
80°C, power to the elements will be turned off immediately and the conveyor will
continue to run so that nothing is left inside the cooking cavity.
The toasting amber pilot light, red pilot light and LED light strip will flash together.
Allow the machine to cool down before trying to cook again. If the problem persists,
call for assistance from a licensed service agent.
STANDBY (OFF) MODE
When switched off the toaster goes to standby mode. The green pilot turns off. The
cooling fan will continue to run on for period of about 10 minutes to cool the toaster.
During standby the toaster will consume a very small amount of power (<10W). It is
recommended that the machine be disconnected from mains power when not in
use.
OPERATING TIPS
Best results are obtained by using day old bread, which has lost some of the
moisture inherent with fresh bread.
Different breads will have different toasting properties. Using the same brand of
bread will result in more consistent toasting through user familiarisation.
When you establish your desired cooking level consider locking the speed to ensure
consistent results.
Regular cleaning of the crumb tray is essential.
When toasting buns make sure you load the buns with the cut face up.

Page: 9
SAFETY
GENERAL SAFETY
This machine contains no user-serviceable parts. Roband Australia, one of our
agents, or similarly qualified personnel should carry out any and all repairs. Any
service personnel should be instructed to read the Safety warnings within this
manual before commencing work on these units.
Steel cutting processes such as those used in the construction of this
machine may result in sharp edges. Whilst any such edges are removed to
the best of our ability it is always wise to take care when contacting any
edge. Do not remove any screwed cover panels that may be on the machine.
This unit can get very hot inside the toast cavity. Do not open the top cover
or remove crumb tray whilst the machine is hot. Do not place your hand into
the entry of the toast cavity. There is a wire guard above the toast chute area, do
not intentionally touch this guard or any part it covers.
Always ensure the power cable does not run next to or behind other hot
machines. Ensure that any damaged power cord is replaced before further
use. These cords should be replaced by qualified service persons only.
Do not clean this unit with the use of a water jet. Do not clean with a soaking
wet cloth or sponge. Do not immerse the machine into water.
Do not move the machine while the top cover is opened. Only move the
machine when the top cover is closed and the machine has cooled down.
The machine should be transported on a trolley and not carried.

Page: 10
CLEANING, CARE & MAINTENANCE
Attention to regular care and maintenance will ensure long and trouble free
operation of your toaster. Although scheduled servicing is not required we do
recommend you adopt a program of regular maintenance to ensure that the toaster
is clean and functional and to avoid inadvertently damaging the unit.
Ensure the power is disconnected and the toaster is cool before attempting to
clean any part of the machine.
Daily cleaning of the crumb tray is a requirement. The crumb tray may be removed
by sliding it out from the toaster. It can then be emptied. Be sure to put the crumb
tray back into the unit.
All toasters will begin to look dirty if not cleaned daily. In order to maintain its
attractive appearance the Sycloid Toaster has been specifically designed to allow
for easy cleaning. Roband recommends cleaning daily.
To clean;
o Remove the crumb tray and empty.
o Open the top cover and brush any excess dried crumbs from the inside of
the toast cavity, lower elements and lower reflector. Brush the dried crumbs
out of off the toast chute.
o Wipe the outside of the toaster down with warm soapy water using a damp
sponge or cloth. Do not immerse the toaster in water or allow the ingress of
water into the ventilation holes or controls. Do not clean this unit with the
use of a water jet.
o Close the cover before wiping the outside of it down.
o Wipe the toast chute out.
o Ensure that the crumb tray is replaced prior to use.
CAUTION: Although every care is taken during manufacture to remove all
sharp edges, care should be taken when cleaning and handling the toaster to
avoid injury.
CAUTION: Some cleaning agents can damage stainless steel, aluminium and
plastic, usually through prolonged use. For this reason we recommend
cleaning with soapy water only with a damp sponge or cloth. Any damage to the
unit through the use of harsh or improper cleaning agents is not the responsibility of
Roband.
OPENING THE COVER
Pull the cover release lever on the left hand side of the machine. With the other
hand swing the top cover fully open. Do not move or bump the machine whilst the
cover is open.

Page: 11
Figure 4: Remove the Crumb Tray
Figure 5: Open the Top Cover

Page: 12
TROUBLESHOOTING
Check all the following points before contacting a service agent.
If the Toaster does not start:
The power point is not faulty.
The machine is plugged in correctly and the power switched on.
The Lid is in the closed position. The amber and red pilots will flash alternatively
if the lid is opened.
The ON – OFF switch is switched on. The green pilot light should be on.
If the conveyor stops during operation:
The machine may be in energy saving mode. Check the flash condition of the
amber pilot. Put bread in and see if it will start automatically.
If smoke is coming from the cooking cavity, turn off the machine and allow it to
cool. Open the top cover and check for anything stuck in the conveyor.
If the machine does not enter Energy Save mode:
Check the bread sensor works (see Sensor Test Mode). Note that if the bread
sensor does not work the machine will never go into energy saving mode.
If the machine trips the RCD:
Check Appendix A at the end of this manual on the subject of RCD’s.
Indicating Lights
Use this table to help diagnose the machine status.
Status
Amber Cook
Red
Chute Lights
Warm Up
QUICK FLASH
OFF
ON
Normal
ON
OFF
ON
Speed Locking
ON
QUICK FLASH
ON
Speed Locked
ON
ON
ON
Speed Unlocked
ON
OFF
ON
Motor Save
ON
OFF
ON
Energy Save
1 SECOND FLASH
OFF
ON
Sleep
2 SECOND FLASH
OFF
ON
Cover Open
1 SECOND FLASH ALTERNATELY
ON
Motor Failure
2 SECOND FLASH TOGETHER
ON
Over Temp.
4 SECOND FLASH TOGETHER
Sensor Test: Beam blocked
ON
DOUBLE FLASH
OFF
Sensor Test: Beam unblocked
OFF
DOUBLE FLASH
OFF

Page: 13
SENSOR TEST MODE
STEP 1: Place the machine in Sensor Test Mode.
This test can be used to test the operation of the bread sensor and conveyor motor.
CAUTION: Ensure the toaster is cold. Do not use this procedure if the toaster is
hot.
Switch the machine OFF.
Open the top cover using the release lever located on the left hand side. The
elements will not activate while the cover is opened.
Switch the main switch on and off 5 times rapidly. The action is as follows:
ON – OFF – ON – OFF – ON – OFF – ON – OFF – ON
This needs to be done in about 5 seconds to complete the action
successfully.
Upon entering the Sensor Test Mode the red pilot light will double flash.
Block the bread sensor beam by pushing the bread chute away from you so
that it is in front of the hole near the bottom right hand side of the bread chute.
o While the bread sensor beam is blocked, the conveyor motor will start
moving and the amber pilot light will turn on.
o While the bread sensor beam is unblocked, the conveyor motor will stop
moving and the amber pilot light will turn off.
STEP 2: Place the machine back in normal mode
Close the cover
Turn the machine OFF. Wait for a minimum of 1 second.
Turn the machine ON. The toaster will start in warm up mode as usual.
SPECIFICATIONS
Model
Voltage
Power
Current
Toast
Output
Nominal Dimensions
Width
Height
Depth
ST350A
230VAC
2300W
10A
Up to
350
slices
per hour
410mm
420mm
(closed)
680mm
(open)
600mm
(closed)
640mm
(open)
ST500A
230VAC
2990W
13A
Up to
500
slices
per hour
NOTE: Constant Research and Development may necessitate machine changes at
any time.

Page: 14
APPENDIX A
RESIDUAL CURRENT DEVICES (RCD’S)
Also known as Earth Leakage Protection systems, an RCD is a protective device
that automatically disconnects the active conductors of a circuit when an earth
leakage current reaches a predetermined value.
Although RCD’s are mandatory in domestic installations, and in the final sub-
circuits of residential-type areas, the Australian Standards quote that the
requirement of an RCD does “not apply to a socket-outlet…..for the connection of
fixed electric cooking appliances, such as ranges, ovens or hotplates”
In installations that are neither Domestic nor Residential-type, AS/NZS 3000 2.5.3.3
states that RCD’s are needed only in situations where equipment may represent an
increased risk of electric shock to the user, and there are many special comments
related to the use of heating elements.
AS/NZS3000 2.5.2 gives the following warnings that should have been taken into
consideration when an RCD circuit was installed.
To avoid unwanted tripping due to leakage currents and transient
disturbances, care should be taken to ensure that the sum of the leakage
currents of electrical equipment on the load side of an RCD is less than
1/3 of its rated residual current.
To avoid excessive leakage current causing unwanted tripping where
socket-outlets are protected by one RCD having a rated residual current
not greater than 30mA, consideration should be given to the number of
socket-outlets protected and the nature of electrical equipment likely to
be connected to the socket-outlets.
Tubular elements (such as those used in this unit) reaching temperatures greater
than 110°C are subject to moisture absorption and therefore earth leakage current
generation. Should the installation and use of this unit trip an RCD the unit will
need to be run on a circuit without an RCD (as mentioned above) for approximately
30-60 minutes, after which time the elements should have dried out and the
machine should function normally. If you are unable to locate a circuit without an
RCD please contact your supplier, or if you prefer you can contact Roband and
send the unit to one of our offices where we can run the machine on a suitable
circuit free of charge (a return freight charge may apply).

Page: 15

Page: 16
WARRANTY
Every care is taken to ensure that no defective equipment leaves our factory and all goods manufactured by
us are guaranteed against defective workmanship and materials for a period of 12 months from the date of
purchase. Roband Australia’s obligations pursuant to this express warranty being limited to the repair or
replacement of the defective goods or materials, at is option and subject to the terms contained within this
Warranty statement. Where relevant, glass, Teflon® and lamps are not included in this warranty and RCD
tripping due to moisture absorption by Tubular Heating Elements is not considered a warranty fault.
Generally, all goods claimed under this warranty must be returned to the factory or an authorized service
agent, freight prepaid, for inspection. All parts deemed to be defective will be replaced, however, no claims
will be entertained for second hand products, or parts damaged in transport, misused or modified in any way
without our approval. For machines that are not considered to be portable (e.g. food bars, rotisseries, large
hotplates and some bain maries), on site warranty service will be provided in capital city metropolitan areas
only. In all other locations, the customer is responsible for all travelling time/service call costs and payment
for this will be required prior to the commencement of the repair. The labour costs to actually repair the fault
will be met by the company.
Any repairs or replacement of defective goods or materials pursuant to this warranty, must be authorized by
Roband Australia prior to any action being taken. The company reserves the right to reject a claim for
warranty if it is not completely satisfied with the circumstances under which it occurred and any other costs
incurred for false claims or faults due to incorrect usage etc. are the responsibility of the claimant. Roband
Australia Pty Ltd nor any subsidiary company or Agent shall be liable for loss of profit or damage to other
equipment and property except where it is in breach of the guarantees provided in accordance with
Schedule 2 of the Competition and Consumer Act 2010 (Cth) or the applicable legislation from time to time.
The goods come with guarantees that cannot be excluded under the Australian Consumer Law (ACL). You
are entitled to a replacement or refund for a major failure and for compensation for any other reasonably
forseeable loss or damage. You are also entitled to have the goods repaired or replaced if they fail to be of
acceptable quality and the failure does not constitute a major failure.
Generally, authorized service agents are located in all areas which have authorized distribution dealers. For
the name of your nearest Australian authorised service agent, please contact:
Roband Australia Pty Ltd
1 Inman Road, Cromer, NSW 2099
Warranty Number: 1800 268 848
Phone: (02) 9971 1788 Fax: (02) 9971 1336
All other countries please contact your selling Agent.
Please complete the following details and keep this card in a safe place.
NAME
ADDRESS
MODEL No: SERIAL No: DATE PURCHASE
NAME OF DEALER:
PLEASE RETAIN THIS SECTION FOR YOUR RECORDS
DO NOT POST
ROBAND
®
AUSTRALIA PTY LTD

OTHER LEADING PRODUCTS AVAILABLE:
Sycloid Toaster
DRINK MIXERS
HIGH PERFORMANCE DEEP FRYERS
VITAMIX BLENDERS
GRILLMAX TOASTERS
NOAW Slicers
Manufactured/Imported in Australia by:
Authorised Distributor/Agent
/

