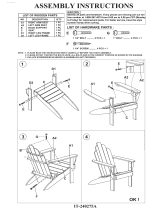
Page is loading ...

111
5
P
IMP
O
this
o
The
s
with
o
5
.5‐062
3
‘‘
M
P
rog
O
RTANT:
R
o
wner’s
m
s
pecificati
o
o
ut notice.
3
16
M
o
b
ram
R
ead all i
n
m
anual fo
r
o
ns of this
O
W
b
ile
A
ma
b
n
struction
s
r
future re
f
p
roduct m
W
NE
R
A
pp
T
b
le R
s
carefull
y
f
erence.
m
ay vary fr
o
R
’S
M
T
rac
ecu
m
y
before
u
o
m this ph
o
M
ANU
kin
g
m
be
n
u
sing this
o
to, subje
c
AL
g
’’
nt B
i
product.
R
c
t to chan
g
i
ke
R
etain
g
e


SERVICE ------------------------------------------------------------------------ 2
LABEL PLACEMENT --------------------------------------------------------- 3
PRODUCT SAFETY ---------------------------------------------------------- 4
OVERVIEW DRAWING ------------------------------------------------------ 5
PARTS LIST --------------------------------------------------------------------- 6
HARDWARE & TOOLS PACK ---------------------------------------------- 8
ASSEMBLY ---------------------------------------------------------------------- 9
COMPUTER --------------------------------------------------------------------- 20
ADJUSTMENTS ---------------------------------------------------------------- 28
TROUBLE SHOOTING & MAINTENANCE ----------------------------- 29
WARRANTY -------------------------------------------------------------------- 30
PARTS REQUEST FORM --------------------------------------------------- 31
1
TABLEOFCONTENTS

IMPORTANT: FOR NORTH AMERICA ONLY
For damage or defective product, questions, replacement parts
or any other service support, please contact our customer
service department (8:00 AM - 5:00 PM Pacific Standard Time,
Daily) by below methods:
For Best Service Email:
Service@paradigmhw.com
Website:
www.paradigmhw.com
Toll-Free:
1-844-641-7921
Please have the following information ready when requesting for service:
Your name
Phone number
Model number
Serial number
Part number
Proof of Purchase
For damaged or defective product please contact our customer
service before returning to the store.
* Emailing us with the information above will be the best method
to receive a response during peak business hours.
**Response time may vary.
Paradigm Health & Wellness, Inc.
1189 Jellick Ave.
City of Industry, CA 91748, USA
SERVICE
2

1115
1115
61
63
61
63
For customer assistance call:
1-844-641-7921
8 am - 5 pm PST
Daily
Pour le service a la clientèle
composer le:
1-844-641-7921
Tous les jours
8:00 h - 17 h (HNP)
AVERTISSEMENT
Maximum weight capacity is 325 lbs.
Le poids maximum pout ce produit
est 148 kgs.
ALL NEW MATERIAL
CONSISTING OF
POLYURETHANE FOAM PAD_100%
manufacturer that the materials
in this article are described in
accordance with law.
Paradigm Health and Wellness, Inc.
1189 Jellick Ave.
City of Industry, CA 91748 USA
REGISTRY NO.
VA25302 (CN)
Under Penalty of law this tag not to
be removed except by the consumer
NOTICE
This article does not meet
ments of California Bureau of
Home Furnishings technical
bulletin. 117 Care should be
with burning cigarettes.
SOUS PEINE DE SANCTION LÉGALE,
CETTE ÉTIQUETTE NE PEUT ÊTRE
ENLEVÉE PAR UNE PERSONNE AUTRE
QUE LE CONSOMMATEUR
ENTIÈREMENT FABRIQUÉ DE
MATÉRIAUX NEUFS
REMBOURRAGE DE MOUSSE DE
POLYURÉTHANE 100%
NO D’ENREGISTREMENT
VA25302 (CN)
Cette étiquette est apposée
Conformément aux lois Canadiennes.
Paradigm Health and Wellness, Inc.
1189 Jellick Ave.
City of Industry, CA 91748 USA
Ce produit ne satisfait pas
devis technique duCalifor-
nia Bureau of Home
Furnishings. Ne pas utiliser
près d’une source de
nue (cigarettes, etc.)
AVIS
3
LABELPLACEMENT

Basic precautions should always be followed when using this equipment.
Read all instructions before using this equipment which include the
following safety instructions:
1. Read all the instructions in this manual and do warm up exercises
before using this equipment.
2. Before exercising, and in order to avoid injuring your muscles, it is
recommended that you perform warm-up exercises for every muscle
group.
3. Make sure all the components are not damaged and tightened well
before use. This equipment should be placed on a flat surface when
using. Using a mat or other covering material on the ground is
recommended.
4. Wear proper clothes and shoes when using this equipment; do not
wear clothes that might get caught by any part of the equipment;
remember to tighten the pedaling straps.
5. Do not attempt any maintenance or adjustments other than those
described in this manual. Should any problems arise, discontinue use
and consult customer service.
6. Do not use or leave the equipment outdoors.
7. This equipment is for household use only.
8. Only one person should be on the equipment while in use.
9. Keep children and pets away from the equipment while in use. This
machine is designed for adults only. This product requires a minimum
of 6 square feet of space for safe operation.
10. If you feel any chest pains, nausea, dizziness, or shortness of breath,
you should stop exercising immediately and consult your physician
before continuing.
11. The maximum weight capacity for this product is 325 lbs/148 kgs.
WARNING: Before beginning any exercise program consult
your physician. This is especially important for the people who are over
35 years old or who have pre-existing health problems. Read all
instructions before using any fitness equipment.
CAUTION: Read all instructions carefully before operating this product.
Retain this Owner’s Manual for future reference.
PRODUCTSAFETY
4

OVERVIEWDRAWING
5

No. Description Qty No. Description Qty
001 Handrail End Cap Ø32x1.5 2 025 Bushing 2
002 Bolt M6x70 4 026 Rear Main Frame 1
003 Washer Ø6xØ12x1.0 5 029
Extension Hand Pulse Sensor
Wire I L=1300 mm
1
004 Left Handrail Ø32x1.5x1085 1 030
Phillips Self Tapping Screw
ST4.8x20
2
005 Backrest 465x465x135 1 031 Right Decorate Cover Ø60 1
006
Hand Pulse Sensor with Wire
L=1150 mm
2 032 Left Decorate Cover Ø60 1
007 Screw ST4.2x30 2 033 Screw ST4.8x25 3
008 Handrail Foam Grip Ø31xØ37x230 2 034 Rear Stabilizer End Cap Ø60 2
009 Bolt M6x35 2 035 Cap Nut M8 4
010 Big Curve Washer Ø6xØ16x1.5 6 036 Big Curve Washer Ø8xØ20x2.0 5
011 Cap Nut M6 2 037 Bolt M8x70 4
012 Right Handrail Ø32x1.5x929 1 038 Rear Stabilizer Ø60x1.5x580 1
013
Extension Hand Pulse Sensor Wire
L=200 mm
1 039 Bolt M8x15 15
014 Wire Grommet Ø12.1 2 040 Washer Ø8xØ16x1.5 18
015 Seat Sliding Tube 53x23x2 1 041 Hexagon Nut M10xH5 1
016 Seat 430x330x90 1 042 Adjustable Leveler M10 1
017
Back and Seat Support Bracket
53x23x2
1 043 Computer M7-570 1
018 Big Washer Ø6xØ18x1.5 4 044
Extension Hand Pulse Sensor
Wire III L=650 mm
2
019 Bolt M6x20 4 045 Bolt M5x10 4
020 Armrest 250x110x45 2 046 Bolt M5x15 2
021
Right Handrail Support Tube
Ø25x1.5
1 047 Bottle Holder 1
022 Bolt M6x50 4 048 Front Post 70x30x1.5 1
023
Left Handrail Support Tube
Ø25x1.5
1 049 Bolt M8x10 4
024 Bolt M6x15 4 050
Extension Sensor Wire I
L=600 mm
1
PARTSLIST
6

No. Description Qty No. Description Qty
051 Extension Sensor Wire L=600 mm 1 075 Hexagon Nut 1/2” 1
052 Screw ST2.9x12 2 076 Adapter L=2000 mm 1
053 Sensor with Wire L=300 mm 1 077 Front Stabilizer End Cap Ø60 2
054 Front Post Cover 1 078 Front Stabilizer Ø60x1.5x580 1
055
Extension Hand Pulse Sensor
Wire II L=1200 mm
1 079 Bolt M6x45 2
056
Phillips Self Tapping Screw
ST4.2x20
6 080 Transport Wheel Ø23xØ6x32 2
057 DC Motor with Wire L=300 mm 1 081 Nylon Nut M6 2
058 Screw ST4.2x25 6 082 Bolt M8x20 1
059 Cover Cap Ø40xØ25x10 2 083 Idler Arm 1
060 Right Cover 672x79x448 1 084 Big Washer Ø8xØ20x2 1
061 Right Foot Pedal (YH-63X) 1 085 Nylon Nut M8 1
062 Crank with Belt Pulley Ø240 1 086 Bearing 6000-2Z 2
063 Left Foot Pedal (YH-63X) 1 087 Washer Ø10xØ14x1.0 2
064 Washer Ø24xØ40x3.0 1 088 Bolt M6x10 1
065 Bearing Nut I 15/16" 1 089 Spring Ø17x80xØ2.5 1
066 Ball Bearing 2 090 Belt PJ360 J6 1
067 Bearing Cup 2 091 Nut M6 2
068 Bearing Nut II 7/8" 1 092 Spring Washer Ø6 2
069 Washer Ø23xØ34.5x2.5 1 093 Tension Bracket 2
070 Hexagon Nut 7/8” 1 094 Adjustable Bolt M6x36 2
071 Left Cover 672x83x448 1 095 Nut M10x1.0x6 2
072 Magnetic Brake Cable L=280 mm 1 096 Flywheel Ø230 1
073 Front Main Frame 80x40x2 1 097 L Shape Knob M6x1.5 1
074 Power Supply Cable L=300 mm 1
7
PARTSLIST

HARDWARE&TOOLSPACK
8

78
78
78
78
73
73
73
73
35
35
35
35
36
36
36
36
37
37
37
37
Multi Hex Tool with Phillips Screwdriver
S10, S13, S14, S15 1PC
Tool:
1. Front Stabilizer Installation
Lift up the Front Main Frame (73), and align the Front Stabilizer (78) onto the front curve
of the Front Main Frame (73). Insert two Bolts (37) into the Front Stabilizer (78), then on
the threaded ends of the Bolts (37) attach two Big Curve Washers (36) and two Cap Nuts
(35). Hold the Front Stabilizer (78) to the Front Main Frame (73) and use the Multi Hex
Tool with Phillips Screwdriver provided to tighten the Cap Nuts (35) until secure.
Hardware:
ASSEMBLY
9
(#35) Cap Nut
2 PCS
(#36) Big Curve Washer
2 PCS
(#37) Bolt
2 PCS

Multi Hex Tool with Phillips Screwdriver
S10, S13, S14, S15 1PC
Tool:
2. Rear Stabilizer Installation
Lift up the Rear Main Frame (26), and align the Rear Stabilizer (38) onto the rear curve
of the Rear Main Frame (26). Insert two Bolts (37) into the Rear Stabilizer (38), then on the
threaded ends of the Bolts (37) attach two Big Curve Washers (36) and two Cap Nuts (35).
Hold the Rear Stabilizer (38) to the Rear Main Frame (26) and use the Multi Hex Tool with
Phillips Screwdriver provided to tighten the Cap Nuts (35) until secure.
Hardware:
ASSEMBLY
10
(#35) Cap Nut
2 PCS
(#36) Big Curve Washer
2 PCS
(#37) Bolt
2 PCS

3. Main Frame Assembly
Use the 6mm Allen Wrench with Phillips Screwdriver provided to remove the six Bolts (39)
and the six Washers (40) from the Rear Main Frame (26). Connect the Extension Hand
Pulse Sensor Wire I (29) from the Rear Main Frame (26) with the Extension Hand Pulse
Sensor Wire II (55) from the Front Main Frame (73). Insert the Rear Main Frame (26) into
Front Main Frame (73). Make sure the wires stay connected and are not pinched. Re-insert
the six Bolts (39) and the six Washers (40) into the Front Main Frame (73). Tighten the six
Bolts (39) using the 6mm Allen Wrench with Phillips Screwdriver Provided.
ASSEMBLY
11
Tool:
6mm Allen Wrench with
Phillips Screwdriver
1 PC

4.1 Right/Left Handrail Support Tubes Installation
Use the Multi Hex Tool with Phillips Screwdriver to remove the four Bolts (24) from the
Back and Seat Support Bracket (17). Align the holes of the Right Handrail Support Tube (21)
and the Back and Seat Support Bracket (17). Re-insert two Bolts (24) into the Right Handrail
Support Tube (21) and use the Multi Hex Tool with Phillips Screwdriver provided to tighten
until secure. Repeat the same assembly steps for the Left Handrail Support Tube (23).
4.2 Seat Installation
Use the 5mm Allen Wrench provided to remove the four Big Washers (18) and the four
Bolts (19) from the underside of the Seat (16). Align the holes of the Seat (16) and the
Back and Seat Support Bracket (17). Re-insert the four Bolts (19) with four Big Washers
(18) into the Back and Seat Support Bracket (17). Use the 5mm Allen Wrench provided to
tighten the four Big Washers (18) and four Bolts (19) until secure.
ASSEMBLY
12
(#19) Bolt
4 PCS
(#18) Big Washer
4 PCS
Tool:
5mm Allen Wrench
1PC
Tool:
Hardware:
6mm Allen Wrench with
Phillips Screwdriver
1PC
17
16

5.1 Seat Sliding Tube Installation
Use the 6mm Allen Wrench with Phillips Screwdriver to remove the eight Bolts (39) and
the eight Washers (40) from the Seat Sliding Tube (15). Insert the Seat Sliding Tube (15)
into the Bushing (25) of the Rear Main Frame (26). Install the L-Shape Knob (97) and tighten
it by turning in a clockwise direction.
5.2 Back/Seat Support Bracket Installation
Attach the Back and Seat Support Bracket (17) onto the Seat Sliding Tube (15) using the
eight Bolts (39) and the eight Washers (40) that were previously removed. Tighten the Bolts
(39) with the 6mm Allen Wrench with Phillips Screwdriver provided.
ASSEMBLY
13
6mm Allen Wrench with
Phillips Screwdriver
1PC
Tool:
6mm Allen Wrench with
Phillips Screwdriver
1PC
Tool:
25
26

6. Front Post and Front Post Cover installation
Use the 6mm Allen Wrench with Phillips Screwdriver provided to remove the four
Washers (40), four Bolts (49), one Bolt (39), and one Big Curve Washer (36) from the tube of
the Front Main Frame (73). Slide the Front Post Cover (54) up on to the Front Post (48) and
keep it there. Connect the Extension Sensor Wire (51) to the Extension Sensor Wire I (50).
Connect the Extension Hand Pulse Sensor Wire II (55) to the Extension Hand Pulse Sensor
Wire III (44)
Insert the Front Post (48) onto the tube of the Front Main Frame (73), making sure not to
pinch or disconnect the wires. Secure the Front Post (48) onto the Front Main Frame (73)
with the four Washers (40), four Bolts (49), one bolt (39), and one Big Curve Washer (36)
that were previously removed. Lightly tighten the four Bolts (49) on the side of the Front Post
(48) and one Bolt (39) on the front of the Front Post (48) by hand. After all five bolts are
tightened by hand, tighten the front Bolt (39) with the 6mm Allen Wrench with Phillips
Screwdriver provided until secure. Then tighten the other four Bolts (49) on the side of the
Front Post (48) with the 6mm Allen Wrench with Phillips Screwdriver. Slide the Front Post
Cover (54) down to the Front Main Frame (73).
ASSEMBLY
6mm Allen Wrench with
Phillips Screwdriver
1PC
Tool:
14

Multi Hex Tool with Phillips Screwdriver
S10, S13, S14, S15 1PC
Tool:
7. Left and Right Foot Pedals Installation
NOTE: The Cranks, Pedal Shafts, and Foot Pedals are marked “R” for Right and “L”
for Left.
Insert the Left Foot Pedal (63) into the threaded hole in the left side of the Crank with Belt
Pulley (62). Turn the Left Foot Pedal (63) by hand in a counter-clockwise direction until
snug.
Note: DO NOT turn the pedal shaft in the clockwise direction, doing so will strip the
threads.
Tighten the Left Foot Pedal (63) using the Multi Hex Tool with Phillips Screwdriver provided.
Insert the Right Foot Pedal (61) into the threaded hole in the right side of the Crank with Belt
Pulley (62). Turn the Right Foot Pedal (61) by hand in a clockwise direction until snug.
Tighten the Right Foot Pedal (61) with the Multi Hex Tool with Phillips Screwdriver provided
ASSEMBLY
15

Multi Hex Tool with Phillips Screwdriver
S10, S13, S14, S15 1PC
8. Left/Right Handrails and Backrest Installation
Attach the Backrest (5) and Left Handrail (4) onto the Back and Seat Support
Bracket (17), using four Bolts (2) and four Washers (3). Tighten the Bolts (2) using the
5mm Allen Wrench provided.
Connect the Hand Pulse Sensor Wire (6) from the Left Handrail (4) to the Extension
Hand Pulse Sensor Wire (13) from the Right Handrail (12). Insert the Right Handrail
(12) into the tube hole of the Left Handrail (4) being careful not to pinch the wires.
Secure the Left Handrail (4) and Right Handrail (12) using two Bolts (9), two Big Curve
Washer (10), and two Cap Nuts (11). Tighten the Cap Nuts (11) using the Multi Hex
Tool with Phillips Screwdriver provided. Connect the Extension Hand Pulse Sensor
Wire I (29) to the Hand Pulse Sensor Wire (6) and Extension Hand Pulse Sensor Wire
(13).
Hardware:
ASSEMBLY
16
(#2)
Bolt
4 PCS
(#3)
Washer
4 PCS
(#9)
Bolt
2PCS
(#10) Big Curve
Washer
2 PCS
(#11) Cap
Nut
2 PCS
Tool:
Allen Wrench 5mm
1PC

9. Armrests Installation
Align the holes of the Armrest (20), the Right Handrail (12), and the Right Hand
Support Tube (21). Fasten the three parts together with two Bolts (22) and two Big Curve
Washers (10). Use the 5mm Allen Wrench provided to tighten the two Bolts (22) and two
Big Curve Washers (10) until firm and secure.
Repeat the step above for the second Armrest (20), the Left Handrail (4), and the
Left Handrail Support Tube (23).
Hardware:
17
ASSEMBLY
Tool:
(#22) Bolt
4 PCS
(#10) Big Curve Washer
4 PCS
Allen Wrench 5mm
1PC

Multi Hex Tool with Phillips Screwdriver
S10, S13, S14, S15 1PC
Tool:
10. Computer and Bottle Holder Installation
Use the Multi Hex Tool with Phillips Screwdriver provided to remove the four Bolts (45)
from the back of the Computer (43). Connect the Extension Hand Pulse Sensor Wires III (44)
and Extension Sensor Wire I (50) to the wires at the rear of the Computer (43). Carefully
tuck the wires into the Front Post (48). Attach the Computer (43) onto the Front Post (48)
with the four Bolts (45) that were previously removed. Tighten the Bolts (45) using the Multi
Hex Tool with Phillips Screwdriver provided.
Use the Multi Hex Tool with Phillips Screwdriver to remove the two Bolts (46) from the
right side of the Front Post (48). Attach the Bottle Holder (47) onto the Front Post (48) with
the two Bolts (46) that were previously removed. Tighten the bolts with the Multi Hex Tool
with Phillips Screwdriver provided.
18
ASSEMBLY
/