Revision Date: 9/1/2020
DMP Plus Series C V / C V AT – RingCentral
Appendix B: Automatic Line Re-Registration
Some call managers and networks go into maintenance windows which do not allow VoIP
endpoints to register or maintain their registration. To help resolve this issue the Automatic
Line Re-Registration function can be configured to re-register a line if line registration is
unexpectedly lost. This function causes the VoIP interface to re-attempt a line re-registration if
the first automatic re-registration attempt fails.
In order to use this feature, the line must first be registered to the call manager.
Note: When enabled, this function will attempt re-registration once the SIP timer has expired.
By default the SIP timer is set to 3600 seconds (60 mins). By default, the Automatic Line Re-
Registration feature is disabled, with the “registration_fail_retry_count” set to zero (0).
To set up Automatic Line Re-Registration, the following steps must be carried out.
Requires Firmware 1.08.0002 or later.
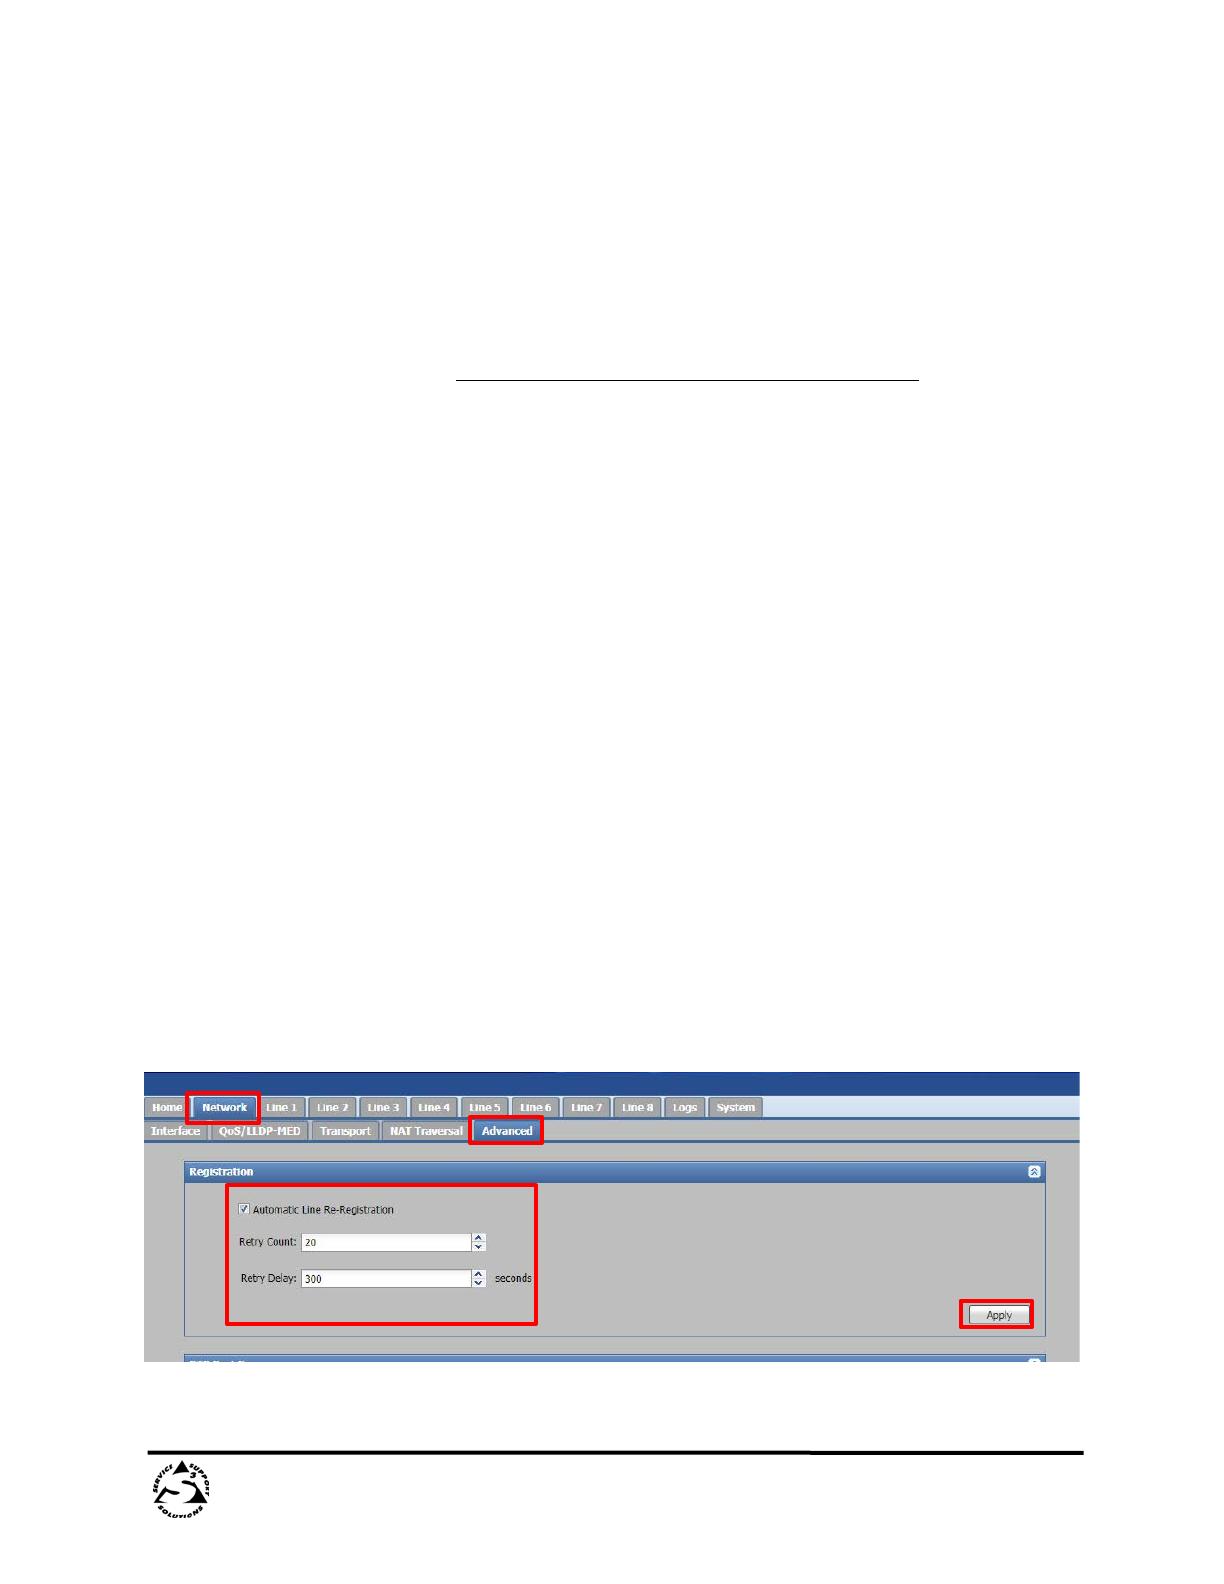
Method 1 – Internal Webpage
1) From internal webpage Select Network then Advanced Tab
2) To Enable the Automatic Line Re-Registration select the check box
3) Enter Retry Count ( 0 – 99)
a. This is the number of attempts a Line will make to re-register
i. Example below is set to twenty (20) reconnections attempts
ii. If this is set to zero (0), the feature is disabled
4) Enter Retry Delay (120 – 3600 seconds)
a. Amount time between registration attempts in seconds
i. Example above is set to 300 seconds (5 mins) between
reconnections attempts
5) Once Set hit Apply


