Online resources and information at MYGENESIS.COM
19
MAIN MENU
Intelligent Speed Limit Assist (ISLA) (if equipped)
The Intelligent Speed Limit Assist uses information from the detected road
sign and navigation system to inform the driver of the speed limit and
additional information of the current road. When activated, it also helps the
driver maintain within the speed limit of the road by adjusting the vehicle’s
speed.
Intelligent Speed Limit Assist (ISLA) can help the driver maintain cruise control speed limit using speed limit sign
recognition. ISLA cannot detect all speed limit signs, including when speed limit signage is obscured or beyond the
camera’s field of view. Driver remains responsible to observe posted speeds. See Owner’s Manual for further details and
limitations.
NEW FEATuRES
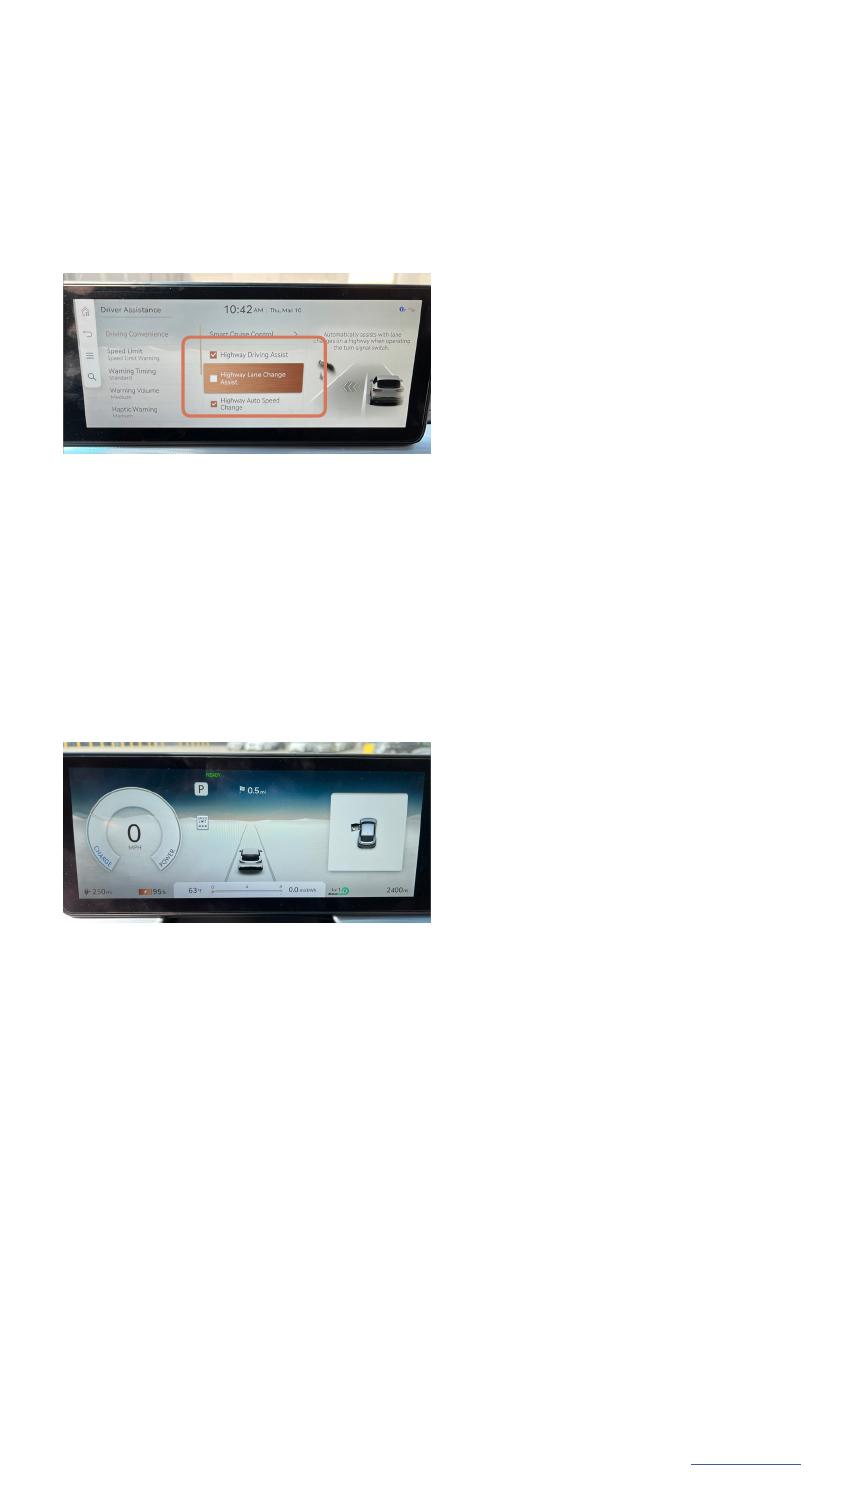
Highway Lane Change Assist
The Highway Lane Change Assist function automatically helps with steering
to help prevent the vehicle from leaving the lane.
Highway Lane Change Assist (HLCA), when used in conjunction with Highway Driving Assist II, can help the driver
change lanes when the turn signal indicator is held above the locked position on the steering column. HLCA can help
the driver check blind spots for other vehicles and can help provide steering assistance during the lane change. There
are limitations to the function, detection, range, and clarity of the system. HLCA may not function correctly if one
or more of the parking sensors is damaged, dirty, or covered, or if weather conditions (heavy rain, snow, or fog) are
interfering with the sensor operation. Always drive carefully and use extreme caution when other vehicles are present.
See Owner’s Manual for further details and limitations.
ADVANCED DRIVER
ASSISTANCE SySTEMS


