Page is loading ...

I
N
S
T
A
L
L
A
T
I
O
N
-
S
A
F
E
T
Y
-
O
P
E
R
A
T
I
O
N
-
M
A
I
N
T
E
N
A
N
C
E
I
N
S
T
A
L
L
A
T
I
O
N
-
S
A
F
E
T
Y
-
O
P
E
R
A
T
I
O
N
-
M
A
I
N
T
E
N
A
N
C
E
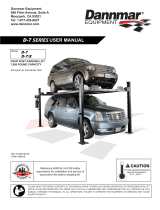
Mobile Column Lift
24V DC Powered
4 Column Lift Capacity 32,800 kg.
6 Column Lift Capacity 49,200 kg.
8,200 kg. per column
© December 2011 by Vehicle Service Group. All rights reserved. CO7946.7 117726
Rev. D 03/2013
IMPORTANT
Reference Safety Requirements
for Installation and Service of
Automotive Lifts before installing lift.
HydroLift S2


Bräunlingen, 19.03.2013
In addition the machine complies with the provisions of the directives 20004/108/EG e electro-magnetic
compatibility (safety objectives were complied with according to Annex I, no. 1.5.1 machine directive
20006/42/EG).
EC Declaration of Conformity
according to EU machine directive 2006//42/EG (Annex II A)
Name and address of manufacturer: BlitzRotary GmbH
Hüfinger Str.55
78199 Bräunlingen, Germaany
This declaration only relates to the machine in condition as supplied; components added and/or subsequent
modifications made by the end user are disregarded. This declaration becomes invalid if the product is
changed or modified without permission.
We declare that the undermentioned machine,
Product name: Lift for vehicles
Serial / type name: HydroLift S2
Machine/serial number: .......... ................... ................................
Year of manufacture: 20…
complies with all relevant provisions or the machine directive 2006//42/EG.
Applied harmonized standards:
EN 1493:2010 Vehicle lifts
EN ISO 12100:2010 Safety of machinery – Basic concepts
EN 60204-11:2006+A1:2009 Electrical equipment of machines
EN 349:1993+A1:2008 Safety of machinery – Minimum gaps
EN ISO 13850:2008 Safety of machinery – Emergency stop
EN ISO 13849-1:2008 Safety-related parts of control systems TT1
EN ISO 13849-2:2008 Safety-related parts of control systems TT2
Other applied technical standards and specifications:
BGG 945 Inspections of lifts
BGR 500 Operation of work equipment
BGV A3 Accident prevention regulation electric equipment and production equipment
EU prototype examination no.:D 006 AA38871 01 EU notified body
No. 0124 , DEKRRA certification
Representative for thee compilation of relevant technical documentation
Reinhold Nienhaus, BlitzRotary GmbH, Hüfinger Str. 55, 781199 Bräunlingen
Place, date
____________________________
Frank Scherer / Managing Director

2
Intended use
The lift is intended to be used to lift and lower
commercial vehicles for repair, maintenance and
cleaning during normal workshop operation.
The lift is only to be used as intended, in techni-
cally sound condition according to technical
specifications.
The maximum load capacity of one lifting column
is 8200 kg and must not be exceeded. The permis-
sible load distribution in or against drive direction
is 2:1.
Standing or working under suspended load is per-
mitted.
Misuse
Improper behavior can cause danger to life and
health of persons working in the vicinity of the lift.
The manufacturer is not responsible for damages
caused by use against regulations and misuse.
Prohibited:
• Standing and riding on load and load-bearing
equipment.
• Standing or working under the load during lifting and
lowering.
• Lifting of vehicles loaded with hazardous goods.
• Lift installation in explosive areas.
The lift
Mode of operation
• The lift is used to lift heavy vehicles for maintenance,
cleaning or repair to optimum working height.
• Operation is carried out with a mobile control
panel.
• Lifting and lowering the vehicle is carried out in jog
mode.
• Electronic controls ensure level lifting of the vehicle.
• The lift columns are movable in vehicle longi-
tudinal direction to adjust for different distances
between axles.
Specifications Value
Lifting System Inverted Rod Hydraulic
Cylinder
Electrical System
Battery
24V DC - 2 12V Deep
Cycle Batteries
Exide: NG27 or NG31
Capacity 8200 Kg. Each Column
Fluid Capacity 11 Liters
Lifting Height (Cylinder
Stroke)
1753mm
Lifting Time At Capacity 78 Seconds
Lowering Time At
Capacity
54 Seconds
AMPS 152-160
Motor 3kW
Number of Cycles
(At Full Charge)
14 Cycles At Capacity
Suspension Simple Spring Load Poly
On Steel (Legs) And Glass
Filled Nylon (Steering)
Wheels With Sealed
Roller Bearings And
Adjustable Height
Fork Adjustment
Positions
5
Relief Pressure 190 Bar
Working Pressure 184-186 Bar
Shipped Weight 730 Kg.
Concrete Floor Slope 20 MPa Min. Strength
Min. 115mm Thick
10.5mm Per Meter Side
To Side
21.0mm Per Meter Fore
To Aft
Noise Level [db(A)] 80
Ambient Temperature 5.. 40°C

3
Index
Set-Up Instructions .................................................. 2
Safety Instructions ................................................... 5
Owner/Employer Responsibilities .......................... 5
Quick Start Operating Instructions ........................ 7
Emergency Lowering ................................................ 9
Detailed Operating Instructions ............................ 10
Battery Charging ...................................................... 11
Maintenance Instructions ..................................... 12
Trouble Shooting ...................................................... 13
Lift Lockout/Tagout Procedure .............................. 14
Wiring Diagram ........................................................ 17
Spare Parts Lists ...................................................... 19
Set-Up Instructions
Follow these instructions to ensure a satisfactory set-up
and operation of the lift.
• Afterset-upandinspectionofthelift,pleasereturnthis
booklet to the literature package and give to lift owner/
operator. Literature package should be kept attached to
controls for easy access.
1. Unloading: Mobile Lift System units are shipped in the
vertical position.
2. After unloading, remove and discard protective
wrapping.
NOTE: Unit is shipped without power unit
fluid. Installation of fluid MUST be completed
prior to lift operation. Failure to do so will result
in air entering the system. The unit will then have to
be bled.
3. To move the column, remove protective banding and
wheel clamps from wheel jack. The forklift brackets can be
removed from the side of the column if desired.
4. Open power unit cover by removing the 3 M8 BHCS
(Button Head Cap Screw). Fill power unit tank with
ISOAW32 hydraulic oil. Tank capacity is approximately 11.5
liters. Short filling may cause vapor lock to occur.
5. Connect two batteries in location shown, Fig. 1.
Different batteries meeting the below specifications may be
used but performance can vary.
Recommended Battery Specifications:
12V DC Sealed Deep Cycle Battery
Size 24 Frame Group
80 AH Capacity (At 20 AH Rate)
Stud Terminals with Stainless Steel Wing nuts
Battery wires are clearly marked/labeled inside the unit
itself.
Install tie-down straps on batteries as shown.
Close lift and re-install M8 BHCS removed earlier.
After the batteries and fluid have been added, screw M20
bolt and M10 socket head bolts clockwise on wheel jack
and front of superstructure to adjust unloaded column
ground clearance, Fig. 1. Ground clearance is determined
by how far the bolts are turned. When the column is
loaded, it will automatically lower to the floor.
WARNING
Permit only trained personnel to
operate lift. After reviewing these instructions,
become familiar with the lift controls by running the lift
through a few cycles before loading a vehicle on lift.
Observe and heed SAFETY and WARNING labels on
the lift.
WARNING
This motor has internal arcing or
sparking parts. To minimize the Risk of Explosion, DO
NOT expose to flammable vapors.
OPERATING CONDITIONS: Lift is not intended for
outdoor use or storage and has an operating ambient
temperature range of 5º-40ºC. This product is intended
for indoor use only in a dry location.
DO NOT use lift in a manner other than intended.
Included (but not limited to) examples of unapproved
uses of the lift are: lifting vehicle by only one side,
lifting different axles with a column pair (lifting on the

4
Fig. 1
diagonal), and lifting non-approved items.
WARNING
DO NOT use on asphalt. Lift must be
on concrete with a minimum strength of 20.6 MPa and
a minimum thickness of 114mm. Maximum allowed
floor slope is 10.5mm per meter side to side of vehicle
and 21.0mm per meter front to rear of vehicle. DO NOT
use on a suspended floor structure without specific
approval from structural engineer.
Ensure tires are properly inflated before lifting. DO
NOT exceed tire load rating when raising vehicle.
DO NOT raise/lower only one side of a vehicle.
Lift only on same axle. DO NOT stagger between
axles.
DO NOT drive over or pinch electrical cables.
Power Unit Tank
Battery Locations
M20 Bolt
Adjust For
Ground
Clearance
M10
Socket Head
Adjust For
Ground
Clearance

5
6. Bleed mobile columns:
a.) Raise forks 150-200mm do not lift forks high enough to engage locks.
b.) Loosen bleed screw to release air from system.
c.) Close screw and repeat steps a and b until there is no air in the system and fluid runs clear.
Bleed Screw

6
SAFETY INSTRUCTIONS
• Inspectyourliftdaily.Neveroperateifitmalfunctionsor
if it has broken or damaged parts. Use only qualified lift
service personnel and genuine parts to make repairs.
• Thoroughlytrainallemployeesinuseandcareoflift,using
manufacturer’s instructions supplied with the lift.
• Neverallowunauthorizedoruntrainedpersonsto
position vehicle/lift or operate lift.
• Prohibitunauthorizedpersonsfrombeinginshoparea
while lift is in use.
• DoNotpermitanyoneonliftorinsidevehiclewhenitis
either being raised or lowered.
• Alwayskeepareaaroundliftfreeoftools,debris,grease
and oil.
• NeverOverloadlift.Capacityofliftisshownon
nameplate affixed to the lift.
• DoNothitorrunoverliftforksorbase.Thiscould
damage lift or vehicle. Before driving vehicle into area,
position lift units to provide unobstructed entrance onto
lift area.
• Properliftsynchronizationrequiresthatallcolumnshave
at least a 500kg. load.
• Loadvehicleonliftcarefully.Positionliftforkstofully
contact the vehicle tires. Release parking break on
vehicle. Raise lift until tires clear the floor. Check lift
forks for secure contact with vehicle tires. Raise lift to
desired working height.
• DoNotblockopenoroverrideself-closingliftcontrols,
they are designed to return to the Off or Neutral position
when released.
• Remainclearofliftandvehiclewhenlowering.
• Avoidexcessiverockingofvehiclewhileonlift.
• Clearareaifvehicleisindangeroffalling.
• Removetooltrays,stands,etc.beforeloweringlift.
• Positionliftunitstoprovideanunobstructedexitbefore
removing vehicle from lift area.
• DoNotperformanymaintenanceonthecontrolpanels
until the power has been shut off to the lift.
• DoNotoperateequipmentwithadamagedcordorifthe
equipment has been dropped or damaged.
• Conrmallliftchannelsmatchbeforeoperatingthelift.
• Thisliftoperatesatasoundlevelofapproximately
80 db(A).
The Owner/Employer:
• Shallensurethatliftoperatorsarequaliedandthattheyaretrainedinthesafeuseandoperationoftheliftusingthe
manufacturer’s operating instructions; ALI/SM 07-1, ALI Lifting it Right safety manual; ALI/ST-05 ALI Safety Tips card;
ANSI/ALI ALOIM-2008, American National Standard for Automotive Lifts-Safety Requirements for Operation, Inspection
and Maintenance; ALI/WL Series, ALI Uniform Warning Label Decals/Placards; and in the case of frame engaging lifts,
ALI/LP-GUIDE, Vehicle Lifting Points/Quick Reference Guide for Frame Engaging Lifts.
• Shallestablishprocedurestoperiodicallyinspecttheliftinaccordancewiththeliftmanufacturer’sinstructionsorANSI/
ALI ALOIM-2008, American National Standard for Automotive Lifts-Safety Requirements for Operation, Inspection and
Maintenance; and The Employer Shall ensure that lift inspectors are qualified and that they are adequately trained in the
inspection of the lift.
• Shallestablishprocedurestoperiodicallymaintaintheliftinaccordancewiththeliftmanufacturer’sinstructionsor
ANSI/ALI ALOIM-2008, American National Standard for Automotive Lifts-Safety Requirements for Operation, Inspection
and Maintenance; and The Employer Shall ensure that lift maintenance personnel are qualified and that they are ad-
equately trained in the maintenance of the lift.
• ShallmaintaintheperiodicinspectionandmaintenancerecordsrecommendedbythemanufacturerorANSI/ALI
ALOIM-2008, American National Standard for Automotive Lifts-Safety Requirements for Operation, Inspection and Main-
tenance.
• Shalldisplaytheliftmanufacturer’soperatinginstructions;ALI/SM07-1,ALILiftingitRightsafetymanual;ALI/ST-05ALI
Safety Tips card; ANSI/ALI ALOIM-2008, American National Standard for Automotive Lifts-Safety Requirements for Op-
eration, Inspection and Maintenance; and in the case of frame engaging lifts, ALI/LP-GUIDE, Vehicle Lifting Points/Quick
Reference Guide for Frame Engaging Lifts; in a conspicuous location in the lift area convenient to the operator.
• Shallprovidenecessarylockout/tagoutmeansforenergysourcesperANSIZ244.1-1982(R1993),SafetyRequirementsfor
the Lockout/Tagout of Energy Sources, before beginning any lift repairs.
• Shallnotmodifytheliftinanymannerwithoutthepriorwrittenconsentofthemanufacturer.

7
RF Exposure:
A separation distance of 20 cm or more should be maintained between the antenna of the device and persons during device operation.
To ensure compliance, operations at closer than this distance is not recommended. The antenna used for this transmitter must not be
co-located in conjunction with any other antenna or transmitter.
Notices:
These limits are designed to provide reasonable protection against harmful interference in a residential installation. This equipment
generates, uses and can radiate radio frequency energy and, if not installed and used in accordance with the instructions, may cause
harmful interference to radio communications. However, there is no guarantee that interference will not occur in a particular installa-
tion.
If this equipment does cause interference, which can be determined by turning equipment off and on, the user is encouraged to try to
correct the interference by one or more of the following measures: Increase the separation between the equipment. Connect equip-
ment to outlets on different circuits.

8
Quick Start Operating Instructions
Control Panel Diagram
1. The service area must be clear of all personnel before
the vehicle is positioned.
WARNING
Locate lift on level concrete surface with a
minimum strength of 20.6 MPa.
2. Spotting: Position the vehicle in the location where it is
to be lifted.
Note: See Fig. 2 for the general arrangement of each lift
column.
3. Loading:
Position one column at a lifting wheel location. Position
so that the forks are under the tire and the unit is pushed
in as far as possible, Fig. 3. Ensure fork width is adjusted
to properly accommodate the tire/wheel size. Turn on the
Power Up Switch, Fig. 4.
4. Using the Control Panel and the bus diagram as a
reference (see graphic above), press the Activate Column
Button relative to the location where the column was just
placed. The column will show Green when activated.
5. Position next column at second wheel using loading
instructions from step 3.
6. Turn on second column. Again, using the Control Panel
and the bus diagram as a reference, press the Activate
Lift Button relative to the location of the second column.
The lift will show Green when activated. The first lift you
activated should now be flashing yellow on your control
panel.
7. Repeat step 5 thru 7 for remaining columns. When
the entire system of columns is complete, press the
System Configuration Lock/Unlock button to lock the lift
configuration for operation.
Lights on/off
(Optional Accessory)
Activate Column Buttons
(8 Total) Turns Red On
One Column When Max
Height Is Reached
Lower To Locks
Height Limit Setting
Battery Charge Indicator
System Configuration
Lock/Unlock
Single/Pair/All Mode
E-Stop
Raise
Lower
Slow Lower
Yellow, Green, Red
Activation LED’s
(8 Total)
Depress To Clear
Error Codes
Data Information
Display and Buttons

9
Fig. 3
Fig. 4
Fig. 2
Power Up
Switch

10
WARNING
Before attempting to lift any vehicle, be
sure that:
A. Vehicle individual axle weight does not exceed two lift
columns combined capacity.
B. Lift forks are in secure contact with vehicle tires.
C. Adequate overhead clearance is provided to raise
vehicle to desired height.
D. Parking brake is released on vehicle.
E. Adjustable forks must be equally spaced off centerline
of lift carriage, and adjusted to properly accommodate
the tire/wheel size.
F. Ensure tires are properly inflated before lifting. DO NOT
exceed tire load rating when raising vehicle.
9. To Raise Lift:
A. Ensuring that the System Configuration Lock/Unlock
light is green, press the Raise Button. Raise the vehicle
until vehicle tires clear the floor.
Check Fork Contact: Stop and check for secure fork contact
with tires, at all columns.
B. Continue to raise the vehicle to desired height.
NOTE: While cycling the lift, you may observe the individual
columns slowing down and speeding up at various stages
of travel. This is a normal characteristic of the lift leveling
system.
Do Not go under vehicle unless all tires are in secure
contact with forks. Lower lift and repeat vehicle and/or lift
spotting and loading procedure if required.
C. Press the Lower To Locks Button to lower columns onto
the locking latches.
10. While Using Lift: Avoid excessive rocking of vehicle
while on the lift.
11. Before Lowering Lift: Remove tool trays, safety stands,
etc. from area.
10.To Lower Lift:
A. Ensuring that the System Configuration Lock/Unlock
light is green, press the Raise Button to raise lifts off the
locks.
B. Press the Lower Button to lower lift. The Slow Lower
Button (1/3 speed) can be used if desired. Observe that
all columns are lowering and vehicle remains level.
C. Remain clear of forks and vehicle when lowering.
Observe pinch point WARNING decals.
D. Reset the parking brake.
E. Move all lift units away from the vehicle to provide an
unobstructed exit before removing the vehicle.
• Duringloweringoflifts,ensurethatvehicledoesnot
move into an inclined position.
• Lowercolumnsequally.
• Removetooltrays,safetystands,etc.fromarea.
• Remainclearofforksandvehiclewhenlowering.
NOTE: In the event batteries become fully discharged, plug
the columns into electrical outlet for approximately 30
minutes to achieve adequate charge for one operation
cycle. Length may vary based on battery type,
condition, etc.
A. Remove M8 BHCS and open Power Unit Cover. Pull
lock open. Pull the Manual Lowering Valve Button and
the carriage will begin lowering.
C. If lift is on locks, slightly lift carriage until lock is free.
D. Lower each carriage a small increment at a time
keeping the vehicle level.
E. Release the Manual Lowering Valve Button and the
downward movement will stop.
F. After lowering is finished, close and re-install M8 BHCS
in Power Unit Cover.
G. If lift is not operating properly, Do Not use until
operation is corrected or repairs are made by qualified
lift service personnel.
Emergency (no power) Lowering:
Pull To
Release
Lock
NOTE: Top cover not shown for clarity.
Manual Lowering
Valve

11
A. The configuration will not lock if there is not an
acceptable pairing of columns. Columns must be paired
left/right directly across from one another.
B. In a locked system, pressing the button next to a column
on the control panel will toggle the LED between active and
inactive states. Active columns are represented as solid
green, and inactive columns are represented by blinking
yellow. A column will not respond to motion commands
when inactive.
Note: The system must be raised and lowered from an
active column.
C. In a locked system, the Single/Pair/All Mode Button may
also be used to quickly activate and deactivate selected
combinations of columns. Pressing the Single/Pair/All
Mode Button will toggle through single column mode,
column pair mode, and all columns mode.
D. Column LED Indication – Summary of column LED’s:
Green – indicates a column ready for motion.
Yellow blink – indicates an inactive column, which does not
respond to motion commands until activated.
Red fast flash– indicates a column with an error.
Operating Instruction Details/Options
Changing the System Configuration
Columns may only be added to, or removed from, a system
by unlocking the existing configuration and then configuring
the additional columns as described above. To unlock the
configuration press the System Configuration Lock/Unlock
Button. Upon pressing the System Configuration Lock/
Unlock Button the Green Lock/Unlock LED will go dark and
the configuration will unlock. At this time, columns may
be safely turned off and removed, and/or replacement or
additional columns may be assigned by the same procedure
for adding columns as outlined above.
Height Limit Setting
The Height Limit Setting is a user setable stop to limit height
travel.
A. To memorize a height stop: Raise all columns to the
desired height position. Hold down the Height Limit Setting
Button until it begins flashing. Flashing indicates that the
height setting has been memorized.
B. Once a height stop has been memorized, press the
Height Limit Setting Button to turn the stop on and off.
When turned on, the system will stop whenever any column
reaches the memorized height stop.

12
Battery Charging
1. Battery chargers can be plugged in nearly continuously or
as needed. Life of the battery can be prolonged if the batteries
are charged regularly (for example, after every use), and not
allowed to be fully discharged.
2. The supplied battery charger is intended for use with any
type lead acid battery, including conventional maintenance
free, deep cycle, gelled-type, valve regulated batteries
.
3. When batteries are not being charged, the front panel
indicator can be used to determine the battery charge level.
On the front panel, a yellow light indicates that the battery
is partly discharged and should be recharged. A red light
indicates that you are near the end of the battery capacity and
may not have enough energy left to complete a fully loaded lift
cycle; the batteries must be recharged. When the batteries
are being charged, the lights on the battery charger will
indicate whether the battery is being charged (yellow light) or
has reached full charge (green light).
4. Charge time will vary depending on the amount of energy
that was discharged. A fully discharged battery will need to
be recharged overnight to be fully restored. However, if a
single lift is required, a short charge time (such as 30 minutes)
should restore the batteries enough for a fully loaded lift cycle.
5. Battery performance will vary depending on the brand
of battery selected, the battery specifications, how well the
batteries are maintained, and the age of the batteries.
Safety Information
IMPORTANT SAFETY INSTRUCTIONS
KEEP THESE INSTRUCTIONS!
The battery charger is a powerful electrical device. If
incorrectly installed, configured or operated, the battery
charger can damage batteries and/or electrical equipment.
Please read thoroughly the instructions and safety information
contained in this manual before operating the battery charger
or lift.
RISK OF EXPLOSIVE GASES
WORKING IN THE VICINITY OF A LEAD ACID BATTERY IS
DANGEROUS. BATTERIES CONTAIN SULFURIC ACID AND
PRODUCE EXPLOSIVE GASES. A BATTERY EXPLOSION
COULD RESULT IN LOSS OF EYESIGHT OR SERIOUS BURNS.
FOR THIS REASON, IT IS OF UTMOST IMPORTANCE THAT
YOU FOLLOW THE INSTRUCTIONS EACH TIME YOU USE
THE CHARGER.
TO REDUCE THE RISK OF BATTERY EXPLOSION, FOLLOW
THESE INSTRUCTIONS AND THOSE PUBLISHED BY THE
BATTERY MANUFACTURER FOR ANY EQUIPMENT YOU
INTEND TO USE IN THE VICINITY OF THE BATTERY. REVIEW
CAUTIONARY MARKINGS ON THESE PRODUCTS AND
ON ENGINE, MOTOR OR OTHER EQUIPMENT REQUIRING
BATTERY USAGE.
Refer to manual, it contains important safety and operating
instructions applicable to the safe and efficient use of your
battery charger. To reduce risk of damage to electric plug or
cord, pull by the plug rather than the cord when disconnecting
the battery charger.
An extension cord should not be used unless absolutely
necessary. Use of improper extension cord could result in a
risk of fire or electric shock. If extension cord must be used,
make sure:
a) That pins of plug of the extension cord are the same
number, size and shape of those of the plug on the battery
charger;
b) That extension cord is properly wired and in good
electrical condition;
c) That wire in extension cord is proper size as follows:
Minimum recommended wire size for various length
extension cords used with each battery charger:
Length of Cord in meters 7.5 15 30
Cross Section (mm^2) 1.3 2.5 4.0
Do not operate the battery charger with a damaged cord or
plug.
Do not operate the battery charger if it has received a sharp
blow, been dropped or otherwise damaged in any way.
Do not disassemble the charger. Incorrect reassembly may
result in a risk of electric shock or fire.
To reduce the risk of electric shock, unplug the charger
from outlet before attempting any maintenance or cleaning.
Disconnecting the leads will not reduce this risk.
To reduce the risk of shock or spark, never touch the ring
terminals together while the charger is plugged into an outlet
or extension cord.
External connections to the battery charger shall comply with
all local, state, and federal regulations.
WARNING

13
Maintenance Instructions
WARNING
If you are not completely familiar with
automotive lift maintenance procedures Stop: contact
factory for instructions.
To Avoid Personal Injury: Permit only qualified personnel to
perform maintenance on this equipment.
• Neveroverloadlift.Seecapacitynameplate.
• Neverdirectwaterstreamatcontrolboxorcable
connections.
• NeverplacesharpobjectsonCommunicationCablesor
drive over cables.
• Alwayskeeplockinglatchfree.
• Alwayskeepallboltstight.
• Alwayskeepliftandliftareaclean.
• Daily
1. Check locking latch for signs of wear. Make sure latch
operates freely.
2. Check for oil leakage.
3. Review all cables and cable connections for damage.
4. Check forks and carriage for damage.
• Monthly:CheckEmergencyStop:Pushthe“Emergency
Stop” button. Columns should be inoperative with any
emergency stop button depressed.
• MonthlyLubrication
1. Lower lift, check oil level in oil tanks on each column:
Open Power Unit Cover. If necessary, add ISOAW32
hydraulic oil, until it reaches the full mark on the tank.
2. Oil the bushings on the jack handle and brake
mechanism assembly.
• Monthly:ExamineCords:Checktheconditionofthe
charging cord and the communication cords on each
column. Replace worn or broken cords as required.
• Every2Years:ChangeFluid:
1. Columns must be completely lowered.
2. Remove cover panel from power unit.
3. Remove oil from power unit tank.
4. Refill with approximately 11.5 liters of hydraulic oil
meeting ISOAW32 specifications, into each tank.
5. Check oil level in oil tanks on each column, add if
necessary.
6. Dispose of waste oil according to legal regulations.

14
TROUBLE SHOOTING
Code Description Troubleshooting steps
E0 CPU error Theprocessorhasdetectedanerror.Press“x”toclear.Iftheproblemcontinues,call
for service.
E1 Improper configuration The column has not been assigned a position, and is connected to a locked system.
Press“x”toclear.Toaddthecolumntothesystem,rstpowerdownthecolumn,
and then unlock the system. Power up the column, assign a position, then re-lock the
system.
E2 Improper column pairing Unless a column is run by itself in single mode, it must be selected and moved with it’s
pairingcolumn.Press“x”toclear.
E3 Communication Error 1) Check for a loosened or unhooked communication cable. Reattach the cable and
press“x”toclear.
2) Check for a powered down column. If one column has been powered down, the
other columns must be powered down to re-initialize the system.
E4 Out of Level One or more columns in the system can not maintain level synchronization
1) Ensure that no columns are hung up on the safety locks
2) Check battery power
3) Check for overloading
Press“x”toclear.Individuallymoveeachcolumnbackintoalevelposition.Onceall
the columns are level, they may be moved as a group.
E5 Emergency Stop To restore operation, clear the emergency stop button at the indicated column.
E6 Potentiometer Error An error has occurred with the string potentiometer, and synchronization can no longer
be guaranteed. Follow manual lowering procedures.
E7 Short circuit detected Ashorthasbeendetectedintheliftactuators.Press“x”toclear.Todeterminethe
faulty component, run the faulty column by itself. Press the buttons below in exact
order until the error is generated:
1) Up button (Error? Check/replace contactor)
2) Slow lower (Error? Check/replace small lowering valve)
3) Lower to locks (Error? Check/replace large lowering valve)
4) Down button (Error? Check/replace lock solenoid)
E8 Software mismatch Power down and disconnect the column from the system. Load the column with the
newest software code. To check the revision level of the software, insert a service
card.Revisionlevelisindicatedintheservicemenusas“r__”.
E9 Stuck Key A stuck keypad button or motion push button has been detected on startup, or a motion
push button has been held on for longer than 2-1/2 minutes.
CL Communication Loss Communication between columns has been lost temporarily during operation. Re-try
operation after release of button.
Display Unresponsive Turn off power and check wire connections on the display board for the keypad, the
push buttons, and the control board. Restart power and test.
Slow To Rise Overloaded, check battery and connections, dirt, debris, in oil system.
Lift Drifts Down Dirt, Debris, in oil system.
Receive Signal Strength Indicator (RSSI) (Inside Control Panel)
Each transceiver has 3 green LED’s near the serial port labeled (RSSI). When operating, these LED’s should all be on. If they are not
all on this indicates a poor signal do to a transceiver failure or antenna/ antenna cable problem.

15
Purpose
This procedure establishes the minimum requirements for the lockout of energy that could cause injury to personnel by the
operation of lifts in need of repair or being serviced. All employees shall comply with this procedure.
Responsibility
The responsibility for assuring that this procedure is followed is binding upon all employees and service personnel from
outside service companies (i.e., Authorized Installers, contactors, etc.). All employees shall be instructed in the safety
significance of the lockout procedure by the facility owner/manager. Each new or transferred employee along with visiting
outside service personnel shall be instructed by the owner/manager (or assigned designee) in the purpose and use of the
lockout procedure.
Preparation
Employees authorized to perform lockout shall ensure that the appropriate energy isolating device (i.e., circuit breaker,
fuse, disconnect, etc.) is identified for the lift being locked out. Other such devices for other equipment may be located
in close proximity of the appropriate energy isolating device. If the identity of the device is in question, see the shop
supervisor for resolution. Assure that proper authorization is received prior to performing the lockout procedure.
Sequence of Lockout Procedure
1) Notify all affected employees that a lockout is being performed and the reason for it.
2) Unloadthesubjectlift.Shutitdownandassurethedisconnectswitchis“OFF”ifoneisprovidedonthelift.
3) The authorized lockout person operates the main energy isolation device removing power to the subject lift.
• Ifthisisalockabledevice,theauthorizedlockoutpersonplacestheassignedpadlockonthedeviceto
prevent its unintentional reactivation. An appropriate tag is applied stating the person’s name, at least 3”
x 6” in size, an easily noticeably color, and states not to operate device or remove tag.
• Ifthisdeviceisanon-lockablecircuitbreakerorfuse,replacewitha“dummy”deviceandtagit
appropriately as mentioned above.
4) Attempttooperatelifttoassurethelockoutisworking.Besuretoreturnanyswitchestothe“OFF”position.
5) The equipment is now locked out and ready for the required maintenance or service.
Restoring Equipment to Service
1) Assure the work on the lift is complete and the area is clear of tools, vehicles, and personnel.
2) At this point, the authorized person can remove the lock (or dummy circuit breaker or fuse) & tag and activate
the energy isolating device so that the lift may again be placed into operation.
Rules for Using Lockout Procedure
Use the Lockout Procedure whenever the lift is being repaired or serviced, waiting for repair when current operation could
cause possible injury to personnel, or for any other situation when unintentional operation could injure personnel. No
attempt shall be made to operate the lift when the energy isolating device is locked out.
LIFT LOCKOUT/TAGOUT PROCEDURE
Lift is not intended for outdoor use and has an operating ambient temperature range of 5º-40ºC.
OPERATING CONDITIONS

16
Software Update/Service Card Instructions
Wireless Operation
Software Updates:
To install a software update:
1) Power down the column by turning off the disconnect switch.
2) Open the control panel door using 11mm socket wrench.
3) Place the software update card into the memory card slot on the control board.
4) Flip switch down to wireless.
5) Turn power on.
6) Select from one of 32 system numbers by cycling up and down and pressing enter on the desired channel.
7) Keep in mind that all the columns in a set must have the same channel selected.
8) Press a “Select Column Button” on one of the columns.
Note: A solid green light should come on in that position. Notice the amber light is blinking on other columns already
programmed.
9) Press a “Select Column Button” on the remaining columns in that set.
Note: Don’t press the buttons where there’s an amber light. The amber light signifies that another column in that set has
taken that position.
10) Once the set of columns are configured in a safe (read the safety guidelines included) and desired manner, press the
lock button.
11) Remove software update card, and close control panel door.
In order to change the channel:
1) Turn on or unlock the column set. When powered up or unlocked, the system number should be displayed on the
menuscreen(e.g.“S1”).
2) Press the key on the menu pad. The system number should then start blinking.
Note: Columns may be added or subtracted when the system is unlocked. Once locked, no columns can be removed, and
no outside columns can be added in or control the locked system. Any column that is set to a system number that is
alreadybeingusedbyalockedsystemwilldisplayan“E1”error.Alwayscheckthecolumndisplaybeforelocking.If
extra columns appear, press the emergency stop and determine the location of the extra columns. Move them
to a different system number before locking the system.
3) Use the up and down buttons to scroll through the system numbers.
4) Press enter once the desired system number is selected
5) You must do this for every column in the set ensuring that all the columns have the same system number selected.
6) Once the same system number is chosen, operate the column as normal.

17
Software Menus:
Service menus can be accessed when a service card is placed in the memory card slot.
Menus are displayed on the menu screen and can be scrolled using the up, down, enter, and cancel keys.
Menu Item Menu Selections Description
[Height] Shows current column height (default menu for locked columns)
H
HC Clear max. height setting
HS Set max. height setting
P
PC Clear pot calibration
PS Set pot calibration
C
C0 Configuration recall - turn off
C1 Configuration recall - turn on
b
b0 Lowering Beeper - turn off
b1 Lowering Beeper - turn on
U
UUS Height display units - US (in)
USI Height display units -metric (cm)
rXX
Software revision level XX indicated revision number
H: Selecting HSsetsthemaximumheightsetting.Raisethecolumntothedesiredheightanddepress“ “onceto
set the value.
In operation the column that reaches its maximum height first stops all columns in the system. Selecting HC clears the maxi-
mum height setting.
Depress“ ” once to clear the Max Height Value. The Maximum Height will default to the Stoke Limit Height until a
new Maximum Height is set.
P: Selecting PCclearsthefullcylinderstrokelimitsetting.Depress“ ” once to clear the value.
Selecting PS sets the stroke limit and height display calibration.
C: C1 (Save/Recall Config at Power Off) of C0 (Erase Config at Power Off). Depress“ “oncetoselectandreturn.
If turned on, upon power-up, the column will recall it’s previous column configuration / position assignment.
b: b1 (Beeper ON) or b0 (Beeper Off). Depress“ ” once to select. Lowering Beeper function will be active or
suppressed accordingly.
U: UUS (Display height in inches) or USI (Display height in centimeters). Depress“ ” once to select.

18
COLUMN WIRING DIAGRAM
NP1040 Rev. B
/