MeldaProduction MPowerSynth User manual
- Category
- Software
- Type
- User manual


Installation
All MeldaProduction plugins are currently available for Windows and Mac OS X operating
systems, both 32-bit and 64-bit versions. You can download all software directly from our
website. Since the installation procedures for the two operating systems are quite different, we
will cover each one separately.
The download files for the effects include all the effects plug-ins and MPowerSynth. During the
installation process you can select which plug-ins or bundles to install. If you have not licensed
all of the plugins in a bundle then you just need to activate each plugin separately.
If you have multiple user accounts on your computer, always install the software under your
own account! If you install it under one account and run it under a different one, it may not
have access to all the resources (presets for example) or may not even be able to start.
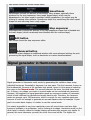
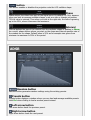
Installation on Windows
All plugins are available for VST, VST3 and AAX interfaces. The installer automatically installs
both the 32-bit and 64-bit versions of the plugins.
Note: Always use 32-bit plugins in 32-bit hosts, or 64-bit plugins in 64-bit hosts.
64-bit plugins cannot work in 32-bit hosts even if the operating system is 64-bit.
Conversely, never use 32-bit plugins in 64-bit hosts. Otherwise they would have to
be 'bridged' and, in some hosts, can become highly unstable.
You can select the destination VST plugins paths on your system. The installer will try to
detect your path, however you should check that the correct path has been selected and
change it if necessary. In all cases it is highly recommended to use the current standard paths
to avoid any installation issues:
32-bit Windows:
C:\Program files\VstPlugins
64-bit Windows:
C:\Program files (x86)\VstPlugins
(for 32-bit plugins)
C:\Program files\VstPlugins
(for 64-bit plugins)
If your host provides both VST and VST3 interfaces, VST3 is usually preferable. If a plugin
cannot be opened in your host, ensure the plugin file exists in your VST plugin path and that if
your host is 32-bit, the plugin is also 32-bit, and vice versa. If you experience any issues,
contact our support via info@meldaproduction.com
Installation on Mac OS X
All plugins are available for VST, VST3, AU and AAX interfaces. Installers create both 32-bit
and 64-bit versions of the plugins.
If your host provides multiple plugin interface options, VST3 is usually preferable. If you
experience any issues, contact our support via info@meldaproduction.com

Most major hosts such as Cubase or Logic should work without problems. In some other hosts
the keyboard input may be partly non-functional. In that case you need to use the virtual
keyboard available for every text input field. You may also experience various minor graphical
glitches, especially during resizing plugin windows. This unfortunately cannot be avoided since
it is caused by disorder in Mac OS X.
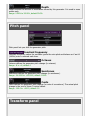
Uninstallation on Windows
The Uninstaller is available from the Start menu and Control panel, in the same way as for
other applications. If you don't have any of these for any reason, go to Program files /
MeldaProduction / MAudioPlugins and run setup.exe.
Uninstallation on OSX
The Uninstaller is available from Applications / MeldaProduction / MAudioPlugins / setup.app.
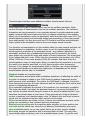
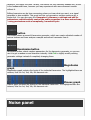
Performance precautions
In order to maximize performance of your computer and minimize CPU usage it is necessary to
follow a few precautions. The most important thing is to keep your buffer sizes (latency) as
high as possible. There is generally no reason to use latency under 256 samples for 44kHz
sampling rates (hence 512 for 96kHz etc.). Increasing buffer sizes (hence also latency) highly
decreases required CPU power. In rare cases increasing buffer sizes may actually increase CPU
power, in which case you can assume your audio interface driver is malfunctioning.
You should also consider using only necessary features. Usually the most CPU demanding
features are upsampling and modulation of certain parameters. You can reduce modulation
CPU usage at the cost of lower audio quality in Settings/Settings/Modulator protection.
Troubleshooting
The plugins are generally very stable, there are known problems however.
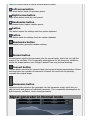
GPU compatibility
The software uses hardware acceleration to move some of the processing (mainly GUI
related) from your CPU (processor) to your GPU (graphics processing unit). It is highly
recommended to use a new GPU, as it will provide higher performance improvements, and
update your GPU drivers. Older GPUs are slower and may not even provide required features,
so the software will have to perform all calculations in the main CPU. We also have had
extremely bad experiences with GPUs from ATI and despite the fact that software is now
probably bulletproof, it is recommended to use NVidia GPUs as there has not been a single
case of a problem with them.

If you experience problems with your GPU (crashing, blank/dysfunctional GUI), and that you
cannot disable the GPU acceleration from the plugin's Settings window itself, download this
file:
http://www.meldaproduction.com/download/GPU.zip
And place the GPU.xml included in the zip into
Windows: C:\Users\{username}\AppData\Roaming\MeldaProduction
Mac OS X: ~/Library/Application support/MeldaProduction
Memory limits of 32-bit platform
Most hosts are now 64-bit ready, however some of them are not or users willingly choose 32-
bit edition, because the required plugins are not 64-bit ready yet. All our software is 64-bit
ready. Please note that you must NOT use the 64-bit plugins in 32-bit hosts, even if you have
a bridge. If you are stuck with a 32-bit host for any reason, note that there is a memory limit
(about 1.5 GB), which you may not exceed. This can happen if you load too many samples or
different plugins for example. In that case the host may crash. There is no other solution than
to use a 64-bit host.
Updating
You can use "Home/Check for updates" feature in any of the plugins. This will check online if
there is a newer version available and open the download page if necessary.
To install a newer (or even older) version you simply need to download the newest installer
and use it. There is no need to uninstall the previous version, the installer will do that if
necessary. You also do not need to worry about your presets when using the installer. Of
course, frequent backup of your work is recommended as usual.
Using touch-screen displays
Touch screen displays are supported on Windows 8 and newer and the GUI has been tweaked
to provide a good workflow. Up to 16 connections/fingers/inputs are supported. Any input
device such as touch-screens, mouse, tablets are supported. These are the main gestures
used by the plugins:
- Tap = left click
- Double tap = double click
- Tap & hold and quickly tap next to it with another finger = right click. Tap & hold is a classic
right-click gesture, however that doesn't provide a good workflow, so came up with this
method, which is much faster and does not collide with functionality of some elements.
Purchasing and activation

You can purchase the plugin from our website or any reseller, however purchasing directly
from our website is always the quickest and simplest option. The software is available online
only, purchasing is automatic, easy and instant. After the purchase you will immediately
receive a keyfile via email. If you do not receive an e-mail within a few minutes after your
purchase, firstly check your spam folder and if the email is not present there, contact our
support team using info@meldaproduction.com so we can send you the licence again.
To activate the software simply drag & drop the licence file onto the plugin.
Unfortunately some hosts (especially on Mac OS X) either do not allow drag & drop, or make it
just too clumsy, so you can use Home/Activate in any of the plugins and follow the
instructions. For more information about activation please check the online video tutorial.
You are allowed to use the software on all your machines, but only you are allowed to operate
the software. The licences are "to-person" as defined in the licence terms, therefore you can
use the software on all your computers, but you are the only person allowed to operate them.
MeldaProduction can provide a specialized licence for facilities such as schools with different
licence terms.
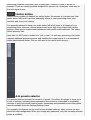
Quick start with your host
In most cases your host will be able to recognize the plugin and be able to open it the same
way as it opens other plugins. If it doesn't, ensure you did installation properly as described
above and let your host rescan the plugins.
Cubase
Click on an empty slot (in mixer or in track inserts for example) and a menu with available
plugins will be displayed. VST2 version is located in MeldaProduction subfolder. However VST3
version is recommended and is located in the correct folder along with Cubase's factory
plugins. For example, dynamic processors are available from the "Dynamics" subfolder.
To route an audio to the plugin's side-chain (if it has one), you need to use the VST3
version. Enable the side-chain using the arrow button in the Cubase's plugin window title.
Then you can route any set of tracks into the plugin's side-chain either by selecting the plugin
as the track output or using sends.
To route MIDI to the plugin, simply create a new MIDI track and select the plugin as its
output.
Logic
Choose an empty insert slot on one of your audio tracks (or instrument tracks for example)
and select the plugin from the popup menu. You will find it in the Audio Units /
MeldaProduction folder.
To route an audio to the plugin's side-chain (if it has one), a side-chain source should be
available in the top of the plugin's window, so simply select the source track you want to send
to the plugin's side-chain.

To route MIDI to the plugin, you need to create a new Instrument track, click on the
instrument slot and select the plugin from AU MIDI-controlled Effects / MeldaProduction. The
plugin will receive MIDI from that track. Then route the audio you want to process with the
plugin to this track.
Studio One
Find the plugin in the Effects list and drag & drop it onto the track you would like to insert the
plugin to.
To route an audio track to the plugin's side-chain (if it has one), first enable the side-chain
using the "Side-chain" button in the Studio One's plugin window title. Then you can route any
set of tracks into the plugin's side-chain from the mixer.
To route MIDI to the plugin, simply create a new MIDI track and select the plugin as its
output.
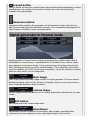
Digital performer
In the Mixing Board, find an empty slot in the track you would like to insert the plugin to. Click
on the field and select the plugin from the effects list.
To route an audio track to the plugin's side-chain (if it has one), choose the track you want
to send using Side-chain menu, which appears at the top of the DP's plugin window.
To route MIDI to the plugin, simply create a new MIDI track in the Track view and select the
plugin as its output.
Reaper
Click on an empty slot in the mixer and a window with available plugins will be displayed.
Select the plugin you want to open by double clicking on it or using Ok button.
It is highly recommended to select all MeldaProduction plugins in the plugin window the first
time you open it, click using your right mouse button and enable "Save minimal undo states".
This will disable the problematic Undo feature, which could cause glitches whenever you
change certain parameters.
To route an audio track to the plugin's side-chain (if it has one), click on I/O button of the
side-chain source track in the mixer. Routing window will appear, there you click "Add new
send" and select the track the plugin is on. In the created send slot select the channels (after
the "=>" mark) for the send, in stereo configuration 3/4 for example. Note that this way the
whole track receives the side-chain signal and all plugins with it. It is possible to send it to a
single plugin only, but it is more complicated, please check the Reaper's documentation about
that.
To route MIDI to the plugin, create a new MIDI track and do the same thing as with side-
chain, except you don't need to change output channels.
Live
In Session view, select the track you would like to insert the plugin to. At the left top of

Ableton Live's interface, click on the Plug-in Device Browser icon (third icon from the top).
From the plug-ins list choose the plugin (from MeldaProduction folder), double click on it or
drag & drop it into the track.
The X/Y grid usually doesn't provide any parameters of the plugin. This is because the plugins
have too many of them, so you have to select them manually. Check Live's documentation for
more information.
To route an audio to the plugin's side-chain (if it has one), select the track you want to send
to the side-chain and in the 'Audio To' menu, choose the audio track that has the plugin on it.
Then in the box just below that select the plugin from the menu.
NOTE: Live does NOT support any interface correctly, it doesn't use the reported buses
properly, hence it doesn't work with surround capable plugins. Therefore you need to use VST
version, which reports only stereo capabilities by default.
To route MIDI to the plugin, create a new MIDI track and in the 'MIDI to' menu, choose the
audio track that has the plugin on it. Note that in Live only the first plug-in on any track can
receive MIDI.
ProTools
In the mixer click an empty slot to insert the plugin to and select the plugin from the tree. The
plugin may be present multiple times, once for each channel configuration (mono->stereo
etc.). As of now ProTools do not arrange them in the subfolders, which is a workflow
dealbreaker, but we cannot do anything about it. The huge empty space on top of each plugin
window, which occupies so much of the precious display area, is part of ProTools and every
plugin window and again we cannot do anything about it. In some cases you may experience
CPU overload messages, in which case please contact Avid for support. Note that ProTools 10
and newer is supported. RTAS compatibility for PT9 and older will never be added.
To route an audio to the plugin's side-chain (if it has one), open the plugin, click on the
No
key input
button in the plugin title and select the bus you want the audio taken from. You
might need to remember the bus number, unless your ProTools version supports bus
renaming. ProTools doesn't support stereo (or surround) side-chains at all.
To route MIDI to the plugin, create a new MIDI track and in the mixer click the output field
for that track and select the plugin, which should already be in the menu.
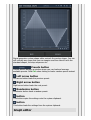
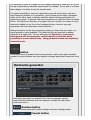
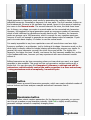
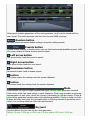
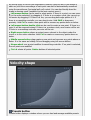
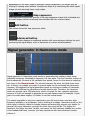
GUI styles, editor modes and colors
MeldaProduction plugins provide a state of the art styling engine, which lets you change the
appearance to your liking. The first time you run the plugins a style wizard will appear and let
you choose the style and other settings. It may not be available in ProTools and other
problematic hosts.
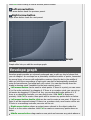
By default each plugin has a certain color scheme, which differs based on what kind of plugin
is that. Also, sections of some plugins are colorized differently, again, based on what kind of
section is that (this can be disabled in global settings). Despite you can change the colors
anyhow you want, it is advantageous to keep the defaults as these are standardized and have
predefined meaning, so just by looking at a plugin's color you can immediately say what kind
of plugin and section is that. Same rules apply when designing active presets for easy screens.

This is the current set of colors:
Dynamics = orange
Equalization, filtering = green
Reverb, delay = brown/yellow
Modulation = blue
Distortion, limiting = red
Stereo = cyan/yellow
Time, pitch, unison... = purple/pink
Tools = grey
Special colors:
Synchronization = grey
Detection = blue/green
Side-chain = green
Effects = red
Advanced stuff = grey

MeldaProduction
MPowerSynth
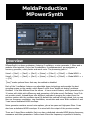
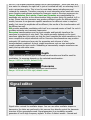
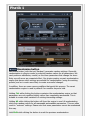
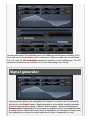
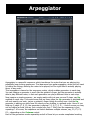
Overview
MPowerSynth is a deep synthesizer, featuring 3 oscillators, a noise generator, 2 filters and a
modular effect pipeline. It also has 8 modulators, 8 multiparameters, an arpeggiator, a
harmony generator, safety limiter and much more. The processing path is:
Voice1 = [Osc1] -> [Osc2] -> [Osc3] -> [Noise] -> [Filter1] -> [Filter2] -> Global ADSR ->
Voice2 = [Osc1] -> [Osc2] -> [Osc3] -> [Noise] -> [Filter1] -> [Filter2] -> Global ADSR -> +
-> [FX]
...
"[xxx]" marks optional items that may be enabled or disabled.
Each of the 3 oscillators features our adjustable shape technology and provides the best
sounding engine on the market, which doesn't suffer from "digital not analog" problems.
Oscillator 1 is a little different from the others - it has a unison feature, which generates up to
10 voices with slight pitch differences and generates a full wide sound. Oscillators 2 and 3 do
not provide unison, instead these offer different methods of merging the output from the
previous section with the oscillator signal. By default the method is simply mixed, but you can
also use frequency modulation, ring modulation, convolution and more. Both oscillators 2 and
3 can have a dedicated ADSR envelope.
Noise generator contains several noise options, plus a low-pass and high-pass filters. It can
also have a dedicated ADSR envelope. It is mixed with the output of the previous section.
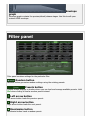
There are 2 deep filters available. Each one has a dedicated extended ADSR driving frequency,
resonance and other parameters. Unlike classic filters the frequency is specified in octaves;

that is a shift from the note frequency. So for example, if the note frequency is 100Hz and the
frequency setting is +1 octave, then the central frequency of the filter is 200Hz, one octave
higher than the note pitch.
There are more than 100 filter types available - classic LP/HP/BP/notch filters with slopes up to
120dB/octave, peak/shelf, harmonics, sub-X and other combined filters, format, comb/diffuser
and polymorph filters. Most of them are pretty unique. The CPU consumption of different filters
varies a lot; the most CPU-demanding ones are high-slope LP/HP/BP/notch filters, combined
filters, diffusers and polymorph filters.
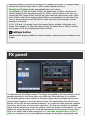
FX section presents the most advanced modular effect engine on the market, featuring more
or less all our high-quality effects in a modular system. The engine is processing the output of
all voices mixed together, so you don't need to worry about CPU that much anymore.
Parameters of the effects loaded into the modular system cannot be automated, simply
because you never know which effects that you will be using. However you can use
modulators and multiparameters to control them, so if you need to automate any of them, you
can just attach a multiparameter to that individual parameter and automate the
multiparameter instead.
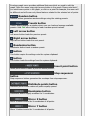
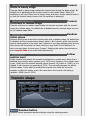
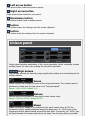
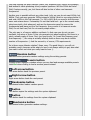
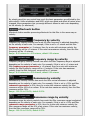
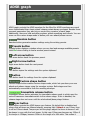
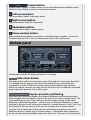
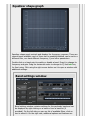
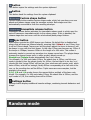
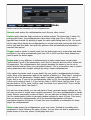
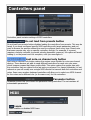
Randomize button
Randomize button (with the text 'Random') generates random settings. Generally,
randomization in plug-ins works by selecting random values for all parameters, but rarely
achieves satisfactory results, as the more parameters that change the more likely one will
cause an unwanted effect. Our plugins employ a smart randomization engine that learns
which settings are suitable for randomization (using the existing presets) and so is much more
likely to create successful changes.
In addition, there are some mouse modifiers that assist this process. The smart randomization
engine is used by default if no modifier keys are held.
Holding Ctrl while clicking the button constrains the randomization engine so that parameters
are only modified slightly rather than completely randomized. This is suitable to create small
variations of existing interesting settings.
Holding Alt while clicking the button will force the engine to use full randomization, which sets
random values for all reasonable automatable parameters. This can often result in "extreme"
settings. Please note that some parameters cannot be randomized this way.
Hold Shift while clicking the button to undo the previous randomization.
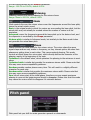
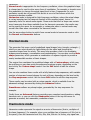
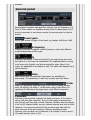
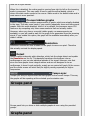
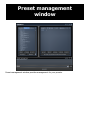
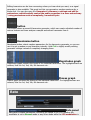
Presets button
Presets button shows a window with all available presets. A preset can be loaded from the
preset window by double-clicking on it, using the arrow buttons or by using a combination of
the arrow keys and Enter on your keyboard. You can also manage the directory structure,
store new presets, replace existing ones etc. Presets are global, so a preset saved from one
project, can easily be used in another.
Holding Ctrl while pressing the button loads an existing preset, selected at random.
Presets can be backed up by using either the Export button, or by saving the actual preset
files, which are found in the following directories:
Windows: C:\Users\{username}\AppData\Roaming\MeldaProduction

Mac OS X: ~/Library/Application support/MeldaProduction
Exported preset files can be loaded into the plug-in's preset store using the Import button. Or
the preset files themselves can be copied into the directories named above.
Files are named based on the name of the plugin in this format: "{pluginname}presets.xml",
for example: MAutopanpresets.xml or MDynamicspresets.xml. If the directory cannot be found
on your computer for some reason, you can just search for the particular file.
The plugin also supports an online preset exchange. If the computer is connected to the
internet, the plugin connects to our server once a week, submits your presets and downloads
new ones, if available. This central preset library is maintained manually in order to validate
submitted presets and remove generally unusable presets. It may take some time before any
newly-submitted presets become available. This feature relies on each user, so we strongly
advise that any submitted presets be named and organised in the same way as the factory
presets, otherwise they will be removed.
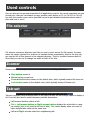
Left arrow button
Left arrow button loads the previous preset.
Right arrow button
Right arrow button loads the next preset.
Randomize button
Randomize button loads a random preset.
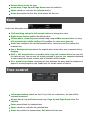
Sound button
Sound button generates a note for the synthesizer to play. One click produces a note-on, the
next one is a note-off. This can be useful to audition the current settings without using a MIDI
keyboard or any other MIDI source to control the instrument.
button
This button resets the plugin state. You can use it to force the plugin to report latency to the
host again and to avoid any audio problems.
For example, some plugins, having a look-ahead feature, report the size of the look-ahead
delay as latency, but it is inconvenient to do that every time the look-ahead changes as it
usually causes the playback to stop. After you tweak the latency to the correct value, just click
this button to sync the track in time with the others, minimizing phasing artifacts caused by
the look-ahead delay mixing with undelayed audio signals in your host. It may also be
necessary to restart playback in your host.
Another example is if some malfunctioning plugin generates extremely high values for the
input of this plugin. A potential filter may start generating very high values as well and as a
result the playback will stop. You can just click this button to reset the plugin and the playback
will start again.
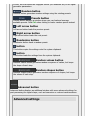
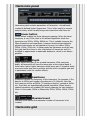
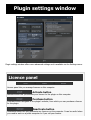
Settings button
Settings button shows a menu with additional settings of the plugin. Here is a brief description
of the separate items.
Activate lets you activate the plugin if the drag & drop activation method does not work in

your host. In this case either click this button and browse to the licence file on your computer
and select it. Or open the licence file in any text editor, copy its contents to the system
clipboard and click this button. The plugin will then perform the activation using the data in the
clipboard, if possible.
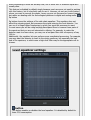
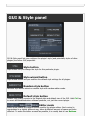
There are 4 groups of settings, each section has its own detailed help information: GUI &
Style enables you to pick the GUI style for the plug-in and the main colours used for the
background, the title bars of the windows and panels, the text and graphs area and the
highlighting (used for enabled buttons, sliders, knobs etc).
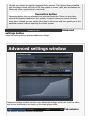
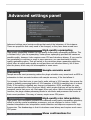
Advanced settings configures several processing options for the plug-in.
Dry/wet affects determines, for Multiband plug-ins, which multiband parameters are
affected by the Global dry/wet control.
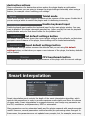
Smart interpolation adjusts the interpolation algorithm used when changing parameter
values; the higher the setting the higher the audio quality and the lower the chance of
zippering noise, but more CPU will be used.
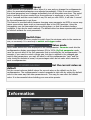
button
This button shows a menu with additional information about the plugin. You can check for
updates, get easy access to support, MeldaProduction web page, video tutorials,
Facebook/Twitter/YouTube channels and more.
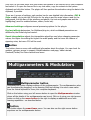
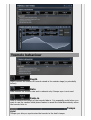
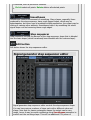
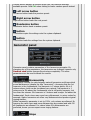
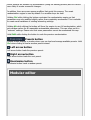
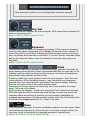
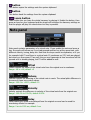
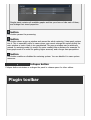
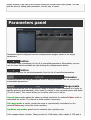
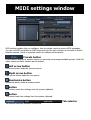
Multiparameters & Modulators
Multiparameter button
Multiparameter button displays settings of the multiparameter. The multiparameter value
can be adjusted by dragging it or by pressing Shift and clicking it to enter a new value
from the virtual keyboard or from your computer keyboard.
Click on the button using your left mouse button to open the Multiparameter window
where all the details of the multiparameter can be set. Click on it using your right mouse
button or click on the menu button to the right to display an additional menu with
learning capabilities - as described below.
button
This button shows the smart learn menu. You can also use the right mouse button
anywhere on the multiparameter button.

Learn activates the learning mode and displays "REC" on the button as a reminder, Clear
& learn deletes all parameters currently associated with the multiparameter, then
activates the learning mode as above. After that every parameter you touch will be
associated to the multiparameter along with the range that the parameter was changed.
Learning mode is ended by clicking the button again.
In smart learn mode the multiparameter does not operate but rather records your actions.
You can still adjust every automatable parameter and use it normally. When you change a
parameter, the plugin associates that parameter with the multiparameter and also records
the range of values that you set.
For example, to associate a frequency slider and make a multiparameter control it from
100Hz to 1KHz, just enable the smart learn mode, click the slider then move it from 100Hz
to 1KHz (you can also edit the range later in the Multiparameter window too). Then
disable the learning mode by clicking on the button.
The multiparameter menu also contains items for reordering - this can be useful for
creating active-presets. Note that this feature can cause problems when one
multiparameter controls other multiparameters, these associations will not be preserved
and will need to be reconstructed.
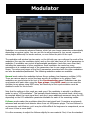
Modulator button
Modulator button displays settings of the modulator. It also contains a checkbox, to the
left, which you can use to enable or disable the modulator. Click on it using your right
mouse button or use the menu button to display an additional menu with learning
capabilities - as described below.
button
This button shows the smart learn menu. You can also use the right mouse button
anywhere on the modulator button.
Learn activates the learning mode and displays "REC" on the button as a reminder, Clear
& learn deletes all parameters currently associated with the modulator, then activates the
learning mode as above. After that every parameter you touch will be associated to the
modulator along with the range that the parameter was changed. Learning mode is ended
by clicking the button again.
In smart learn mode the modulator does not operate but rather records your actions. You
can still adjust every automatable parameter and use it normally. When you change a
parameter, the plugin associates that parameter with the modulator and also records the
range of values that you set.
For example, to associate a frequency slider and make a modulator control it from 100Hz
to 1KHz, just enable the smart learn mode, click the slider then move it from 100Hz to
1KHz (you can also edit the range later in the modulator window too). Then disable the
learning mode by clicking on the button.
button
This button displays additional menu containing features for modulator presets and
randomization.

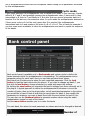
Randomize button
Randomize button generates random arpeggiator settings.
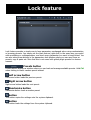
Lock button
Lock button displays settings of the parameter lock. Click on it using your left mouse
button to pen the Parameter Lock window, listing all those parameters that are currently
locked. Click on it using your right mouse button or use the menu button to display the
menu with learning capabilities - Learn activates the learning mode, Clear & learn
deletes all associated parameters and then activates the learning mode. After that, every
parameter you touch will be associated with the lock. Learning mode is then stopped by
clicking the button again.
Tab selector
Tab selector switches between subsections.
Randomize button
Randomize button generates random settings for the tab.
Presets button
Presets button chooses a random preset for the tab.
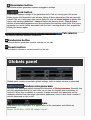
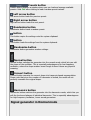
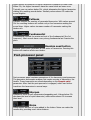
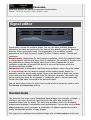
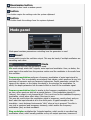
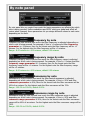
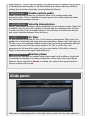
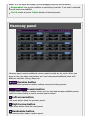
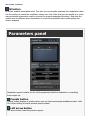
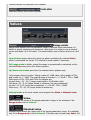
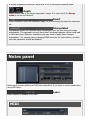
Globals panel
Globals panel contains some basic global settings, such as output volume or panorama
Random note panorama
Random note panorama switch changes the behaviour of Note panorama. Normally that
sets the panorama directly for each note, so you can for example use a modulator to
control it. When this is enabled, it is merely a range and each note panorama will be
randomly selected from the range -panorama..panorama. Hence it also doesn't matter if
current panorama is right or left.
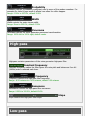
Gain
Gain defines the output gain. It is applied after all the generators and effects are
performed.
Range: -48.00 dB to +48.00 dB, default 0.00 dB

Volume
Volume defines the output volume adjustment, which is basically an alternative to gain
with a different range. It is applied after all the generators and effects are performed.
Range: silence to 0.00 dB, default 0.00 dB
Panorama
Panorama defines the output panorama. It is applied after all the generators and effects
are performed.
Range: 100% left to 100% right, default center
Note panorama
Note panorama defines the panorama-per-note. It is applied after all the generators and
effects are performed, but unlike global Panorama, this may be different for each note.
The value is assigned at the moment the note is pressed and isn't changed later.
Range: 100% left to 100% right, default center
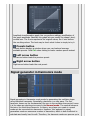
Quality
Quality controls the ratio between audio quality and CPU requirements used by the signal
generator. In almost all instruments the signal generators are the weakest point, because
generating digital signals is extremely CPU demanding if it shouldn't be prone to aliasing
and digital distortion. Therefore almost all synthesizers on the market provide inferior
quality, sometimes masking it by adding noise and claiming it to be analog simulations.
Our generators on the other hand are the finest on the market and in most cases Medium
mode will provide nearly perfect sound quality. If you are using saw-tooth waves,
frequency modulation and other features creating extremely harmonically rich signals, you
may consider using High or even Highest quality.
Low quality requires the least amount of CPU time, but you can experience aliasing
(which may be used creatively of course). This is especially significant when using
harmonically rich generator shapes, such as saw-tooth or square waves.
Medium activates an advanced generator, which requires slightly more CPU and memory
resources, but minimizes aliasing. This mode is sufficient in most cases.
High improves the quality using more advanced interpolation.
Highest activates oversampling to at least 80kHz. This usually removes all aliasing and
provides a true analog sound, in fact it provides a better than analog sound as it doesn't
suffer from either analog or digital artifacts.
Extreme additionally uses extremely steep filters for the oversampling to minimize
aliasing way below the limits of human hearing. This mode provides technically perfect
generators. Its modifications such as Extreme 16x in addition increase the upsampling
factor, which may be useful to remove distortion & aliasing when using transformations
and additional mixing options such as frequency modulation. Please note that you can use
the global upsampling as well, but this one is per-voice and may save CPU power as it is
not upsampling the filters and FX section.
Mode
Mode defines the way in which the synthesizer works.
Polyphonic mode is the default mode, which makes the synth create as many voices
simultaneously as necessary.
Polyphonic (single voice per note) is similar to polyphonic, but ensures that only one
voice will be created for each MIDI key. If sustain is pressed (or other conditions cause

multiple notes of the same key), the previous one will be terminated in the same way as
when you release the key. This prevents voices stacking up when holding sustain pedal,
however it may cause problems when harmonies are used, as pressing one key simulates
pressing multiple keys.
Monophonic mode makes the synth play only one note at a time. When you hold one
note and press another one the existing previous voice pitch is changed according to the
new note, potentially with gliding. No attack stage or any kind of restart happens, so it
sounds simply like the pitch has been changed.
Monophonic (toggle) mode is similar to the monophonic mode, however when you
then release the new note while holding the previous one, the pitch of the voice is
changed back to the note you are holding.
Monophonic (attack), Monophonic (toggle + attack) and Monophonic (toggle +
attack even off) modes are similar to the 2 previous monophonic modes, however the
voice is always switched back to the attack stage. This brings some focus to the new note,
but no new voices are actually created. This mode smartly jumps in the ADSR envelope to
the attack stage avoiding any abrupt changes in level and changes the pitch. The even
off flag means that the attack is restarted even on note-offs. That means if you hold a
long note, press a short one, then the attack is restarted not only when you press the
short one, but also when you release it.
Monophonic (brutal) mode is similar to the previous modes, but the switch to the
attack stage doesn't do any smoothing, so you may expect sharp clicking when the notes
are restarting. This may be useful for short percussive sounds.
Monophonic (restart) mode and Monophonic (toggle + restart) mode are similar to
the other monophonic modes, however instead of changing the pitch of the existing
voices, the current voices are stopped in the same way as when you release them and
new voices are created for the notes being pressed. This way the ADSR envelope is
followed and you can get interesting overlaps of the release stages.
Trigger mode makes the synth completely ignore note release events and makes the
notes be triggered on and off immediately providing a sort of staccato behaviour. This is
especially useful for percussive sounds and in conjunction with another synth to form
special attack sounds.
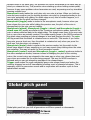
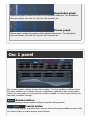
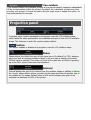
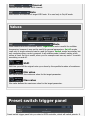
Global pitch panel
Global pitch panel lets you shift all generators and filters upwards or downwards.
Octaves
Octaves defines the global pitch change in octaves.

Range: -8 to +8, default 0
Semitones
Semitones defines the global pitch change in semitones.
Range: -24.0000 to +24.0000, default 0.0000
Cents
Cents defines the global pitch change (in cents of a semitone). The actual pitch change is
the sum of these 3 control values.
Range: -100.0 to +100.0, default 0.0
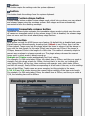
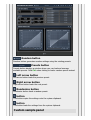
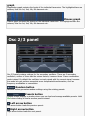
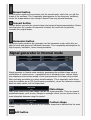
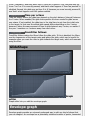
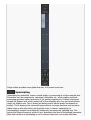
ADSR graph
ADSR graph controls the global ADSR envelope of the generated voices. Please note that
additional oscillators, noise generators and filters can have their own ADSRs too.Our ADSR
envelopes are much more sophisticated than classic attack-release-sustain-decay
envelopes. Besides these common parameters they also let you control the curvature of
each stage. Additionally, there are hold and delay sections, global smoothing and tremolo.
You can even use the custom shape mode to define your own attack/release curves.
Random button
Random button generates random settings using the existing presets.
Presets button
Presets button displays a window where you can load and manage available presets. Hold
Ctrl when clicking to load a random preset instead.
Left arrow button
Left arrow button loads the previous preset.
Right arrow button
Right arrow button loads the next preset.

button
This button copies the settings onto the system clipboard.
button
This button loads the settings from the system clipboard.
Custom shape button
Custom shape button enables custom shape mode, which lets you draw your own attack
and release stages using the envelope system. Both stages are then automatically
connected to form the resulting envelope.
Immediate release button
Immediate release button activates the immediate release mode in which case the note-
off causes an immediate switch to the release stage. If this is disabled, the release stage
does not occur until the whole attack/decay stage finishes.
Sync button
Sync button controls the ADSR tempo sync feature. By default this is disabled and means
that all times are followed exactly, meaning that if Attack is say 100ms, then it will be
100ms indeed. Tempo sync lets the plugin adjust the times to ensure it will be always in
sync with the host tempo. In this case 100ms may become say 125ms if the tempo is
120bpm, because 125ms is the length of a 16th note. This makes it extremely simple to
convert any envelope to a tempo-synced one. The plugin always chooses the nearest
longer note, in other words it always round up.
Straight and Triplets modes automatically find 'nice' values.
For example, if a 16th note takes 100ms, the attack time is 550ms, and the sync mode is
straight, then the plugin checks for 100ms, find out that it is too low, so it checks 8th
note, being 200ms, still too low, then continues with quarter note, which takes 400ms,
and still not enough, finally 800ms corresponding to a half note is the one, so the resulting
time will be 800ms.
Triplet cases are more complex, but the principle is the same.
1/16, 1/8 and 1/4 modes choose the nearest higher multiply of the base note length.
For example, if a 16th note takes 100ms, the attack time is 550ms, and the sync mode is
1/16, the resulting time will be 600ms.
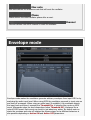
Envelope graph menu

Envelope graph menu provides additional features which are used to edit the
graph. Open the menu using right mouse button in the graph. Please note that if
you select some points in the graph, or click on a point for example, the menu will
be different and will cover only those features related to the selected set of points.
Random button
Random button generates random settings using the existing presets.
Presets button
Presets button displays a window where you can load and manage available
presets. Hold Ctrl when clicking to load a random preset instead.
Left arrow button
Left arrow button loads the previous preset.
Right arrow button
Right arrow button loads the next preset.
Randomize button
Randomize button loads a random preset.
button
This button copies the settings onto the system clipboard.
button
This button loads the settings from the system clipboard.
Insert point button
Insert point button creates a point at mouse position.
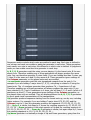
Step sequencer
button
Step sequencer button generates the envelope from step sequencer.
Distribute points button
Distribute points button makes all points equally spaced.
Randomize button
Randomize button slightly modifies the Y coordinates.
Mirror X button
Mirror X button inverts the X coordinates of all points.
Mirror Y button
Mirror Y button inverts the Y coordinates of all points.

Clear points button
Clear points button deletes all points.
Curvature
Integral curvature
Integral curvature makes the multi-curvature modes such as rectangles always
have an integral number of items, e.g. 1, 2, 3, ... rectangles. If you disable this, it
will be also possible to have for example 2.3 rectangles, which will however cause
a discontinuity.
Smoothing
Lock sides
Lock sides makes the smoothing factor equal on both sides.
Proportional
Proportional makes the smoothing area size defined by the smaller side.
Faster smoothing
Faster smoothing enables slightly faster algorithm, which can however often cause
unnecessary curving.
Settings button
Settings button displays additional tremolo settings, containing tremolo behaviour and
shape.
Tremolo settings
Page is loading ...
Page is loading ...
Page is loading ...
Page is loading ...
Page is loading ...
Page is loading ...
Page is loading ...
Page is loading ...
Page is loading ...
Page is loading ...
Page is loading ...
Page is loading ...
Page is loading ...
Page is loading ...
Page is loading ...
Page is loading ...
Page is loading ...
Page is loading ...
Page is loading ...
Page is loading ...
Page is loading ...
Page is loading ...
Page is loading ...
Page is loading ...
Page is loading ...
Page is loading ...
Page is loading ...
Page is loading ...
Page is loading ...
Page is loading ...
Page is loading ...
Page is loading ...
Page is loading ...
Page is loading ...
Page is loading ...
Page is loading ...
Page is loading ...
Page is loading ...
Page is loading ...
Page is loading ...
Page is loading ...
Page is loading ...
Page is loading ...
Page is loading ...
Page is loading ...
Page is loading ...
Page is loading ...
Page is loading ...
Page is loading ...
Page is loading ...
Page is loading ...
Page is loading ...
Page is loading ...
Page is loading ...
Page is loading ...
Page is loading ...
Page is loading ...
Page is loading ...
Page is loading ...
Page is loading ...
Page is loading ...
Page is loading ...
Page is loading ...
Page is loading ...
Page is loading ...
Page is loading ...
Page is loading ...
Page is loading ...
Page is loading ...
Page is loading ...
Page is loading ...
Page is loading ...
Page is loading ...
Page is loading ...
Page is loading ...
Page is loading ...
Page is loading ...
Page is loading ...
Page is loading ...
Page is loading ...
Page is loading ...
Page is loading ...
Page is loading ...
Page is loading ...
Page is loading ...
Page is loading ...
Page is loading ...
Page is loading ...
Page is loading ...
Page is loading ...
Page is loading ...
Page is loading ...
Page is loading ...
Page is loading ...
Page is loading ...
Page is loading ...
Page is loading ...
Page is loading ...
Page is loading ...
Page is loading ...
Page is loading ...
Page is loading ...
Page is loading ...
Page is loading ...
Page is loading ...
Page is loading ...
Page is loading ...
Page is loading ...
Page is loading ...
Page is loading ...
Page is loading ...
Page is loading ...
Page is loading ...
Page is loading ...
Page is loading ...
Page is loading ...
Page is loading ...
Page is loading ...
Page is loading ...
Page is loading ...
Page is loading ...
Page is loading ...
Page is loading ...
Page is loading ...
Page is loading ...
Page is loading ...
Page is loading ...
Page is loading ...
Page is loading ...
Page is loading ...
Page is loading ...
Page is loading ...
Page is loading ...
Page is loading ...
Page is loading ...
Page is loading ...
Page is loading ...
Page is loading ...
Page is loading ...
Page is loading ...
Page is loading ...
Page is loading ...
Page is loading ...
Page is loading ...
Page is loading ...
Page is loading ...
Page is loading ...
Page is loading ...
Page is loading ...
Page is loading ...
Page is loading ...
Page is loading ...
Page is loading ...
-
 1
1
-
 2
2
-
 3
3
-
 4
4
-
 5
5
-
 6
6
-
 7
7
-
 8
8
-
 9
9
-
 10
10
-
 11
11
-
 12
12
-
 13
13
-
 14
14
-
 15
15
-
 16
16
-
 17
17
-
 18
18
-
 19
19
-
 20
20
-
 21
21
-
 22
22
-
 23
23
-
 24
24
-
 25
25
-
 26
26
-
 27
27
-
 28
28
-
 29
29
-
 30
30
-
 31
31
-
 32
32
-
 33
33
-
 34
34
-
 35
35
-
 36
36
-
 37
37
-
 38
38
-
 39
39
-
 40
40
-
 41
41
-
 42
42
-
 43
43
-
 44
44
-
 45
45
-
 46
46
-
 47
47
-
 48
48
-
 49
49
-
 50
50
-
 51
51
-
 52
52
-
 53
53
-
 54
54
-
 55
55
-
 56
56
-
 57
57
-
 58
58
-
 59
59
-
 60
60
-
 61
61
-
 62
62
-
 63
63
-
 64
64
-
 65
65
-
 66
66
-
 67
67
-
 68
68
-
 69
69
-
 70
70
-
 71
71
-
 72
72
-
 73
73
-
 74
74
-
 75
75
-
 76
76
-
 77
77
-
 78
78
-
 79
79
-
 80
80
-
 81
81
-
 82
82
-
 83
83
-
 84
84
-
 85
85
-
 86
86
-
 87
87
-
 88
88
-
 89
89
-
 90
90
-
 91
91
-
 92
92
-
 93
93
-
 94
94
-
 95
95
-
 96
96
-
 97
97
-
 98
98
-
 99
99
-
 100
100
-
 101
101
-
 102
102
-
 103
103
-
 104
104
-
 105
105
-
 106
106
-
 107
107
-
 108
108
-
 109
109
-
 110
110
-
 111
111
-
 112
112
-
 113
113
-
 114
114
-
 115
115
-
 116
116
-
 117
117
-
 118
118
-
 119
119
-
 120
120
-
 121
121
-
 122
122
-
 123
123
-
 124
124
-
 125
125
-
 126
126
-
 127
127
-
 128
128
-
 129
129
-
 130
130
-
 131
131
-
 132
132
-
 133
133
-
 134
134
-
 135
135
-
 136
136
-
 137
137
-
 138
138
-
 139
139
-
 140
140
-
 141
141
-
 142
142
-
 143
143
-
 144
144
-
 145
145
-
 146
146
-
 147
147
-
 148
148
-
 149
149
-
 150
150
-
 151
151
-
 152
152
-
 153
153
-
 154
154
-
 155
155
-
 156
156
-
 157
157
-
 158
158
-
 159
159
-
 160
160
-
 161
161
-
 162
162
-
 163
163
-
 164
164
-
 165
165
-
 166
166
-
 167
167
-
 168
168
-
 169
169
-
 170
170
-
 171
171
-
 172
172
-
 173
173


MeldaProduction MPowerSynth User manual
- Category
- Software
- Type
- User manual
Ask a question and I''ll find the answer in the document
Finding information in a document is now easier with AI
Related papers

Other documents
-
Waves Flow Motion FM Synth Owner's manual
-
 Polyverse Music I wish User manual
-
M-Audio Trigger Finger Pro User guide
-
 TINRS Edgecutter User manual
-
-
SINEVIBES Blend v2 User manual
-
BENDIX PNU-105 User manual
-
Akai MPC Essentials User manual
-
Elektron Overbridge User manual
-

