1
1. Alarm and Error indications on CL-S 521/621/631 and CL-S 6621
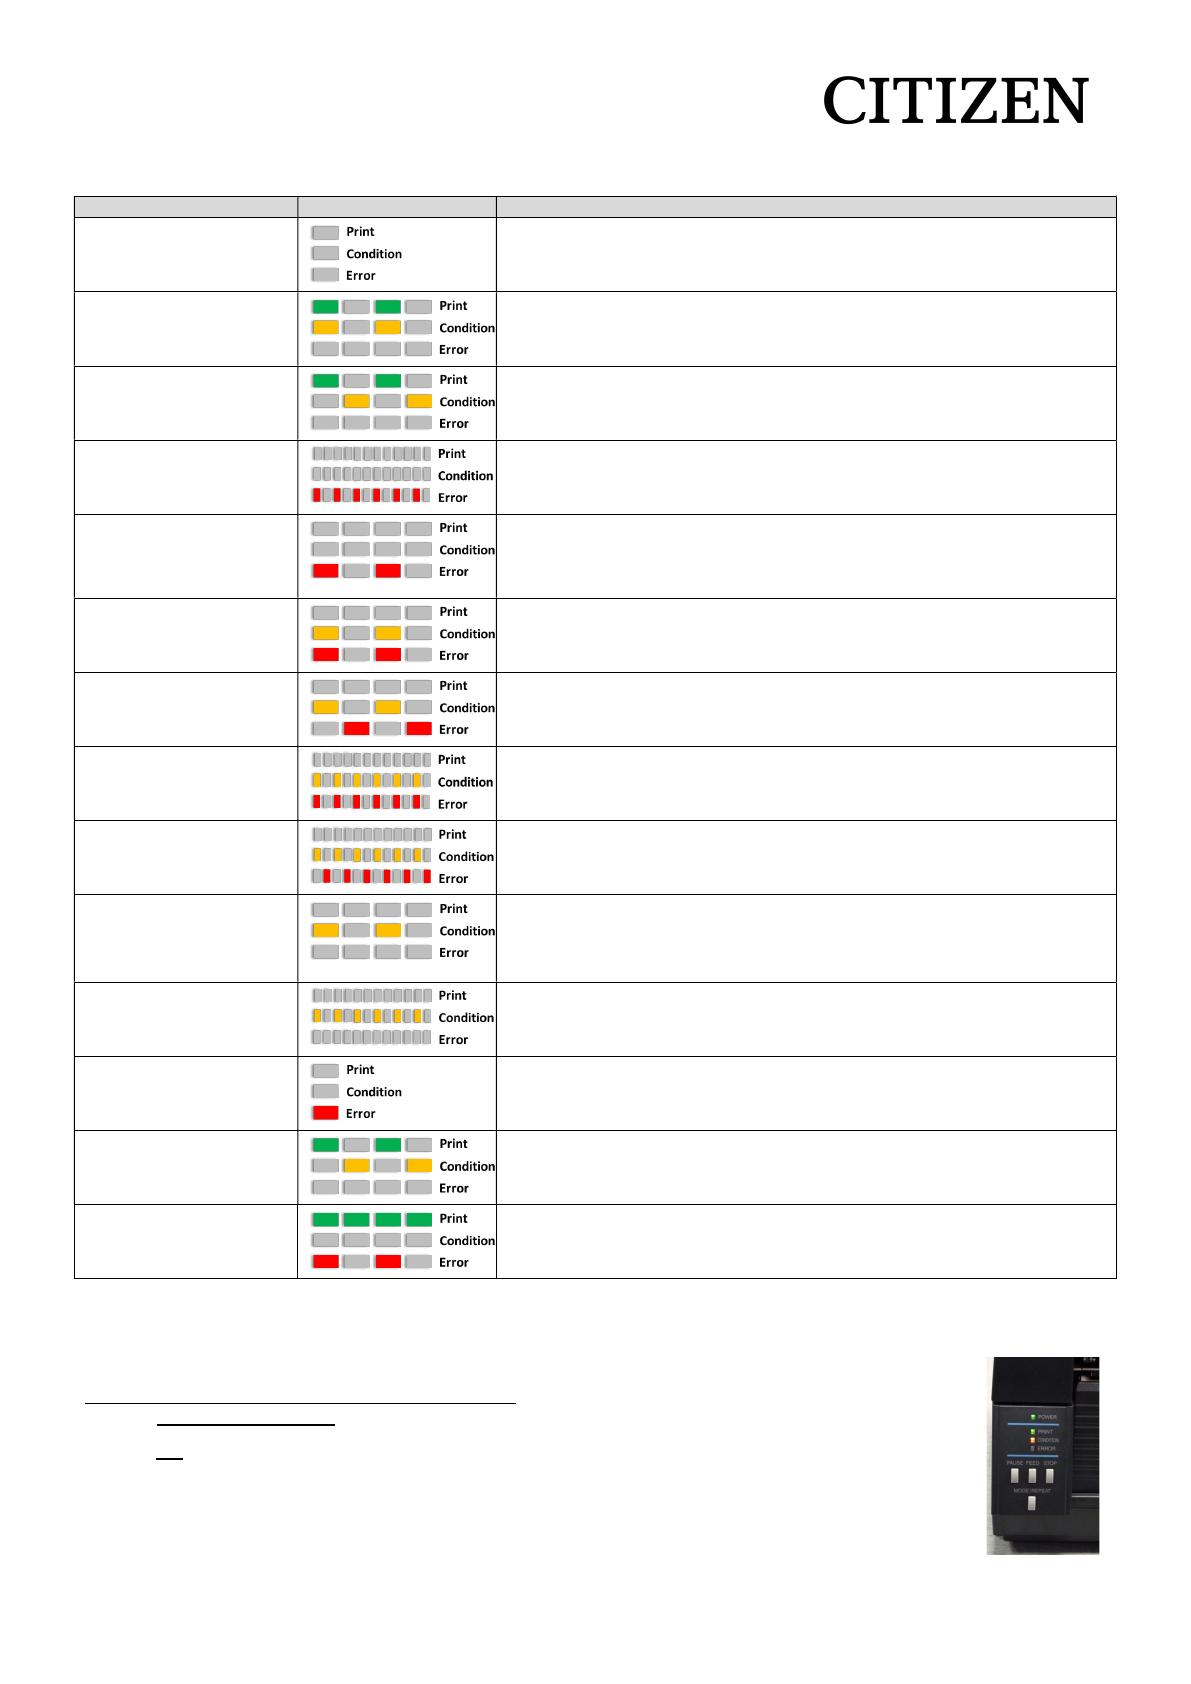
Item LEDs status Comments
When the STOP key has
been pushed
Print LED off: printer is OFF line.
Abnormal head
temperature
Usually related to heavy dark printing. Print head is effectively overheating
and needs to cool down. Wait a while and then try it.
Abnormal motor
temperature
A motor, not necessarily the stepping motor if the printer is a 621/631, is
detected as overheating. May require a replacement motor OR a control
board.
Head Open Fast Error LED flash. Buzzer sounds 3 fast beeps, short pause and 3 fast
beeps.
Either the head switch is faulty or the print head is not fully closed.
Media End Slow Error LED flash. Buzzer sounds in sympathy with the LED flash.
Check the paper sensors are in line with each other. Maybe wrong media
installed in the printer. Customer may be using Reflective / Black Mark OR
Continuous media. By default, all these models are set to See Through.
Media Out (media
location cannot be
detected)
Buzzer sounds in sympathy with the LED flash. Media gaps and black
marks not being seen. Paper sensors may be out of line, or wrong media
may be installed or printing type (See Through is default) is incorrectly set.
Abnormal head
resistance
Error seen at Power ON. Buzzer sounds in sympathy with the LED flash.
Probable head fault. Briefly press the STOP button, it will cancel the error
BUT the print head is still faulty and will need to be replaced.
Ribbon feed error Buzzer sounds three times and pauses.
The printers 621/631 & 6621 all default to Outside wound. Is the ribbon
outside wound?
Ribbon end Buzzer sounds three times and pauses. The printer driver might be set to
Thermal transfer Mode (TT) and the ribbon is not loaded. Is the ribbon
loaded? Is the Ribbon Core too big for the Ribbon holder?
Communication error Possible service issue. Possible causes:
Reception buffer overrun
Parity, framing
Transmission buffer overflow
System error Specific to CL-S6621.
Auto-cutter abnormality
(jamming, etc.)
Only where cutter fitted. Make sure the two parts of the cutter are correctly
connected. Make sure all safety lockout options are OK. Nothing broken on
the plastics? Has Cutter been turned ON in Driver?
Auto-cutter temperature
abnormal
Only where cutter fitted. Usually reported if the cutter is faulty OR
sometimes if the CUT command is sent to the printer but the cutter is not
fitted. User error: incorrect setting in the driver.
Paper near end Specific to CL-S6621 provided the paper holders are being used inside the
printer (not outside where PNE sensor is not available).
Default is set to OFF.
2. General Operation Panel Short cut options
From the control panel, it is possible to quickly change the settings using one or more buttons pressed, either with the printer
already switched ON OR by holding the buttons at the same time as turning the printer ON.
Key to images with green dot buttons on page two – representing the 4 buttons:
Power ON and Press – means holding down the buttons with green dots while turning the printer ON
ON – means, the printer is already ON and showing two green LED’s (Power and Print), and then
press and release any green dot buttons shown.
If there is more than one button to press ensure those required are all pressed at the same time.
Where something prints the best label size is 100x100mm (4x4 inches).


