Page is loading ...

www.electrohome.com
INSTRUCTION MANUAL
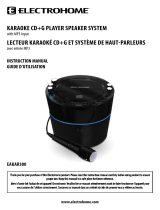
KARAOKE CD+G/MP3G PLAYER SPEAKER SYSTEM
with Digital Key Control
EAKAR535
Thank you for your purchase of this Electrohome product. Please read this instruction manual carefully
before using product to ensure proper use. Keep this manual in a safe place for future reference.

- 2 -
NEED
HELP?
DO NOT RETURN THIS
PRODUCT TO THE STORE
Please contact an ELECTROHOME® customer support representative rst regarding any additional
information on product features, specications or assistance with setup.
Please contact us via one of the methods below:
For more product information visit www.ELECTROHOME.com
Toll free telephone:
1.800.663.5954
Email:
support@electrohome.com
Toll free fax:
1.888.771.1701

- 3 -
TABLE OF CONTENTS
• Karaoke CD+G/MP3G Player Speaker System
• Dynamic Microphone (10ft cord)
• CD+G Multiplex Karaoke Disc with Music from Various Artists
• RCA Audio/Video Composite Connection Cable
• 100-240V AC/DC Power Adapter
• Instruction Manual
• 1 Year Warranty
• Lifetime Live Customer Support
WHAT’S INCLUDED
NEED HELP?............................................................................................................................................. 2
TABLE OF CONTENTS ................................................................................................................................ 3
WHAT’S INCLUDED ................................................................................................................................... 3
SAFETY AND WARNINGS ........................................................................................................................... 4
BUTTONS AND CONNECTIONS ................................................................................................................... 7
SETTING UP YOUR KARAOKE SYSTEM ......................................................................................................... 11
CONNECTING THE POWER CORD .................................................................................................................................. 11
CONNECTING TO AN EXTERNAL AUDIO INPUT DEVICE ................................................................................................. 11
CONNECTING TO A TV OR VCR/DVD PLAYER ................................................................................................................. 11
SELECTING THE KARAOKE PLAYER AS THE SOURCE INPUT ......................................................................................... 12
AUDIO CONNECTION .................................................................................................................................................... 12
LINE IN OPERATION ...................................................................................................................................................... 13
CONNECTING THE MICROPHONE .................................................................................................................................. 13
ADJUSTING THE VOLUME ............................................................................................................................................. 13
OPERATION ............................................................................................................................................. 14
PREPARATION .............................................................................................................................................................. 14
TURNING ON/OFF ........................................................................................................................................................ 14
LOADING A DISC ........................................................................................................................................................... 14
PLAY/PAUSE MODE ...................................................................................................................................................... 14
PLAYING FROM A USB FLASH DRIVE ............................................................................................................................ 15
CONTROLLING PLAYBACK ............................................................................................................................................ 15
SELECTING AN AUDIO SOURCE ..................................................................................................................................... 15
CHANGING THE KEY OF THE MUSIC .............................................................................................................................. 16
SELECTING A TRACK FOR PLAYBACK ............................................................................................................................ 16
REPEATING A TRACK OR DIRECTORY ............................................................................................................................ 16
CREATING A PLAYBACK PROGRAM ............................................................................................................................... 16
LINE IN OPERATION ...................................................................................................................................................... 16
ECHO CONTROL ............................................................................................................................................................ 16
AUTO VOICE CONTROL AVC SINGING COACH ............................................................................................................. 17
TROUBLESHOOTING ................................................................................................................................. 17
MAINTENANCE ........................................................................................................................................ 18
SPECIFICATIONS ...................................................................................................................................... 19
GLOSSARY OF KARAOKE TERMS ................................................................................................................. 19
NOTES ..................................................................................................................................................... 20
ELECTROHOME WARRANTY ...................................................................................................................... 22

- 4 -
SAFETY AND WARNINGS
The lightning ash with arrowhead symbol, within an
equilateral triangle is intended to alert the user to the
presence of uninsulated dangerous voltage within the
product’s enclosure that may be of sucient magnitude
to constitute a risk of electric shock.
The exclamation point within an equilateral triangle is
intended to alert the user to the presence of important
operating and maintenance (servicing) instructions in
the literature accompanying the appliance.
DRIPPING WARNING
The product shall not be exposed to dripping or splashing and that no objects lled with liquids, such as vases, shall be placed on the
product.
VENTILATION WARNING
The normal ventilation of the product shall not be impeded for intended use.
This CD player is made and tested to meet exacting safety standards. It meets FCC requirements and complies with safety performance
standards of the U.S. Department of Health and Human Services.
WARNINGS
• This CD player employs a laser light beam. Only a qualied service person should remove the cover or attempt to service this device, due
to possible eye injury.
• The use of controls, adjustments, or procedures other than those specied herein might result in hazardous radiation exposure.
CAUTION
This compact disc player is classied as a CLASS 1 LASER product. The CLASS 1 LASER PRODUCT
label is located on the bottom panel.
CAUTION
Invisible laser radiation when open and interlocks defeated. Avoid exposure to beam.
IMPORTANT
Since CD circuitry may cause interference to other radio tuners nearby, switch this unit o when not in use or move it away from the
aected radio tuner.
This class[B] digital apparatus complies with Canadian ICES-003.
NOTE:
This digital apparatus does not exceed the Class B limits for radio noise emissions from digital apparatus as set out in the Radio Interference
Regulations of Industry Canada. These limits are designed to provide reasonable protection against harmful interference in a residential
installation. This equipment generates, uses and can radiate radio frequency energy and, if not installed and used in accordance with the
instructions, may cause harmful interference to radio communications. However, there is no guarantee that interference will not occur in
a particular installation. If this equipment does cause harmful interference to radio or television (which can be determined by turning the
equipment o), the user is encouraged to try to correct the interference by one or more of the following measures:
• Reorient or relocate the receiving antenna.
• Increase the separation between the equipment and receiver.
• Connect the equipment into an outlet on a circuit dierent from that to which the receiver is connected.
• Consult the dealer or an experienced radio/TV technician for help.
WARNING: To reduce the risk of re or shock hazard, do not
expose this product to rain or moisture.
The CAUTION marking is located on the bottom panel.

- 5 -
IMPORTANT SAFETY INSTRUCTIONS
1. Read all instructions.
2. Keep these instructions.
3. Heed all warnings.
4. Follow all warnings.
5. Do not use this apparatus near water.
6. Clean only with a dry cloth.
7. Do not block any ventilation openings. Install in accordance with the manufacturer’s instructions.
8. Do not install near any heat sources such as radiators, heat registers, stoves, or other apparatus (incl. ampliers) that
produce heat.
9. Do not defeat the safety purpose of the polarized or grounding-type plug. A polarized plug has two blades with one
wider than the other. A grounding type plug has two blades and a third grounding prong. The wide blade or the third
prong are provided for your safety. If the provided plug does not t into your outlet, consult an electrician for replacement
of the obsolete outlet.
10. Protect the power cord from being walked on or pinched particularily at plugs, convenience receptacles, and the point
where they exit from the apparatus.
11. Only use attachments/accessories specied by the manufacturer.
12. Use only with cart, stand, tripod, bracket, or table specied by the manufacturer, or sold with the
apparatus. When a cart is used, use caution when moving the cart/apparatus combination to avoid
injury from tip-over.
13. Unplug this apparatus during lightning storms or when unused for long periods of time.
14. Refer all servicing to qualied service personnel. Servicing is required when the apparatus has been damaged in any
way, such as power-supply cord or plug is damaged, liquid has been spilled or objects have fallen into the apparatus, the
apparatus has been exposed to rain or moisture, does not operate normally, or has been dropped.
15. Apparatus should not be exposed to dripping or splashing, and objects lled with liquids, such as vases, should
not be placed on the apparatus.
16. An outside antenna system should not be located in the vicinity of overhead power lines or other electric light or power
circuits, or where it can fall into such power lines or circuits. When installing an outside antenna system, extreme care
should be taken to keep from touching such power lines or circuits, as contact with them might be fatal.
17. Do not overload wall outlets and extension cords, as this can result in a risk of re or electric shock.
18. Do not push objects through any openings in this unit, as they may touch dangerous voltage points or short out parts
that could result in re or electric shock. Never spill or spray any type of liquid into the unit.
19. If an outside antenna or cable system is connected to the unit, be sure the antenna or cable system is grounded to provide
some protection against voltage surges and built-up static charges. Section 810 of the National Electrical Code, ANSI/
NFPA 70, provides information with respect to proper grounding of the mast and supporting structure, grounding of the
lead-in wire to an antenna discharge unit, size of grounding conductors, location of antenna discharge unit, connection
to grounding electrodes, and requirements for the grounding electrode.
21. When replacement parts are required, be sure the service technician uses replacement parts specied by the manufacturer
or those that have the same characteristics as the original part. Unauthorized substitutions may result in re, electric
shock or other hazards.
22. Upon completion of any service or repairs to this unit, ask the service technician to perform safety checks to determine
that the unit is in proper operating condition.
SAFETY AND WARNINGS

- 6 -
23. When you connect the product to other equipment, turn o the power and unplug all of the equipment from the wall
outlet. Failure to do so may cause an electric shock and serious personal injury. Read the owner’s manual of the other
equipment carefully and follow the instructions when making any connections.
24. Sudden high volume sound may cause hearing or speaker damage. When you use headphones, (if the unit is equipped
with a headphone connection) keep the volume at a moderate level. If you use headphones continuously with high
volume sound, it may cause hearing damage.
25. Do not allow the product to output distorted sound for an extended period of time. It may cause speaker overheating and
re.
26. This reminder is provided to call the cable TV system installer’s attention to Article 820-40 of the NEC that provides
guidelines for proper grounding and, in particular, species that the cable ground shall be connected to the grounding
system of the building, as close to the point of cable entry as practical.
27. The socket-outlet must be installed near the unit and easily accessible.
The unit emits heat when in operation. Do not place any covers or blankets on the unit, this may cause overheating. Do not
block ventilation holes, or set up near radiators. Do not place in direct sunshine. When placing on a shelf leave 10 cm (4 inches)
free space around the entire unit.
WARNING:
To reduce the risk of re or electric shock, do not expose this apparatus to rain or moisture.
WARNING:
The batteries shall not be exposed to excessive heat such as sunshine, re or the like.
WARNING:
Never place heavy or sharp objects on the LED panel or frame.
WARNING:
The excessive sound pressure from earphones and headphones can cause hearing loss.
This marking indicates that this product should not be disposed with other household wastes throughout North
America. To prevent possible harm to the environment or human health from uncontrolled waste disposal, recycle
it responsibly to promote the sustainable reuse of material resources. To return your used device, please use the
return and collection systems or contact the retailer where the product was purchased. They can take this product
for environmental safe recycling.
FCC warning
Changes or modications not expressly approved by the party responsible for compliance with the FCC Rules could void the
user’s authority to operate this equipment.
Canada ICES-003 statement
This Class B digital apparatus complies with Canadian ICES-003.
SAFETY AND WARNINGS

- 7 -
TOP
# Item Description
1 CD/CD+G Door Lift to open the disc compartment and insert a CD/CD+G disc.
2 TFT Screen Displays on-screen menus.
3 POWER Indicator Light indicates when karaoke system is on or o.
4 ON/OFF Button ON OFF
5 MIC VOLUME Control Rotate to adjust the microphone volume and obtain the best performance.
6 ECHO Control When using the microphone, rotate to adjust the echo eect and enhance your
voice for a concert hall eect.
7 STOP/MODE Button ■ Press once to stop playback (the icon will be shown on the TFT screen). If you press
this button once more, it will change the source from USB or DISC.
8 PROG/REP Button Press to repeat the current track or to create a playback program.
9 TRACK Button Press to select a track number.
BUTTONS AND CONNECTIONS
TOP

- 8 -
BUTTONS AND CONNECTIONS
TOP
# Item Description
10 KEY-/PAGE- Button • During PLAY mode only, press KEY- to lower the key of the music (max. 6 times).
• In STOP mode, press PAGE- to go to previous page of song list.
11 SCREEN ON/OFF Button Press to turn the screen on or o.
12 USB INPUT Connect a USB device, such as a USB ash drive, to this connection so you can play
les on the device through your karaoke system.
13 KEY+/PAGE+ Button • During PLAY mode only, press KEY+ to raise the key of the music. (max. 6 times)
• In STOP mode, press PAGE+ to go to next page of song list.
14 SKIP Press to skip to the next audio track.
15
SKIP
Press to skip to the previous audio track.
16
PLAY/PAUSE
Press to start or pause playback.
17 AVC (Auto Voice Control) Rotate to mute the vocals on a multiplex recording when a singer starts singing
through the microphone. When the singer stops singing, the recorded vocals will
start playing again.
18 BALANCE Button Rotate to adjust the balance between the prerecorded singer’s voice and the music
when using a multiplex karaoke disc.
19 MASTER VOLUME Control Rotate to adjust the master volume.

- 9 -
BUTTONS AND CONNECTIONS
# Item
20 AUDIO OUT Connection (Left)
21 AUDIO OUT Connection (Right)
22 VIDEO OUT Connection
23 MIC 2 Connection
# Item
24 MIC 1 Connection
25 LINE IN Connection
26 DC POWER Connection
BACK

- 10 -
BUTTONS AND CONNECTIONS
1 2 3
4 5
6
# TFT DISPLAY ICONS
1 DISC MODE
• CD = CD disc is playing
• CDG = CD+G disc is playing
• CDrom = CD ROM disc is playing
• USB = USB is playing
2 Current track number and total tracks number
3 PLAY/PAUSE/STOP Symbols
• PLAY
• PAUSE
• STOP
4 PROGRAM MODE
P = Program mode play
C = No program mode play
5 REPEAT MODE
• REPEAT ONE
• REPEAT ALL
• REPEAT FOLDER
• NO REPEAT
6 PLAYING TIME

- 11 -
REAR VIEW OF TV OR VCR
VIDEO INPUT (YELLOW JACK)
VIDEO OUTPUT
(YELLOW JACK)
Connecting the power cord
To connect the power cord:
1. Plug the small connector on the DC power adapter into the DC connection on the back of the karaoke system.
2. Plug the other connector into a standard AC 120V~60Hz wall socket.
Connecting an external audio input device
You can connect an external audio input device to play the audio from the device through your karaoke system.
To connect an external audio input device:
1. Connect an audio cable to the LINE IN connection on the back of your karaoke system and to the LINE OUT
connection on the external device.
2. Press STOP/MODE to select the LINE IN mode.
Connecting to a TV or VCR/DVD player
Your karaoke system is designed to connect to your TV the same way you would connect most video cameras, VCR/DVD players
or video games consoles. RCA cables are provided to connect your unit to a TV, VCR/DVD player, video device or an external
audio/sound system. The RCA cables have three connections at each end (white and red are for left and right audio
connections and the yellow is for video connections).
To connect to a TV, or VCR/DVD player:
1. Connect video cable (yellow) to the VIDEO OUT of the back of the karaoke system.
2. Connect the other end of the video cable (yellow) to the video connection on your TV or VCR/DVD player.
SETTING UP YOUR KARAOKE SYSTEM
AC OUTLET
AC ADAPTER PLUG

- 12 -
SETTING UP YOUR KARAOKE SYSTEM
Selecting the karaoke system as the source input
Selecting your karaoke system as a source input on your TV is very similar to connecting a VCR/DVD or satellite system.
To set your karaoke system as the source input (common instructions):
1. In the set up menu of the TV player there may be an option for "Input Select" where you can choose between
"Cable/Ant., Video 1, Video 2, etc" as the input source.
2. There may also be a button on your TV remote labelled "Input" or "Source".
3. Choose a source input. (i.e AUX, LINE 1 or LINE IN).
4. Choosing one of the available sources, in most cases, will display the lyrics from your karaoke system.
5. Some older TV’s may require you to switch the TV to channel 3 or 4, in these cases, no input source needs to be
selected.
Audio connection
As an alternative to listening to the audio through your TV, you can listen through your home stereo system.
To connect to your home stereo system:
1. Plug the white end of the cable into the white AUDIO OUT connection on the unit.
2. Plug the red end of the cable into the red AUDIO OUT connection on the unit.
3. Connect the other end of the cable’s white (left) and red (right) plugs to your home stereo system’s AUX
IN connections.
REAR VIEW OF TV OR VCR
AUDIO INPUT (Red = R, White = L)
AUDIO OUTPUT
(Red = R, White = L)

- 13 -
SETTING UP YOUR KARAOKE SYSTEM
LINE IN operation
To use the karaoke player as a speaker for another audio device:
1. Connect a 3.5mm cable (not included) into the LINE IN connection on the back of the karaoke system.
2. Connect the other end of a 3.5mm cable to the AUDIO OUT connection of your external audio device.
3. Operate the external audio device as you normally would, use the VOLUME knob of the karaoke system to
adjust the volume.
Connecting the microphone
Sing along with the music by plugging in the provided microphone into either one of the microphone inputs on the unit.
Adjusting the volume
To adjust the volume:
1. Rotate the MIC VOLUME control on the top of your karaoke system to adjust the microphone volume.
2. Rotate the MASTER VOLUME control on the top of your karaoke system to adjust the master volume.

- 14 -
OPERATION
WARNING - Tapping or dropping the microphone while it is ON can permanently damage your microphone. Please do
not swing the microphone around by the cord!
Preparation
This unit is designed to play CD’s bearing the identication logo. If CD’s do not conform to the CD standard they may
not play properly.
• Fingerprints and dust should be carefully wiped o with a soft cloth. Wipe in a straight motion from the centre of
the disc to the outside edge.
• Never use chemicals, such as record cleaning spray, antistatic sprays or uids, benzene or thinner to clean compact
discs. These chemicals will permanently damage the plastic surface of the disc.
• Always place the compact disc on the disc tray with the label facing upward. Compact discs can be played on only
one side.
• To remove a disc from its storage case, press down on the centre of the case and lift the disc out, holding it carefully
by the edges.
• Discs should be returned to their cases after use to protect them from dust and scratches.
• To prevent warping the disc, do not expose it to direct sunlight, high humidity or high temperatures for extended
periods of time.
• Do not apply paper or write anything on either side of the disc. The inks used in some felt-tip pens may damage
the surfaces of the disc.
Turning ON/OFF
To turn the karaoke system ON or OFF:
1. Press POWER ON/OFF button, to turn on the karaoke system. The ON/OFF
LED will light up and the TFT screen will light up.
2. Press POWER ON/OFF button again to turn o the system. The ON/OFF
LED and the TFT screen will turn o.
Note: Due to AUTO OFF feature, TFT display will automatically turn o after
several minutes of inactivity.
Loading a disc
To place a karaoke disc in the karaoke player:
1. Lift the OPEN tab on the top of your karaoke system to open the disc
compartment. Place a disc in the compartment with the printed
side upwards.
2. Gently close the CD door to the CD+G compartment. The karaoke system
will begin to read the disc.
3. Press PLAY/PAUSE to play the disc. If no disc is loaded, it will display
"NO DISC". If CD/CD+G disc is loaded, the CD/CD+G indicator will light up.
Play/Pause Mode
To play/pause a disc:
1. Press the PLAY/PAUSE button to start playing disc. The rst track will display on the TFT display.
2. To pause playback, press the PLAY/PAUSE button, and to resume playback, press the PLAY/PAUSE
button again.

- 15 -
OPERATION
Note: Pressing pause when a CD+G is playing may cause distorted lyrics on the monitor. Any distortion will remain until
the whole screen is refreshed during an instrumental break or you stop the song and start it from the beginning.
• Do not open the disc compartment while a CD/CD+G is playing.
• Do not place anything except a CD/CD+G in the disc tray. Foreign objects can damage the karaoke system.
• Do not apply excessive force when closing the disc compartment.
• Only place one disc on the disc tray at a time.
Playing from a USB ash drive
To play from a USB ash drive:
1. Insert a USB ash drive into the USB port on the top of your karaoke system.
2. Make sure that USB is selected as the audio source. See “Selecting the audio source” .
3. Press PLAY/PAUSE to start playback.
Controlling playback
To control playback:
1. Press PLAY/PAUSE to pause playback, then press again to resume playback.
2. Press STOP ■ to stop playback. If you press this button once, then press PLAY/PAUSE , playback resumes at
the beginning of the disc.
3. Press and hold SKIP or SKIP for fast reverse or fast forward for CD or MP3 play only.
4. Press SKIP or SKIP to go to the previous or next track for CD/CD+G or MP3/MP3G le.
Selecting the audio source
To select the audio source:
1. Insert a disc or USB ash drive.
2. Press the STOP/MODE button to change the audio source shown on the TFT screen.
NOTE: Selecting and changing the audio source can only be done in STOP mode.
• If you do not have a media source inserted and you select that audio source, your karaoke system will go to a
media source that is inserted. For example, if you have a disc inserted but do not have a USB ash drive inserted
and you select USB, your karaoke system will automatically select DISC.

- 16 -
OPERATION
Changing the key of the music
You can adjust the key of the music.
To change the key:
• During playback, press KEY+ to raise the key of the music or KEY– to lower
the key of the music (max. 6 times).
Selecting a Track for playback
1. Press the TRACK button once. The track number will start to ash on TFT display.
2. Press the SKIP
or SKIP button to select a desired track.
3. Press the PLAY/PAUSE
button when you have selected a track and start
singing.
Repeating a Track or Directory
To repeat a Track or Directory:
1. During playback, press the PROG/REP button once, the REP 1 indicator will appear on the TFT display. It can keep
repeating the current track.
2. To repeat the Directory, press the PROG/REP button twice, the REP D indicator will appear on the TFT display.
3. To repeat all tracks on a disc or USB, press the PROG/REP button again, the REP ALL indicator will appear on the TFT
display.
4. To clear the REPEAT function, press the PROG/REP button again, the REP indicator will turn o on the TFT display.
Creating a playback program
To program songs to play in a selected order:
1. Programming should be done in the stop mode only. Press the PROG/REP
button, "PROG P01" will appear on the TFT display.
2. Press the SKIP
or SKIP buttons to select a desired track or press and
hold SKIP
or SKIP to fast forward to a desired track.
3. Press the PROG/REP button again to select each track, you can select up to a
maximum of 20 tracks.
4. Press the PLAY/PAUSE
button when you have completed programming and you are ready to start singing.
5. Press the STOP/MODE button twice to clear all of the programmed entries.
LINE IN operation
To use the karaoke player as a speaker for another audio device:
1. Connect a 3.5mm cable (not included) into the LINE IN connection on the back of the karaoke system.
2. Connect the other end of a 3.5mm cable to the AUDIO OUT connection of your external audio device.
3. Operate the external audio device as you normally would, use the VOLUME knob of the karaoke system to adjust the
volume.
ECHO control
To adjust the ECHO:
• Turn the ECHO knob on the karaoke system to enhance your voice for more or less ECHO.

- 17 -
TROUBLESHOOTING
Problem Possible Problem Solution
No power when the
power button is on
• No power plug connection at the AC outlet.
• Improper connection between the unit and
the AC power cord.
• Insert the power plug into the AC outlet.
• Check the connection between the unit and
the AC power cord.
No power when
plugged in
• The AC outlet may not have power. • Test the power outlet by plugging in
another appliance and turning it on.
No sound from TV
or PA
• TV or PA system is set to minimum.
• TV or PA system is powered o.
• Patch cables are not connected securely.
• Turn up the volume on the TV or PA system.
• Power the TV or PA system on.
• Ensure white and red patch cables are
securely inserted into both the karaoke
system and the TV/PA system.
CD Player does not
work normally or the
LED displays “NO”, “E”
or “00”
• Disc is inserted upside down.
• Disc is dirty.
• Disc is scratched or warped
• A non-standard disc is inserted.
• Moisture has formed inside the CD deck.
• Karaoke system needs resetting.
• Insert the disc correctly.
• Wipe clean with a soft cloth.
• Use a new disc.
• Only use discs bearing the standard logo.
• Wait about 20 - 30 mins to let it dry out.
• Disconnect the machine from the power
source for 30 seconds then reconnect.
No sound − If audio
is going through TV
or VCR
• Patch cables are not connected securely.
• Source selection on TV or VCR is not correct.
• Ensure white and red patch cables are
securely inserted into both the karaoke
system and the home stereo system.
• Ensure that the source selection on the TV
or VCR is correct.
No sound − When
audio is connected to
a home stereo
• Source selection on your stereo is not set
properly.
• Improper connection to stereo system or
patch cables are not connected securely.
• Select AUX IN as the source for your home
stereo.
• Ensure white and red patch cables are
securely inserted into both the karaoke
system and the home stereo system.
No video is displayed
from the TFT screen
• TFT screen is turned o.
• The disc being played is a regular music CD,
therefore no image will be displayed.
• Set SCREEN ON/OFF Button to ON.
• Ensure you are playing a CD+G or CDG
Karaoke disc.
Auto Voice Control (AVC) Singing Coach
To adjust the AVC:
• Auto Voice Control can be activated by the AVC knob. The vocals on the multiplex recording will be muted when
the singer starts to sing through the microphone. When the singer stops singing, the vocals will resume to normal.
OPERATION

- 18 -
MAINTENANCE
Storing discs
• Do not store discs in a place that is exposed to direct sunlight or heat.
• Do not store discs in a place that is exposed to moisture and dust, such as a bathroom or near a humidier.
• Store discs vertically in their cases. Stacking discs or placing objects on discs when not in their cases may cause
warping.
Handling discs
• To keep a disc clean, do not touch the play side (non-label side) of the disc.
• Do not attach paper or tape to the disc
Cleaning discs
• Before playback, wipe the disc outwards from the center (not in a circle) with a clean cloth.
Problem Possible Problem Solution
No song lyrics
appear on the TV
screen
• Video cable is not connected properly to
the TV.
• Source selector on TV is not set to VIDEO.
• TV does not have video line connection.
• A CD+G is loaded but the CD+G icon is
not lit.
• Connect the video cable to the karaoke
system’s VIDEO OUT and to the TV VIDEO
IN. Refer to page 7 under "Connecting to
your TV or VCR/DVD player".
• Using your TV remote to select video input or
select the proper video input on the TV itself.
• Connect from VIDEO OUT of the system
to the VIDEO IN on your VCR or connect to
an RF Modulator and then to the TV cable
connection.
• Check the disc to be sure it is a CD+G.
No sound from mic • MIC volume control is set to minimum.
• MIC is o.
• Adjust MIC volume to max, and then readjust
to a comfortable level.
• Turn on MIC with the ON/OFF switch located
on the microphone.

- 19 -
GLOSSARY OF KARAOKE TERMS
Audio Output (maximum): 1.2W + 1.2W (RMS)
Impedance: 8 ohms
CD Player Frequency response: 100Hz to 20kHz
Signal-to-noise ratio: 50dB
Number of programs: 20 steps random access programming
Sampling system: 8 times over
Compatible Discs CD, CD+G
Compatible USB les MP3, MP3G
Microphone -73dB 600 ohms impedance with 6.3 dynamic microphone
AC Power Input 120V ~ 60Hz, output DC 10.5V
Dimensions (H x W x D) 10.4 × 8.6 × 8.5 inches (26.4 × 21.8 × 21.6 cm)
Weight 5.5 lbs (2.5 kg)
Specications are subject to change without notice. Measurements and weights may vary slightly.
Echo
• Adds depth and resonance to a singer’s voice without aecting the music. The echo eect is produced by creating
minor controlled feed-back in the singer’s voice.
Multiplex
• Some multiplex CD+Gs have two versions of a song. One version is a stereo recording without the lead singer. The
other version is recorded with music and background vocals on the left channel and the lead singer recorded on the
right channel. The “split-track” recording lets you control the volume of the lead singer by rotating the BALANCE
knob. You can sing a duet with the lead singer or use the lead singer as a guide while you learn the song, gradually
fading out the lead singer voice until you can sing the song alone.
Auto Voice Control (AVC) Singing Coach
• When AVC is activated, the vocals on a multiplex CD stop playing when a singer begins singing through the
microphone. When the singer stops singing, the vocals on the CD start playing again. This feature only works with
multiplex CDs.
CD+G
• Stands for “Compact Disc plus Graphics.” A CD+G has a video track that displays the song lyrics in sync with the
music. The lyrics usually change color as when they are to be sung.
SPECIFICATIONS

- 22 -
ELECTROHOME® WARRANTY
Thank you for choosing ELECTROHOME® Consumer Electronics Products!
ELECTROHOME gives the following express warranty to the original consumer purchaser or gift recipient for this ELECTROHOME product,
when shipped in its original container and sold or distributed by ELECTROHOME or by an Authorized ELECTROHOME Dealer: ELECTROHOME
warrants that this product is free, under normal use and maintenance, from any defects in material and workmanship. If any such defects
should be found in this product within the applicable warranty period, ELECTROHOME shall, at its option, repair or replace the product as
specied herein. Replacement parts furnished in connection with this warranty shall be warranted for a period equal to the unexpired
portion of the original equipment warranty.
This warranty shall not apply to:
A. Any defects caused or repairs required as a result of abusive operation, negligence, accident, improper installation or inappropriate
use as outlined in the owner’s manual.
B. Any ELECTROHOME product tampered with, modied, adjusted or repaired by any party other than ELECTROHOME or ELECTROHOME’s
Authorized Service Centres.
C. Damage caused or repairs required as a result of the use with items not specied or approved by ELECTROHOME, including but not
limited to head cleaning tapes and chemical cleaning agents.
D. Any replacement of accessories, glassware, consumable or peripheral items required through normal use of the product including
but not limited to earphones, remote controls, AC adapters, batteries, stylus, trays, lters, cables, paper, cabinet, cabinet parts,
knobs, buttons, baskets, stands and shelves.
E. Any cosmetic damage to the surface or exterior that has been defaced or caused by normal wear and tear.
F. Any damage caused by external or environmental conditions, including but not limited to transmission line/power line voltage or
liquid spillage.
G. Any product received without appropriate model, serial number and CSA /cUL /cULus /cETL /cETLus markings.
H. Any products used for rental or commercial purposes.
I. Any installation, setup and/or programming charges.
Should this ELECTROHOME product fail to operate during the warranty period, warranty service may be obtained upon delivery of the
ELECTROHOME product together with proof of purchase and a copy of this LIMITED WARRANTY statement to an Authorized ELECTROHOME
Service Centre. In-home warranty service may be provided at ELECTROHOME’s discretion on any ELECTROHOME television with the screen
size of 40” or larger. This warranty constitutes the entire express warranty granted by ELECTROHOME and no other dealer, service centre or
their agent or employee is authorized to extend, enlarge or transfer this warranty on behalf of ELECTROHOME. To the extent the law permits,
ELECTROHOME disclaims any and all liability for direct or indirect damages or losses or for any incidental, special or consequential damages
or loss of prots resulting from a defect in material or workmanship relating to the product, including damages for the loss of time or use
of this ELECTROHOME product or the loss of information. The purchaser will be responsible for any removal, reinstallation, transportation
and insurance costs incurred. Correction of defects, in the manner and period of time described herein, constitute complete fulllment of all
obligations and responsibilities of ELECTROHOME Electronics to the purchaser with respect to the product and shall constitute full satisfaction
of all claims, whether based on contract, negligence, strict liability or otherwise.
1 YEAR PARTS & LABOUR WARRANTY PERIODS
TO OBTAIN THE NAME AND ADDRESS OF THE NEAREST AUTHORIZED ELECTROHOME SERVICE CENTRE OR FOR MORE INFORMATION ON
THIS WARRANTY
• Contact ELECTROHOME Support by Email: support@electrohome.com
• Visit www.ELECTROHOME.com
• Mail your inquiry to:
ELECTROHOME
ELECTROHOME Customer Service, 4080 Montrose Road, Niagara Falls, ON L2H 1J9
• Call toll free 1-800-663-5954
ELECTROHOME is a registered trade-mark of Circus World Displays Limited.
09.2011
/