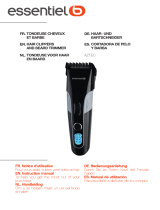
Princess 535600 Operating instructions

Category
Hair trimmers & clippers
Type
Operating instructions
Gebruiksaanwijzing . . . . . . . . . . . . . . . . . . . . . . . . . . . . . . . . . . 3
Instructions for use . . . . . . . . . . . . . . . . . . . . . . . . . . . . . . . . . . . 5
Mode d’emploi . . . . . . . . . . . . . . . . . . . . . . . . . . . . . . . . . . . . . . . 7
Anleitung . . . . . . . . . . . . . . . . . . . . . . . . . . . . . . . . . . . . . . . . . . . . . . 9
Instrucciones de Uso . . . . . . . . . . . . . . . . . . . . . . . . . . . . . . . . 12
Istruzioni d’uso . . . . . . . . . . . . . . . . . . . . . . . . . . . . . . . . . . . . . . 14
Bruksanvisning . . . . . . . . . . . . . . . . . . . . . . . . . . . . . . . . . . . . . . 16
Brugsanvisning . . . . . . . . . . . . . . . . . . . . . . . . . . . . . . . . . . . . . . 18
Bruksanvisning . . . . . . . . . . . . . . . . . . . . . . . . . . . . . . . . . . . . . . 20
Käyttöohje . . . . . . . . . . . . . . . . . . . . . . . . . . . . . . . . . . . . . . . . . . . 22
Instruções de utilização . . . . . . . . . . . . . . . . . . . . . . . . . . . . 24
. . . . . . . . . . . . . . . . . . . . . . . . . . . . . . . . . . . . . . . . . . . . . . . . . . . . . . . 26
18 . . . . . . . . . . . . . . . . . . . . . . . . . . . . . . . . . . . . . . . . . . . . . . . . . . . . 29
JAN 11 V1
NL
UK
F
D
E
I
S
DK
N
SF
P
GR
ARAB
5
- Reparatie en service dient u uit te laten voeren door onze servicedienst. Gebruik het apparaat niet als
het beschadigd is of als het snoer beschadigd is, maar stuur het dan naar onze servicedienst.
- Zorg ervoor dat kinderen niet met dit apparaat spelen.
- Het is niet zonder gevaar om dit apparaat te laten gebruiken door kinderen of personen met een
geestelijke of lichamelijke handicap, of met te weinig ervaring of deskundigheid. De voor de veiligheid
van deze gebruikers verantwoordelijke persoon dient ze duidelijke instructies te geven voor of ze te
begeleiden bij het gebruik van dit apparaat.
- Dit apparaat is alleen geschikt voor huishoudelijk gebruik.
PRINCESS NICE PRICE CLIPPER ART. 535600
BEFORE USE
Before use first read these instructions for use and save them for future reference. Do not use clippers in
the bathroom or near a washbasin filled with water. Never try to grab an appliance that has fallen into
water, but pull the plug from the socket.
DETAILS
The clippers have a powerful swing motor, steel cutting blades, an adjustable cutting length and clip-on combs.
The clip-on combs are used to set different cutting lengths. This makes cutting and trimming so easy that
even as a home hairdresser you can achieve professional results. The cutting blades need not be oiled.
Accessories provided:
- brush
- comb
- hairdresser's scissors
- bottle of oil
- 4 clip-on combs:
# 1: for cutting length 3 mm.
# 2: for cutting length 6 mm.
# 3: for cutting length 9 mm.
# 4: for cutting length 12 mm.
DIRECTIONS FOR USE
First remove the protective cover from the cutting blades. Switch the clippers on with the slide switch.
Always switch off the CLIPPERS first after use and then pull the plug out of the socket. Put the protective
cover back again on the cutting blades.
Adjustable handle
By turning the handle, the cutting length can be adjusted between 1 and 3mm.
Clip-on combs
The clip-on combs can be clicked onto the cutting blades by placing them onto the cutting blades and
clicking them into position. To remove just click the clip-on combs back off.
Before you start cutting:
- Check the clippers. Make sure that there are no hairs or dirt on the clippers. Allow a drop of oil to run
over the teeth of the blade.
Switch the clippers on and check whether they work without problems.
- Drape a towel over the neck of the person whose hair you are going to cut.
- Make the person sit in such a way that the head is at eye-level for you. This ensures that
you can see well enough and that you can work better. If necessary, use books or cus-
hions to make the person sit higher.
- Comb the hair first, so that it is not tangled. Then hold the clippers as comfortably as
possible.
- Relax and work with precision. Only use short tracks. Do not finish the side or back
straightaway, but work gradually over the whole head.
- It is better to take off a small part at a time. After all, you can always take off more later.
- Before you start and while you are working on it, regularly comb the hair back in the
style desired.
- Use the clippers only on dry hair.
6
Starting the cutting
When working with the clippers for the first time, only cut a small part of the hair, until you are used to the
cutting length which goes with a given clip-on comb. Try the longest # 4 comb first. If you prefer a closer
cut, use # 2. Experience will teach you which clip-on comb you need to get the desired result. After the
hair has been combed in the natural direction of growth, proceed as follows to achieve a flowing tapering
hairstyle:
STEP 1 The Neck section.
Attach the Clip-on comb # 1 or 2. Hold the clippers with the cutting side up and begin the cutting in the
middle, at the bottom of the neck. Hold the clippers lightly against the head with the teeth of the clip-on
comb facing up. Gradually move the clippers upwards, work up and to the outside through the hair, removing
only a small part at a time. While you are cutting, move the head of the clippers gradually towards you.
Subsequently cut the back section from the start of the neck to above the ears.
STEP 2 Back of the Head.
Change to clip-on comb # 3 or 4 and then cut the back of the head.
STEP 3 Side of the Head.
Use one of the shorter clip-on comb settings (# 1 or 2) for cutting the sideboards, that is to say the hair
that is directly in front of the ears. After that, adjust the clip-on comb to a longer length (# 3 or 4) and
continue cutting to the top of the head.
STEP 4 Top of the Head.
Cut the top of the head from back to front against the direction of growth of the hair. In some cases, this
means that you must work from front to back. Clip-on combs # 2 or 3 are to make short, cropped hair. If
you want to keep the hair on the top of the head longer, you must use a comb to keep the hair above the
head. Cut with the clippers over the comb, or hold the hair between the fingers and cut it off at the desired
length. Always work from the back of the head. Gradually cut the hair shorter by reducing the distance
between the comb, or the fingers, and the head. Use the comb regularly to check whether there are any
uneven locks between them and to comb out cut-off hair.
STEP 5 The Finishing Touches
Finally, for a good, accurately finished cut, take the clip-on comb off again and turn the clippers over
(with the lower side up), so that you can touch up the lower side of the neck, the sides and the area
around the ears. Set the adjustable cutting length button to its lowest setting. Put the clippers in at a
right angle along the head, with the points of the cutting blade lightly touching the skin, and work in a
downward direction. In this way you get just as smooth a result as if you had used a razor blade.
Cutting Longer Hair.
If the hair is supposed to taper, then first divide and comb the hair as usual. Subsequently divide the hair
on the head from behind into three equal parts around the head. Fix the two upper layers with pins, so
that they will not be in the way when you cut the lowest layer. After that, proceed to cutting with a pair of
scissors or with the help of the clippers in combination with the hairdresser's comb.
CLEANING AND MAINTENANCE
Always first take the plug out of the socket!
After each use remove hair clippings and drip a little oil onto the blades. Only non-acidic oils may be
used, like the oil supplied, but sewing machine oil is also suitable. The blades should be removed from
time to time to eliminate any hair clippings. When replacing the blades, always ensure they are properly
aligned and the inner rings are not missing. Align the blades as follows:
- Slide the blades back onto the clippers but do not completely tighten the screws.
- Turn the adjustable handle on the side downwards.
- Slide the large upper blade until it is even with the lower blade and make sure the blades
are approximately 1mm apart.
- Now tighten the screws, ensuring the blades are firmly in place.
You can clean the outside of the clippers with the help of a soft, damp cloth.
7
PRINCESS TIPS
- For safety reasons, the appliance should never be used within a metre of a bath or shower or above a
wash basin. Never submerge it under water!
- Always supervise if children or the less able use the appliance.
- Handle the blades with care avoiding contact with hard objects and never drop them.
Do not use if the blades are damaged.
- Any repairs or service should be carried out by our service department. Never use the appliance if it or
the cord are damaged, but return it to our service department.
- Children should be supervised to ensure that they do not play with the appliance.
- This appliance is not intended for use by persons (including children) with reduced physical, sensory
or mental capabilities, or lack of experience and knowledge, unless they have been given supervision
or instruction concerning use of the appliance by a person responsible for their safety.
- This appliance is only suitable for household use.
U.K. WIRING INSTRUCTIONS
The wires in the mains lead are coloured in accordance with the following code:
BLUE NEUTRAL
BROWN LIVE
As the colours of the wire in the mains lead of this appliance may not correspond with the colour
markings identifying the terminals on your plug, proceed as follows:
The wire which is coloured BLUE must be connected to the terminal which is marked with the
letter N or coloured black.
The wire which is coloured BROWN must be connected to the terminal which is marked with the
letter L or coloured red.
With this appliance, if a 13 amp plug is used a 3 amp fuse should be fitted. If any other type of plug is
used, a 15 amp fuse must be fitted either in the plug or at the distribution board
WARNING: ON NO ACCOUNT SHOULD EITHER THE LIVE OR NEUTRAL WIRES
BE CONNECTED TO THE EARTH TERMINAL
PRINCESS NICE PRICE CLIPPER ART. 535600
AVANT L'UTILISATION
Avant d'utiliser la tondeuse, veuillez d'abord lire le mode d'emploi et conservez-le pour pouvoir le consulter
ultérieurement. N'utilisez pas la tondeuse dans la salle de bains ou à proximité d'un lavabo rempli d'eau.
N'essayez jamais de rattraper un appareil électrique tombé dans l'eau, mais débranchez-le de la prise de courant.
DESCRIPTIF
La tondeuse est équipée d'un moteur puissant à oscillations et de lames en acier, la longueur de coupe est
réglable et l'appareil est fourni avec des peignes accessoires utilisés pour régler les différentes longueurs
de coupe. La coupe de cheveux est ainsi vraiment plus facile, ce qui permet d'obtenir à domicile des
résultats professionnels.
Fourni avec :
- une petite brosse
- un peigne de coiffeur
- ciseaux
- une burette d’huile
- 4 peignes :
# 1 = pour 3 mm de longueur de coupe
# 2 = pour 6 mm de longueur de coupe
# 3 = pour 9 mm de longueur de coupe
# 4 = pour 12 mm de longueur de coupe
  • Page 1 1
  • Page 2 2
  • Page 3 3
  • Page 4 4
  • Page 5 5
  • Page 6 6
  • Page 7 7
  • Page 8 8
  • Page 9 9
  • Page 10 10
  • Page 11 11
  • Page 12 12
  • Page 13 13
  • Page 14 14
  • Page 15 15
  • Page 16 16
  • Page 17 17
  • Page 18 18
  • Page 19 19
  • Page 20 20
  • Page 21 21
  • Page 22 22
  • Page 23 23
  • Page 24 24
  • Page 25 25
  • Page 26 26
  • Page 27 27
  • Page 28 28
  • Page 29 29
  • Page 30 30
  • Page 31 31
  • Page 32 32

Princess 535600 Operating instructions

Category
Hair trimmers & clippers
Type
Operating instructions

Ask a question and I''ll find the answer in the document

Finding information in a document is now easier with AI