StarTech.com ST121SHD50 User manual
- Category
- AV extenders
- Type
- User manual
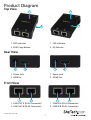
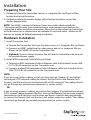
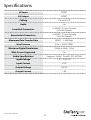
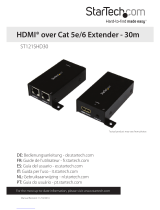
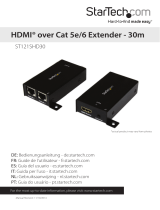
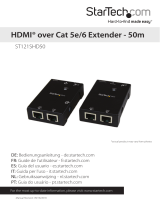
StarTech.com ST121SHD50 extends HDMI video and audio signals up to 165 feet over CAT5e (1080i) or 130 feet over CAT6 (1080p) Ethernet cables. It supports resolutions up to 1920x1080 with accompanying digital audio. The extender is plug-and-play and can be powered from either end using Power over Cable (POC). It's ideal for digital signage, home theater, and more.
StarTech.com ST121SHD50 extends HDMI video and audio signals up to 165 feet over CAT5e (1080i) or 130 feet over CAT6 (1080p) Ethernet cables. It supports resolutions up to 1920x1080 with accompanying digital audio. The extender is plug-and-play and can be powered from either end using Power over Cable (POC). It's ideal for digital signage, home theater, and more.


-
 1
1
-
 2
2
-
 3
3
-
 4
4
-
 5
5
-
 6
6
-
 7
7
-
 8
8
-
 9
9
-
 10
10
-
 11
11
-
 12
12
-
 13
13


StarTech.com ST121SHD50 User manual
- Category
- AV extenders
- Type
- User manual
StarTech.com ST121SHD50 extends HDMI video and audio signals up to 165 feet over CAT5e (1080i) or 130 feet over CAT6 (1080p) Ethernet cables. It supports resolutions up to 1920x1080 with accompanying digital audio. The extender is plug-and-play and can be powered from either end using Power over Cable (POC). It's ideal for digital signage, home theater, and more.
Ask a question and I''ll find the answer in the document
Finding information in a document is now easier with AI
Related papers
-
 StarTech.com ST121SHD30 User manual
-
 StarTech.com ST121SHD30 User manual
-
StarTech.com ST121HDBTPW User manual
-
 StarTech.com StarTech.com ST121SHD50 User manual
-
 StarTech.com HDMIEXTGB Datasheet
-
StarTech.com ST121UTPDVGB User manual
-
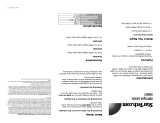
 StarTech.com VS410HDMIE User manual
-
 StarTech.com VS221HDQ Owner's manual
-
 StarTech.com VS122HDMIU User manual
-
 StarTech.com ST122HD4K User manual


Other documents
-
Cables Direct 15m Cat5e Datasheet
-
 StarTech VS421HD20 User guide
-
StarTech com ST121USBHD User guide
-
StarTech com C15012-USB-1-Port User guide
-
StarTech com C15012-USB-EXTENDER User guide
-
StarTech 4-Port HDMI Video Splitter – 4K at 60Hz User guide
-
StarTech com ST12MHDLAN4R User manual
-
StarTech com 4K70IC User guide
-
StarTech com 4K70IC EXTEND User guide
-
StarTech Over CAT5 or CAT6 Extender User guide
