Page is loading ...

For questions or help with this product contact Tech Support at (570) 546-9663 or techsupport@grizzly.com
MODEL T32793
WOOD TURNING SHARPENING
JIG FOR T32720 WET GRINDER
INSTRUCTIONS
COPYRIGHT © JUNE, 2021 BY GRIZZLY INDUSTRIAL, INC.
NO PORTION OF THIS MANUAL MAY BE REPRODUCED IN ANY SHAPE
OR FORM WITHOUT THE WRITTEN APPROVAL OF GRIZZLY INDUSTRIAL, INC.
(FOR MODELS MFD. SINCE 07/21) #CS21963 PRINTED IN CHINA
Introduction
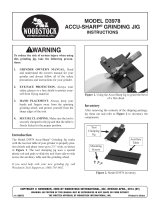
The Model T32793 Wood Turning Sharpening
Jig is designed to sharpen beveled and hollowed
chisels on the T32720 10" Wet Grinder.
Description Qty
A. Jig ............................................................... 1
B. Chisel Pin ................................................... 1
C. Chisel Clamp .............................................. 1
D. Jig Holder ................................................... 1
E. Hex Bolt M8-1.25 x 12 ................................ 1
Inventory
Figure 1. Example of Model T32793 in use.
V1.06.21
To reduce your risk of
serious injury, read this
entire manual BEFORE
using machine.
NOTICE
If you cannot find an item on this list, care-
fully check around/inside the machine and
packaging materials. Often, these items get
lost in packaging materials while unpack-
ing or they are pre-installed at the factory.
Figure 2. Inventory.
A
B
C
D
E

-2- Model T32793 (Mfd. Since 07/21)
Sharpening Beveled Chisels
Attach the jig holder to the jig to grind beveled
chisels.
To sharpen beveled chisels:
1. Completely disassemble jig, as shown in
Figure 3.
Figure 3. Jig disassembled.
2. Assemble jig and jig holder, as shown in
Figure 4.
Figure 4. Jig assembled for beveled chisels.
3. DISCONNECT GRINDER FROM POWER!
4. Install tool rest (refer to Grinding Wheel
Rotation on Page 23 of Model T32720 own-
er's manual to determine best way to install
tool rest for your operation).
5. Use knob to clamp chisel (bevel-side down)
in jig, as shown in Figure 5. Exact clamping
method may vary slightly depending on your
chisel.
Note: Remove hex nut on knob to extend
length of knob bolt if needed (see Figure 5).
Items Needed Qty
Wrench or Socket 13mm ................................... 1
Phillips Head Screwdriver #2 ............................ 1
Eye and face injuries and respiratory prob-
lems can occur while operating this tool.
Wear personal protective equipment to
reduce your risk from these hazards.
Keep hair, clothing, and
jewelry away from mov-
ing parts at all times.
Entanglement can result
in death, amputation, or
severe crushing injuries!
Figure 5. 2-sided beveled chisel clamped in jig.

Model T32793 (Mfd. Since 07/21) -3-
6. Install jig on tool rest as shown in Figure 6.
7. Adjust tool rest closer to or further from
grinding wheel until desired grinding angle is
achieved.
8. Tilt chisel away from grinding wheel, connect
grinder to power, and turn machine ON.
9. Use firm grip to return chisel to surface of
grinding wheel to perform operation. Move
chisel back and forth across surface of wheel
while grinding to prevent excessive or uneven
wheel wear (see Figure 6).
Figure 6. Example of grinding beveled chisel.
Sharpening Hollow Chisels
Use the chisel pin or chisel clamp to secure a hol-
low chisel in the jig for grinding.
Figure 7. Jig disassembled.
To sharpen hollow chisels:
1. Completely disassemble jig, as shown in
Figure 7.
Eye and face injuries and respiratory prob-
lems can occur while operating this tool.
Wear personal protective equipment to
reduce your risk from these hazards.
Keep hair, clothing, and
jewelry away from mov-
ing parts at all times.
Entanglement can result
in death, amputation, or
severe crushing injuries!
Items Needed Qty
Wrench or Socket 13mm ................................... 1
Phillips Head Screwdriver #2 ............................ 1
2. Assemble jig, as shown in Figure 8.
Figure 8. Jig assembled for hollow chisels.
3. DISCONNECT GRINDER FROM POWER!
4. Install tool rest (refer to Grinding Wheel
Rotation on Page 23 of Model T32720 own-
er's manual to determine best way to install
tool rest for your operation).

-4- Model T32793 (Mfd. Since 07/21)
6. Support jig against tool rest, as shown in
Figure 11.
Figure 11. Example of grinding hollow chisel.
7. Adjust tool rest closer to or further from
grinding wheel until desired grinding angle is
achieved.
8. Tilt chisel away from grinding wheel, connect
grinder to power, and turn machine ON.
9. Use firm grip to return chisel to surface of
grinding wheel to perform operation. Move
chisel back and forth across surface of
wheel while grinding to prevent excessive or
uneven wheel wear and rotate chisel to grind
entire edge (see Figure 11).
5. Use knob to clamp chisel (bevel-side down)
in jig with either chisel clamp or chisel pin
(see Figures 9–10). No single clamping
method works best for all chisels, and only
trial-and-error with each specific tool will give
best clamping orientation.
Figure 9. Wide chisel secured with chisel clamp.
Chisel
Clamp
Chisel
Pin
Figure 10. Narrow chisel secured with chisel pin.
/