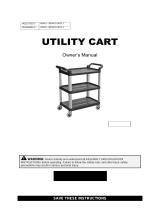
Wen 73002 User manual

Type
User manual

This manual is also suitable for

Model # 73002
# 73004
SERVICE CART
bit.ly/wenvideo
Your new tool has been engineered and manufactured to WEN’s highest standards for dependability,
ease of operation, and operator safety. When properly cared for, this product will supply you years
of rugged, trouble-free performance. Pay close attention to the rules for safe operation, warnings,
and cautions. If you use your tool properly and for intended purpose, you will enjoy years of safe,
reliable service.
IMPORTANT:
NEED HELP? CONTACT US!
Have product questions? Need technical support?
Please feel free to contact us at:
800-232-1195
WENPRODUCTS.COM
(M-F 8AM-5PM CST)
TABLE OF CONTENTS
Technical Data
2
3
4
4
5
6
Rules for Safe Operation
Assembly
Exploded View
Warranty
TECHNICAL DATA (73002)
Model Number:
Maximum Capacity:
Tray Size:
Casters:
73002
500 pounds evenly distributed
30 in. x 16 in. x 3 in.
5 in. x 1 in.
Two Fixed Wheels, Two Swivel Wheels
2
Contents Included
TECHNICAL DATA (73004)
Model Number:
Maximum Capacity:
Tray Size:
Casters:
73004
500 pounds evenly distributed
36 in. x 24 in. x 3 in.
5 in. x 1 in.
Two Fixed Wheels, Two Swivel Wheels
3
GENERAL SAFETY RULES
Safety is a combination of common sense, staying alert and knowing how your item works. SAVE THESE SAFE-
TY INSTRUCTIONS.
WARNING: To avoid mistakes and serious injury, do not use your item until the following steps
have been read and understood. These safety rules cannot address every possible scenario you may
encounter, so please use common senese and caution when using the item.
1. READ and become familiar with this entire instruction manual. LEARN the tool’s applications, limitations, and
possible hazards.
2. KEEP WORK AREA CLEAN. Cluttered areas invite injuries and accidents.
3. OBSERVE work area conditions. Keep work area well lit.
4. ALWAYS keep your work area clean, uncluttered, and well lit. DO NOT work on floor surfaces that are slippery
with sawdust or wax.
5. STORE IDLE EQUIPMENT. When not in use, store the service cart in a safe and clean location. Always secure
products and keep out of reach of children.
6. USE THE RIGHT PRODUCT FOR THE JOB. There are certain applications for which this item was de-
signed. Do not modify it and do not use it for a purpose for which it was not intended.
7. CHECK FOR DAMAGED PARTS. Before using any product, any part that appears damaged should be care-
fully checked to determine that it will operate properly and perform its intended function. Check for any broken
or damaged parts and any other condtiions that may affect its operation. Replace or repair damaged or worn parts
immediately.
8. WHEN SERVICING use only identical replacement parts and accessories. Using any other parts will void the
warranty.
9. DO NOT operate the tool if you are under the influence of drugs, alcohol, or medication that may affect your
ability to properly use the tool.
10. USE EYE PROTECTION. Always wear ANSI approved impact safety goggles.
11. DO NOT EXCEED THE PRODUCT’S MAXIMUM LOAD CAPACITY. Always keep weight evenly dis-
tributed.
12. ONLY USE ON A FLAT SURFACE capable of supporting the item with its maximum capacity load. It is easy
to lose control if attempting to pull a load on a sloping or uneven surface.
13. DO NOT ALLOW CHILDREN TO PLAY ON, stand upon or climb on this item. It is not intended for car-
rying people or animals.
14. ALWAYS CHECK HARDWARE and assembled parts after assembling. All connections should be tight.
4
1. Select the shelf tray with the uninterrupted flat surface (part 1) and place it upside down on a flat work surface.
2. Turn the push handle (part 3) upside down with the cup holder towards the shelf tray. Using a rubber mal-
let, tap the push handle down into the grooves on the tray. Make sure the handle is all the way on the shelf tray.
HINT: To overcome the friction between the two plastic surfaces, rub a little petroleum jelly onto the grooved
surface. The two parts should slide together with a few gentle taps of the rubber mallet.
3. Since all four legs (parts 5) look alike, positioning of the legs can be confusing. Locate two of the legs, taking
note of the positions of the bottom flanges. Place one nearest the handle (part 3) and the other diagnolly across
the shelf tray corner as shown in the assembly diagram. Using a rubber mallet, tap the legs onto the upper tray
(part 1) until the tab with the three screw holes is in contact with the shelf tray. Repeat this process with the other
two legs so all four legs are in solid contact with the shelf tray.
4. Insert and tighten three screws per leg so that the legs are secured in the shelf tray (part 1). Hint: if needed, rub
some soap on the screw before inserting and tightening it. The soap acts as a lubricant and makes tightening the
screw easier.
5. Now for the lower tray (part 2). Turn the shelf tray upside down and place it onto the four legs (parts 5). The
flanges on the four legs should fit into the depressions in this shelf tray (part 2). If all 12 screws were correctly
secured through the four legs into the shelf tray (part 1), everything should fit together. Gently tap shelf tray (part
2) onto the four legs until the tabs and shelf tray depressions are in contact with each other.
6. Insert the carriage bolts (part 9) up through the leg tabs and the shelf tray (part 2). Attach the casters by first
hand tightening the nuts and bolts. Once all four casters are in place, go back and use an adjustable wrench to
make sure all nuts and bolts are fully tightened and secure.
NOTE: To maximize control, fixed casters are suggested to be put on the same side as the handle (part 3) while
the swivel casters go on the opposite side of the cart. However, if you prefer to have them the opposite way in
order to make sharper turns and pivots, that will also work.
7. Turn the service cart upright and install the towel rack (part 4). Make certain all hardware is tight and that the
casters roll properly before adding any weight onto the cart.
ASSEMBLY
PART DESCRIPTION QUANTITY PART DESCRIPTION QUANTITY
1 Upper Tray 1 7 Swivel Casters 2
2 Lower Tray 1 8 Fixed Casters 2
3 Handle 1 9 Carriage Bolts 16
4 Towel Rack 4 10 Washers 16
5 Legs 4 11 Nuts 16
6 Screws 12
5
1
3
4
5
5
2
9
6
7
8
10
11
EXPLODED VIEW
6
WEN Products is committed to building tools that are dependable for years. Our warranties are consistent with
this commitment and our dedication to quality.
LIMITED WARRANTY OF WEN CONSUMER POWER TOOLS PRODUCTS FOR HOME USE
GREAT LAKES TECHNOLOGIES, LLC (“Seller”) warrants to the original purchaser only, that all WEN con-
sumer power tools will be free from defects in material or workmanship for a period of two (2) years from date of
purchase. Ninety days for all WEN products, if the tool is used for professional use.
SELLER’S SOLE OBLIGATION AND YOUR EXCLUSIVE REMEDY under this Limited Warranty and, to
the extent permitted by law, any warranty or condition implied by law, shall be the repair or replacement of parts,
without charge, which are defective in material or workmanship and which have not been misused, carelessly
handled, or misrepaired by persons other than Seller or Authorized Service Center. To make a claim under this
Limited Warranty, you must make sure to keep a copy of your proof of purchase that clearly defines the Date of
Purchase (month and year) and the Place of Purchase. Place of purchase must be a direct vendor of Great Lakes
Technologies, LLC. Third party vendors such as garage sales, pawn shops, resale shops, or any other secondhand
merchant void the warranty included with this product. Contact [email protected] or 1-800-232-
1195 to make arrangements for repairs and transportation.
When returning a product for warranty service, the shipping charges must be prepaid by the purchaser. The prod-
uct must be shipped in its original container (or an equivalent), properly packed to withstand the hazards of ship-
ment. The product must be fully insured with a copy of the warranty card and/or the proof of purchase enclosed.
There must also be a description of the problem in order to help our repairs department diagnose and fix the
issue. Repairs will be made and the product will be returned and shipped back to the purchaser at no charge.
THIS LIMITED WARRANTY DOES NOT APPLY TO ACCESSORY ITEMS THAT WEAR OUT FROM
REGULAR USAGE OVER TIME INCLUDING BELTS, BRUSHES, BLADES, ETC.
ANY IMPLIED WARRANTIES SHALL BE LIMITED IN DURATION TO TWO (2) YEARS FROM
DATE OF PURCHASE. SOME STATES IN THE U.S., SOME CANADIAN PROVINCES DO NOT AL-
LOW LIMITATIONS ON HOW LONG AN IMPLIED WARRANTY LASTS, SO THE ABOVE LIMITA-
TION MAY NOT APPLY TO YOU.
IN NO EVENT SHALL SELLER BE LIABLE FOR ANY INCIDENTAL OR CONSEQUENTIAL DAM-
AGES (INCLUDING BUT NOT LIMITED TO LIABILITY FOR LOSS OF PROFITS) ARISING FROM
THE SALE OR USE OF THIS PRODUCT. SOME STATES IN THE U.S. AND SOME CANADIAN
PROVINCES DO NOT ALLOW THE EXCLUSION OR LIMITATION OF INCIDENTAL OR CON-
SEQUENTIAL DAMAGES, SO THE ABOVE LIMITATION OR EXCLUSION MAY NOT APPLY TO
YOU.
THIS LIMITED WARRANTY GIVES YOU SPECIFIC LEGAL RIGHTS, AND YOU MAY ALSO HAVE
OTHER RIGHTS WHICH VARY FROM STATE TO STATE IN THE U.S., PROVINCE TO PROVINCE
IN CANADA AND FROM COUNTRY TO COUNTRY.
THIS LIMITED WARRANTY APPLIES ONLY TO PORTABLE ELECTRIC TOOLS, BENCH POW-
ER TOOLS, OUTDOOR POWER EQUIPMENT AND PNEUMATIC TOOLS SOLD WITHIN THE
UNITED STATES OF AMERICA, CANADA AND THE COMMONWEALTH OF PUERTO RICO. FOR
WARRANTY COVERAGE WITHIN OTHER COUNTRIES, CONTACT THE WEN CUSTOMER SUP-
PORT LINE.
LIMITED TWO YEAR WARRANTY
  • Page 1 1
  • Page 2 2
  • Page 3 3
  • Page 4 4
  • Page 5 5
  • Page 6 6

Wen 73002 User manual

Type
User manual
This manual is also suitable for

Ask a question and I''ll find the answer in the document

Finding information in a document is now easier with AI